
Introduction
Resurfacing a concrete driveway restores a worn surface with a proper prep, a suitable mix, and careful application.
The guide explains what to expect and why resurfacing matters, and shows you how to plan, prep, and apply a resurfacing layer with practical tips and sensible guidelines.
You’ll learn how to evaluate the condition of the surface and avoid common missteps.
Key takeaways
- Assess driveway condition and weather factors before planning a concrete resurfacing project.
- Thorough cleaning and surface profiling yield better adhesion for the resurfacer.
- Repair cracks, spalls, and joints prior to overlay to prevent telegraphing.
- Follow manufacturer mixing instructions precisely and apply in workable, consistent coats.
- Control curing conditions with protection and sealing to maximize longevity.
- Evaluate costs early, compare DIY versus pro, and plan maintenance schedule.
Table of Contents
- Introduction
- Key takeaways
- TL;DR — Quick Overview & When to Resurface
- Tools and Materials Checklist
- Prep: Assessment, Cleaning, and Surface Profile
- Repairing Cracks, Spalls, and Joints (prep before overlay)
- Mixing and Applying the Resurfacer
- Finishing, Curing, and Sealing for Longevity
- Safety, Common Mistakes, and Pro Tips
- Budgeting, DIY vs Hiring a Pro, and Maintenance Plan
- Conclusion
- FAQ
TL;DR — Quick Overview & When to Resurface
Resurfacing is a cost‑savvy option when the concrete only shows surface wear, light cracking, or aesthetics you want to fix without tearing out the slab. Use replacement when you’ve got structural damage, deep spalling, wide cracks, or drainage problems that can undermine the new surface. Quick checks you can do: measure crack width and look for delamination, pooling or poor slope, and notice if moisture or dampness shows through. A simple flow is to prep and clean, repair as needed, prime, apply the resurfacer, then cure and seal, with the choice clearly leaning toward replacement if the signs point to structural compromise.
You’ll want a straightforward kit of common supplies, plus clear surface prep: clean the area, address cracks if applicable, mask edges, and mind the weather window. This matters because improper prep or wrong mix timing can ruin adhesion and final finish, so always check the label, manufacturer instructions, and local cautions. Decide DIY or pro based on project scope, your comfort with surface repair, and safety considerations like ventilation and working conditions. If you’re unsure about slope, drainage, or damage depth, err on the side of professional assessment to avoid costly mistakes later.
When to Choose Resurfacing vs Replacement
If your concrete driveway shows minor surface wear, light cracking that’s stable and not spreading, or just needs a fresh look, resurfacing is often the way to go. It’s cost-effective and can extend the life of your slab by decades.
However, if you notice deep spalling, wide cracks over 1/4 inch, structural damage like heaving or sinking sections, or poor drainage that causes water pooling, it might be time for a full replacement. These issues indicate deeper problems that resurfacing can’t fix.
DIY homeowners should check:
– Crack width: If cracks are less than 1/4 inch wide and stable, they’re likely candidates for repair with surface treatments.
– Surface delamination: Look for flaking or peeling concrete that’s more than just a cosmetic issue. This could indicate deeper problems requiring replacement.
Estimated Timeframe & Quick Cost Ranges
The time it takes to resurface your driveway will depend on its size and condition. For a typical 2-car garage, expect the DIY process to take about 1-2 days. Professionals can usually complete the job in half that time.
Cost-wise, DIY projects generally range from $0.50 to $1 per square foot for materials alone, plus any tools you might need to rent or buy. Hiring a professional will cost more, typically between $3 and $6 per square foot including labor and materials.
To get accurate estimates, check local quotes and factor in potential hidden costs like repairs needed before resurfacing can begin. Remember, these figures are rough guidelines; actual prices may vary based on your specific situation.

Tools and Materials Checklist
This section lays out the essential sequence for crack repair, grinding/etching, resurfacer application, finishing, and sealing, and groups the tools and materials you’ll need for each stage in that order. You’ll see a prioritized list that starts with safety and prep, then moves through crack repair, grinding and profiling, resurfacing, and finally finishing and sealing, with notes on what to have on hand for each step. Expect to assemble PPE, dust controls, containment, and a surface cleaning plan as the foundation before you touch the concrete, and keep the plan visible at the jobsite.
Having the right toolkit at each stage keeps the project moving and helps avoid delays from missing items or incompatible parts, and it also makes it safer to work. You’ll want to understand what works with your concrete and repair materials, and you should check labels or datasheets for set times, bond strength, and workable pot life if you’re unsure. Knowing how to store and handle everything properly, and recognizing when components don’t mix well, helps you avoid costly or risky mistakes and gives you a cleaner, longer-lasting repair.
Essential Tools
Before you start resurfacing your concrete driveway, make sure you have all the necessary tools and safety gear.
- Pressure washer: Use to clean the surface thoroughly. Confirm it’s in working order with a test run.
- Concrete grinder or buffer: For grinding down high spots and etching rough surfaces. Check that diamond segments are sharp and replace if dull.
- Squeegees/trowels: To spread resurfacer evenly. Ensure they’re clean and free of debris.
- Mixing drill: For mixing resurfacer compounds. Confirm it’s charged or has fresh batteries.
- Caulk gun: For applying crack filler. Make sure the nozzle is clear and replace if clogged.
- Dust shroud/vacuum: To control dust during grinding. Check that filters are clean and vacuum is operational.
- Gloves, respirator, eye protection: For safety. Confirm they fit properly and offer adequate coverage.
Quick rule: Always prioritize safety gear to prevent injuries on the job site.
Materials
Choosing the right materials is crucial for a successful resurfacing project. Here’s what you need and when to use them.
- Polymer-modified overlays: For added durability and flexibility. Confirm it matches your driveway’s condition.
- Cementitious overlays: For thicker applications, up to 1/2 inch. Ensure proper mixing ratios are followed.
- Flexible polyurethane caulk: To fill cracks without shrinking. Check that the backer rod is correctly sized and placed.
- Penetrating sealer: For long-lasting protection against water damage. Confirm it’s applied after proper curing time.
- Film-forming sealer: For a glossy finish, but less durable than penetrating sealers. Ensure it’s recoated within the recommended window.
Quick rule: Always choose materials that match your driveway’s specific needs for best results.
Prep: Assessment, Cleaning, and Surface Profile
Before you proceed, walk the area to identify cracks, delamination, spalling, and unevenness, plus any moisture issues or prior coatings. Plan how you’ll remove oil, grease, chemicals, and growth, and choose a surface profiling method that matches the coating you’ll apply. Confirm the surface is clean, dry, and textured to the right degree for adhesion.
This step matters because a well-assessed, properly cleaned, and correctly profiled surface helps the new layer bite in and last longer. It also reduces the risk of failures, moisture problems, and adhesion issues that can bite you later on the job. Have your tools, safety gear, and inspection checklist ready so you can verify flatness, texture, and cleanliness before moving forward.
Assessment & Repair Decision Matrix
Before you start resurfacing, it’s crucial to assess the condition of your concrete driveway. Look for signs like cracks that run deep or wide, areas where chunks of concrete are missing (spalling), and sections that look uneven or have delaminated layers. If these issues indicate structural problems, such as settlement or movement in the ground underneath, resurfacing won’t fix them.
Use a hammer and chisel to test for soundness by tapping on different spots of the concrete. If it sounds hollow, there’s likely voids beneath that need addressing before you proceed with resurfacing. In cases where structural repair is needed, consult a professional contractor who can assess whether repairs or replacement are necessary.
If your driveway has moisture issues—like standing water or damp patches—you’ll want to address those too. A wet surface isn’t ideal for adhesion and could lead to future problems with the resurfacer. Test for moisture vapor emissions using in-situ meters or plastic sheet tests, and plan accordingly if high levels are detected.
Deep Cleaning & Degreasing
To ensure your concrete is ready for resurfacing, you need to clean it thoroughly. Start by removing any loose debris and dirt with a broom or blower. For stubborn stains like oil or grease, use a pressure washer set at around 2000-3000 PSI to blast away contaminants.
Apply a degreaser specifically designed for concrete surfaces according to the manufacturer’s instructions. Let it sit for the recommended time and then scrub with a stiff brush before rinsing thoroughly. Make sure all soap residues are washed off, as they can interfere with adhesion later on.
If you encounter efflorescence—a white powdery substance caused by salts moving through concrete—use an acid-based cleaner to remove it. Rinse the area well and let it dry completely before proceeding. Drying times will vary depending on weather conditions, so be patient and check that everything is bone-dry before applying your resurfacer.
Etching or Grinding for Adhesion
To prepare the surface properly, you’ll need to create a profile on your concrete. This can be done through chemical etching or mechanical grinding. Chemical etching uses acid-based solutions that eat away at the top layer of concrete, creating a rougher texture ideal for adhesion.
Mechanical methods like grit blasting or shot blasting are also effective and involve using abrasive materials to scour the surface. Both techniques aim to achieve a CSP (Concrete Surface Profile) level that’s suitable for your resurfacer. The goal is not just to clean but to create a texture that will hold onto new material.
Regardless of which method you choose, safety comes first. Wear proper protective gear like gloves, goggles, and respirators when handling chemicals or operating machinery. Also, test the surface moisture levels before proceeding; too much moisture can prevent adhesion. Follow up with a final inspection to ensure the profile meets your target depth and texture requirements.
Repairing Cracks, Spalls, and Joints (prep before overlay)
Cracks range from hairline to wide, spalls leave voids, and joints are areas that can move as the slab expands and contracts; recognizing which defect you’re dealing with and where movement is likely is the first job, because that choice drives what repair material you pick and how you apply it. For movement-prone zones, you’ll want flexible, movement-tolerant repairs that bridge cracks without creating rigid patches, while spalls get filled with bonding mortars or polymer-modified patch materials that bond to the surface and cure with some give. Avoid rigid patches in joints and never force a patch where movement can tear it out or crack again.
Prepare thoroughly: clean, dry, edge-profile the crack or void, test for residual moisture, and set a plan that sequences cleaning, dry-out, edge profiling, primer or etchant, and the actual repair so the overlay bonds cleanly. After repair, feather edges, let cures follow the manufacturer’s guidance, and prime as needed before the overlay; use proper tools and a clear workflow to keep from trapping moisture or creating weak spots, because a good prep sets up the entire resurfacing job for success. This approach helps the resurfacer perform reliably in movement areas and gives you a durable, long-lasting deck that stays tight under traffic and temperature shifts.
Crack Repair with Backer Rod + Polyurethane Caulk
For wide cracks, start by inserting a backer rod to create a pocket for the caulk. The diameter of the backer rod should be about 1/4 inch smaller than the width of the crack. This ensures that the polyurethane caulk can form a proper seal without being squeezed out.
Once you’ve got your backer rod in place, apply the polyurethane caulk using a caulking gun. Smooth it over with a putty knife to create a neat finish. Make sure not to overfill; just enough to cover the crack and fill any voids left by the backer rod.
After applying the caulk, broadcast sand over the area to match the texture of your driveway. This helps blend in the repair so it’s less noticeable once you apply the overlay. Let it cure according to the manufacturer’s instructions before proceeding with further repairs or resurfacing.
Patching Spalls and Depressions
To fix spalls and depressions, use a polymer-modified repair mortar. This type of patching compound is more flexible than regular concrete mix and better suited for areas that need to move slightly without cracking.
Start by cleaning out the damaged area thoroughly. Then, feather the edges of the hole with a grinder or chisel to create a smooth transition between old and new material. Apply the repair mortar in thin layers, allowing each layer to set before adding another until you reach the level of the surrounding concrete.
Once patched, let it cure for at least 24 hours. This ensures that the patch is strong enough to bond with the overlay material without compromising its integrity. Feathering and curing properly are key steps in making sure your repair blends seamlessly into the rest of the driveway.
Treating Control/Expansion Joints
Control joints play a crucial role in managing concrete movement. When repairing, you have three main options: leave them open, fill them with flexible joint filler, or install new joint material that matches the overlay.
If you choose to fill the joints, use an elastomeric sealant designed for concrete. This type of sealant can stretch and compress without breaking, ensuring your driveway remains crack-free over time. Apply it evenly and smooth out any excess with a putty knife.
For new overlays, consider matching existing joints by embedding joint strips or using a tool to create the same pattern in the fresh concrete. This not only looks better but also helps prevent stress concentration at these points, reducing future cracking risks.

Mixing and Applying the Resurfacer
Mixing the resurfacer correctly is the backbone of a smooth, durable finish that lasts through foot traffic and temperature swings. Use the product’s exact water and additive directions from the label, and mix slowly with the drill and paddle until there are no unmixed pockets or streaks, checking the consistency as you go, then scrape down the sides and pause when it looks uniform. Work in clearly defined sections to keep thickness uniform and edge treatment consistent, and confirm you’re staying within the recommended coverage area to avoid gaps, lap lines, or feathering at transitions.
Plan 4–6 ft sections and keep tools ready so you don’t create cold joints or heavy lap marks, and treat edges and transitions with care as you progress, steadily and consistently. Keep surface prep, moisture checks, temperature considerations, and cure timing in mind, because a weak bond or uneven drying shows up as grooves, pinholes, or edge lines. Following the label and manufacturer guidance, plus noting local ventilation and safety needs, gives you a predictable result and fewer headaches on a DIY job, safely and confidently.
Mixing Best Practices and Consistency Checks
To start, mix your resurfacer according to the manufacturer’s guidelines. Typically, you’ll add water or a special additive until it reaches a thick pancake batter consistency. Overwatering can lead to weak spots, so aim for just enough fluidity to pour easily without being runny.
Before mixing up large batches, do a small test mix first. This lets you check the workability and adjust water levels if needed. Once satisfied with your mix ratio, proceed to batch up larger quantities but ensure each one is thoroughly mixed—no lumps or streaks allowed. A drill with a paddle attachment works great for this.
Consistency is key throughout mixing. Keep an eye on the slump of the mixture as you work; it should remain consistent across all batches. If your mix gets too dry, add water gradually in small increments until it reaches the right consistency again.
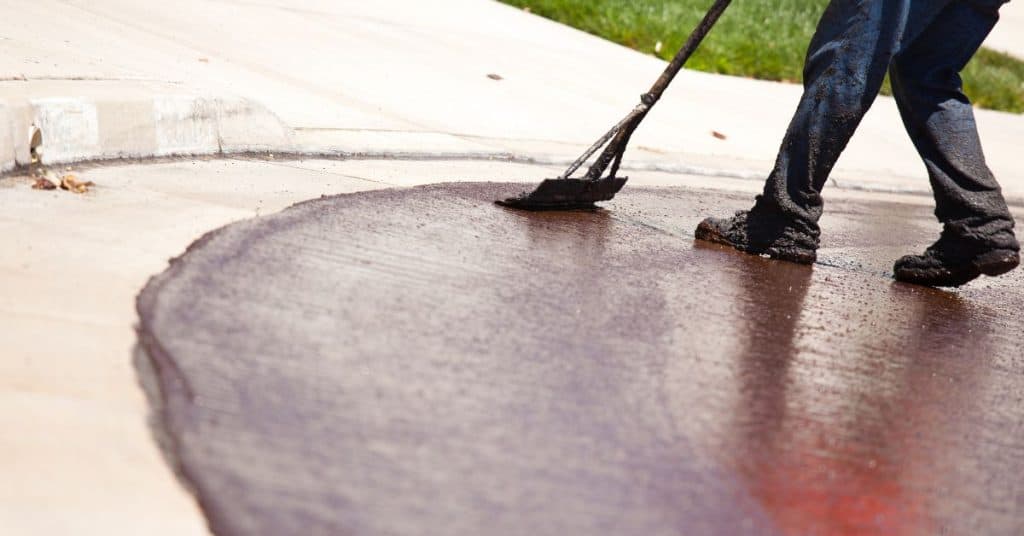
Application Techniques (squeegee, trowel, broom finish)
Once mixed, apply your resurfacer using a squeegee to spread it evenly across the surface. Start from one edge and work in long strokes, overlapping slightly as you go. This helps avoid streaking or uneven coverage.
To level out any high spots or low areas, use a trowel for finer adjustments. Blend seams between sections by feathering edges with a squeegee to create smooth transitions without cold joints forming.
For texture options, consider using a broom for a non-slip finish or adding decorative chips for visual interest. Whatever method you choose, ensure the surface is uniform and free of voids before moving on to curing steps.
Working in Sections & Weather Considerations
Plan your work into manageable sections, typically 4-6 feet wide at a time. This helps control the amount of material you’re working with and ensures that each section can cure properly before moving on to the next.
Temperature and humidity play critical roles in curing times. Avoid applying resurfacer when temperatures are too low or high, as this can affect how well it sets up. Also, be mindful of direct sunlight; it can dry out your work prematurely if not covered.
To join sections seamlessly, feather the edges where they meet to create a smooth transition. This prevents cold joints from forming and ensures uniform thickness across the entire surface. Always follow product-specific curing times before allowing traffic on the new driveway.
Finishing, Curing, and Sealing for Longevity
Finish with a clean sequence: tack coat, skim or final layer, leveling, and feathering edges so the surface is smooth and ready for sealer. Follow proper curing timing by avoiding early traffic and watching for signs that the surface isn’t ready for further steps. Choose a sealer based on climate and exposure, and apply per the label to lock in the finish.
This matters because a smooth, evenly prepared surface prevents lap marks and uneven gloss, which helps the sealer perform longer. Proper curing minimizes moisture loss and reduces cracking or surface defects, while weather conditions can shorten or extend usable windows. Understanding the differences between penetrating and film-forming sealers, plus a smart prep and application plan, keeps the overlay looking good and lasting longer with realistic maintenance and recoat expectations.
Curing Methods and Timeframes
To ensure your concrete driveway overlay cures properly, start by covering the surface with a curing blanket or plastic sheeting to retain moisture. This is crucial in preventing rapid drying that can lead to cracking.
Wait at least 24 hours before allowing light foot traffic on the surface. For vehicle use, wait an additional 7 days if possible, but no less than 3 days under ideal conditions. If you’re dealing with extreme weather—like high heat or heavy rain—extend these times to ensure proper curing.
Protect your new driveway from unexpected rainfall during the curing period. Rain can wash away the concrete mix and cause uneven surfaces. Use tarps if necessary, but make sure they don’t stick to the surface as this can create a weak spot.
Choosing and Applying a Sealer or Top Coat
When it comes to sealing your driveway, you have two main options: penetrating sealers and film-forming sealers. Penetrating sealers soak into the concrete, enhancing its durability without changing its appearance much. Film-forming sealers create a protective layer on top of the surface.
For most driveways, especially in areas with harsh winters or heavy traffic, a film-forming sealer is recommended due to its superior protection against water and chemicals.
To apply your chosen sealer, start by ensuring the concrete is clean and dry. Remove any dust, oil stains, or other contaminants using a degreaser if necessary. Check for moisture content; it should be below 4% before sealing.
Apply the sealer with a brush, roller, or sprayer depending on your preference and coverage needs. Follow up coats as directed by the manufacturer to achieve full protection. Expect to recoat every 2-5 years based on wear and tear.
Safety, Common Mistakes, and Pro Tips
Safety comes first: wear proper PPE, know how to handle tools, ventilate and suppress dust, and store chemicals safely. Skipping surface prep, rushing steps, or ignoring dust and fumes leads to poor adhesion and messy results. Keep weather, temp, and site controls in mind to protect yourself and others.
Pro tips and quick checks give you a smoother job: pre-wet, prime, and stagger coats as you plan the sequence, and mask edges to reduce touch-ups. Check cracks, pick compatible products, and decide when you should DIY or hire based on scope and risk. Always check labels and datasheets for tool and chemical instructions instead of guessing.
Safety Checklist and Hazard Mitigation
Use this checklist before starting any concrete resurfacing work.
- Respirator on: Wear a respirator when grinding or etching to avoid inhaling dust. Confirm it fits properly; skipping can lead to respiratory issues.
- Gloves and goggles: Put on gloves and safety glasses before handling chemicals. Check for proper fit; missing protection risks skin irritation and eye injuries.
- Electrical safety: Ensure all tools are grounded or use battery-operated models in wet conditions to prevent electric shock.
- Ventilation setup: Set up fans or exhaust systems when applying coatings. Confirm they’re running; poor ventilation can lead to chemical inhalation risks.
- Dust suppression: Use water foggers during grinding and patching to control dust. Check for adequate coverage; skipping increases airborne particulates.
- Chemical containment: Store chemicals in sealed containers away from work areas. Confirm proper storage; spills can cause environmental damage and health hazards.
Quick rule: Always wear PPE and set up safety measures before starting any concrete resurfacing task.
Common Mistakes to Avoid
Avoid these common pitfalls for a smoother, more successful project.
- Skip prep work: Proper surface preparation is crucial. Ensure concrete is clean and free of debris; skipping leads to poor adhesion.
- Rigid patches in joints: Use flexible materials like polyurethane caulk for moving joints. Rigid patches can crack over time due to movement.
- Work in bad weather: Avoid resurfacing during rain or extreme temperatures. Weather extremes affect curing and adhesion, leading to poor results.
- Neglect profiling: Properly profile the surface for better adhesion. Skipping this step can result in a weak bond between old concrete and new overlay.
Avoid these common mistakes to ensure your resurfacing project goes smoothly and lasts longer.
Pro Tips for a Durable, Professional Finish
Feather edges of patches and overlays for seamless transitions. This prevents cracking and improves the overall look.
Use primers where recommended to enhance adhesion and durability. Priming ensures better bonding between layers, reducing the risk of peeling or flaking.
Broadcast sand over freshly applied resurfacer for added traction and a more natural finish. Sand helps prevent slips and adds texture that matches existing concrete surfaces.
Schedule work during cooler parts of the day to avoid rapid drying and uneven curing. Cooler temperatures allow for better control over application and finishing steps, leading to a superior final product.
Budgeting, DIY vs Hiring a Pro, and Maintenance Plan
This section lays out a complete budgeting framework and a clear DIY vs pro path, plus a simple maintenance plan to extend the resurfacer’s life. You’ll see how to break down materials, tools, disposal, and protective gear, and how to set aside a contingency for overruns while comparing DIY costs to contractor quotes. It also flags the kinds of maintenance that matter after the job so you don’t lose gains too fast.
Knowing the decision points helps you avoid costly mistakes—look for triggers to hire a pro such as major cracks, shifting slabs, or drainage problems, and use plain benchmarks to compare bids. It also explains how cost drivers change with driveway size, surface age, and required prep like crack repair or patching, plus a practical maintenance calendar with sealing intervals and seasonal inspections to protect your investment.
Cost Breakdown & When Pro Pricing Makes Sense
When budgeting for your concrete driveway resurfacing project, start by listing out all the materials you’ll need. This includes the resurfacer itself, primer if required, sealant, and any patches or fillers to fix cracks or holes. Don’t forget protective gear like gloves, masks, and safety glasses.
Next, consider tool costs. You’ll likely need a squeegee for application, a trowel for smoothing, and possibly an edger if you’re working around curbs or walls. If your driveway is large, renting equipment might be cheaper than buying it outright. Factor in rental fees along with disposal costs for any waste materials.
For DIY projects, add a contingency of 10-20% to cover unexpected expenses like additional sealant or extra patches. When comparing this against contractor quotes, remember pros will charge more but offer expertise and faster turnaround times. They can handle extensive repairs that might be beyond your skill level, such as leveling uneven slabs or addressing serious drainage issues.
Deciding whether to DIY or hire a pro depends on the condition of your driveway. If you have minor cracks and surface-level wear, DIY is feasible. But for deep cracks, shifting slabs, or significant structural damage, it’s best to call in a professional who can provide guarantees and quality work.
Maintenance Schedule and Long-Term Care
To keep your resurfaced driveway looking great for years, establish a regular maintenance plan. Start with annual inspections to check for new cracks or wear spots that need attention. Clean the surface twice a year—once in spring to clear winter debris and again in fall before harsh weather sets in.
Resealing is crucial every 2-3 years depending on traffic and exposure. Use high-quality sealants designed for concrete driveways, applying them evenly with a sprayer or roller. This protects the surface from UV damage and water intrusion that can cause cracking over time.
Maintaining your driveway also means addressing issues promptly. Small cracks should be filled immediately to prevent them from spreading. Regularly check around expansion joints and edges where water tends to collect, as these areas are prone to wear.
By following a simple calendar of tasks—like cleaning, resealing, and inspecting—you can extend the life of your driveway significantly. Remember, proper maintenance is key to keeping your investment looking new for longer.

Conclusion
Get this right and your driveway will be safer, more durable, and look better for years. The work hinges on solid prep, careful mixing and application, and a proper cure and seal.
Begin with a quick check of the surface, clean thoroughly, profile the concrete, and repair cracks, spalls, and joints before you overlay. Then mix and apply the resurfacer in thin, even coats, finish as directed, and follow a deliberate curing and sealing plan. If any step looks uncertain, test a small area first and never rush through the cure or a seal.
Common mistakes to avoid are skipping crack and joint prep, applying on a dirty or rough surface, and ignoring temperature, humidity, or drying times. Wear proper PPE, work in workable conditions, and don’t mix or apply material thicker than recommended. If you’re unsure about drainage, large damaged areas, or structural issues, bring in a pro rather than pushing on and risking more damage.
Call in a pro when you encounter extensive spalls, significant rebar exposure, large cracks that keep opening, or drainage problems. Otherwise, follow the plan, stay conservative with each step, and stay focused on safety. Stay steady, follow the steps, and you’ll finish with a solid, long-lasting resurfaced drive.
FAQ
What’s the first thing I should do before resurfacing?
Turn off that power and clean the driveway. Remove all vehicles, debris, and oils. You need a clean, dry surface to get a lasting patch.
Do I need special tools or equipment?
You’ll need a pressure washer, stiff broom, a concrete grinder or sander, and a trowel or float for the mix. Get a proper resurfacing kit or mix designed for concrete; plain patch stuff won’t hold up long.
How long will it take, from prep to finish?
Prep days depend on weather and surface. Expect at least a full day for cleaning, repair, and drying, then another day for the surface to cure. Don’t rush; moisture wrecks the coating.
What mistakes should I avoid on a driveway resurfacing?
Don’t skip cleaning or skip the crack repair. Don’t apply in cold, humid, or rainy conditions. Don’t seal too early; moisture trapped underneath can cause peeling.