
Table of Contents
- Why hidden moisture in stucco and EIFS matters
- Quick overview of moisture meters: pin, pinless, and combo
- Choosing a single, affordable meter for DIY stucco checks
- When to test: timing and triggers
- Where to test on stucco and EIFS — high-risk zones
- Pre-inspection visual checklist
- Step-by-step scanning workflow using one simple meter
- Interpreting meter readings for stucco and EIFS
- Common limitations and false positives — how to avoid mistakes
- Complementary tools and techniques to confirm findings
- Safety, PPE, and working at height
- Documentation: how to record scans for records and insurance
- DIY triage: when you can patch vs when to hire a professional
- Simple maintenance and moisture prevention tips
- Typical costs and time estimates — meters, inspection, and repairs
- Common DIY mistakes and how to avoid them
- How to create a repeatable inspection schedule and checklist
- When and how to present findings to contractors or insurers
- Limitations of DIY meters and the value of professional EIFS/stucco inspections
- FAQ: quick answers to homeowners’ most common questions
- Conclusion and homeowner action plan (30-minute DIY scan)
- The importance of regular eifs inspections and repair
- Eifs inspection checklist for homeowners
- Eifs 2.0: how modern systems fix the failures of the past
- Foam board insulation: key types, benefits, and best uses
- Stucco & eifs myths busted with clear, science-backed facts
- Indiana wall systems
Introduction
A simple moisture meter can reveal hidden moisture behind stucco by detecting elevated readings.
You’ll learn how hidden moisture affects the structure and finishes, and the guide walks through practical steps to test, interpret readings, and judge what action is needed.
Why hidden moisture in stucco and EIFS matters
Hidden moisture in stucco and EIFS quietly undermines buildings by fostering mold growth, wood rot, accelerated structural deterioration, and energy waste as damp insulation loses its thermal performance, sometimes masking problems behind exterior finishes. Early detection matters for homeowners and building owners because catching problems before they spread reduces repair costs, supports proactive maintenance planning, protects occupant safety, and helps preserve property value; common entry points include cracks, flashing failures, improper sealants, joint penetrations, clogged weep holes, defective seals around windows and doors, and roof-to-wall term leaks.
This issue also ties directly to health and indoor air quality, as mold and moisture can trigger allergies, asthma symptoms, and other respiratory concerns, while sustained dampness raises insurance considerations and potential liability for property owners. A simple moisture meter provides a practical first step in the field, guiding targeted confirmatory testing, timely repairs, and sensible maintenance schedules so DIYs and job crews can prioritize drying, sealant reapplications, flashing fixes, and monitoring over time.
Health and structural consequences
Hidden moisture under stucco or EIFS often shows up as musty smells, paint stains, or soft spots inside walls. If you notice any of those, check baseboards and attic penetrations and use a moisture meter or probe to confirm wet pockets. Don’t wait for visible mold growth to act—mold spores can make people cough, trigger allergies, and worsen asthma long before you see colonies.
Left too long, moisture rots timber and corrodes fasteners. That leads to weakened framing, doors that stick, and siding or trim that pulls away. Small repairs become major structural work fast. If probing finds soft wood or rusted nails, plan for invasive repairs: cut out the wet framing, replace it, and fix flashing or drainage causes.
Decide quickly between a DIY patch and hiring a pro. For small, surface mold and isolated wet spots you can dry and clean safely. For hidden pockets, widespread mold, or structural decay get a qualified contractor who will do destructive testing and repair properly. It costs more to ignore the problem. Budget for thorough fixes, not temporary patches.
How stucco and EIFS differ in moisture behavior
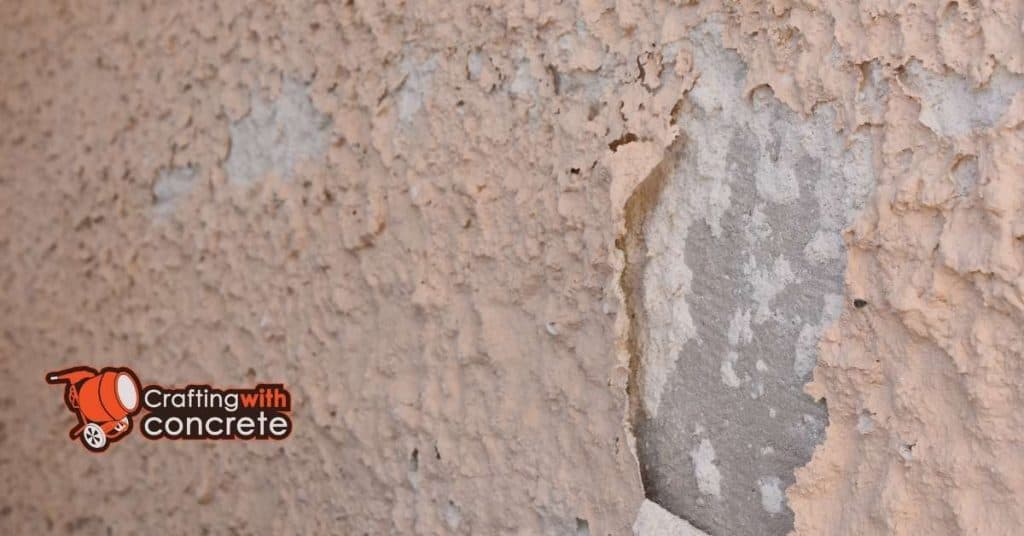
Cement-based stucco soaks and releases moisture slowly. It’s thick and tied to the wall sheathing, so leaks show up as staining, softened trim, or efflorescence over time. Layered EIFS (synthetic) often has a thin outer coat over foam or a drainage plane. That means water can sit behind the finish and not show obvious surface signs until damage is already advanced.
Because they behave differently, your checks must differ too. For stucco, press on suspect areas, look for cracks that lead to the lath or wall, and check flashings and weep screed. For EIFS, probe at penetrations (windows, lights), lift localized edges if possible, and pay attention to seams—moisture meters can miss wet foam behind a dry surface.
If you get any suspicious readings or see rot, don’t trust a single noninvasive test. Recheck with a different tool or method, and consider a small invasive probe or core. If you’re unsure what you found, call a contractor experienced with both systems. Wrong diagnosis leads to wasted repairs or covered-up rot.
Quick overview of moisture meters: pin, pinless, and combo
Pin meters measure electrical resistance by inserting probes to depth, translating moisture presence in stucco and EIFS into higher conductance readings while being more invasive and potentially leaving small penetrations. Pinless meters scan surfaces noninvasively through electromagnetic signals, offering rapid moisture indicators across the exterior without penetrating coatings, though results can be influenced by surface treatments or metal lath. Combo meters combine both methods in one device, enabling quick surface checks for touch‑ups, deeper moisture profiling behind EIFS finishes, and screening before repairs to locate elevated moisture zones that warrant further investigation.
On the jobsite, expect a trade‑off between accuracy and invasiveness, with pin measurements offering precise depth readings but requiring access and calibration for exterior assemblies, while pinless options prioritize speed and noninvasiveness suitable for screen tests and large area surveys. For EIFS, pinless meters are often favored for rapid surface screening, whereas pins may be used selectively to confirm suspected wet areas or to map moisture behind finish layers when safe access is available. Readings should be interpreted with typical stucco/EIFS moisture thresholds in mind, guiding next steps such as core sampling, moisture mapping, or remediation planning rather than standalone judgments.
How pin meters work and when to use them
Pin meters measure moisture by driving metal probes into the material and reading the electrical resistance between them. Wet wood or drywall conducts electricity better than dry material, so lower resistance equals higher moisture. Because the pins must actually touch the inside of the material, you have to penetrate the material — that means small holes in drywall or lumber. Don’t expect a pin meter to read through paint or finished flooring without making contact.
Use a pin meter when you need a precise, local reading. If a pinless meter shows a suspicious area, stick the pins in to confirm it. They’re the tool of choice for checking studs, framing, trim and any spot where you need a real-number reading rather than a general area scan. Take multiple readings around the suspect area and compare them to known dry spots so you can spot a true wet area versus a surface anomaly.
Practical tips: press the pins firmly and evenly, keep them clean, and watch the scale or %MC conversion for the material you’re testing. Don’t probe decorative surfaces unless you’re okay with small holes. And if you’re testing concrete, be aware pin meters read near the pins only — they’re great for finding a leak’s exact location but won’t replace broader scanning when you need an overview.
How pinless meters work and when to use them
Pinless meters send an electromagnetic field into the material and read how that field changes. That gives you a quick, non-contact moisture estimate over a broad area. Hold the flat sensor firmly to the surface and sweep slowly to map moisture patterns. For finished floors, drywall, or large subfloor checks, they save time and avoid leaving holes.
Use a pinless when you need fast, non-destructive surface scans and a general pattern of wet spots. They’re great for pre-inspections, spotting leaks, and checking whether a floor is generally dry enough for installations. If you already own a combo meter, use the pinless first to find trouble spots, then confirm with pins when you need exact percent readings.
Remember the trade-off: pinless meters have limited depth penetration and struggle with layered or dense materials. Thick finishes, concrete overlays, or hidden vapor barriers can hide deep moisture. If you suspect saturated joists, floor cavities, or a multi-layer system, don’t rely on pinless alone—follow up with invasive probes or remove a small section to be sure.
Combination meters: best of both worlds
Want speed and accuracy without carrying two tools? A combo meter gives you a pinless pad for quick scans and pins for spot checks. Scan large areas fast to find suspicious zones, then use the pins to confirm actual moisture content exactly where it matters.
For DIY jobs, the practical routine is simple: scan first, verify second. Walk the room with the pad to map wet spots. When the pad flags a problem, stick the pins in to get a true moisture reading. That keeps you from chasing false alarms or missing hidden wet spots.
Pick a combo with clear mode switching and a readable display. Learn how your unit reports readings and what surfaces need pins versus pad use—then actually follow it. Don’t assume every spot needs invasive testing; also don’t skip pin checks when you plan repairs. A combo meter saves time and mistakes if you use it like a pro.

Choosing a single, affordable meter for DIY stucco checks
Choosing a single, affordable moisture meter for DIY stucco checks means prioritizing a versatile option—prefer a pinless model with adjustable depth or a combo unit that includes pins for spot checks. Budget options exist under $50, mid-range $50–$150, and premium models offer durability and warranties, so pick one that covers both EIFS and traditional stucco with straightforward setup.
Rather than vague language, here are practical, real-world suggestions and buying guidance for homeowners:
- Good starter pinless meters (fast non-invasive scans): General-use models like the Extech MO55 (pinless pad + pin) or the Delmhorst BD-2100 (pinless pads available) are frequently recommended for home inspections; lower-cost options include Wagner Meters Orion 930 (pinless) or the Protimeter Surveymaster (combo, often rented). Expect $80–$300 depending on features.
- Reliable combo meters for homeowners: Look at the Protimeter Surveymaster (combo) or the General Tools MMD7NP (pin + pinless combo). These balance surface scans and spot verification without carrying separate devices.
- Pin probes and lengths: For external checks around stucco and sheathing, use 1/2″–1″ hardened steel pins for typical spot verification on trim and sheathing. Longer probes (2″+) are used for deeper framing checks—rent or buy separately if you need them. Choose corrosion-resistant pins for exterior work.
- Where to rent: Tool rental shops and home centers often rent mid-range thermal cameras and professional combo meters; rent when you need thermography or a contractor-grade pin meter for a single job.
- Calibration basics (quick procedure): Always follow the manufacturer’s quick-cal step—power on, select the material setting (masonry/plaster), take a baseline reading on a known-dry area, and verify pin meters on a manufacturer calibration block or a dry wood sample plus a damp cloth for a wet reference. Document the baseline before scanning.
Minimum feature checklist for a reliable meter
Pick a meter with adjustable scales so you can switch ranges for thin stucco, thick stucco, and lath. On the job, flip through ranges and confirm readings change smoothly. If the unit only ever reads max or min, it’s useless for real checks.
Make sure the meter has a clear hold/display function. Test it on a spot, press the hold, then move the probe—if the number drops or flickers, the hold is junk. Also check probe condition and simple calibration steps in the manual before you trust readings.
Check battery life and warranty before buying. Short battery life means you’ll be replacing cells mid-job; a decent meter should run many hours on one set. Get at least a year warranty and know the return policy. Don’t buy from unknown sellers with no support—cheap meters without backing cause wasted time and bad decisions.
Typical price tiers and what you get
On a tight budget ($50–150) you get simple pin meters or basic pinless units. They work for quick spot reads on stucco and substrate moisture. Don’t expect lab-grade accuracy, calibration options, or deep readings. These are fine if you only do a few checks each year and just want to flag wet areas.
Mid-range meters ($150–400) are the sweet spot for serious DIYers. Expect better accuracy, selectable modes (pin and pinless), temperature/humidity compensation, and data hold or simple logging. You can trust them for pre-repair checks and for showing a homeowner what needs fixing. If you plan to test multiple walls or document conditions before repairs, spend here.
Pro gear ($400+) gives true contractor features: certified calibration, interchangeable probes, robust logging, deeper penetration, and service options. Buy this only if you inspect often, need court-ready readings, or plan to resell services. In most home jobs I tell people: buy once, buy right—but don’t overpay if you only need basic spot checks. Refer back to the minimum feature checklist when deciding which tier meets your needs.
When to test: timing and triggers
Establish a routine testing cadence that combines biannual checks with post-storm assessments and immediate testing when triggers appear, such as visible stains, discoloration, musty odor, renovations near exterior walls, or a new insurance claim. Regular timing improves early detection and can save costs by catching moisture before it causes major damage. Focus testing on key stucco/EIFS surfaces and substrate interfaces, including areas behind recent repairs and transitions to balconies, with consistent readings over time.
Read the meter consistently to distinguish wet, damp, and dry zones, note readings with simple logs (location, date, readings, ambient conditions, photos), and document any notable changes. This disciplined approach supports swift action—quarantine affected area if needed, coordinate with contractors, and align findings with warranty and safety requirements. Using clear thresholds and practical steps helps non-technical readers understand what to do next and keeps moisture management on schedule.
Post-storm and seasonal testing routine
After a big storm or at the turn of the wet season, walk the site and make a quick, methodical sweep. Check base compaction by probing with a screwdriver or rebar in several spots and look for soft, muddy areas. Pay special attention to low spots, joints, and the areas around drains and downspouts.
Look for signs that water changed the job: new cracks, settled edges, or areas where material washed away. If you see pooling, rutting, or saturated fill, mark the spots, take photos, and measure how large or deep the issue is. If the problem is more than a few square feet or deeper than an inch, plan a proper test or call a pro.
Do a quick repeat check at least once before and once after the wet season to catch problems early. Keep a simple log with dates, weather, and what you found. Small fixes now save big repairs later.
Red flags that require immediate testing
If you find soft spots under flooring, stairs that sag, or a ceiling that feels spongy, stop using that area and get it checked right away. Probe gently with a screwdriver or walk carefully — these are signs of structural rot or failed support that won’t fix itself.
Visible signs like dark stains, peeling paint, fresh discoloration, or a musty smell mean active water is getting in. Move valuables out, wipe up surface water, then test moisture in the materials and behind finishes. If you see mold growth, don’t just scrub—contain the area and consider professional remediation.
Don’t wait for a scheduled inspection. If leaks are obvious, flash flooding occurred, or you notice spreading damage, document photos, shut off affected utilities if safe, and call a pro for immediate testing and repair. Quick action prevents bigger repairs and keeps the house safe to occupy.
Where to test on stucco and EIFS — high-risk zones
Hidden moisture in stucco and EIFS tends to accumulate at openings and transitions, making window and door perimeters, rooflines and flashing interfaces, base of walls near grade, control joints, and material transitions the highest priority testing zones. Focus the survey on these areas first, using a logical scan pattern and consistent probe placement to capture comparable readings. Use pin-type meters for pin-down accuracy at edges and interfaces, while pinless tools can screen larger expanses before targeted follow-ups.
Understanding why these zones matter helps DIY and jobsite inspectors plan efficiently and document findings clearly for remediation timelines. Testing during favorable conditions—after rainfall or during dry-wet cycles—yields the most meaningful comparisons, and noting recent repairs, coatings, or diversions prevents skewed results. Recording readings, mapping high-risk zones, and setting practical alert thresholds turn a scattered one-off check into a credible, actionable maintenance plan that protects coatings and substrates without damaging finishes.
How to map your test grid
Pick a clear pattern and stick to it. Measure and mark a baseline across the wall — horizontal or vertical — then lay out a regular grid. For most small to medium walls, 2–3 foot spacing works. For large facades or areas you suspect problems, tighten to 12–18 inches. Consistency is everything so your scans are repeatable.
Start by marking the corners and any high-risk zones you already identified, then fill in the middle with the grid. Use a chalk line, tape, or stakes so marks don’t move. Label rows and columns as you go so each scan has a clear reference point you can record.
Scan every intersection on the grid and note readings in a simple log with the grid coordinates. If a scan flags a problem, split that square into a tighter grid and re-scan. Don’t wander around testing randomly — a sloppy pattern gives you gaps and false confidence.
Keep one person responsible for marking and one for recording. That way you avoid missed spots, inconsistent spacing, and duplicate scans. A clean, repeatable grid makes follow-up repairs and future inspections much easier.
Special attention spots for EIFS
Start at the obvious weak points: where the EIFS meets windows, doors, and rooflines. Those sealant joints take the most abuse and hide failures. Push on the sealant edges with a screwdriver or probe and look for gaps, soft spots, or old dried-out caulk. If you find any, mark them on your test grid and test around them more densely.
Check every penetration — light fixtures, vents, pipes, railings — as if it were leaking right now. The cladding often separates from flashings at penetrations. Remove escutcheons or trim where safe, and feel for soft backing, trapped moisture, or staining at the inside face. Don’t trust neat looking paint to mean it’s dry.
Watch the transitions to the drainage plane and substrate. EIFS relies on proper drainage behind the finish; where it changes direction or material you usually see failures first. Focus testing at those transitions and where the EIFS terminates at decks, grade, or kickouts. If you’re unsure, increase sampling density around these spots on the map and follow up with longer probes or moisture logging.
Pre-inspection visual checklist
Before using the meter, perform a focused visual sweep of the exterior: look for cracks and edge gaps, staining or efflorescence, surface softness, and any damaged sealants or flashing. Note horizontal, vertical, or diagonal crack patterns, check for stair-step corners, and photograph each area for a baseline later comparison. Scan around windows and doors, joints, and drainage areas to gauge moisture pathways before proceeding with readings.
This inspection helps you interpret meter results more accurately by revealing moisture sources, prior repairs, or DIY changes that could skew readings. It also creates a practical reference—zones labeled, photos captured, and observations documented—so you can track changes over time and decide where to focus further testing or remediation. Skipping this step can lead to misreadings or missed issues, undermining the reliability of the investigation and any subsequent repairs.
Exterior visual cues to mark for meter scanning
Walk the perimeter and look for surface signs that usually hide moisture beneath. Dark or peeling paint, white powdery efflorescence, green moss or black mildew on lower siding, and consistent staining under gutters are all high-probability spots. Pay extra attention where the grade drops toward the foundation, at downspout discharge points, and around porch steps or stoops where water pools.
If you see soft or sagging trim, warped siding, or soil depressions next to the foundation, mark with tape or flags right away. Also flag areas with dead or stunted vegetation in otherwise healthy beds, and any window wells, vent openings, or utility penetrations that look rusty or stained. These are quick wins when prioritizing scan points from your pre-inspection visual checklist.
Don’t waste time scanning smooth, dry walls with good clearance. Prioritize scanning where multiple cues overlap — stains plus pooling plus vegetation stress — and note obvious low spots in your sketch so your meter operator hits them first. If anything smells musty at the exterior, treat it as a red flag and scan immediately.
Interior signs linked to exterior moisture
Look for horizontal stains on walls, peeling or bubbling paint near the floor, and discolored carpet edges. Those tell you where water has tracked inside. Smell musty odors or rotten wood? That points to ongoing moisture, not a one-time spill.
When you find a spot, trace it to the nearest exterior wall and mark suspect areas for outside testing. Note the height of the stain, whether it’s wider at the base, and if it lines up with a window, downspout, or low-grade soil. These details tell you where to run the meter and where to dig a sample if needed.
Don’t assume the biggest stain is the worst leak. Small, repeated stains often mean chronic entry points. If multiple rooms show similar patterns, check the roofline and gutters above those walls first. Be direct: mark the outside, document the location, then verify with moisture readings before tearing anything out.
Step-by-step scanning workflow using one simple meter
A clear, repeatable sequence guides you from pre-scan safety and setup through a structured exterior sweep, a pinless moisture survey, targeted pin checks, and recorded readings, with explicit escalation criteria if invasive tests become necessary, so you can deliver consistent results every time you survey a stucco or EIFS surface. The workflow emphasizes prevention and accuracy: plan PPE, ladder stability, weather windows, surface prep, and meter calibration upfront; perform a broad visual risk scan to flag suspect zones; then run a multi-directional pinless sweep, documenting gradients, depth expectations, and how to distinguish transient moisture from embedded moisture.
When readings exceed thresholds, switch to targeted pin checks on heights and substrate interfaces to confirm penetration depth and moisture presence, note orientation (vertical joints, transitions, corners), and capture coordinates, surface conditions, and readings to build a reliable hotspot map. This disciplined approach helps you compare results against acceptance criteria, decide whether follow-up invasive checks or EIFS/ECS evaluation are warranted, and obtain written permission when required, while documenting decisions to protect safety, liability, and project timelines. Keeping a detailed plan and clear thresholds also improves communication with clients or contractors, supports transparent invoicing, and provides a repeatable framework you can reuse on surveys to drive consistent outcomes across substrate conditions and weather scenarios.
Step-by-Step Process
This sequence walks you through a single‑meter scanning job from prep to finish so you get reliable readings and clear marks to act on. Follow each step in order and stop if readings or conditions look wrong.
- Do a quick kit and safety check before you start. Confirm the meter has fresh batteries, the probe/lead integrity, and any required PPE so the tool will behave reliably. A quick power-on self-test and known‑reference reading (if available) should match expected values — if not, replace batteries or the meter. Call a pro if the meter fails diagnostics or shows wildly inconsistent numbers.
- Establish a baseline reading on a known good spot. Take a control reading on an unaffected area to know what “normal” looks like for this site. This gives you something to compare against when scanning suspect areas; the check is the control value stays steady over three repeated reads. Stop and get help if you cannot get a stable baseline after troubleshooting.
- Lay out a simple grid or reference marks across the work area. Mark consistent spacing (for example every 12–24 inches) so scans are repeatable and you can return to any point. The check is that marks are straight and numbered; if they’re not, remeasure once. No pro needed unless structural access or permits are required to mark the area.
- Scan systematically along the grid with steady probe contact and consistent meter settings. Move at a consistent speed and angle so readings are comparable from point to point. You’re done with each pass when adjacent readings form a sensible pattern; random spikes mean you need to repeat that pass. Call a pro if you hit unexpected hazards (sparks, heavy wiring, suspected gas lines).
- Log and mark any anomalies immediately on the surface and in your notes. Record the grid location, reading value, and a short note about the condition so you don’t rely on memory. Check by re‑measuring the anomaly after a short pause; true anomalies repeat, one‑offs do not. If values indicate a serious risk (electrical live, structural failure), stop work and call the appropriate professional.
- Verify critical findings with a second pass and, if possible, a different meter setting or orientation. This confirms you didn’t get a false positive from a bad probe angle or dirty contact. The quick check is that the second pass shows the same pattern and similar numbers. Hire a pro for destructive inspection only when the issue affects safety or you must open walls/floors.
- Finish with cleanup and final documentation. Erase temporary marks you don’t want left, secure any temporary repairs, and compile your scan notes, photos, and grid map for future reference. The check is that notes match what you marked on the surface and photos show the same points. No waiting time needed unless you made repairs that have a specified cure time—respect those cure times before re‑testing.
Pro tip: Always trust repeatability over a single reading—if a suspect spot doesn’t repeat on a second, well‑controlled pass, it’s probably noise. If it does repeat, stop and get professional help rather than guessing.
Non-destructive scan pattern (pinless)
Keep the meter flat and flush to the surface and sweep in straight, even passes. Move the meter like you’re mowing a lawn: steady hands, steady pace, same height. Don’t jab or tilt—those give false spikes. If you followed the earlier step-by-step process, use the same grid orientation you set up there.
Overlap each pass so you cover at least half the width of the sensor on the next sweep. That overlap coverage prevents gaps and blind spots. Walk slow enough to let the meter update—think deliberate, not rushed. When a reading jumps, pause and re-sweep the spot at different angles before declaring it suspicious.
Mark suspect areas immediately with chalk, tape, or a stake. Write a quick note or number so you can relocate it later and log the reading beside the mark. If you find multiple suspects, mark corners of a small box rather than a single dot so you know the rough footprint. Later, refer back to the detailed steps for confirmation or pinpointing with a secondary tool.
Confirmatory pin testing and how to place pins
After your non-destructive sweep finds the area, use pins to confirm the exact spot. Pick a tight, targeted point — not a random grid. Drive the pin vertically or very slightly angled toward the center of the flagged zone. Check depth as you go; stop when you feel a distinct change in resistance or reach the expected substrate limit.
Space pins close enough to pinpoint the feature, but not so close you hit reinforcement everywhere. For concrete slabs, move pins in 1–3 inch increments across the flagged line until you get a consistent hit. If you get a hard metallic strike, pull back and shift a half-inch to avoid rebar or wire mesh.
Never jab blindly. Tap the surface first with a small probe to sense wire or conduit and listen for metallic echoes. If power lines or complex mesh are possible, reduce pin depth and angle shallowly, or call for a small core/pothole instead. Remember: a cautious pin now beats tearing up a slab and fixing an electrical mess later.
Interpreting meter readings for stucco and EIFS
Key readings for stucco and EIFS should translate into simple thresholds: dry usually under 12% moisture, moist around 12–18%, and wet above 18%, with pin meters giving a trench-like reading and pinless meters offering surface-to-subsurface estimates through composites. Use control/dry-spot comparisons by taking baseline readings from known dry areas and comparing them to suspected spots to spot rising moisture trends. Look for localized pockets versus widespread moisture, and distinguish surface moisture from sub-surface leaks by monitoring whether readings stay elevated after surface drying or rain ceases.
Because the article previously mixed several numeric cutoffs, here is a consolidated, practical guidance headnote you can stick to (adjust slightly for your meter model and manufacturer guidance):
- Control / baseline: Select a known-dry spot on the same wall and record 3 readings — this is your site baseline.
- Pinless surface scan (comparative): baseline <10 = normal for dry stucco/EIFS exterior; 10–16 = caution (retest after 24–48 hours dry); >16 = suspect (confirm with pins or invasive test).
- Pin (contact) %MC readings: <12% = dry; 12–18% = moist (monitor/retest and evaluate source); >18% = wet (action required — confirm depth and consider remediation). Many pros treat sustained >20% across multiple adjacent readings as immediate escalation.
- Decision anchors: use repeated elevated readings (same spot on two passes) and clustering across adjacent grid points (2+ adjacent high cells) to decide escalation — single spikes alone are rarely diagnostic.
This guidance helps you prioritize actions on the job—surface prep, patching, or calling in EIFS specialists—while reducing guesswork. Real-world factors like temperature, porosity, recent rain, and sun exposure can skew numbers, so document readings, compare across multiple spots, and allow for drying cycles before deciding remediation. A compact decision framework: if readings cross the moist or wet thresholds across several adjacent areas, plan targeted prep and remediation and note patterns for the homeowner or client to review later.
Typical reading ranges and what they mean
Quick reference: think low, moderate, high. For most moisture meters used on stucco and EIFS, a low reading means the wall is dry and normal — you can expect roughly under 10% on moisture-percentage scales or a low single-digit reading on many non-contact units. A moderate reading is a yellow flag: roughly 10–16% (or the equivalent mid-range on pinless models). A high reading is anything consistently above about 16% — treat that as actionable moisture until proven otherwise.
For meter types: if you have a pin (contact) meter, trust the percentage numbers but check several spots through the assembly — one wet hairline joint can skew results. If you use a pinless (non-contact) meter, treat its scale as comparative: low <10, moderate 10–16, high >16 on most models. At low, no action needed. At moderate, re-check after 24–48 hours of dry weather and probe around seams and terminations. At high, stop cosmetic work, remove trim or cladding where feasible, and confirm with a pin meter or a small exploratory cut.
Don’t obsess over a single reading. Take multiple readings across the problem area and at known dry spots for a baseline. If readings stay moderate-to-high after repeated checks, call a contractor who can do a more thorough diagnostic — leaking EIFS or failed WRB often looks subtle but can ruin the assembly if ignored. If someone tells you to “just paint over it,” don’t do it — fix the moisture source first.
Using a control spot to reduce false positives
Pick a true dry area and treat it as your control spot. Good choices are an interior wall away from exterior exposure, a garage wall, or a section of stucco known to be dry (covered during rain). Clean the surface, avoid loose paint or dirt, and take two or three readings so you know what “normal” looks like with your meter and settings.
Write down the meter model, scale or setting, and the exact reading. Repeat the same method on the suspect area: same contact pressure, same angle, same spot pattern. Treat the control reading as your baseline for relative readings — you’re looking for a meaningful delta, not a single number.
If the suspect area only reads a few points higher than the control, don’t panic. Retest after changing conditions: dry a small patch with a hairdryer or wait for a dry day and retake readings. If the delta stays significant, consider a probe or core test. Small differences are often meter noise, surface salts, or different substrate thickness.
Don’t use a control spot on a different material or a place with hidden insulation or moisture sources. Batteries, dirty pins, and high-salt finishes all give false highs. If you can’t get a clear delta, stop guessing and call someone with calibrated tools. It’ll cost less than ripping out good stucco.
Common limitations and false positives — how to avoid mistakes
Common limitations and false positives can mislead moisture testing, so distinguish surface moisture from true substrate moisture and verify persistence beyond dampness with quick cross-checks at different depths, including re-testing after drying periods and comparing results across multiple probes. Temperature fluctuations and relative humidity skew both pinless and pin-type readings, so plan retesting after significant shifts, during typical daily cycles, or when readings stabilize enough to merit documentation, and note any ambient changes that could affect interpretation. Insulation and foam board layers can produce false positives or negatives for pinless meters, and signs that readings are influenced by substrates behind the finish should trigger deeper verification, including comparing pins with pinless results, probing at multiple locations, and assessing whether readings track proximity to hidden backing or cold surfaces.
Conductive finishes such as epoxy, paints, or metalized coatings can skew pin measurements; adapt testing by selecting uncoated test spots, sanding away a small area, or using complementary methods to confirm results, particularly near joints or edge zones. Rely on cross-checks, multiple probes, and measuring at varying depths to confirm anomalies, while noting recent rain, dew, HVAC condensate, or sun-heated surfaces as potential false positives and documenting how these factors shift between quick checks and longer-term monitoring. A simple, practical decision path helps DIYers know when readings warrant deeper investigation or professional EIFS/stucco evaluation, and documenting test conditions with timestamps, photos, and clear trends supports re-testing, trend analysis, and responsible follow-up actions over time.
When pinless meters under-report in EIFS
EIFS has a foam or insulation layer behind the finish that the pinless meter often can’t see through. If the moisture is below the insulation or in the sheathing, a pinless reading at the surface can look fine while the substrate stays wet. Remember the broader limits and false-positive issues covered earlier—this is one of the common blind spots.
When you see suspicious signs—stains, soft spots, efflorescence, or runs under window/door penetrations—don’t trust a single surface scan. Insulation boards block detection, so either take small invasive checks (drill a tiny 1/4″ hole and use a pin meter or probe) or remove a test patch of finish to expose the substrate. If you need proof for repairs or a claim, do an invasive test rather than hoping a pinless number tells the whole story.
If invasive testing shows moisture, map the affected area and mark locations for a proper contractor. If the invasive checks are dry, seal your test holes and document the results. And if you’re unsure, err on the side of an invasive check—skipping it because the pinless read “looks good” is a fast way to miss hidden damage.
Avoiding false alarms from surface salts or recent rain
Surface salts (efflorescence) and recent wetting are the two biggest cheats when you’re trying to read moisture. They can spike a meter fast. Don’t panic—there are quick checks and fixes you can do on site.
- Brush and inspect — Salt crystals and dirt hold moisture on the surface. Scrape or brush a test spot first and retest the cleaned area to see if the reading drops.
- Wait after rainfall — Don’t test right after rain, sprinkler runs, or pressure washing. Let the surface dry for a day or two (longer in cool or shaded areas) and re-test before concluding there’s a leak.
- Compare adjacent areas — Take readings on a known-dry control spot nearby. If both readings are similar, the spike is likely surface-related; if only the suspect spot is high, you have more reason to investigate.
- Remove loose salt — If efflorescence is present, chip or wash it off and let the wall dry. Persistent high readings under salt indicate deeper moisture; surface salt alone will drop the reading once removed and dried.
- Repeat tests over time — Don’t rely on a single reading. Re-test the same spots after 24–72 hours and after different weather conditions to confirm a true moisture problem.
Do the simple cleanup, compare with a dry control, and re-test after drying. That cuts false positives down to almost zero and saves you chasing ghosts.
Complementary tools and techniques to confirm findings
Use complementary tools to corroborate meter readings and narrow repair scope. Common, practical additions are thermal cameras for temperature anomalies, borescopes for visual inspection through small access holes, relative-humidity dataloggers for cavity monitoring over 24–72 hours, and small moisture probes or pin meters for depth confirmation. A combination of at least two independent indications (pinless reading + pin reading or pinless + IR anomaly) is the fast rule-of-thumb before drilling larger cores.
When to add thermal imaging
Bring a thermal camera when you can’t see the problem with your eyes or a moisture meter alone. Infrared shows temperature anomalies that often line up with wet spots—cooler areas where evaporation is happening or warmer areas where insulation and heat flow have changed. Use it for hidden cavities, behind siding, under floors, or large ceilings where poking holes would be messy.
Use thermal imaging early in the inspection if the issue is intermittent or seasonal. If a leak shows up only in heavy rain or when the HVAC runs, a snapshot with a thermal camera during the event will find the track. It’s also worth adding after repairs to verify drying and to spot stray wet areas you missed with probes.
Don’t rely on thermal alone. Sunlight, drafts, and surface differences can fool you. If the camera flags something, follow up with a moisture meter or a targeted probe to confirm moisture. If you’re unsure, hire someone who knows how to read thermograms—cheap results are worse than none.
Quick invasive checks and moisture probes (expanded safe protocol)
When non-destructive tools indicate a problem, an invasive check may be necessary. Follow this safe, minimal-impact protocol to avoid creating new leaks or hitting utilities:
- Confirm location and mark it on your grid; photograph the area and meter reading before you touch anything.
- Check for hidden services — use a stud/metal detector and verify no electrical conduit or plumbing runs where you plan to drill. If unsure, stop and call a utility locator.
- Drill a controlled access hole using a 1/4″–3/8″ masonry or wood bit depending on substrate. For EIFS, start at a joint or an old sealant gap where repairs are expected; avoid cutting mid-panel when possible.
- Insert pin probe or humidity probe and record depth, orientation, and reading. For cavity RH logging, install a small RH logger and leave 24–72 hours for trend data (useful for slow leaks).
- Collect any removed material (dust or small cores) in a sealed bag if you plan to submit to a lab—label with date, location, and who collected it. For lab submissions, ask for fungal identification or moisture content analysis; follow lab guidance on sample size and chain-of-custody requirements.
- Seal test holes immediately with compatible sealant or temporary waterproof tape. For EIFS, use manufacturer-recommended patching or a waterproof temporary cover until a permanent repair is made; document the sealing step with photos.
- Record everything: time, operator, drill depth, meter IDs, and photos before/after. If you hit unexpected materials, stop and consult a professional.
Do not core larger holes unless you have confirmed utilities and a repair plan. If you must remove larger sections for diagnosis, photograph and document each step and hire a qualified contractor for replacement and proper re-sealing.
Safety, PPE, and working at height
Start with a quick risk assessment to identify mold or moisture-containing materials, potential lead or asbestos concerns in older stucco, and nearby electrical hazards, then decide if containment or professional help is needed. PPE essentials for mold/disturbed material include an N95 respirator (or P100 for heavier exposure), disposable gloves, compliant eye protection such as goggles or a face shield, disposable coveralls, plus guidance on sizing, seal checks, and proper donning and doffing. For respiratory protection, ensure a properly fitted respirator, perform seal checks, and know when to upgrade to a full-face respirator or shield based on exposure, air movement, and task duration.
Working at height basics cover ladder setup on firm ground with a 4:1 angle, maintaining three points of contact, using scaffolds when available, and planning fall-arrest considerations while keeping the area clear of trip hazards. Weather and footing matter, so verify non-slip surfaces and dry conditions, and keep access routes free of clutter to reduce slips and falls during tool handling and material disturbance. Site controls and workflow matter too: establish a contained work zone, use HEPA-filter vacuums for cleanup, secure tools with tethers, minimize disturbance of moisture-damaged areas, and designate a lookout for safety oversight.
Mold disturbance precautions
Do not treat mold like paint you can scrape off fast. Stay calm and work slowly. For small patches (a few square feet) use the minimal containment approach: close doors, cover vents, and dampen the area so you don’t send spores flying. Keep your PPE on from the other section — goggles, respirator, gloves — and avoid loud brushing or sanding that stirs the colony up.
Wetting the mold and gently lifting or wiping is better than dry scraping. Use a damp cloth or a light mist, then remove material and put it straight into a sealed bag. Don’t run a regular shop vac over mold unless it’s a HEPA-rated unit. If you see mold in wall cavities, above ceiling tiles, or inside ducts, don’t try to clear it by poking around.
If the affected area is larger than a small patch, smells strongly, or comes from an unknown water source, stop and call a pro. Also call one if the HVAC system, insulation, or structural cavities are involved, or if occupants have health issues. It’s cheaper to bring in trained help than to spread contamination and make the job twice as big.
Hazardous finishes — when to stop and test
If the building was constructed before 1980 (check building permit or age), or if you see thick textured coatings, damaged brittle finish with powdery debris, or suspect lead-based paint or asbestos-containing materials (ACM), stop invasive work and order hazardous-materials testing. Triggers to stop and test immediately:
- Building age < 1980 or unknown and finish presents cracking/chalking.
- Visible friable white/gray dust when you probe or cut a small opening.
- Occupants reporting respiratory symptoms during disturbance.
Who to call: a certified asbestos inspector or lead-based paint inspector. Do not disturb suspect materials without test results and appropriate containment; remediation requires licensed contractors and clearance testing.
Ladder and access safety tips
Set the ladder on firm, level ground and check base compaction before you climb. Angle the ladder so the feet are one-quarter of the ladder length from the wall. If the wall or roof edge is slippery or crumbling, don’t try to make it work—move the ladder or stop and get better access.
Always have a second person as a spotter. They steady the base, hand you tools, and call if something looks wrong. If you can’t get someone to spot you, don’t be proud—wait or use better equipment.
For anything above a single-story or if you need to work from the edge for more than a few minutes, use scaffolding or a raised platform. Scaffolding is slower to set up but far safer for multi-story inspections and gives you both hands free to work. Remember your PPE from the main safety section and keep tools tied off; dropped tools cause bad days fast.
Documentation: how to record scans for records and insurance
Good documentation turns on-site data into claim-ready evidence. Capture consistent photos, labeled meter screenshots, a named CSV or PDF log of readings, and a clear location map so contractors and insurers can verify what you found. Keep originals and provide copies for claims. Below is a focused, practical evidence checklist you can use immediately.
Claim-ready evidence checklist (downloadable-friendly)
- Project ID: address, date, inspector name, contact info.
- Meter ID/model/serial and calibration note (where/how you calibrated).
- Grid map or elevation sketch with labeled test points (A1, A2, etc.).
- Reading log (CSV or printed): timestamp, grid coordinate, mode (pin/pinless), reading value, probe depth if applicable, ambient temp/RH.
- Photos: wide context shot + close-up with readable meter display for each flagged point. File naming convention: YYYYMMDD_Address_Grid#_MeterModel.jpg
- Chain-of-custody for invasive samples: sample bag label, collector name, date/time, recipient lab name and contact.
- Temporary repair notes: how test hole was sealed, sealant used (product and batch if available), photos before/after.
- Recommended next steps and who was notified (contractor, insurer), with dates.
Keep originals on at least two devices (phone + cloud) and a printed copy if submitting to an insurer. Labs usually require clear bagged samples, a filled submission form, and chain-of-custody—call the lab in advance for their sample size and packaging instructions.
Simple reading-log template to use
Keep a plain log you can fill out on-site. Start each entry with the exact location — room, grid reference, or GPS — so you can find the spot again. Note the reading type next: moisture, density, radon, whatever test you ran. Short and specific is better than vague.
Record the numeric value next, with units and the device used. Write the number exactly as the meter shows and include the meter ID or serial if you can. Take a clear photo of the spot and the meter display, then save it with a short file name that matches the log entry for the photo ID.
Finish each line with a quick recommended follow-up: retest at X hours, sample to lab, notify insurance, or no action needed. If a reading is out of range, flag it and schedule the follow-up right away—don’t wait. Keep entries dated and signed so the record is defensible.
Using photos and comparison shots
Take a mix of shots: wide photos to show context and layout, and close-ups to capture texture, stains, cracks, or rust. Always get the wide shot first so you know where the close-ups belong. Use the same angle and distance for later photos so you can compare easily. If you move an object, the comparison is useless.
Include a physical scale or a familiar object (ruler, coin, tape measure) in close-ups. Make sure lighting is even and avoid heavy filters. Keep original files with timestamps or leave camera metadata intact. If your phone can add location or date automatically, leave that turned on.
Photograph when wet and again after drying. The before/after drying pair shows progression and helps with claims or contractor bids. Back up images in at least two places and reference your scan log or reading-log template for cross-checking. Don’t over-edit photos—insurers and contractors want raw facts, not glossy touch-ups.
DIY triage: when you can patch vs when to hire a professional
DIY triage helps you decide patch now versus calling a professional by using three axes: meter readings that indicate moisture severity, the size of the affected area, and visible signs such as mold, staining, cracking, or delamination. Establish quick thresholds: small patches under 5–10 square feet with low to trace readings and no structural signs may be safe to patch, while higher readings or larger areas should prompt professional evaluation and potential system remediation. This flow keeps you focused on safety and limits exposure to hidden damage while you work through containment and patching decisions.
To make escalation clear and actionable, use this concise prioritized list of triggers to call a professional immediately:
- Meter-based trigger: sustained pin %MC >18% (or pinless >16) across two or more adjacent grid cells, or any reading >20%.
- Size trigger: visual delamination or soft/crumbly finish over >1 sq ft, or moisture footprint >5–10 sq ft.
- Structural/interior trigger: soft framing on probe, sagging floors/ceilings, interior stains through drywall, or active leaks that flood interior spaces.
- Mold/health trigger: visible mold covering >3 sq ft or occupants reporting respiratory symptoms tied to the area.
- Hazardous finish trigger: suspected asbestos/lead in older finishes as described in safety section.
For small DIY fixes follow the steps below; otherwise document and hire a certified contractor with EIFS/stucco experience.
Small DIY fixes and sealant repairs
Start by finding the exact leak path — surface stains don’t tell the whole story. For hairline cracks and failing joints, scrape out loose sealant, wire-brush the joint, and make sure the surface is dry before you apply new caulk. Use a backer rod for gaps over 1/4″ and choose a sealant rated for the material (silicone for non‑paintable areas, polyurethane or hybrid for painted surfaces).
Keep repairs small and honest: these fixes are temporary if there’s movement, rot, or active water pressure. Apply a smooth, continuous bead and tool it to get full contact. Allow proper cure time and avoid rain or freezing temperatures while it sets. After sealing, monitor the area for a few heavy rains — if the seal fails again, there’s a deeper problem.
If you find soft substrate, expanding gaps, or repeated leaks despite good sealant work, step back and call a pro — this is where patching only masks a structural issue you shouldn’t ignore. For deciding when to escalate, refer back to the main DIY triage points about damage extent and safety before you keep patching.
Red flags that demand a licensed inspection or remediation
If you see sustained high readings across multiple locations on a meter, or the numbers jump well above normal in spots you can’t trace to a single leak, stop the DIY. Those are not patching jobs. Call a licensed inspector. Tell them where the readings spike, how long you’ve seen it, and what DIY steps you’ve already tried.
If you find interior damage — bubbling paint, warped flooring, staining through drywall — or visible mold colonies, don’t keep scraping and painting. Evacuate or isolate the area if the mold is widespread or if occupants have breathing issues. A pro will surface-test, air-test, and follow protocols a homeowner shouldn’t improvise.
Soft spots in floors, bulging walls, or suspicious rot under joists mean structural risk. Photograph everything and keep samples and receipts. Document with photos and call a remediation contractor plus a structural inspector. Small sealant fixes are fine for tiny, obvious leaks, but these red flags demand licensed work and clearance testing before you rebuild.
Simple maintenance and moisture prevention tips
Establish a simple, seasonal maintenance cadence focused on moisture control, with spring and pre-winter checks that lead to post-storm assessments to catch leaks early, and a routine of inspecting gutters, downspouts, drainage paths, and flashing while re-caulking joints as cracks appear to keep water from penetrating stucco surfaces and EIFS joints.
Regular care matters because directing water away from walls and preventing capillary intrusion saves time and money on repairs, and a quick DIY moisture-screening routine—visual checks for staining, efflorescence, soft spots, plus a basic meter to confirm dampness behind the surface—helps you prioritize urgent fixes, document findings, and know when to call a licensed EIFS/stucco professional for non-visual issues.
How to maintain sealants and flashing
Walk the roof and exposed joints at least once a year and after any big storm. Look for gaps, shrinkage, cracking and anything that has pulled away from the joint. If the sealant is brittle, cracked or has pulled free, replace if hard, cracked, or pulled away — don’t try to patch on top of failed material.
Remove old sealant back to sound substrate with a knife or scraper, clean the surface, and use a compatible exterior-grade sealant applied in a proper bead. Tool the joint so the sealant adheres well and seats into the gap. For most typical sealants expect replacement every 5–10 years depending on sun and movement.
Check flashing for rust, loose fasteners, lifted edges and improper laps. Lift the flashing gently and verify overlaps and underlayment are intact; reseal laps only when the metal and substrate are dry and clean. If flashing is corroded, bent, or missing more than a small section, replace it — sealant is a bandage, not a long-term substitute for bad flashing.
Landscaping and grading to keep water away
Make the ground slope away from the house. Aim for at least a 6-inch drop in the first 10 feet. If you have low spots next to the foundation, fix them with compacted fill so water runs away, not toward the wall. Check base compaction after you add soil — loose fill settles and ruins the slope.
Keep roof water well away from the foundation. Install and maintain gutters, and extend downspouts so they discharge several feet from the house. Short, broken or buried extensions that leak under plants are useless. Use rigid extensions or splash blocks that throw water past your slope, not into the planting bed.
Be careful with planting beds and mulch against the foundation. Keep soil and mulch a few inches below siding or masonry to prevent splash-back and rising moisture. Use gravel or a drained strip next to the wall if you need a neat look but still want water to flow away. If water keeps pooling despite grading, consider a shallow French drain or call a pro — patching sealants or flashing is only fixing the symptom, not the source.

Typical costs and time estimates — meters, inspection, and repairs
Typical costs cover a spectrum of meters, on-site inspections, and repair work, from simple screening to more invasive diagnostics and rebuilds. Meters range from inexpensive entry-level handhelds around $20–100 to moisture meters with deeper reach about $50–200, up to professional-grade devices in the $400–1500 range, with calibration pins and interchangeable probes adding to the total. Inspection time can be brief or extended: quick on-site surveys of 0.5–2 hours for screening versus full diagnostic sessions that can stretch to half a day if multiple exterior surfaces, inaccessible areas, or adverse weather slow progress, and repair costs follow a similar range from minor patching to partial tear-out or full removal.
To add useful realism and help homeowners budget, here are ballpark local cost ranges and time expectations for common outcomes:
- Basic screening (DIY or contractor short visit): $75–250, 0.5–2 hours (pinless scan + photos + brief report).
- Targeted invasive diagnostic (small patch/core, RH logger 48–72h, lab sample): $300–800 depending on access and lab fees; 1–3 days for data collection.
- Minor reseal/patch around windows or penetrations: $200–800 depending on scaffold/lift needs; single day if ground-level.
- Small localized EIFS/stucco repair (replace <10 sq ft, mesh/base/finish): $800–2,500 depending on finish matching and access; 1–3 days with drying times.
- Partial removal and substrate/sheathing repair (several bays): $5,000–20,000+ depending on area and structural repairs; multiple days to weeks including drying and rework.
- Full remediation and reclad (large-scale water intrusion): $20,000–100,000+ for full systems on multi-story homes; timeline weeks to months depending on permitting and access.
Scaffolding or boom lift rental is a major line item: expect $300–1,200/day for scaffold rental and setup for typical two-story work, or $500–1,500/day for a boom lift (operator costs extra). Mold remediation and lab analyses add $500–5,000 depending on area and sampling. Always get at least two written quotes and ask for line-item pricing for scaffolding, demo, drying, repairs, and finish work so you know what you’re buying.
Meter and accessory cost breakdown
Most handheld meters for home jobs run between about $50 and $300. Cheap meters can read basic volts/ohms; spend toward the top of that range if you need higher accuracy or extra ranges. Expect to pay another $30–$100 if you need professional calibration after purchase.
Pins, probes, or test leads cost very little — typically $5–$20 each — but buy decent insulated leads. A hard case or protective pouch adds $10–$50 depending on size and foam. If you rely on your phone for documentation, the thermal phone-camera add-on falls in the $80–$250 range and is worth it only if you’ll use it regularly.
Before you buy, check compatibility with the meter and the jobs you do. Also factor in replacement batteries, an inexpensive multimeter holster, and a small contingency for calibration or a certified inspection. If you only need a meter for one short job, consider renting instead of buying.
Repair cost examples and factors that drive price
Expect a simple reseal around penetrations and windows to be the cheapest fix. That often takes a few hours to a day and mostly costs for materials and labour. If the stucco has small soft spots you’ll pay more for local patching and matching the texture. For both, check access first — scaffolding or cherry pickers add real dollars fast.
Replacing damaged EIFS board runs higher. You need to remove cladding, replace the substrate, reinstall mesh and finish coats. That turns a half-day job into several days and raises material and waste disposal costs. If water got into the cavity you’ll also need drying and possible insulation replacement, which drives price up again.
Full remediation is the big cost. It includes stripping back large areas, repairing framing or sheathing, treating mold, and restoring the finish. The main variables are the size of the job, how deep the damage goes, and how easy the crew can work (tight yards, high sites, or occupied homes slow everything). Always get a few written quotes, ask for a breakdown of labour vs materials, and don’t accept a cheap quote that skips fixing the hidden damage.
Common DIY mistakes and how to avoid them
Relying on a single moisture reading is insufficient for an accurate assessment of wall conditions, as moisture can vary across materials and spots. Use multiple control spots and baseline comparisons across different wall areas to map moisture trends over time. Place spots high, mid, and low, near penetrations and openings, and choose pin or pinless methods for each to balance accuracy and convenience.
Proper technique matters: calibrate the meter, keep pin depth consistent if you use pins, avoid metal interference, and record exact locations with precise coordinates. Thorough documentation—timestamped logs, labeled photos, color-coded readings, and a simple map—helps you track changes, compare sessions, and communicate findings clearly to anyone working on the project. When DIY checks miss flashing, skip expansion joints, or fail to re-test after weather events, establish a clear re-test protocol with expected drying times and explicit escalation steps to a professional or certified EIFS inspector.
Troubleshooting inconsistent readings
Meters lie when their basics are ignored. First do quick checks: check battery, confirm the meter is on the right mode, and run a fast calibration or verification against the control spot you used earlier. If you skipped those routine checks covered above, stop and do them now — they fix most problems.
Probe placement and surface condition matter. Make the same type of contact every time. Wipe or lightly sand the spot if it’s dirty or flaky, then let it dry and test again. If readings jump wildly while the material is still damp, retest after drying — moisture is a common culprit.
If results still don’t line up, try a different meter mode or a different meter altogether to cross-check. If two meters agree, trust that reading and move on. If they disagree, re-evaluate your control spot and repeat the simple checks. Don’t guess — retest until you get consistent results.
Best practices to ensure repeatable inspections
Pick a clear start point and stick with it every time. Use the same route and the same pacing. A consistent stride or sweep angle matters more than you think. Mark the start on a permanent reference like a stake, doorway, or GPS point so you don’t guess each visit.
Keep conditions as similar as you can. Do the scan at the same time of day, with similar temperature and moisture. Use the same device settings and charge levels. If you must change a variable, note it in your file so you can separate real changes from noise.
Make a permanent map and label your files, photos, and notes the same way every time. Save a screenshot or printed map of each inspection. That makes trends obvious and lets you compare like-for-like. If readings still wiggle, consult the section on troubleshooting inconsistent readings. Don’t trust guesses—document and repeat.
How to create a repeatable inspection schedule and checklist
Create a repeatable inspection cadence by scheduling biannual checks and post-storm assessments, and link them to a simple calendar reminder system to stay consistent. Maintain a lightweight data log that records date, location, surface temperature if relevant, moisture readings, photos, and a brief note on any visible damage or staining to track trends over time. Focus on critical inspection zones such as EIFS/stucco edges, corners, penetrations, flashings, sealants, control joints, window/door openings, and areas with prior moisture events.
Normalize readings by capturing a baseline moisture level for typical problem areas and comparing future results to identify rising trends rather than single outliers. Define simple thresholds and response actions that trigger deeper assessment or a professional EIFS evaluation, and document post-storm effects—affected zones, interior signs, and weather data—to guide timely follow-ups. Use this approach to establish when escalation is needed and to build a long-term history that supports informed decisions without unnecessary alarm.
Step-by-Step Process
This sequence puts a workable inspection schedule and checklist into practice. Follow each step in order to prepare, perform, verify, and record inspections you can repeat reliably.
- Survey the site and do a focused safety check before you start. Confirm access, turn off required systems, and note hazards so you don’t miss them during inspections. Check: hazards are tagged or isolated and PPE is on; if you find live electrical work or unstable structures, stop and call a licensed pro. No curing waits here.
- Gather and stage your tools, forms, and measuring devices at the inspection start point. Having the right gear prevents rushed shortcuts and keeps records consistent. Check: all items on your pre-made kit list are present and calibrated (battery, tape, level); if you can’t calibrate a meter or a tape is damaged, replace or get an electrician. No wait time.
- Walk the inspection route once to set the sequence and time budget. Doing this identifies choke points and allows you to set realistic frequencies for each area. Check: you can complete the route in the planned time and each inspection point is reachable; if parts of the route are inaccessible or hazardous, stop and re-plan or call a contractor. No curing time.
- Create the checklist entries with clear pass/fail criteria and quick tests. Write one-line checks (e.g., “no leaks at valve A — pressure holds 20 min”) so anyone can repeat them. Check: each item has a measurable or observable acceptance sign next to it; if you cannot define a clear pass/fail for a critical system, get professional input. If a test requires drying/settling, note the wait (e.g., 20–30 minutes for a leak test).
- Perform the first formal inspection, following the checklist step-by-step and recording results immediately. The initial run validates timing and clarity of each item. Check: every box is stamped with a result and a short note, and photos are taken where needed; if you encounter conditions beyond your skill (e.g., major structural cracks, buried gas leaks), stop and call a specialist. Observe any required test waits noted on items before concluding that check.
- Adjust the schedule and checklist based on findings and set responsibilities. Tighten or loosen frequencies where failures were frequent or redundant. Check: the revised schedule fits into your weekly/monthly plan and each task has an assigned person; if you can’t assign responsibilty or commitment, escalate to a contractor or building manager. No curing waits unless tied to specific tests.
- Finish with cleanup, documentation, and a quick final verification of corrective actions. Tidy tools, store records, and confirm repairs are complete before the next round. Check: work area is clear, records filed, and repaired items pass their checklist tests; call a pro if repairs failed or created new hazards. Allow any material cure times listed in repair notes before re-inspecting (common 24–72 hours for many fixes).
Pro tip: Keep the checklist short and evidence-based — a photo and a one-line result beat vague comments. That makes repeats fast and reveals trends you can’t see from memory.
Printable/portable checklist items
Keep the sheet short and handheld. Start each row with the area or zone name, a quick meter scans by zone field, and a line for visual condition. Write only what you can read standing in the sun: cracks, water, loose fittings, sagging, rust. If you must note measurements, keep them to one number or a simple pass/fail.
Add a clear spot for a photo reference and timestamp. Take one wide shot, one close detail. Jot the phone photo filename or a quick code next to the item so you can match photos to checklist later. If something looks unsafe, mark it bold and snap the photo before you touch it.
Reserve a small column for immediate actions: who will fix it, priority (now/24h/next visit), and a sign-off initial. Include a tiny space for notes like check base compaction or permit needs. Keep it printable on one page. If it needs more room, it needs a separate job sheet—not a crammed checklist.
Integrating inspections into home maintenance calendar
Pick a cadence that fits your house and stick to it. Tie inspections to obvious seasonal chores — spring gutter clean, fall HVAC service, winter pipe insulation checks. That way inspections happen when you already have tools out and contractors scheduled. Link inspections to seasonal tasks so you don’t treat them as optional extras.
Put every inspection on a real calendar. Use phone alerts, a paper planner, or contractor reminders. Block a specific hour and note what to check that day — roof flashing, attic moisture, filter changes, smoke-detector batteries. Do not wing it; set calendar reminders and follow them.
Combine items sensibly and assign responsibility. If you’re not doing a task yourself, schedule the pro for the same visit as a related service. Log the results and update your repeatable checklist (refer back to your checklist setup) so you can track trends. Skip the habit of “I’ll remember” — that’s how small problems become big ones.
When and how to present findings to contractors or insurers
When you need contractors or insurers involved, present clear, concise, and chronological evidence: grid map, reading log (with meter IDs and calibration notes), timestamped photos showing meter screens, and any invasive sample chain-of-custody. Present facts, not opinions—contractors and insurers want defensible data they can act on.
What contractors look for in your report
Contractors want clear, factual evidence. Bring a set of dated reading logs (temps, moisture, movement) and label each entry with location. Don’t hand them vague notes — they need numbers and times to judge cause and urgency.
Provide sharp, well-lit photos that show the problem and the surrounding area. Include at least one wide shot for context and one close-up for details. Note exactly where each photo was taken and how to reach that spot — contractors hate guessing access points.
Mention any prior repairs, warranties, or permits tied to the issue. If a roof patch or plumbing repair happened before, say so and show receipts or warranty papers. Keep it concise: facts, access, and proof. If you’ve already gone over timing with insurers or contractors above, just hand them the package and be ready to answer questions on-site.
Tips for using findings in an insurance claim
Start by making a tight timeline. Document timestamps on every photo, note the weather and any related events, and write down who was on site and when. Insurers want cause-and-effect that lines up. If your timeline has gaps, expect questions — and delays.
Keep your originals. Print or save the unedited photos and reports and hand the insurer copies. If they ask for digital files, give them duplicates but keep the masters. Chain of custody matters: log when you gave files and who accepted them.
Don’t over-explain. Give clear facts, short notes about observed damage, and one or two practical repair estimates from contractors. If they try to lowball or stall, push back with your documentation. A clean paper trail and straightforward facts win claims.
Limitations of DIY meters and the value of professional EIFS/stucco inspections
DIY moisture meters can help with early detection and simple triage in EIFS and stucco, but they have clear limits. They usually provide surface readings and may miss hidden plenum or cavity moisture, delamination behind finishes, or leaks that don’t reach the area being tested. Professional EIFS/stucco inspections add destructive testing, calibrated probes, moisture mapping, and a formal remediation plan that covers hidden moisture and long-term prevention.
Use DIY readings for post-storm checks, initial triage after a suspected leak, or to monitor a known surface issue, but escalate to a professional when readings are inconclusive, when stains or cracking persist, or if there is suspected delamination or moisture behind the façade. A qualified inspector will provide an inspection report, detailed moisture maps, calibrated data, and targeted remediation recommendations with clear timelines, defined scope, and actionable next steps so you know what to expect and how to respond. This matters because early, accurate assessment saves time, concentrates remediation where it’s needed, protects the building envelope and interior from ongoing damage, and supports long-term durability and value.
What pros do differently (destructive testing, lab analysis)
When a pro shows up they don’t just wave a meter and guess. They cut into the coating and insulation to get real samples. That destructive sampling lets them see the adhesion, layer build-up, and any hidden rot or delamination that surface checks miss.
They also run a moisture-content profile through the wall, not a single spot reading. Technicians probe at multiple depths and locations so you get a pattern, not a lucky number. Those readings tell you if moisture is trapped in the sheathing, insulation, or just on the surface.
Finally, they put all that data into a building-envelope analysis and, if needed, send pieces to a lab for material ID and fungal testing. That changes the decision from “maybe replace the finish” to a clear scope: what to repair, how deep to tear out, and what materials to use. If you want a reliable repair plan, this is where DIY meters stop being enough.
Cost-benefit of hiring a pro early vs late
Call a pro early if you see ongoing staining, soft spots, or recurring leaks. A quick paid inspection can save money by catching moisture paths before they rot sheathing or force full re-clads. DIY meters and quick looks miss a lot, and pros will do the deeper checks you can’t.
Waiting until problems are obvious usually means the simple fixes are gone. What started as a small patch job can turn into structural repairs, mold remediation, and siding replacement. Those costs add up fast and the work takes longer — more mess, more disruption to your schedule.
Think of a professional inspection as triage. Get actionable priorities: what to stop now, what can wait, and what needs a full destructive check later. If budget is tight, ask the inspector to point out the most urgent items to address first so you can phase repairs without letting the damage spread.
FAQ: quick answers to homeowners’ most common questions
These quick answers cover how often homeowners should check stucco or EIFS for moisture, what to look for between inspections, and the basic steps after a positive finding, plus practical tips for maintaining long-term stucco health. They also address meter choices for DIY use, how to interpret readings, essential safety practices, and how to proceed before bringing in a licensed contractor, including when to do more checks and how to document surprises.
Plan for seasonal checks, post-storm reviews, and post-renovation assessments, noting what qualifies as a red flag versus a localized spot, how to document readings with zone locations, the typical ranges that indicate safe versus concerning moisture levels, and how weather can influence readings over time. Weigh setup tips for pin-type versus pinless meters, explain basic safety steps like turning off power when needed, and describe when to pause DIY testing and call a pro to avoid damaged areas or unsafe readings. After a positive find, capture photos, note exact locations or zones, summarize the readings, and coordinate promptly with a licensed contractor to plan next steps, including further assessment and potential repairs or warranty discussions and cost expectations. This helps homeowners track progression and prioritize repairs with clarity.
How often should I test and what reading means “dangerous”?
Test twice a year, and always test again after a big storm, after renovations, or if your systems act up. Twice a year covers seasonal changes in humidity, heating use, and soil gases. If you have battery-powered alarms, check batteries more often — at least once a year or when the unit chirps.
Here are practical numeric/action thresholds for common meters: Radon — 4.0 pCi/L or higher means you should mitigate. Carbon monoxide — anything over about 9 ppm long-term is a concern; 35 ppm or higher requires action, and if a CO alarm sounds evacuate and call emergency services. Moisture in wood — above ~16% is risky for rot and mold; above 20% you should find the leak and dry or replace materials. Electrical outlets — normal is about 120 V; a steady drop of more than ~5% or flickering means call an electrician. Any smell of gas or a gas meter reading that suggests a leak — call the gas utility immediately.
If a reading is over the threshold, don’t shrug it off. Retest with a second device or a longer test, ventilate where appropriate, and hire a pro for mitigation or repairs. For quick reference, remember: twice a year + post-storm, numeric thresholds above tell you when it’s time to act.
Can a single meter guarantee there’s no moisture?
No. No single test is foolproof. One reading can miss pockets of moisture, buried leaks, or wet framing behind finishes. Treat a single clean reading as a clue, not proof.
If a reading looks suspicious, do quick follow-up checks. Take readings in several spots and at different depths. Probe with a screwdriver or sharp awl to feel for soft wood. Smell for mildew and look for stains, bubbling paint, or warped trim. Compare a surface moisture meter with a pin-type probe or a humidity gauge to get a fuller picture.
If doubts remain, keep records and retest after normal conditions (dry spell or after a day without rain). Calibrate the meter before use and don’t be shy about calling a pro for a destructive inspection or a moisture map if the area matters. Quick meter checks are useful, but follow-up checks decide whether you act or ignore it.

Conclusion and homeowner action plan (30-minute DIY scan)
The 30-minute DIY moisture-scan guides homeowners through a tight, time-boxed routine: 10 minutes of exterior visual checks for staining, cracking, or delamination; 15 minutes of pinless moisture readings; and 5 minutes of spot checks with simple documentation. Record readings and map where they occur, noting high-moisture zones, exposed edges, and any texture changes that signal moisture ingress. Use a clear Go/No-Go decision at the end of each phase to decide whether to recheck, schedule a sealant inspection, or call a certified EIFS professional.
This approach delivers a rapid, homeowner-friendly cadence that turns moisture data into practical, action-ready steps. It clarifies thresholds in plain terms—acceptable ranges by surface and when readings warrant further action or professional assessment after rain or storms. Keeping notes, photos, and a compact checklist supports safe handling, weather awareness, and consistent reporting that guides maintenance and helps prevent future moisture ingress.
Quick survival checklist for immediate action
First thing: stop the leak. Shut valves, contain the water, and remove anything wet from the floor to avoid mold. If you can’t stop the source quickly, cut power to the affected area to avoid electrical hazards.
Document everything with photos and short notes. Take shots of the damage, the meter, and any readings. These images will speed claims and make the pros’ job easier. You’ve already seen the 30-minute scan steps above—use those as your order of operations.
Do a quick meter check and note the numbers. If readings jump past normal ranges or you find unexplained flow, call a pro right away. Don’t wait or guess on pressure numbers—bad outcomes from delay are on you. If in doubt, bring in a plumber or electrician and get it fixed right.
The importance of regular eifs inspections and repair
Regular EIFS inspections are essential to catch hidden moisture and energy losses before they become costly, pervasive problems. By monitoring indicators like hidden moisture, staining, efflorescence, finish blisters or cracks, and spalling around penetrations, you can differentiate cosmetic issues from structural risks and prioritize timely repairs, scheduling targeted interventions before moisture migrates. Establishing a routine—seasonal checks, post-storm evaluations, and age- or climate-appropriate triggers—keeps your exterior envelope performing and protects the investment for decades amid weather variability and building aging.
Practical inspections rely on simple field methods and selective instrumentation: a careful exterior walkaround, moisture meters (pin vs pinless), infrared imaging, and moisture mapping to reveal hidden pockets before damage shows on the surface to prioritize moisture control and energy performance. When issues go beyond cosmetic resealing to drainage changes or structural signs, prioritize professional EIFS evaluations and timely remediation while keeping a running checklists and photo logs to guide future work for specific projects and weather events. A clear maintenance plan helps DIYers communicate with certified inspectors or licensed contractors, reduces guesswork, and supports durable, energy-efficient performance over decades.
Annual Visual Inspection Routine: what to check and how to document
Walk the whole building on a calm day. Look at common trouble spots first: roofline and parapets, window and door perimeters, control joints, building base and where the EIFS meets other materials. Check for obvious moisture signs like soft or spongy areas, efflorescence or mineral deposits, blistering or bubbling of the finish, and any brown or green staining. Tap suspicious areas lightly; a hollow or dull sound can mean delamination beneath the finish.
Inspect cracks and fastener areas up close. Note crack length and width, whether they move when pushed, and whether hairline cracks are only in the finish or run through the base. Watch for rust stains, biological growth, and continuous staining below a roof edge or window — those are clues water is running where it shouldn’t. Don’t ignore small moisture signs; they grow fast.
Document everything neatly: date, exact location (north wall, second bay, window A3), brief description, and severity. Take clear, dated photos with a close shot and a wider context shot for every issue, and label photos to match your notes. Keep a simple maintenance calendar: quick exterior checks quarterly, a full documented walk once a year, and another inspection after any big storm. If you find moisture intrusion or delamination, schedule repairs promptly and record the work and materials used in the same log for future reference.
Moisture Testing Protocols after suspected leaks: when to test, methods, and safety
Test as soon as you suspect a leak or after heavy storms and after any repair work. Don’t wait for staining or mold—those are late signs. Start by confirming the obvious with a quick visual check (you already do annual walkarounds), then move to meters for real data.
Follow a simple order: non-destructive first, targeted invasive only if needed. Use a pinless (capacitive) meter over large areas to map high readings fast. Pin-type meters give spot-depth confirmation and can differentiate surface dampness from deeper wetness. If readings conflict, use an IR camera to find cold/wet areas, then do small probe holes or cores only where those tools point. Always verify meter calibration and take a dry-reference reading on an unaffected spot before you trust numbers. Record readings and locations so you know if moisture is migrating.
Work safely: wear gloves, eye protection and a dust mask when probing. Watch for fall risks on scaffolds and ladders. Don’t drill until you confirm there are no hidden utilities or fasteners. If you hit unexpected materials or suspect structural rot, stop and call a pro—cutting blind can make things worse. And don’t skimp on batteries, calibration, or basic PPE; cheap mistakes on moisture checks cost more later.
EIFS Repair Workflow: from drying to finishing and when to escalate to a pro
First step: stop the water and dry completely. Remove loose finish and allow air flow behind panels if possible. Use fans, dehumidifiers and temporary vents; small repairs can need 24–72 hours of warm, moving air, but deeper wet layers or insulation may take several days. If you did moisture testing earlier, use that result to judge whether drying is sufficient before you patch.
Next: clean, prep and patch. Wash the area with a mild detergent and stiff brush, rinse and let dry. Cut back to sound EIFS and substrate—don’t try to feather out rotten material. Embed a new fiberglass mesh into the manufacturer-recommended base coat and trowel smooth. For joint repairs use a good quality polyurethane or polysulfide sealant with a backer rod, and always use manufacturer materials for the base coat and finish. Typical cure windows: base coat 24–48 hours before sanding/priming, finish coat 24–48 hours to skin, sealants usually reach handling strength in 24–48 hours and full cure in 5–7 days depending on temperature and humidity.
When to hire a licensed contractor: call one if you find moisture behind the system, widespread delamination, mold, structural movement, or more than a quarter of a facade needs repair. Also hire a pro for high-access work, complex EIFS drainage details, or if the job affects the building warranty. A proper contractor should be licensed, carry liability insurance, provide references for EIFS work, and offer a written warranty on both materials and labor. If you’re unsure of the leak source after your checks and moisture tests, stop and get a pro—patching without fixing the cause is throwing money away.
Eifs inspection checklist for homeowners
An EIFS inspection checklist for homeowners focuses on spotting hidden moisture, evaluating exterior conditions, and documenting the steps you’ll take before, during, and after weather events. Start with quick EIFS fundamentals: understand how concealed moisture can affect safety, energy efficiency, and structural integrity, and look for red flags like staining, soft spots, powdery coatings, or unusual texture near seams and penetrations. Then map the process: gather warranty details and repair history, arrange a capable helper, ensure access, and pick a dry, calm day or a window after storms to begin.
Exterior evaluation follows a practical path—start at the most vulnerable zones (around windows, doors, joints, penetrations, and low-slope areas), and note signs that moisture is traveling behind the finish. Use moisture meters judiciously, with pinless methods for a quick scan and pin meters when you need behind-the-surface readings, and consider infrared thermography as a supplementary check. The payoff is clear: a methodical record helps you prioritize repairs, decide between DIY fixes and professional reflash or reseal, and decide whether a certified EIFS inspector or licensed contractor should handle the work.
Visual and moisture-audit walkthrough
Start at ground level and walk the perimeter slowly. Scan the EIFS from about 10–15 feet out so you see overall patterns, then step in for close looks. Note any areas with uneven color, vertical or feathered staining, and soft-looking patches near the base—those are the usual suspects for water getting in.
Get close to windows, doors, vents, roof transitions and at the wall base. Look for hairline cracks, edge separation at trim, small bulges or areas where the finish looks thin or has come away from the substrate. Use a bright flashlight to catch subtle delamination shadows and a screwdriver to gently probe only where the finish already looks compromised; if it gives easily, mark it and stop — that’s a job for a repair or further testing.
Perimeter check: pay special attention to sealant joints, flashings and any suspicious patched areas that don’t match the surrounding texture. If you find stains that track down from a penetration or constant wet spots at the base, document and photograph them, then schedule a moisture meter survey or pro inspection. Don’t guess—bad patches often hide bigger problems beneath the surface.
Essential tools and safe testing methods
These are the tools you actually need to do a careful, non-destructive EIFS check. They let you scan for moisture bridges and soft spots without punching holes. Buy the basics and rent the heavy stuff if you only inspect once or twice a year.
- Pinless moisture meter — Scans surface moisture over a broad area without piercing the finish; look for units with 0–100% wood/moisture scale and a medium-depth sensor (about 3/4″–1″). Essential for preliminary sweeps. Cheap models work; a $70–$250 unit is typical. Warning: press too hard or use on very uneven surfaces and you get false highs.
- Pin moisture meter — Uses probes to read moisture at a point and verify pinless readings; choose corrosion-resistant pins and a reading range to at least 30% MC. Optional for homeowners; rent or borrow if you need verification after a suspect scan. Don’t force pins through EIFS; that damages the finish and voids warranties.
- Infrared thermometer — Quick spot-check for temperature anomalies that often match wet areas; pick a unit with a laser pointer and reasonable emissivity control. Essential when checking for thermal bridging or evaporation patterns. Cheap units under $30 work, but wrong emissivity masks problems and gives a false sense of dryness.
- Extension pole or non-contact sensor pole — Lets you scan higher walls without climbing. Use a pole made for your meter or a telescoping painter’s pole rated for your gear. Rent or buy ($25–$80). Tip: using the wrong pole can drop and break your meter — tie it off or use a safety leash.
- Sturdy ladder and ladder safety — Use a properly rated ladder (Type IA/II for tall jobs) and a spotter. Essential whenever you work above ground level. Cheap ladders wobble and cause falls; don’t overreach — move the ladder instead of extending your body.
- Personal protective equipment — Safety glasses, nitrile gloves, and an N95 or P100 respirator for dusty or deteriorated EIFS. Essential for your health when inspecting older or damaged areas. Skimping on PPE risks eye, skin, and lung irritation from EIFS dust and crumbling insulation.
- Camera or smartphone — Document suspect areas, meter readings, and thermal/visual anomalies for later comparison. Essential for tracking changes and sharing with pros. Keep the lens clean and note the date/time; blurry pics make diagnosis impossible.
- Inspection mirror and flashlight — Small mirror and a bright LED light let you check seams, terminations, and shadowed joints without prying. Optional but very handy for tight spots and soffits. Using low-light alone hides defects and leads to missed failures.
Pro tip: Start wide with the pinless meter and infrared thermometer, mark suspicious spots, then confirm with a pin meter or a close-up camera shot. Use a pole or ladder instead of leaning — keeping tools and safety gear paired prevents accidental damage to the EIFS and keeps you from getting hurt.
Documentation, thresholds, and repair planning
Take a methodical record of every issue you find during the walkthrough. Shoot wide photos for context, then close-ups with a ruler or tape visible for scale. Label each image with the date and location (e.g., north wall, 2nd-floor corner). Keep a simple log that matches photo filenames to notes so you can show the problem to a pro without guessing.
Use a basic map of the house and map moisture hotspots on it as you test. Mark which areas tested high on your moisture meter and which had visual damage. Decide upfront what counts as “repair now” versus “monitor”: hairline cracks under 1/8″, small soft spots under a single square foot, or isolated sealant failures can be DIY. Anything with obvious delamination, widespread softness, or meter reads above the manufacturer’s suggested limit should be treated as a contractor job. Make these your clear, written set repair thresholds.
When choosing a pro, pick someone who shows EIFS-specific experience, carries insurance, and offers a written scope with materials and warranty. Share your photos, map, and thresholds before they come so quotes match reality. If they want to gut and replace everything without explaining why, walk away — that’s often a sales pitch. Coordinate scheduling so any scaffolding, scaffold protection, or roof trades are synced to avoid repeated mobilization charges.
Eifs 2.0: how modern systems fix the failures of the past
EIFS 2.0 refines exterior finish systems by adding a dedicated drainage plane, improved moisture-management strategies, newer sealants, and updated insulation interfaces to address classic failure modes like water intrusion and flashing gaps. It emphasizes better integration of the wall assembly so that the drainage path remains unobstructed and moisture can escape rather than back up into joints, penetrations, or corners. In plain terms, EIFS 2.0 aims to keep the wall dry by designed-in pathways and materials that work together to manage rain and vapor more effectively than older systems.
For DIYers, the practical takeaway is a moisture-control workflow you can run alongside a typical home-check routine: identify drainage paths, assess vapor permeance, and avoid trapping moisture behind the finish. You’ll learn how to time inspections after storms, read surface indicators of hidden moisture, and decide when professional help is warranted, using a simple grid of visual checks and meter readings. The guidance centers on choosing the right meter settings (pinless vs. pin), interpreting readings on EIFS substrates, and performing maintenance—like keeping joints clean, refreshing sealants, and patching promptly—to keep the drainage plane functional and reduce the risk of costly failures.
Assessing EIFS 2.0 System Components and Access Points for Inspection
First map the visible parts: the insulation board behind the finish, the reinforced base coat under the finish, the drainage/air barrier behind the insulation, the stucco finish, and all flashings at windows, doors, rooflines and penetrations. Walk the wall and mark control joints, weep screeds, window sills and any mechanical penetrations. Those are your safe access corridors for checks and repairs. If you already read the earlier section on how modern systems work, you know why the drainage plane and flashings get top priority.
Do non‑destructive checks first. Run a moisture meter over the finish and along seams. Use a thermal camera or borescope through existing joints or at the weep screed rather than cutting random holes. If you must open the system, do it at a control joint, an old sealant joint, or a removable trim piece so you can reseal properly. Never rip into the middle of a field panel where the drainage plane is unknowingly exposed — avoid cutting into the drainage plane.
When you create an inspection port, make the opening as small as possible and plan the repair before you touch anything. Remove sealant back to the substrate, probe at the flashing intersection, and feel for soft spots in the base coat and insulation edge. After inspection, replace backing, use manufacturer‑approved sealant and detail the flashing if needed. If you find widespread wetting or bond failure, stop DIY and call a qualified EIFS contractor — don’t patch your way out of a major drainage failure.
Step-by-Step Moisture Inspection Protocol for EIFS 2.0 Installations
This sequence gives a non-destructive workflow using a pinless meter and infrared scan to find moisture problems, document results, and know when to stop and call a pro.
- Walk the perimeter and set up staging. Use binoculars and safely positioned ladder or lift to inspect all elevations for obvious wet stains, ponding, or failed sealant; this quick visual shows where to focus scans. Check: note discolored areas or soft-looking joints. Stop and call a pro if you find large delaminated panels or active leaks you cannot safely access; no wait time.
- Calibrate the pinless meter on a known dry spot. Press the meter to a clean, flat EIFS area away from trim and record the baseline reading; this gives you a reference for later comparison. Check: baseline should be steady and low (typically under 6–8% on most pinless models). If readings are erratic or exceed manufacturer specs, stop and swap batteries or meter—don’t guess.
- Perform a systematic grid scan with the pinless meter. Scan in overlapping vertical strips about 6–12 inches apart, covering whole wall faces and transitions; this finds localized moisture pockets under the finish. Check: mark any spots that read above 12% for EIFS substrates (or follow your meter/manufacturer thresholds). If you see multiple high readings across a wide area, call a pro—this may indicate widespread intrusion.
- Follow up high readings with an infrared camera sweep. Scan the same areas you flagged while keeping the camera at least 3–6 feet back to get a stable thermal image; IR helps locate cold spots tied to moisture. Check: moisture shows as thermal anomalies (cooler, damp shadows) that match your meter locations. If the IR pattern is inconsistent with meter data, repeat scans or call a thermographer — don’t assume one device is wrong without verification.
- Spot-check suspicious areas with secondary non-destructive tests. Use a moisture probe accessory if available, or a small borescope at existing access points, to confirm depth and source without cutting large openings. Check: corroborating evidence (probe dampness, visual water trails) confirms intrusion. Stop and call a remediation contractor if you detect mold, extensive damp insulation, or cannot identify the source through non-destructive means.
- Document everything clearly and in order. Photograph each flagged spot with a ruler and timestamp, record meter and IR readings, and sketch a wall elevation noting locations; this gives a defensible record for repairs or warranty claims. Check: you should be able to point to photos and numbers that match the problem area. No special wait time, but keep notes organized immediately after scanning each face.
- Verify exterior flashings and seals after weather-exposed scans. Re-check seals, scuppers, and transition seals that border your flagged areas; many failures are failed interface details. Check: properly sealed areas show no meter/IR anomalies and look continuous with uniform caulking. If you must remove old sealant or see complex flashing failures, stop and hire a roofer or EIFS specialist—do not attempt complex flashing repairs without experience; allow any newly applied sealant to cure per product label (usually 24–48 hours) before retesting.
Pro tip: Always correlate at least two independent indications (pinless meter + IR image + photo) before drilling or cutting—false positives are common from surface temperature or salts. If you document properly, a pro can act faster and cheaper than a blind tear-out.
Repair Best Practices and Material Choices for EIFS 2.0 Failures
Pick the right materials and you avoid callbacks and rot. Use compatible products rated for EIFS 2.0, follow repair sequence (drainage plane, insulation, base coat/mesh, finish), and don’t shortcut flashing or sealants. Wrong choices lead to staining, delamination, and leaks.
- Drainage membrane — Used to restore the weather plane behind EIFS and direct water out. Look for a 40–60 mil polymeric drainage mat or housewrap rated for above-grade, vapor-permeable drainage. Cheap non‑breathable tarps block drying and cause mold; expect $1.50–3.00/ft² or hire a contractor if working overhead; wrong membrane = trapped moisture and rot.
- EPS insulation board — Replaces damaged foam; used for thermal layer and substrate for base coat. Choose ASTM C578 Type I or II EPS with the R-value marked per inch and consistent density (≥1.0 pcf for siding applications). Low-cost bagboard or thin panels sag and compress; panels run $10–30 each depending on size; wrong density causes soft spots and bond failure.
- EIFS adhesive/insulation adhesive — Bonds EPS to substrate or sheathing in direct-adhere repairs. Buy a manufacturer‑approved adhesive for EIFS with documented adhesion to foam and sheathing; look for non‑solvent, polymer-modified adhesives. Don’t use general construction adhesives—solvents eat foam and the bond will separate; tube or pail pricing $15–50 for small jobs.
- Base coat and fiberglass mesh — Provides impact resistance and the embed for the finish. Use a cementitious or polymer-modified base coat specified by the EIFS maker and alkali-resistant fiberglass mesh (fiberglass weight ~110–160 g/m²). Skimping on mesh or using indoor drywall mesh causes cracking and blisters; base coat typically $20–60/50 lb bag; work in 4–6 hour pot windows and keep joints staggered.
- Acrylic finish coat — Restores textured look and UV/weather resistance. Select a factory-tinted acrylic finish with proper UV rating and permeability; pick the exact color code and 100% acrylic or manufacturer-specified product. Cheap patch paints fade or chalk and show repair lines; finishes cost $25–60/gallon; wrong paint leads to mismatched color and reduced durability.
- Sealants (low-modulus) — Seals control joints, window perimeters, and dissimilar materials. Use low‑modulus, neutral-cure silicone or polyurethane sold as EIFS-compatible and flexible at -20°F to 122°F. High-modulus or solvent silicones will stress the system and delaminate the finish; expect $7–20 per 10 oz tube; wrong sealant = split joints and water intrusion.
- Flashings & metal trim — Redirects water at sills, heads, and terminations. Use corrosion‑resistant stainless steel or Kynar-painted aluminum with mechanically hemmed edges and drip lips. Thin flashing or painted cardboard trims corrode or warp; good flashing runs $5–20/linear ft; improper flashing causes chronic leaks regardless of other repairs.
Pro tip: Buy materials from EIFS suppliers or big-box stores that list compatibility. Store powders dry and sealed, keep liquids above freezing, and mix base coats in small batches. If you don’t own a decent drill, mixer, and a 5–6 ft scaffolding platform, rent or hire — trying to save there risks poor mixes, weak bonds, and safety problems on ladders.
Foam board insulation: key types, benefits, and best uses
Foam board insulation comes in EPS, XPS, and polyiso, each excelling in moisture-prone stucco contexts for exterior insulation, with differences in R-value, vapor permeability, and moisture handling that influence where and how they perform best alongside EIFS and stucco systems. The material interacts with moisture through absorption tendencies, drainage channels, and mold considerations, making seam quality, edge detailing, and wind-driven-rain protection crucial to long-term performance. Understanding these traits helps you choose the right type and thickness for climate, budget, and the specific stucco or EIFS assembly you’re working with.
For DIY projects, the practical payoff is higher insulation value per inch, lower installed cost, and simpler handling when installation tolerances and air/water barriers are managed properly, along with the potential for faster drying after minor leaks. This paragraph also highlights common pitfalls—improper seams, gaps, punctures—and provides a concise decision framework for selecting foam type by climate and budget, plus a quick visibility- and moisture-checklist to use during and after installation. Quick-dix guidance on detecting hidden moisture behind coatings, interpreting readings near foam, and when to call a pro helps you protect the wall assembly without overcomplicating a DIY job.
Selecting the Right Foam Board Type for EIFS: Expanded vs. Extruded vs. Polyiso
Keep it simple: EPS (expanded polystyrene) is what most EIFS systems were built around. It’s the cheapest, easy to cut and shape, and works well with standard EIFS adhesives and meshes. R-value sits around R‑3.6–4.2 per inch, so you’ll need thicker panels in cold climates. Use EPS when you’re on a budget, dealing with complex details, or retrofitting over uneven substrates.
XPS (extruded polystyrene) gives better R-value, around R‑5 per inch, and better long‑term moisture resistance than EPS. That makes XPS a good pick for damp sites, below‑grade walls, or places with a high water table. It’s stiffer and holds screws better, but it’s pricier and not as common in traditional EIFS — confirm adhesive and mesh compatibility before you buy.
Polyiso has the highest initial R‑value, roughly R‑6–6.5 per inch, but its performance drops in cold temperatures. Use polyiso in warm climates or above‑grade walls where it stays dry and you want the thinnest assembly. If you’re in cold or wet conditions, stick with XPS or thicker EPS. Bottom line: match R-value needs to your climate, pick the more moisture‑resistant board where water is a risk, and always check adhesive compatibility and fastening method with your EIFS manufacturer before installing.
Installation Best Practices and Common Mistakes with Foam Board in Exterior Walls
These are the common faults I see on job sites. Avoid them and you’ll save time, money, and headaches down the road.
- Poor substrate prep — Skipping cleaning or leaving loose material prevents full contact and causes gaps. Knock off loose mortar, flatten ridges, and patch holes so the board sits flat against the wall.
- Sloppy cutting — Jagged or oversized cuts force gaps at corners and around openings. Score and snap or use a straightedge saw; fit boards tight to windows, doors, and corners before fastening.
- Gaps at joints — Leaving seams open defeats the thermal and air barrier. Seal joints with compatible foam-compatible tape or low-expansion spray foam, and check from both interior and exterior sides.
- Insufficient fasteners — Using too few or wrong-length fasteners lets boards bow and lose contact. Follow recommended spacing for your board type and drive fasteners flush without crushing the foam.
- Ignoring flashing and EIFS ties — Terminating boards at flashings or skipping proper EIFS attachment leads to water intrusion. Integrate boards under flashings, maintain drainage planes, and fasten through the substrate per EIFS details.
Do a quick walkaround after install and check these points. Fixing them now avoids costly repairs once cladding goes on.
Inspecting Foam Board for Moisture Stress: Signs, Tools, and Safe Handling
These are the tools you actually need on a moisture check. They help find wet spots, confirm moisture levels, and let you make safe temporary fixes so the wall stays stable until a proper repair.
- Pin/Pinless Moisture Meter — Measures moisture percent in foam and sheathing; pinless is faster for surface scans while pins give deeper contact readings. Expect $60–$400; a cheap homeowner meter is fine for spot checks, but pros use calibrated units. Warning: using a cheap meter for structural decisions can miss hidden moisture—wrong readings can leave rot unaddressed.
- Infrared Camera (Optional) — Shows thermal anomalies that often point to wet areas behind foam without cutting anything. Rent for $50–$200/day or buy $300–$3,000; look for 160×120 resolution or better for clear images. Don’t trust it alone—temperature patterns can be misleading and a low-res camera hides small wet pockets.
- Probe or Long Screwdriver — Simple tool to pierce foam or probe sheathing to check for softness or delamination. $5–$25; use steady pressure and avoid large holes—0.25–0.5″ checks are enough. Tip: stabbing aggressively can damage insulation and create a new path for water, so be deliberate.
- Inspection Light / Flashlight — Bright, focused light for seams, cavities and behind flashings. $15–$75 for a dependable LED work light; waterproof/impact-resistant models last longer. Bad lighting makes you miss staining or mold; don’t use a dim light and assume everything is fine.
- Relative Humidity/Datalogger — Measures RH inside wall cavities and tracks changes over time to confirm drying or ongoing leaks. $50–$300; place it for 24–72 hours for useful trends. Skipping RH checks risks declaring a wet panel dry too soon and reinstalling finishes over trapped moisture.
- Utility Knife & Straightedge — For carefully cutting back foam for a closer look or to remove failed portions. $8–$40; fresh blades and controlled thin cuts reduce tearing and jagged edges. Don’t hack aggressively—ragged cuts make proper repairs harder and harm your sealant adhesion.
- Plastic Sheeting & Waterproof Tape — Temporary protection to cover exposed foam and stop more water getting in after inspection. $10–$50 per roll/sheet; use UV-resistant tape and overlap seams by 2–3 inches. Poor temporary sealing lets rain into the cavity and turns a minor job into a full replacement.
Pro tip: Start with a pinless meter and flashlight, then confirm suspicious spots with pins, a probe or targeted cuts. Rent an IR camera only when you’re not finding obvious clues—use a humidity datalogger for follow-up if you suspect slow leaks. Combining simple tools keeps damage minimal and gives you the evidence needed for a proper repair.
Stucco & eifs myths busted with clear, science-backed facts
EIFS myths about moisture risk often mislead homeowners by focusing on marketing claims rather than measurable performance. This section cuts through the hype with science-backed explanations of moisture transport, drainage, and vapor dynamics, clarifying why “breathable” finishes can be misleading in practice and how real-world performance follows established principles. It also maps the main intrusion pathways—flashing failures, control joints, penetrations, and wind-driven rain—so you can anticipate problem areas behind finishes, not just at obvious leak sites.
For a DIY reader, this matters because practical inspection, simple moisture readings, and disciplined documentation help you distinguish minor concerns from costly failures and guide timely professional involvement. The guidance translates into a homeowner-friendly inspection cadence, a clear red-flag list, and a straightforward decision tree for when to call a pro, along with practical tips on sealant choices, installation gaps, and maintenance logging that keep EIFS and stucco performs reliably over time.
Myth vs. science: common EIFS misconceptions busted with real-world data
People say “EIFS always leaks” or “you can see all the moisture,” but field studies and lab tests tell a different story. Failures are almost always tied to poor installation or missing details — bad flashing, open sealant joints, or no drainage plane — not the EIFS material by itself. If you keep those details right, the system performs like any other cladding.
What you need to do: visually inspect flashings, window terminations, and jambs. Use a moisture meter at suspect spots and probe behind trim where you can. If you see staining, soft substrate, or recurring leaks, that’s a red flag for installation issues, not proof that EIFS is inherently bad. Look for contractors who follow tested details and manufacturers’ instructions.
Don’t get distracted by myths. Rely on measured results and proven fixes. Emphasize moisture management and proper flashing. If you’re deciding to repair or replace, weigh the cost of correcting poor details versus ripping everything off. In most cases, correcting the drain plane and terminations is the practical, science-backed fix.
Safe, step-by-step homeowner EIFS inspection protocol (tools, access, and documentation)
These tools let you non-destructively check EIFS from the ground and on ladders. Use them to find soft spots, moisture, and flashing problems without cutting into the wall. I’ll keep it practical — what to buy, what to rent, and what will actually save you time and headaches.
- Personal protective equipment (PPE) — Gloves, eye protection, and a dust mask. Price: $10–$40 for decent gear and essential for any ladder work; never skip it. Wrong or missing PPE risks eye injury, inhaling dust, and a ruined inspection if you need medical attention.
- Extension ladder — Reach rooflines and upper walls safely. Use a non-conductive fiberglass ladder rated for your weight and set at a 4:1 angle; rent if you don’t own one (rentals $20–$60/day). A cheap, unstable ladder will slip or bend and can cause falls and damage to the EIFS when it hits the wall.
- Pinless moisture meter — Reads moisture through the cladding without drilling. Look for one with a depth/scale for sidings; $60–$300 depending on quality. Don’t press too hard or use a pin meter on EIFS foam — pins can puncture the moisture barrier and create leaks.
- Inspection mirror & flashlight — See under eaves, around windows, and behind gutters. Bright LED flashlight (≥200 lumens) and a 4″ mirror on a telescoping handle are fine; under $40 total. Poor lighting hides evidence; using a weak light can make you miss small cracks or pooling that becomes a big problem.
- Digital camera or smartphone — Document defects, locations, and dates. Use geotagging or a simple filename system; your phone is fine — no extra cost if you already have one. Skipping photos makes disputes with contractors and insurers harder and loses a time-stamped record of the condition.
- Telescoping pole with camera or binoculars (optional) — Inspect high areas without climbing. Rent or buy a pole camera for $50–$200 or use binoculars for under $100. Climbing when you could use a pole increases fall risk and scuffs the EIFS; low-quality optics can give false impressions of damage.
- Tape measure & checklist — Measure gaps, flashing overhangs, and record findings. A 25′ tape and a printed checklist are cheap ($10–$20) and essential for clear notes. Guessing sizes leads to wrong repair bids; poor documentation costs you time and money later.
Pro tip: Pair the pinless meter with good photos and ladder access. Do the meter readings with the light on and document each reading with a photo and note. If you rent a ladder or pole camera, bring your own PPE and flashlight — rental gear often lacks the basics or is beat up.
When moisture is detected: practical repair decisions, drying strategies, and reputable next steps
If your meter reads under about 15% across the sheathing, you’re usually in the clear and can monitor. Readings between 15–20% mean caution — dry the area and re-test. Anything consistently at or above 20% moisture or positive readings that widen over time requires action. If you also see soft sheathing, staining, visible mildew, or failed flashings, treat it as a serious leak, not a cosmetic repair.
Start drying immediately. Open vents, run fans and dehumidifiers, and remove trim or interior finishes that trap moisture. For small, localized wet spots pull back the EIFS cap, let the substrate dry for several days while forcing air circulation, and replace any wet insulation or sheathing. For larger wet areas, use controlled drying with a dehumidifier and indirect heat; do not seal over damp materials. When re-finishing, favor use breathable finishes and proper EIFS-compatible sealants with backer rod at joints rather than impermeable paints that trap moisture.
Decide DIY vs pro by scope and numbers. You can handle under ~2 sq ft of affected area with meter readings below 18% if no rot or mold is present and you’re comfortable removing and replacing small EIFS sections. Call a qualified EIFS/roofing contractor or building envelope specialist when readings hit 20%+, wetting is widespread, structural sheathing is soft, or water routes are unclear. If in doubt, get a moisture map, thermal scan, or invasive inspection—cheap in the short term, expensive if you skip it. Also check base compaction and flashing details before closing everything up; bad flashing fixes need pros.
Indiana wall systems
Indiana homes use a mix of EIFS, traditional stucco, and foam-backed assemblies, and the climate here makes each choice perform differently under freeze-thaw cycles, which repeatedly stress joints, penetrations, and insulation at the property line. In plain terms, this means understanding which system is on a house, how moisture moves behind finishes, and why gaps, cracks, or poorly sealed penetrations matter for long-term durability in Indiana’s wet springs and snowy winters. Knowing these distinctions helps you anticipate where hidden water may hide, what signs to watch for from corners to penetrations, and how failures in any layer can cascade into mold risks, cold spots, or insulation problems that cost more to fix later.
To use this in practice, plan a DIY moisture-check workflow with a simple meter: sweep suspected areas such as corners, eaves, window lines, and penetrations along the siding or stucco joints in a deliberate grid, taking pinless readings and noting any patterns over time to establish baselines. Learn how to interpret numbers by correlating higher readings with potential moisture behind stucco, foam, or EIFS layers, and decide when readings indicate surface versus subsurface issues that require different investigation steps or timing. Schedule checks seasonally, with pre-winter scans, post-storm or wet-spell audits, and mid-season spot checks so small problems don’t become costly failures and you can document changes for future work.
Inspect EIFS drainage and flashing around openings (windows/doors, corners)
Walk the wall and look at every window, door and outside corner. Pull back trim or loose EIFS where you can to expose the flashing and the joint. Check flashing continuity — flashing should be tight to the rough opening, lapped downhill, and free of gaps or folds that trap water.
Use a flashlight and probe the sealant joints and drainage gaps. Verify sealant is adhered, not cracked or soft; if the sealant peels off with light pressure, plan to replace it. Look for clogged or blocked drainage paths at the bottom of the EIFS assembly and behind trim. Make sure backer rod is present where used and that weeps or drainage strips are clear and installed at the proper slope.
Inspect safely: use a stable ladder or scaffolding with a spotter, and wear gloves, eye protection, and a dust mask when pulling back materials. If flashing is corroded, improperly lapped, or you find continuous wet substrate or mold, stop and arrange repairs from a qualified contractor. Small gaps and aged sealant are repairable; missing or misinstalled flashing usually needs a more invasive fix.
Conduct exterior moisture readings on stucco with a meter (pinless vs pin-type)
Pick the tool for the job: use a pinless meter for quick, non‑destructive scans across large stucco runs. It reads a few inches deep and lets you find suspicious areas without drilling into the finish. Use a pin‑type meter when you need to verify depth or get a true contact reading through the surface — but only in spots you’re prepared to patch. Don’t go stabbing the whole wall; that’s how small problems become big repairs.
Calibrate before you start. For pinless units, zero the pad on a known dry section of the same wall or on a manufacturer calibration block, and confirm battery level. For pin meters, check the pins against a known dry and a known wet reference (or a calibration block) so you know what the numbers mean on that job. Hold the pinless flat and steady, and insert pins fully for consistent contact when you use the pin meter.
Work methodically with a grid so you don’t miss pockets. Start low at grade and scan across in horizontal rows, then move up in 12–24 inch vertical steps, marking higher readings on a sketch of the wall. Pay special attention near flashings, penetrations and window/door openings (you’ve already inspected EIFS drainage and flashing), and repeat suspicious spots with a pin meter to confirm depth. Record baseline readings on a visibly dry zone and compare everything to that — anything that jumps well above baseline gets investigated further. And again: avoid random probe holes; only use pins where you can repair the finish or in a controlled test patch.
Safe, step-by-step remediation workflow for Indiana wall systems
This sequence walks you from initial damage assessment to finished seal on an Indiana wall system. Follow each step in order, check the quick signs listed, and stop for a pro when conditions go beyond basic DIY scope.
- Document and pinpoint damage. Take photos and mark affected areas after your visual inspection and moisture readings; this establishes scope and prevents missed pockets. Check: photos match what’s on the wall and moisture meter shows elevated values where marked. Call a pro if moisture is widespread beyond a single bay or you find mold inside wall cavities. No wait time—move to drying once documented.
- Set up controlled dry-out. Use fans, dehumidifiers and taped plastic containment to dry the cavity and substrate so you don’t trap moisture under new materials. Check: meter readings fall to near baseline and wood/substrate feels dry to the touch. Call a pro if you can’t reach safe moisture levels after 48–72 hours. Wait until readings are stable for 24 hours before cutting stucco.
- Remove damaged stucco and lath selectively. Cut back to sound material and open just enough to reveal the substrate, flashing and insulation so repairs are limited and effective. Check: edges expose intact lath/substrate and no loose, crumbling material remains. Call a pro if you expose structural framing rot, widespread insulation collapse, or suspect hidden leaks. No curing wait—proceed to substrate repairs once clean.
- Repair substrate, flashing and insulation. Replace rotten sheathing, reinstall or fit new flashing at openings, and replace insulation to restore drainage and thermal performance. Check: new flashing seats tight, insulation fits without gaps, and seams are taped or sealed. Call a pro for structural sheathing replacement, complex flashing detail work, or if utilities are encountered. Allow any installed sheathing or sealants to flash-cure per manufacturer (usually 24 hours).
- Rebuild the EIFS/stucco layers. Reapply base coat, embed mesh, and finish coat per product instructions so you restore the original system layers and drainage path. Check: mesh is fully embedded with no voids and finish bonds uniformly. Call a pro if you can’t achieve full mesh embedment or see blisters/peeling during application. Respect manufacturer cure times between coats (commonly 24–48 hours).
- Cure and test performance. Let the finish cure fully, then run a brief water test at flashings and windows to confirm no leaks and proper runoff. Check: no water entry, no soft spots, and meter readings stay low after the test. Call a pro if water shows up inside or you detect persistent high moisture. Typical cure before testing: 48–72 hours depending on product and weather.
- Reseal joints and final inspection. Install back any trim, apply final sealants at joints, and inspect drainage/flashings visually and with a quick moisture spot check. Check: joints bead cleanly, sealant adheres, and no new moisture spikes occur. Call a pro for permit sign-off, complex window-to-wall transitions, or if local code requires an inspection. Allow sealant skin time per product (often 24 hours) before exposing to heavy water.
Pro tip: Don’t skim over flashing and insulation fixes to save time. Fixing the visible finish without correcting the substrate or flashings guarantees a repeat failure—take the extra day to do it right and avoid a costly redo.
Conclusion
Hidden moisture in stucco and EIFS undermines durability, looks, and safety—get ahead of it with a quick, disciplined scan so problems don’t grow into costly repairs.
Begin with a simple, natural workflow: start with a visual check, choose one affordable meter, test the high‑risk zones and transition areas, sweep the rest of the surface in sections, record readings, compare them to any baseline you’ve noted, and note any suspicious spots for follow‑up or drying. Keep the process small, repeatable, and well documented so you can track changes over time.
Common pitfalls to avoid are rushing through the test, ignoring calibration or manufacturer guidance, testing in wet or recently drenched spots, using the wrong meter setting, and trying to patch or seal without confirming the underlying moisture source. Use PPE, maintain three points of contact when at height, and keep power tools away from damp areas. Test small areas first to confirm your technique and never force readings or dig into finished surfaces.
If readings are inconsistent, or you uncover persistent moisture near a penetrant, flashing, or structural joint, don’t push ahead solo—call a professional for a full EIFS/stucco inspection. A careful, documented DIY scan builds confidence and supports faster, smarter decisions, so you can protect your home and stay on top of repairs with momentum. Stay disciplined, stay safe, and keep moisture from becoming a bigger problem.
FAQ
What is the simplest way to check for hidden moisture in stucco?
Grab a moisture meter and take a few readings from multiple spots, especially along seams and low corners. Look for consistently high readings that don’t match the surrounding dry areas. If you see spikes, that area likely has hidden moisture.
Where should I test on an exterior stucco wall?
Test near downspouts, near the ground, and along any cracks or patches. Check both above and below grade if possible. Don’t skip corners or areas that stay damp after rain.
What readings indicate a real problem?
Any reading well above the wall’s normal range, usually above the meter’s wet threshold, signals trouble. If several spots show high readings, you’ve got a moisture issue to address. One high reading by itself isn’t a diagnosis, but it’s a red flag.
What should I do after finding moisture?
Dry the area first if possible and fix the source of moisture, like leaks or poor drainage. Then remove damaged stucco and reapply with proper flashing and sealants. If you’re unsure, call a pro—this isn’t a job for a DIY quick fix.