

Introduction
Painting over efflorescence is not a real fix for moisture and can trap water inside concrete walls.
In this guide you’ll learn how to recognize moisture issues, properly prepare the surface, choose breathable coatings, and apply a treatment plan that prevents future efflorescence.
The steps and tips provided aim to give you practical, durable results you can implement on real walls.
Key takeaways
- Identify moisture sources: hydrostatic pressure, capillary rise, condensation at walls
- Efflorescence may be cosmetic but often signals ongoing salt migration
- Painting over is a temporary fix that traps moisture and salts inside
- Start with gentle brushing, then targeted chemical cleaners if needed
- Diagnostics: moisture meters, salt tests, and video inspection confirm migration paths
- Long-term fixes: sealing doors/windows are not enough; retrofit dampness controls
Table of Contents
- Introduction
- Key takeaways
- Common causes and moisture pathways that feed efflorescence
- When efflorescence is cosmetic vs. when it’s a symptom of deeper problems
- Why painting over efflorescence is a failing strategy
- Removal strategies — from gentle brushing to chemical cleaning
- Step-by-step DIY remediation workflow (diagnose → remove → repair → protect)
- Diagnostics and testing: how to confirm ongoing salt migration and moisture sources
- Long-term prevention and retrofit repairs (practical fixes on a budget)
- Costs, ROI, and decision guide: patch-and-paint vs. full remediation
- Conclusion
- FAQ
Common causes and moisture pathways that feed efflorescence
Efflorescence starts where moisture enters walls and carries salts to the surface. Understanding the physics of moisture movement helps you separate cosmetic staining from underlying failures that will recur after painting. In plain terms: moisture finds a path, salts ride along, and surfaces crystallize where movement concentrates.
For DIY readers, the key is tracing sources, not just chasing white stains. By pairing moisture monitoring with an eye for detailing flaws, you can decide whether painting over efflorescence is a band-aid or a true prevention strategy. The goal is to stop the water, then manage salts, before coatings ever go on.
Key diagnostic steps you can apply now (without opening walls):
- Measure surface moisture and ambient conditions with a non-penetrating meter and a hygrometer. Look for persistent damp spots and rising damp indicators.
- Test for soluble salts on a small, representative area using a simple salt-spot test or a calibrated dip test per manufacturer instructions.
- Note the history: recent heavy rainfall, melting snow, or irrigation nearby can drive short-term moisture that may subside if the source is addressed.
- Decide on a plan: if moisture persists after remediation, painting is unlikely to provide lasting protection. If you resolve the source and dryness is sustained, you can consider coatings designed for moisture and salt management.
Construction and material-related causes
What you put in the wall and how you mix it matters. Porous or salty materials and wet practices become long-term moisture and salt reservoirs. Choose materials and mixes that shed water and limit soluble salts.
- Porous masonry Use dense, low-absorption units rated for exterior use. High-absorption blocks hold water and salts, causing staining and freeze-thaw cracking. Avoid soft units or unsealed concrete block on exposed walls.
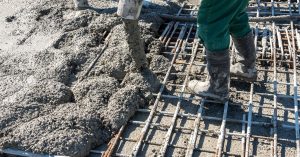
- Improper concrete mix Use the correct water–cement ratio and proper admixtures for durability. Too much water raises porosity and leaches salts to the surface. Follow mix specs and don’t add excess jobsite water.
- Unwashed aggregates Source clean, tested sand and gravel with low soluble-salt content. Contaminated aggregate introduces chlorides and sulfates that migrate out as efflorescence. Specify washed, quality aggregate and test if in doubt.
- Salty mortar Use low-salt cement and clean sand for mortar mixes. Mortar with high soluble salts will bleed those salts into the masonry. Don’t reuse wash water or sand from demolition without testing.
- Wet curing practices Keep curing controlled and avoid ponding or long-term wet forms. Excess curing water can push soluble salts into the surface layer. Use damp curing methods that don’t saturate the element.
- Incompatible sealers Pick breathable, vapor-permeable sealers where required. Non-breathable coatings trap moisture, raising internal salt migration and causing delamination or staining. Match sealer specs to the substrate and climate.
- Poor jointing materials Use joint compounds and sealants rated for exterior exposure and movement. Low-grade or salty joint compounds provide a path for salts and crack under stress. Specify flexible, low-salt sealants and tool joints properly.
Site and detail failures (grading, flashing, vents)
Water that keeps returning to the same spot is the biggest reason efflorescence keeps showing up. Poor site grading, missing or improperly installed flashing, and gaps at penetrations let water run into or sit against masonry. Fixing the detail stops the source so salts can’t keep migrating.
Grade the ground to slope away from foundations and extend downspouts well past the wall. Install continuous, properly lapped flashing at sills, rooflines, and shelf angles. If you see rising damp, check for missing capillary breaks and drain paths.
Vents, sleeves and penetrations need tight seals and backer where

When efflorescence is cosmetic vs. when it’s a symptom of deeper problems
Visual signs and simple tests
Look first at the pattern. Thin, powdery white deposits that wipe or brush off and don’t return after the wall dries are usually cosmetic. If the white layer forms repeatedly in the same spot, appears after a rain or wash, or is accompanied by paint flaking or crumbling mortar, treat that as a warning sign.
Do a couple quick checks: scrape a small area with a screwdriver — powdery and easily removed points to surface salts; a hard, crusty layer that drills off can mean salts are pushed from deeper inside. Try a tape-lift: press clear tape to the deposit and pull it off; visible salt on the tape confirms loose surface salts. Finish with a spot-dry test: dry the area for 48–72 hours with a fan or heat and watch for recurrence.
Keep notes — date your cleaning and check back. If the deposit returns within a few days or after weather events, it’s likely driven by ongoing moisture rather than a one-off surface salt.
When to call a pro (mold, structural damage, persistent moisture)
If you see mold growth, a musty odor, rotted wood, bulging walls, or large vertical cracks near the efflorescence, stop DIY work and call a professional. Those signs mean moisture is affecting more than the surface and may need invasive investigation or structural repair. Also call a pro if efflorescence reappears repeatedly after drying and basic fixes.
Use thresholds to decide: widespread deposits covering several square feet, recurring damp spots after drying, or persistent high humidity in the room are reasons to get help. If a moisture meter shows consistently elevated readings compared with unaffected areas, or you suspect rising damp or leaks inside walls, schedule a contractor with diagnostic tools (thermal imaging, borescope, or lab salt analysis).
Don’t wait when health or structure are at stake. A trained inspector or structural engineer can pinpoint the moisture source and recommend repairs — stopping the source is cheaper than fixing collapsed mortar or mold remediation later.
Why painting over efflorescence is a failing strategy
Efflorescence on concrete walls arises when moisture moves soluble salts to the surface, leaving a salt-rich film that undermines coating adhesion and creates osmotic pressure that pushes coatings away. The salt-laden substrate traps moisture behind the film, provoking blistering, peeling, and wash-off as the film can’t maintain a secure bond or steady moisture balance. This is a symptom, not a cure, and it signals deeper moisture dynamics within the wall.
For a DIY reader, the lesson is pragmatic: verify moisture and salt levels before painting and accept the limits of surface prep on efflorescent substrates. Short-term aesthetics can seduce, but recurring dampness will undermine coatings again. Prioritize drainage, moisture management, and permanent fixes rather than chasing a cheap, decorative finish.
How salts destroy coatings and adhesives
Salts left by efflorescence sit under the paint film. They dissolve when moisture returns and migrate through the coating with the water, creating osmotic pressure between wall and paint. That pressure weakens adhesion and can cause lifting, blistering, and accelerated debonding as crystals form beneath the surface.
Over time, the continual salt transport perpetuates an internal moisture cycle that the coating cannot seal. Even a fresh-looking finish can fail from the inside out, because the salts keep active movement under the film and won’t be halted by surface cleaning alone.
Real-world failure examples and timelines
Paint on efflorescent concrete often begins to peel within a few months where salts are concentrated, while other jobs show the coating lasting a season before large patches detach after a wet period.
Homeowners report recurring stains, touch-ups, and accelerated substrate decay under wood trim and fasteners. The pattern is clear: without removing salts and addressing the moisture source, painting becomes an ongoing cycle of repairs rather than lasting protection.
Removal strategies — from gentle brushing to chemical cleaning
Removal strategies cover dry brushing and scraping, low‑pressure washing, and chemical cleaners or desalination. To make this actionable, follow a repeatable workflow: assess substrate condition and moisture, protect adjacent surfaces, mask edges and vegetation, test a small patch, and plan drying times. Start with the gentlest method that will work, then escalate only as needed. After cleaning, rinse thoroughly, neutralize where required, and allow the wall to dry completely before sealing or repointing to stop future salt migration. Finally, monitor for reoccurrence and re-clean as needed. Dry brushing removes loose surface minerals and efflorescence with gentle abrasion, best on solid, sound surfaces and minimal moisture; scraping targets stubborn crusts but risks texture damage on softer bricks. Low‑pressure washing uses controlled water flow to flush salts from pores without aggressive abrasion, suitable for larger areas but requires masking, testing, and guarding against mortar joints; chemical cleaners or desalination can dissolve salts and reverse efflorescence where minerals are embedded, yet may impact finishes and require neutralization and rinsing.
Pros and cons vary by substrate, moisture, and safety concerns, so decision criteria include substrate condition, presence of loose minerals, moisture levels, labor tolerance, and whether the goal is temporary mitigation or long‑term prevention. For DIY readers, the takeaway is to prep thoroughly, test patches first, wear PPE, mask adjacent areas, and plan drying times plus maintenance after cleaning; follow with sealing or repointing to stop future salt migration and rebreathe walls, then monitor and re-clean as needed. Consider surface‑level color changes, mortar joint integrity, and paint or finish presence, stopping methods if staining or etched occurs, and connect cleaning with sealing and repointing strategies.
Mechanical cleaning: when and how to brush or chip safely
Start with the softest tool that will do the job. Use nylon or natural-bristle brushes for efflorescence and light deposits; move to stiffer wire brushes only where the surface is sound and the mortar joints are deep and intact. Keep strokes along the face of the brick or concrete, not at an angle that gouges mortar.
Work in cool, dry weather when possible. Wet masonry makes mortar softer and more likely to crumble. Do small test patches first so you don’t damage the substrate. If you must chip or scrape, use light taps and a small chisel—heavy hammering cracks brick and loosens joints.
Clean-up and disposal: Sweep or vacuum residues into a sealed bag. If the debris contains heavy contaminant stains or chemical residues, treat it as construction waste and follow local disposal rules. Don’t wash brashings into storm drains.
Water-based cleaning and pressure washing guidelines
Low-pressure washing is useful, but pressure can force salts deeper into the masonry. Keep pressure below about 500–800 psi for brick and concrete; use a fan tip and keep the nozzle 12–24 inches away. Test a small area to judge effect before doing a whole wall.
Choose a warm, dry period so the wall dries within a day. Prolonged dampness can reactivate salts or promote mildew. Avoid pressure washing after recent repointing—fresh mortar needs time to cure.
Practical note: direct runoff away from foundations and plants. If you suspect soluble salts, rinse gently and allow several dry cycles rather than blasting, so you don’t push salts deeper.
Chemical cleaners and desalinators — selection and application
Pick the mildest product that will work. Non-ionic cleaners and masonry desalinators are first choice for salt deposits. Acid-based cleaners remove stubborn mineral staining but attack mortar and concrete if overused. Always read the label and match the cleaner to the surface.
Do a small patch test and follow dwell times exactly. After application neutralize acid cleaners as recommended and rinse thoroughly with low-pressure water until runoff is clear. Protect nearby plants and metal fixtures from splash.
Safety and waste: Wear gloves and eye protection. Collect rinse water when local rules require it, and don’t send concentrated chemical runoff to storm drains. If in doubt, consult product data sheets or a pro for desalination protocols.
Step-by-step DIY remediation workflow (diagnose → remove → repair → protect)
The step-by-step DIY remediation workflow guides you through diagnosing the moisture path and salt migration, removing deposits, repairing the moisture source, and protecting the surface in a time-estimated sequence. Start with mapping ingress routes, environmental conditions, and baseline readings using a moisture meter, hygrometer, and visual indicators, then test ongoing salt movement with repeatable checks. Plan the removal of efflorescence and prepare the area for repair, address leaks or drainage, and allow for cure and treatment windows before applying coatings or sealers, all with clearly defined checkpoints and expected durations.
This approach matters on real jobsites because it helps you distinguish indoor humidity from active salt movement, prevent re-deposition, and avoid premature finishing. Following the cadence ensures you verify substrate stability, control contamination, and choose compatible treatments and sealants after proper cure windows. With a documented timeline and decision points, you gain confidence to proceed step by step and stay aligned with safety and long-term protection goals.
Step-by-Step Cleaning Process
Follow this sequence to diagnose, remove salts and deposits, repair the moisture path, and protect the surface. It keeps the job orderly and shows when to pause for drying and testing.
- Prepare the area and set safety controls. Clear furniture and cover floors to protect finishes. Check ventilation and lighting so you can work safely and see salt stains clearly.
- Confirm moisture paths with a meter. Map damp spots to find the source, not just the visible salts. A steady high reading means stop and address the leak first.
- Test for ongoing salt migration. Use a simple blot test or tape lift to see if salts transfer after a wipe. If salts keep reappearing, you still have active moisture to fix.
- Dry the surface before major cleaning. Use fans and dehumidifiers until readings fall into the safe range. The right dryness means cleaners will work and repairs will bond.
- Remove loose deposits mechanically. Scrape or brush away powdery salts and efflorescence with a stiff brush and vacuum. A clean surface is the sign you’ve removed the bulk of deposits.
- Apply mild cleaning solution where needed. Use appropriate masonry cleaner or diluted acid per instructions to dissolve remaining salts. Rinse and neutralize; clear runoff means the treatment did its job.
- Repair the moisture source. Seal cracks, replace failed flashing, or re-point mortar as needed. The repair is correct when rechecked moisture readings no longer spike after a rain or water test.
- Allow full cure and moisture equilibration. Give repairs and coatings the manufacturer’s dry time; typically days to weeks depending on conditions. Confirm with a final moisture check before finishing.
- Protect with a compatible treatment. Apply breathable water-repellent or sacrificial coating to slow salt return. A uniform finish and no staining after the next wet cycle show success.
Tools, PPE, and materials checklist
Bring these items to the jobsite. They cover diagnosis, removal, repair and protection steps without guessing.
- Moisture meter — Measures dampness in walls and floors. Look for a pin or pinless model; price $50–$300. Tip: do spot checks and record readings for comparison.
- Stiff brushes — For scraping salts and loose mortar. Use nylon for soft finishes, wire for masonry. Warning: avoid wire on delicate surfaces to prevent damage.
- Pump sprayer — Applies cleaners, neutralizers, or water. Choose a 1–2 gallon unit with adjustable nozzle. Rent if occasional use; buying is cheap ($20–$60).
- Shop vacuum — Captures dust and salt residue. Use one with a HEPA or fine dust filter. Empty often to keep suction effective.
- PPE: gloves — Chemical-resistant hand protection. Nitrile for cleaners; heavy leather for mechanical work. Replace if torn or contaminated.
- PPE: respirator — Protects from dust and fumes. Use an N95 for dust or an organic-vapor cartridge for acids. Fit-check before use; disposable masks are cheaper but limited.
- PPE: eye protection — Safety glasses or faceshield. Prevents splash and dust injury. Keep on near cleaners and power tools.
- Sealants & mortar — For patching leaks and joints. Match material to substrate (masonry or cement-based). Buy small tubs for DIY; pro-grade packs cost more but last longer.
- Water-repellent — Breathable silane/siloxane or masonry sealer. Check VOCs and coverage rate on the label. Apply when substrate is fully dry; expect 150–400 sq ft per gallon.
Sample project timeline and labor estimates
Small job (single wall or small basement section): allow a full weekend. Expect 6–12 hours of hands-on work spread over 2–3 days to allow drying and rechecks. Most DIY homeowners can complete this without calling a pro unless hidden leaks appear.
Medium job (multiple rooms or an exterior elevation): plan 3–7 days. Time splits roughly: 1 day diagnosis and prep, 1–2 days removal and cleaning, 1 day repairs, then 1–3 days for drying and protective treatments. Bring help for heavy scraping or long scaffold work; consider a pro for complex flashing or structural moisture issues.
Large job (whole foundation or repeated failures): expect 1–3 weeks of intermittent work and testing. These projects often require specialty equipment and trade skills like repointing, exterior drainage, or structural sealing. Call a pro at the first sign of persistent high moisture readings, structural cracks, or recurring efflorescence after repair.
Diagnostics and testing: how to confirm ongoing salt migration and moisture sources
This diagnostic guide helps clearly confirm ongoing salt migration and identify the present moisture sources—rising damp, penetrating moisture, capillary action, or condensation—so you know what you are dealing with. It suggests practical field tools you can actually use on site: pin and pinless moisture meters, relative humidity probes, surface salt concentration tape, and quick leaching or boiling tests to gather evidence without expensive equipment. By planning targeted tests at the base of walls, in high-moisture zones, and near joints, you can assemble a coherent picture of drivers, pathways, and the urgency of remediation.
Interpreting results translates meter readings and salt indicators into the Likelihood of ongoing salt migration, the dominant moisture source, and the urgency of remediation, helping you prioritize actions. Results then guide concrete actions for homeowners and contractors—where to seal, ventilate, or adjust drainage, how to document findings for records, and when to escalate to professional moisture-control interventions, including when to engage consultants or remediation specialists. Understanding seasonal timing and weather effects helps plan measurements, reduces false alarms, and improves the reliability of trend data across different times of year.
Simple field tests anyone can do
Start with quick checks you can do with basic supplies. Use a piece of clear tape pressed onto the salt-stained surface and pull it off. If white or grey powder sticks to the tape you’ve got salt migration. That’s the same basic idea as the tape-lift test professionals use.
For a crude leach test, cut a small sample of the plaster or masonry or drill a pea-sized hole and collect the dust. Place it in a jar with distilled water, shake, then let it settle. Cloudiness or residues indicate soluble salts. Do the bucket/soak test on a small removed sample if you want to confirm mobility.
After drying a repaired area, monitor for recurrence every few weeks. Recheck the tape-lift spot and the visual surface. If salts return or damp spots come back, you’re still getting moisture into the wall and it’s time to step up to instruments or pro help.
When to use instruments or lab analysis
Use a moisture meter or in-situ relative humidity probes when the problem is persistent, covers large areas, or when you need to know how deep the moisture goes. A pin meter gives surface readings; a pinless meter reads deeper. RH probes give reliable readings inside the wall and help confirm drying progress.
Send samples to a lab for full salt analysis when you suspect mixed salts, need a remediation spec, or when repairs keep failing. Labs tell you which salts are present and in what concentration. That information guides proper salt-neutralising products and drying targets.
Call in a contractor or consultant with instrumentation if you’re dealing with hidden leaks, rising damp over several rooms, or if the building has plaster finishes or historic fabric that require careful work. Good diagnostics upfront saves you from repeating repairs later.
Long-term prevention and retrofit repairs (practical fixes on a budget)
Long-term prevention focuses on reducing hydrostatic pressure on exterior walls through proper site grading, improved drainage, and mindful exterior water management, followed by durable retrofit options that fit a budget, so moisture is kept away from masonry and deterioration is slowed before costly repairs are needed. Key elements include correct flashing installation (surface and through-wall), careful termination details to avoid water ingress, selective use of vapor barriers versus breathable sealers, and timely repointing with compatible mortars that match texture and color.
Low-cost retrofit tips provide practical, DIY-friendly steps such as minor crack sealing, improving surface drainage, adding external grading adjustments, and affordable flashing retrofits that can be implemented without major overhauls. A simple maintenance and monitoring plan—seasonal inspections, watching for new efflorescence, and a straightforward checklist—helps sustain effectiveness and prevent surprises without expensive interventions. Understanding when to upgrade materials and how these steps integrate with existing walls makes retrofits predictable, repeatable, and affordable while extending the life of the structure.
Detailing and drainage improvements
Start by moving water away from the wall. Regrade soil to slope away at least 4–6 inches over the first 10 feet and keep plantings and mulch clear of the base.
Fit gutters and downspouts that dump at least 3–4 feet from the foundation. Add splash blocks or underground extensions so runoff doesn’t soak the wall. A small drip edge or metal flashing at the roofline and over window heads forces water off the face before it runs down the wall.
Simple retrofits like extending downspouts, cutting a shallow swale, or adding a low-cost plastic drip edge stop most recurring wet spots. They’re cheap, fast, and prevent bigger masonry repairs later.
Material and finish choices that reduce recurrence
Pick materials that breathe and move with the wall. The right finish, sealant and mortar will shed water but let trapped moisture escape — that’s the goal.
- Breathable coatings Use silicate or mineral-based silanes. Look for vapor-permeable ratings and avoid impermeable acrylics. Wrong choice traps moisture and causes blistering or freeze damage.
- Flexible sealants Use exterior-grade polyurethane or silicone with movement capability. Check joint movement percentage on the tube. Hard sealants crack and let water back in.
- Lime-based mortar Use NHL or lime-cement blends for repointing. Look for compatible compressive strength with the existing masonry. Portland-rich mixes are too stiff and cause cracks or spalling.
- Through-wall flashing Install corrosion-resistant metal or flexible flashing at shelf points. Specify stainless or properly coated copper where possible. Cheap flashing fails and lets water run into the wall assembly.
- Vapor-permeable membranes Choose membranes labeled breathable for masonry backs. Check perm ratings and UV tolerance. Impermeable membranes can trap moisture and cause staining.
- Breathable sealers Use silane/siloxane water repellents with high vapor transmission. Look for product data on capillary water reduction. Film-forming sealers can peel and cause uneven staining.
- Color-matched patches Match thermal expansion and color when patching. Use compatible aggregate and binder for the original material. Incompatible patches separate, stain, or show differential weathering.
Costs, ROI, and decision guide: patch-and-paint vs. full remediation
Costs for addressing moisture on a wall fall into three bands: patch-and-paint for quick cosmetic fixes, standard remediation for efflorescence removal and sealing, and major reconstruction for masonry repair or structural fixes. Realistic national ranges are roughly $200–$800 per wall for patch-and-paint, $1,000–$5,000 for standard remediation, and $15,000–$60,000+ for major reconstruction, with local factors like labor, materials, wall height, thickness, age, and accessibility driving the spread. Include typical contractor fees, permits, and climate-related delays that can tilt the total.
ROI matters: patching may protect value in the short term but risks ongoing moisture if the source isn’t fixed, while remediation offers better long-term durability and warranties, and major reconstruction can restore structural integrity in severe cases. Use a simple decision lens—evaluate moisture source, damage extent, climate, occupancy timeline, and budget to choose patch-and-paint, remediation, or major rebuild, and factor in future maintenance costs. Be aware of tradeoffs like hidden damage, VOCs, and required moisture management upgrades that can influence both cost and risk.
Quick fix cost vs. long-term repair cost examples
Quick fixes are cheap up front but often short lived. A patch-and-paint to cover efflorescence or small hairline cracks typically runs $150–$800 for a room or single wall and will usually last 1–3 years before stains or salt bloom return.
Standard remediation — cleaning salts, sealing, and repairing moisture sources — is pricier but lasts longer. Expect $800–$4,000 for targeted remediation (one basement wall or limited area) with a 5–15 year useful life when the source is addressed.
Major reconstruction, where we remove and rebuild damaged sections or fix structural water entry, is $4,000–$20,000+. That buys you durable results and often a 15–30 year lifespan. If you plan to stay in the house, this can be the smarter spend. Think short-term savings vs. long-term value when choosing.
Common mistakes, failure case studies, and how to avoid them
These are the real jobsite errors that send homeowners back to square one. Read them like a checklist: what went wrong, why it failed, and the simple fix to prevent it.
- Painting over salts — paint hides white bloom but traps salts under the film; remove salts and neutralize before painting to stop reappearance.
- Skipping the source — patched wall looks fine until water returns; trace and fix leaks or drainage first, then repair the wall.
- Wrong cleaners or chemicals — acid or bleach can damage masonry or finishes; use manufacturer-recommended cleaners or mild alkaline solutions and rinse well.
- Thin skim repairs — shallow fills crack away in freeze/thaw or wet conditions; cut out to sound material and use proper patch depth and materials.
- Ignoring ventilation — damp areas need airflow; add vents, dehumidifiers, or improve exterior grading to keep repairs dry.
Fixing right the first time costs more but avoids repeat work. When in doubt, stop and diagnose — that saves money and headaches down the road.

Conclusion
Painting over efflorescence is not a fix. The real work is stopping the salt and moisture from getting in, drying what’s already there, and rebuilding a surface that can run dry and breathe. Do that, and your walls stay solid, look better, and last longer.
To get this done, act like a small crew: first dry and test the area, then inspect for leaks or cracks, brush away loose material, clean the surface with a mild cleaner if needed, patch where damage shows, and finally seal in a way that slows water in but still lets moisture escape. Keep the steps simple and in order: diagnose, remove, repair, protect, and monitor the wall for a steady, dry result.
Common mistakes to avoid are skipping diagnostics and painting on a wet surface, trying to cover salt residues with a cosmetic coating, or using the wrong products that trap moisture. Safety rules are non-negotiable: wear eye protection and gloves, test a small area first, work in dry conditions, and ventilate. If you’re unsure about sources of moisture or persistent salt migration, pause and reassess instead of pushing ahead with a quick patch.
If the moisture source or salt movement is ongoing, or you’re dealing with large areas, cracks, or structural concerns, call in a professional instead of forcing a DIY patch. With the right diagnosis and a solid remediation plan, you’ll see durable results and avoid costly repeat work. Stay practical, stay safe, and keep the wall dry and solid.
FAQ
Q: Can I just paint over the efflorescence to get my walls looking good again?
No. Efflorescence is a sign moisture is moving through the wall. Painting over it hides the problem and will peel, blister, or fail sooner than you think.
Q: Why is my wall showing white crystals after a rainstorm?
That’s salt coming to the surface as moisture evaporates. It means water is wicking through the wall and carrying minerals with it. If you don’t fix the moisture, the salt will keep coming back.
Q: What should I do before painting a concrete wall?
Clean the surface, remove loose material, and let any moisture dry out. Treat the root cause first, not the symptom. Then use a stain-blocking, breathable concrete paint.
Q: How can I fix the moisture problem properly?
Find and fix the source: cracks, leaks, or poor drainage. Grade or redirect water away from the wall and consider a vapor barrier if needed. Don’t skip this step or the paint will fail fast.