
Introduction
Washed sand in concrete is sand that has been rinsed to remove fine particles and impurities, while unwashed sand still carries those fines.
The difference shows up in how easy it is to mix and how the finish looks after it cures. In DIY terms, washing mainly affects fines and dust content, which you can verify on the bag label or with the supplier’s instructions.
Washed sand generally improves bonding and finish smoothness, while unwashed sand can leave a rougher surface due to clay and silt, but the effect depends on other mix ingredients and curing conditions. For a DIY project, evaluate the sand by feel and how it blends with cement, and follow manufacturer instructions or local rules for acceptable sand.
Key takeaways
- Washed sand versus unwashed sand: definitions, production steps, and impurity expectations.
- Sand quality influences concrete strength, bonding, and potential voids or weak interfaces.
- Finish quality differs: washed sand often yields smoother, more uniform surfaces than unwashed sand.
- Bonding issues tied to wash status: contaminants affect adhesive strength between cement and sand.
- Mixing and preparation: follow manufacturer instructions; adjust moisture and slump for each sand type.
- Always wear dust mask and eye protection when handling sand.
Table of Contents
- Introduction
- Key takeaways
- Washed Vs. Unwashed Sand — Definitions and How They’re Produced
- How Sand Quality Affects Concrete Strength
- Finish, Surface Texture, and Aesthetic Outcomes
- Bonding and Adhesion — When and Why Problems Occur
- Application, Mixing, and Preparation Best Practices
- Cost, Environmental Impact, and Lifecycle Trade-Offs
- Performance Under Different Climates and Durability Implications
- Common Mistakes, Troubleshooting, Safety, and Project Planning Checklist
- Conclusion
- FAQ
Washed Vs. Unwashed Sand — Definitions and How They’re Produced
Washed sand is material that has gone through a washing process to remove fines, silt, clay and organic matter, resulting in cleaner sand. Unwashed sand is the natural material pulled from a pit with minimal processing and may still carry fines and organic stuff. In concrete mixes, washed sand gives better workability and cleaner appearance, while unwashed sand can be cheaper but may trap more fines and affect bonding.
On-site washing uses equipment like wash drums, screens, and settling to separate fines, then drying. Supplier-washed sand comes pre-cleaned; compare cost, logistics, and risk of recontamination before buying. Check the label or datasheet for fines content and to see if it meets your project spec.
Washed sand — production and expected characteristics
Washed sand undergoes a cleaning process to remove contaminants. The main goal is to eliminate fines – particles smaller than 75 microns.
Why remove fines? Fines can cause concrete to bleed, leading to inconsistent strength and finish. Washing ensures a clean, consistent product.
The washing process typically involves screening, washing (using water jets or sprays), settling (allowing heavier particles to sink while lighter contaminants float away), and drying. The result is sand with uniform particle size and minimal impurities.
Unwashed sand — common contaminants and variability
Unwashed sand retains silt, clay, and organic matter. These contaminants vary by source, leading to inconsistent quality.
Why the variation? Sand deposits form in different environments, with varying mineral content and contamination levels. Even within a single deposit, quality can fluctuate.
The presence of silt and clay can lead to weak concrete due to reduced aggregate-paste contact area. Organic matter can cause staining and affect bond strength over time. Using unwashed sand is a gamble; you might get lucky with a clean batch, or you might not.
Material specs and standards to check
Choosing the right sand is crucial for your concrete’s strength and finish. Here’s what to look for:
- Grading: Check the particle size distribution. Well-graded sand (with a mix of particle sizes) packs better, reducing voids and improving strength.
- Silt/clay limits: Ask for silt and clay content by weight. Lower values mean less contamination. Aim for < 5% combined.
- Source certification: Ensure the sand meets relevant standards (ASTM C33, CSA A23.1). Certified sources provide peace of mind.
- Avoid fine sands: Fine sands (< 4.75 mm) can lead to weak concrete due to excessive paste demand and poor aggregate-paste contact.
- Check project specs: If unsure, consult your project’s specifications or ask an engineer. They’ll guide you towards the best sand for your needs.
How Sand Quality Affects Concrete Strength
Sand quality matters for bonding and strength. Fines like clay, silt, and dust, and surface coatings, hurt the cement-aggregate bond and raise water demand, which shifts the local water-to-cement ratio. That weakens the ITZ, creates micro-cracks, and lowers early compressive and flexural strength as well as long-term durability.
This matters because poorer ITZ bonding and higher water demand show up as weaker concrete and more cracking risk. Do simple diagnostics and translate results into mix adjustments: washed vs unwashed sand, moisture handling, and aiming for an appropriate slump; follow the label or datasheet for water capacity and any admixture guidance. Check the label/datasheet and adjust your mix accordingly to keep strength and durability in check.
Mechanisms: fines, coatings, and water demand
The quality of sand affects concrete strength by influencing how cement bonds with aggregates. Here’s what happens:
Fines, like clay, silt, and dust, coat sand particles. These coatings prevent cement paste from bonding properly to the aggregate surface, weakening the interfacial transition zone (ITZ).
Clay films also absorb water, raising the effective water-to-cement ratio locally. This increases water demand and reduces early-age strength.
Coatings can also create micro-cracking pathways, further compromising concrete’s durability over time.
Tests and evidence to request from suppliers or labs
To ensure you’re getting quality sand, ask your supplier for these test results:
Aggregate gradation: This shows the particle size distribution. Too much fines can indicate unwashed sand.
Silt content: High silt indicates excessive fines, which can weaken concrete.
Absorption: This tells you how much water the sand will absorb, affecting your mix’s water demand.
Also, request strength performance data on design mixes using their sand. Check these results with your project engineer to ensure they meet your acceptance criteria.
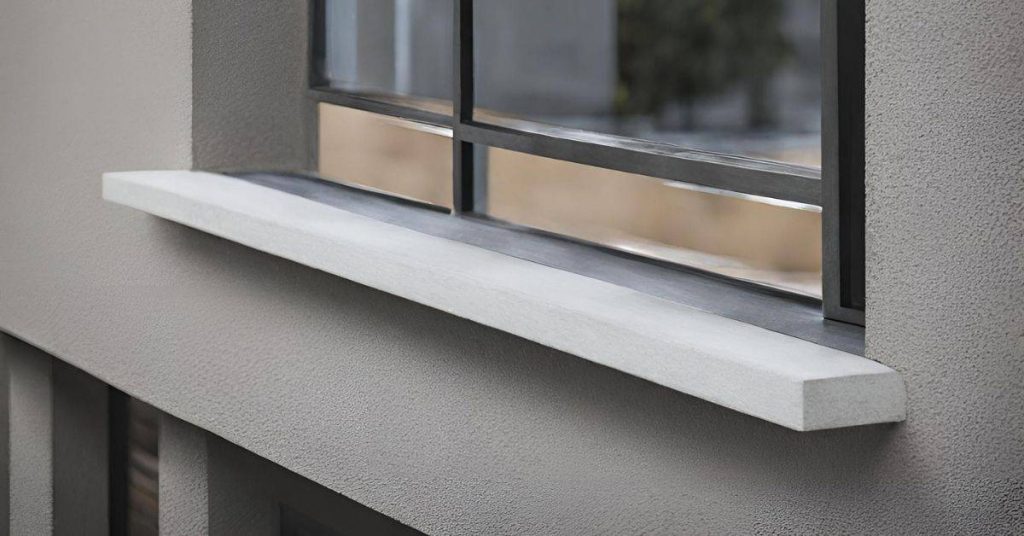
Finish, Surface Texture, and Aesthetic Outcomes
Washed sand tends to produce a smoother, more uniform surface with fewer fines, making cast concrete finishers easier to control and reducing the risk of random glaze or feathering marks, while unwashed sand can leave greater fines that influence texture, edge definition, and the ability to achieve a consistent exposed aggregate or smooth finish. In practice, this means washed sand usually gives you better surface clarity and fewer hidden voids that show up as pinholes or irregularities, while unwashed sand can trap fines that mold the final sheen and increase surface blemishes or staining potential after curing and weathering.
For a DIY reader, this matters because you want predictable results from a small or medium pour, with less guesswork about finishing time, compaction, and how the surface will look once it’s set. Use washed sand when you plan a cast, a smooth sheen, or a crisp edge, and save unwashed sand for projects where you’re aiming for a more textured or feathered finish, but be prepared to manage fines that may migrate to the surface and cause blemishes, and consider cleaning or priming steps and careful curing to mitigate those risks. Check product labels and manufacturer instructions for any notes on fines, staining, and finishing recommendations, and tailor your curing and joint filling to the texture you’re pursuing.
Workability and Finishing Behavior
Washed sand’s consistent grading and lack of fines make it easier to finish. It reduces surface dust, allowing for smoother trowel or power-float results.
Unwashed sand can contain varying particle sizes and fines that clog tools and create inconsistencies in the finish. The more fines present, the harder it is to achieve a smooth, uniform surface.
Tip: For best finishing results, opt for washed sand when aiming for a smooth cast concrete or polished look.
Discoloration, Efflorescence, and Staining Risks
Unwashed sand may contain organics and soluble salts that can cause discoloration or efflorescence on the concrete surface. These impurities migrate to the surface over time, leading to staining.
Washed sand has fewer impurities, reducing this risk. However, it’s not entirely eliminated, especially with exposed aggregate finishes where the sand is visible.
Mitigation: Before pouring, check for any visible contaminants in your unwashed sand. Consider washing or screening to remove larger particles and reduce staining risks. Priming the surface before finishing can also help seal potential sources of discoloration.
Bonding and Adhesion — When and Why Problems Occur
Contaminants in unwashed sand and aggregates—like clay, silt, fines, and organic matter—get between the paste and the aggregate and weaken the bond at the microscopic level. This bad bond shows up as delamination, popouts, or raveling as the concrete is loaded or worn. Particle shape and surface roughness matter too, with clean, angular aggregates giving better interlock and paste adhesion than dirty or rounded particles.
This matters because the strength and durability of your concrete often ride on that ITZ where paste meets aggregate. For DIY mixes, reserve washed, well-cleaned aggregates for high-strength or load-bearing work, while watching field indicators such as a dull or uneven paste sheen and occasional bond pull tests. Keep materials dry, minimize fines during handling, and specify simple washing or fines limits in the mix plan to promote consistent adhesion.
How contaminants cause bond failure
Contaminants like clay, silt, and organic matter in unwashed sand can wreak havoc on concrete’s bond strength. Here’s why:
Clay and silt form weak interlayers between the cement paste and aggregate. They prevent chemical bonding by blocking hydration reactions. Mechanically, they create slippery surfaces that reduce interlocking.
Organic matter can coat aggregate particles, preventing them from bonding with the cement paste. It also consumes water, leading to a drier mix and weaker concrete.
On-site remediation and admixture strategies
If you’re on site and facing bonding issues, here are some non-prescriptive mitigation options:
Surface cleaning: If contaminants are only on the surface, a quick wash or brush-off might do the trick.
Additional cement or bonding agents: Increasing cement content can help consume excess water and improve bond. Bonding agents like superplasticizers or admixtures can also enhance adhesion.
As for admixture selection, consider using air-entraining, water-reducing, or high-range water-reducing admixtures. But remember, dosages should be coordinated with a concrete technologist or engineer to avoid overuse or misuse.
Application, Mixing, and Preparation Best Practices
Choosing washed versus unwashed sand hinges on what you’re making and how the mix will behave. For footings or high-appearance surfaces, you want to manage fines and bonding potential so the early set and overall strength aren’t compromised, while slabs and decorative finishes can tolerate a bit more workability or surface texture depending on the finish you’re after. On site, plan practical steps: pre-wet aggregates to steady moisture, decide if the sand needs washing or isolation, and adjust the mix design to keep the water behavior consistent with the target strength and finish without overwatering the batch.
Pre-placement checks matter because you’re shaping strength and surface quality from the very first stir. Check moisture content by feel and provide quick, simple slump cues to flag if the mix is too stiff or too wet, then assess cleanliness and bond potential between sand and cement, watching for organic material, salts, or gypsum that could impair performance. Have the right tools—sieve sizes, wash drums, or portable screeners—and plan water containment and dust controls; document your field decision on washed versus unwashed sand, batch sources, and any adjustments to slump or admixtures so future batches stay consistent and predictable.
When to buy washed vs. wash on-site
Buying pre-washed sand is ideal for large projects where transport costs are manageable and availability is guaranteed.
On-site washing might be more feasible for smaller jobs or when local sand sources aren’t washed but are of good quality. It saves on transport but requires proper equipment and technique.
Consider these factors:
- Project scale: Large projects favor pre-washed sand due to consistent quality and reduced logistical issues.
- Transport costs: For smaller jobs, washing on-site might be cheaper despite initial equipment investment.
- Sand source quality: If local unwashed sand is of good quality, consider washing it on-site for better control over the process.
Tools, materials checklist, and visual checkpoints
Before accepting any sand delivery, use this checklist to ensure quality and prevent issues later on.
- Sieve/gradations report: Check for fines content and gradation to meet your mix design needs. Too many fines can cause strength loss, while too few may lead to poor workability.
- Moisture check: Ensure sand moisture is within acceptable limits (usually 5-10%) to maintain target water-cement ratio.
- Clean water supply: Have a clean water source ready for washing or adjusting mix proportions.
- Scalping screen: Use this to remove oversized particles that could cause finishing problems.
- PPE (Personal Protective Equipment): Safety glasses, gloves, and dust masks are essential when handling sand and cement.
- Visual inspection: Look for organic material, salts, or gypsum that could impair strength or finish. Sand should be uniformly colored with no visible contaminants.
Quick rule: If in doubt, test a small batch before committing to the entire delivery.
Mixing and batching quality checks
Once you’ve selected your sand, perform these quick checks to confirm it performs as expected with your design mix.
Moisture adjustment: Pre-wet aggregates to maintain target water-cement ratio. Too much or too little water can affect strength and workability.
Trial mixes: Make small trial batches to observe workability, finish quality, and slump. Adjust mix proportions as needed.
Slump test: Perform a quick slump test to ensure the mix meets your required consistency. A slump that’s too high or low may indicate issues with sand quality or mix design.
Cost, Environmental Impact, and Lifecycle Trade-Offs
Washed sand often has higher upfront material and transport costs. Over the life of the concrete, maintenance and repair needs can change the total cost. Washing affects water use and how you handle sediment and wastewater.
For DIY, know that washing can improve bond and finish but may require additives or sealants to manage workability. The decision matters for regional supply, water availability, and any permitting for wash water. Check labels and manufacturer instructions for what’s recommended, and compare long-term costs instead of just the sticker price.
Upfront vs. Lifecycle Cost Considerations
Washed sand might seem pricier upfront, but it can save you money in the long run.
Initial Cost: Washed sand costs more due to processing. Unwashed is cheaper but may need extra additives or repairs later.
Lifecycle Costs: Cleaner sand reduces maintenance and repair needs, extending your concrete’s service life. Consider this when calculating total cost over the structure’s expected life.
Environmental Impacts and Regulatory Issues
Washing sand has environmental implications, mainly water usage and waste management.
Water Consumption: Washing requires significant water. Check if it’s a concern in your region due to scarcity or droughts.
Effluent/Sediment Management: Wastewater from washing needs proper treatment before discharge. Sediments should be handled responsibly to prevent pollution.
Regulations: Check local discharge regulations and consider water-reuse options to minimize environmental impact.
Performance Under Different Climates and Durability Implications
Washing sand changes how it interacts with cement by reducing fines and organics, which tightens the pore structure and lowers capillary action. That cleaner sand resists water ingress better and improves freeze-thaw durability, especially in climates with regular cycles. Unwashed sand brings fines that can trap moisture and create weaker bonds over time.
In practice, climate drives the choice: muddy, humid, or salt-exposed sites, and dry, dust-prone zones all behave differently under freeze-thaw and moisture cycling. For DIY slabs and pavers, cleaner sand often means less maintenance, fewer crack issues, and longer intervals between sealing or repointing—check labels and manufacturer guidance for moisture limits and grading to decide what you need for your project.
Freeze-thaw, drainage, and moisture-related performance
Cleaner aggregates in washed sand allow for better drainage. This reduces the risk of internal moisture pockets that can worsen freeze-thaw damage.
Unwashed sand contains fines and organic material that can clog pores and capillaries, leading to water entrapment. When temperatures drop, this trapped water freezes and expands, causing cracks and structural weakening.
In freezing northern zones, washed sand is preferable as it promotes better freeze-thaw durability. It also reduces the risk of efflorescence, a common issue in concrete made with unwashed sand.
In wet climates, while both types of sand can be used, proper drainage and moisture management are crucial to prevent capillary action from drawing water into the concrete, leading to potential damage.
Long-term durability and expected maintenance
Cleaner sand in concrete typically reduces long-term degradation mechanisms like raveling (surface wear), scaling (flaking of the surface), and staining. This is due to better bonding between cement paste and aggregate, reducing the likelihood of delamination.
Unwashed sand can contain contaminants that weaken this bond over time, leading to increased maintenance interventions like re-coating or applying sealers more frequently.
In arid/dust-prone regions, while both types of sand can be used, the cleanliness of the aggregate is crucial for maintaining bond strength and preventing dust from migrating into the concrete’s surface, causing deterioration over time.
Maintenance frequency depends on climate and local conditions. Regular inspections are recommended to monitor for signs of freeze-thaw damage, efflorescence, or moisture cycling.
Common Mistakes, Troubleshooting, Safety, and Project Planning Checklist
Common mistakes include misjudging sand type (washed vs unwashed) and fineness, using the wrong cement-to-sand mix, ignoring dust and impurity limits, and not accounting for moisture which affects workability. This section also covers a quick troubleshooting flow and safety and planning guidelines to help you get a solid, durable job.
You’ll learn a practical troubleshooting order for symptoms like weak bonding, dusting, or cracking, and how to adjust after testing. The safety notes cover PPE, dust control, ventilation, and waste handling, while the planning checklist helps you decide washed vs unwashed sand, washing steps, and schedule so you don’t get caught short. Following this guidance saves time and avoids disappointing results on your project.
Top mistakes to avoid and quick fixes
Before you start mixing, review this checklist to avoid common pitfalls.
- Misjudging sand type: Unwashed sand in critical mixes causes weak bonding. Use washed for high bond needs.
- Insufficient washing: Dust and impurities reduce strength. Wash thoroughly or use washed sand.
- Ignoring supplier data: Check fineness modulus, moisture content, and impurity limits.
- Improper ratios: Wrong cement-to-sand ratio affects workability and strength. Stick to recommended ratios.
- Neglecting dust limits: Excess dust causes efflorescence and weakens concrete. Keep dust below 5%.
- Ignoring moisture effects: High moisture reduces workability. Control water demand with admixtures or rehydrate.
- Failing to align selection: Consider load, environment, and curing needs when choosing sand type.
- Not testing batches: Test potential mixes for strength and workability before pouring.
Quick rule: Always test and adjust your mix design based on the specific sand you’re using.
Safety and handling precautions
Protect yourself and your crew with these safety measures during sand handling and washing.
- PPE: Wear respiratory protection, eye protection, and gloves when handling dry sand.
- Dust control: Wet down sand and wash areas to suppress dust.
- Safe washing: Use proper washing techniques to avoid slurry buildup and slips.
- Waste management: Dispose of slurry responsibly, following local regulations.
- Ventilation: Ensure adequate ventilation in enclosed spaces to prevent silica dust accumulation.
- Permitting: Check if environmental permits are needed for washing and disposal.
- Training: Train crew on safe handling, washing, and disposal procedures.
Quick rule: Never compromise safety for speed. Always follow proper procedures.
Project planning and selection checklist
Use this checklist to make informed decisions before starting your project.
- Establish sand source criteria: Consider location, reputation, and certifications of sand suppliers.
- Decide on washed vs unwashed: Based on required bond and finish, choose the right sand type for your needs.
- Plan washing workflow: Determine if you’ll wash on-site or use pre-washed sand.
- Confirm equipment training: Ensure crew is trained to operate mixing and washing equipment safely.
- Set realistic schedule: Account for material delays and weather impacts on your timeline.
- Budget with contingency: Allocate funds for potential material price fluctuations and delays.
- Consult experts: Talk to suppliers, labs, or engineers about specific project needs and challenges.
Quick rule: Thorough planning upfront saves time, money, and prevents costly mistakes later on.
Conclusion
Choosing the right sand makes concrete safer, stronger, and easier to finish. Stay disciplined about what you mix with, how you prepare it, and how you cure it, and you’ll avoid costly repairs and ugly patchwork down the line.
First, verify your sand choice and its condition before you mix. confirm the wash status and particle size, test a small batch to see how it bonds and finishes, pre-wet or dry the sand as your recipe calls for, mix with clean water and tools, and keep the work area dry and well-ventilated. Follow a simple sequence: inspect, measure, mix, place, compact, cure, and protect the surface from moisture or temperature swings during setting.
Common mistakes to avoid are using unwashed sand for critical bonds, rushing mixing or placement, and skipping tests or proper curing. Always wear eye and respiratory protection when handling sand and cement, keep dust down, and clean tools promptly. If you’re unsure about the sand’s quality or the climate needs for your project, don’t push ahead—consult a pro before you commit to a full mix.
The right move now is to plan a small test patch, confirm sand suitability, and then scale up only after you’ve seen the initial results. With careful checks and concrete-safe habits, you’ll finish with a solid, durable surface you can be proud of.
FAQ
Does washed sand really make concrete stronger than unwashed sand?
Strength differences depend on the dirt and fines in the sand. Washed sand tends to be cleaner, which can reduce unnecessary voids, but there’s no magic number—check the sand’s label or instructions from the supplier for guidance.
How does sand wash status affect the finish and surface texture of concrete?
Clean sand usually yields a smoother mix with fewer specks and better aggregate exposure control. Unwashed sand can leave more surface irregularities or stains if residues are left on the surface after finishing.
Can wash status cause bonding issues between concrete layers or with toppings?
Residue or fines from unwashed sand can interfere with bonding in some mixes. If you’re layering or topping, verify with the product instructions and test a small batch to see how it adheres.
Which option is more cost-effective and environmentally friendly for DIY projects?
Unwashed sand is typically cheaper and may use less processing, but washing reduces contaminants that can affect durability. Compare local availability, transport, and your project’s long-term performance needs, then weigh the trade-offs.