
Introduction
You can resurface a spalled concrete garage floor without full replacement by applying a concrete resurfacer and following proper prep steps.
This guide walks you through the prep, repair, and finishing steps, plus practical tips for achieving a durable, smooth surface.
You’ll learn what materials work best, how to patch spalls, and how to prevent future damage with simple maintenance.
Related: Transolid vs Swanstone: An In-Depth Comparison of Two Leading Solid Surface Brands.
Key takeaways
- Identify spalling by flaking surface, hollow sounds, and loose, powdery concrete beneath.
- Test delamination with pry bar in inconspicuous area; extensive movement requires repair.
- Clean dust and debris, seal cracks, and moisture test before overlays.
- Choose patching, partial resurfacing, or overlay based on delamination extent and moisture.
- Use cementitious overlay with proper bonding agent for best adhesion.
- Follow exact cure times, weather windows, and ventilation for a durable finish.
- Apply sealer after cure to protect against future moisture intrusion.
Table of Contents
- Introduction
- Key takeaways
- What is concrete spalling and how to diagnose severity
- Common causes of garage-floor spalling (including climate and installation factors)
- Safety, PPE, and dust control essentials before starting
- Tools, equipment and materials checklist
- Surface preparation: removing loose concrete and testing for delamination
- Repair methods — patching vs. partial resurfacing vs. full overlay
- Step-by-step guide to resurfacing with a cementitious overlay
- Application and cure times, weather windows, and realistic project timeline
- Bonding agents, primers and when to use epoxy vs. latex primers
- Protective coatings and sealers after resurfacing
- Costs, labor estimates, and a DIY vs. professional decision guide
- Maintenance plan to prevent recurrence of spalling
- Common DIY mistakes and troubleshooting guide
- When resurfacing is NOT appropriate — signs you need full replacement or structural repair
- Appendix: quick-reference visual checkpoints, material specs, and suppliers
- Conclusion
- FAQ
What is concrete spalling and how to diagnose severity
Spalling is when concrete outwardly fails or flakes away, distinct from surface scaling or pitting, and often progresses from water intrusion, freeze–thaw cycles, corrosion of embedded rebar, or improper curing. It shows up as edge chipping, hollow sounds when tapped, and a rough or flaky surface rather than a smooth, intact face. Distinguish surface spalling from deeper, structural damage by noting whether the loss remains shallow or indicates a reduced cross-section and potential failure risk.
Look for practical signs you can observe without tools: exposed aggregate or broken concrete beneath the surface, pale or damp patches, a damp odor, and edges that feel jagged rather than uniformly smooth. Differentiate shallow flaking from deeper damage by assessing whether rebar is exposed, hollow areas are growing, or there is rust staining that signals embedded steel corrosion. Use a quick triage checklist to decide if patching is feasible or if professional evaluation is needed, focusing on extent and depth, moisture source, active wetness, coving and slope to drains, and safe demolition and dust control steps.
Surface vs. structural spalling — decision criteria
First check how deep the damage goes. Surface spalls are shallow—typically less than 10–20 mm—and the reinforcing steel is not exposed. Structural spalling goes deeper, reveals rebar, or leaves chunks missing that change the member’s shape.
Tap the concrete with a hammer or screwdriver to listen for hollow sounds; widespread delamination or long areas that ring hollow point to a structural problem. Also look for rust stains and active cracking radiating from the spalled area—those are strong signs the reinforcement is corroding and the issue is beyond cosmetic.
Quick triage: if depth is shallow, no rebar exposure, no hollow areas, and no active cracks, it’s usually repairable without replacing the member. If rebar is exposed, section loss is apparent, or the member shows deflection or load-related distress, assume structural and call an engineer.
Delamination depth assessment and repair thresholds (quick matrix):
- Surface-only spalling with no rebar exposure, no extensive hollow sounds, and no active cracking. Proceed with patch repair and surface preparation per the project plan. Monitor for progression.
- Moderate delamination. Rebar may be exposed in a localized area or hollow sounds may be present in a band. Patch repair can be feasible if the area is stabilized, moisture source is controlled, and there is no spanning structural member distress. Recommend minor patch + local sealant/overlay with surface prep before applying repair mortar.
- 40 mm (1.6 in) or any visible rebar exposure, significant loss of cross-section, or deflection: Structural concern. Patch repair alone is unlikely to restore capacity. Treat as potential structural repair or replacement and consult a structural engineer. Plan for temporary support and a formal remediation strategy (overlay, injected epoxy, or partial replacement as advised).
Tap the concrete with a hammer or screwdriver to listen for hollow sounds; widespread delamination or long areas that ring hollow point to a structural problem. Also look for rust stains and active cracking radiating from the spalled area—those are strong signs the reinforcement is corroding and the issue is beyond cosmetic.
Quick triage: if depth is shallow, no rebar exposure, no hollow areas, and no active cracks, it’s usually repairable without replacing the member. If rebar is exposed, section loss is apparent, or the member shows deflection or load-related distress, assume structural and call an engineer.
Visual checkpoints and photo examples to document damage
Take clear close-ups of the spalled area from several angles: one straight-on, one at 45 degrees, and one showing the spall in context with the whole member. Include a ruler or tape in the frame so depth and scale are obvious.
Photograph any exposed or corroded rebar, rust stains, nearby cracks, and connections to beams or supports. Capture wider shots that show adjacent areas and any signs of movement or settlement. These images speed up a pro’s assessment and help you track progression over time.
Tip: Date-stamp or keep a simple log with each photo: location, approximate depth, hammer-test result (sound: solid/hollow), and whether water or salt exposure is present. That record is gold when deciding repair vs. replacement.
Common causes of garage-floor spalling (including climate and installation factors)
How poor finishing and curing create weak surface layers
Finishing too soon and troweling while bleed water is still on the surface locks that water under a dense skin. That skin looks smooth at first but is brittle and prone to flaking when stressed by tires or small impacts.
A high water‑to‑cement ratio dilutes strength at the top. It makes the paste weak and easy to dust or spall. Likewise, skipping the proper curing window prevents the concrete from gaining strength and bond at the surface.
Quick fixes on the job—like overly aggressive hand-troweling or cutting curing time—always show up later as a thin, weak layer that flakes off. Do the job right: wait to finish, control water, and keep the slab moist long enough to cure.
Environmental and local-climate considerations
Match materials and methods to your climate. In freeze‑thaw zones use an air‑entrained mix and proper jointing so trapped water can expand without popping the surface. Coastal garages need mixes and coatings that resist chlorides from salt spray and road salt.
Hot, dry regions demand faster curing practices to prevent plastic shrinkage—use windbreaks, fogging, or curing compounds. In all climates, vehicle fluids and deicing salts in garages speed up deterioration, so choose dense, well-cured concrete and consider a protective floor coating.
Placement technique matters as much as mix design. Proper consolidation, reinforcement placement, and timely curing will make the slab live longer in whatever climate you have.
Safety, PPE, and dust control essentials before starting
Before starting any grinding or shotblasting, equip yourself with essential PPE: properly fitted P100/HEPA respirators, ANSI-rated eye protection, hearing protection, chemical-resistant gloves, and sturdy footwear. Pair this with awareness of silica-dust hazards, regulatory basics that DIYers should know, and a strong emphasis on wet methods and HEPA vacuums to minimize dust during work.
Wet grinding or slurry methods reduce airborne silica exposure, while dust-control tools such as HEPA-filter vacuums, dust shrouds, containment barriers, and localized exhaust help keep the work area safe. Safe-use practices—lockout/tagout basics, careful cord routing, moisture management near water, grounding, and minimizing kick-back—are essential for a cleaner, legal, and less disruptive jobsite. A practical pre-job check includes assessing ventilation, scheduling, neighbor considerations, and a plan for proper disposal of silica-containing waste to ensure compliance and reduce health risks for DIYers and helpers alike.
Containment, ventilation, and cleanup best practices
Seal off the work area before you start. Tape plastic to doors and windows and create a clear boundary so dust and slurry don’t migrate through the house.
Run negative pressure if you can—box fan blowing out through a window with a HEPA filter in-line works for DIY jobs. Keep exhaust away from neighbors and avoid re-circulating contaminated air. For rinse water and abrasive waste, collect and contain it; let solids settle, decant clear water to sanitary drain only if allowed locally, and bag the solids for hazardous-waste disposal when required by local rules.
Do not sweep dry dust or hose it into storm drains. Use wet methods and a HEPA-equipped vacuum for cleanup, and label and double-bag contaminated materials for disposal according to your municipality.
Tool-specific safety tips (grinders, shot blasters, acid etches)
Quick checks and practical settings for the gear you’ll likely rent or buy. Keep PPE and dust controls at hand and follow manufacturer guards and speed limits.
- Angle grinder Handy for edges and small spots. Use a 4–5″ cup or flap wheel rated for your RPM. Hold two hands on the tool, keep guards on, and avoid cutting with the side of the wheel.
- Hand-held floor grinder For small slabs and patch prep. Match grit/diamond size to the surface; run at manufacturer RPM. Move slowly, keep water feed low-to-moderate, and use a HEPA vac or wet method to control dust.
- Walk-behind grinder Best for larger floors; rentable for $80–$200/day. Use correct cup wheel and slow consistent passes. Don’t force the machine—let it do the work and maintain negative pressure in the room.
- Shot blaster Aggressive profile for thick coatings. Check abrasive size and blast pressure; use enclosed or ventilated units. Rent only if you can contain the blast area and collect grit—this creates a lot of respirable dust without HEPA containment.
- Wet diamond cup Use for heavy grinding with slurry control. Keep a steady water feed to suppress dust and avoid dry grinding. Be prepared to collect and treat rinse water and solids.
- Acid etch Chemical etching for small areas or stains. Use the correct dilution and neutralizer per label. Work outside or ventilate strongly, wear chemical gloves and eye protection, and never mix acids with other cleaners.
- Scarifier/planer Removes coatings and trip hazards quickly. Use low-speed settings and multiple light passes. These make coarse dust—always pair with shrouds and HEPA vacuums and consider professional rental setup.
- HEPA vacuum Critical for cleanup and tool shrouds. Use a true HEPA-rated unit, not just a shop vac. Empty following safety steps and replace bags/filters as recommended.
Tools, equipment and materials checklist
Clear separation of tool tiers is the focal point, outlining DIY-friendly options such as handheld grinders, basic vacuums, and simple mixing paddles versus pro-grade gear like diamond cup wheels, shot blaster or scarifier, and commercial pressure washers, with brief usage notes and safety reminders for each category. The materials catalog covers essential patching compounds like polymer-modified patch, overlays, bonding primers, surface sealers, and compatible extenders to ensure adhesion and durability. Guidance on equipment specifics remains model-agnostic, focusing on grinder wattage, water-fed versus dry diamond tooling, and sensible replacement choices to match floor size and project scope.
This approach helps readers plan a practical, safe workflow from prep through cure, avoiding delamination by matching patch or overlay products to the slab and testing compatibility on site. It also supports budgeting and sourcing decisions—whether to rent or buy, which tools stay on-site, and how to maintain gear for repeated jobs—while offering clear sequencing tips for prep, patch, overlay, primer, and seal stages. By framing what to use at DIY scale versus pro jobs, the guidance empowers a steady, efficient jobsite routine aligned with ventilation, safety gear, and realistic cure-time expectations under varying temperature and humidity conditions.
Rental vs. buy recommendations and estimated costs
Big, heavy machines pay to rent unless you run concrete work regularly. If you’re doing a single driveway or patio, rent grinders, shot blasters, scarifiers and pressure washers by the day or week.
Typical rates: angle/grinder with diamond cup about $30–$60/day, walk-behind grinder $150–$300/day, shot blaster or scarifier $300–$600/day, pressure washer $50–$150/day. Expect to buy consumables—diamond cups, discs, vacuum bags, abrasive—at another $30–$200 depending on the job size.
Rule of thumb: buy small hand tools and mixing gear; rent large walk-behind equipment unless you’ll use it more than a few times a year. If equipment uptime matters (tight schedule or large area), hire a contractor—the labor and reliability often offset rental hassle.
Material specs and recommended product types
Material choice controls durability, bond and appearance. Pick products rated for exterior concrete overlays and compatible with your substrate and sealer.
- Polymer-modified overlay Use as the wearing surface for repairs and decorative overlays. Look for cementitious mixes with polymers or acrylics for flex and adhesion. Avoid plain portland mixes—those crack and delaminate under freeze/thaw.
- Latex/acrylic mortar Use for patching and feathering low spots before overlays. Choose mixes labeled latex- or acrylic-modified with good compressive strength. Unmodified mortars can be weak and will fail at the edges.
- Epoxy bonding primer Apply between old concrete and new overlay when specified. Pick epoxies formulated for concrete with high solids and non-sag properties. Skipping a proper primer often causes bond failure and peeling.
- Polymer-modified patch Use for deeper repairs and holes over 1/2 inch. Look for shrinkage-compensated, polymer-modified repair mortars. Ordinary patching compounds will shrink and crack in larger voids.
- Penetrating silane/siloxane Use as your water-repellent sealer for long-term protection. Choose silane or siloxane with siloxane-silane blends rated for concrete and UV exposure. Film-forming sealers are easier to spot but can trap moisture and cause staining or blistering.
- Concrete densifier Use where abrasion resistance matters before sealing. Select sodium or lithium silicate products labeled for densifying. Using a densifier incorrectly (over-application) can leave white residue or interfere with some toppings.
- Bonding additives Use in the mix when manufacturer requires for extra adhesion and flexibility. Look for polymer liquid additives compatible with the overlay system. Substituting random additives risks poor cure and reduced strength.
Surface preparation: removing loose concrete and testing for delamination
Surface preparation focuses on removing loose concrete and identifying delaminated zones before resurfacing, using a clear sequence: sweep to remove debris and oil stains, pressure wash the slab to a clean, dry substrate, pare back any loose spall with a chisel and hammer, then perform practical delamination tests and mark the repair areas for subsequent patching. The tests—chain drag, hammer rebound/Schmidt-type checks, and optional infrared thermography—help distinguish solid from compromised concrete, while a consistent marking system records depth, moisture, and intended repair zones.
This approach matters on a DIY or jobsite level because proper prep directly impacts adhesion, durability, and the longevity of repairs, reducing future failures and costly callbacks. By documenting delamination results and clearly outlining where repairs are needed, you create a repeatable workflow that guides patching, epoxy priming, and moisture control before resurfacing. Emphasizing PPE, dust control, and ensuring a dry or properly conditioned surface protects workers and improves patch performance, making the entire process safer and more predictable.
Chemical cleaning and oil stain removal
Start with a degreaser to break up oil and grease so the patch or overlay can bond. Use a commercial concrete degreaser or heavy-duty cleaner (TSP alternatives or citrus-based degreasers work well). Apply per label, let it dwell, scrub with a stiff brush, then rinse thoroughly with a pressure washer.
Stubborn stains may need a poultice or a second application. For small spots, apply a paste, cover with plastic, let it sit overnight, then remove and rinse. Always follow product directions and rinse until runoff is clear.
Important: allow the slab to fully dry before priming or applying repair material. Moisture and residual oil are the two biggest causes of bond failure.
Mechanical prep: grinding, shot blasting, and profile targets (CSP)
For overlays aim for a Concrete Surface Profile between CSP 2 and CSP 4 depending on overlay thickness. CSP 2–3 works for thin toppings; CSP 3–4 for thicker overlays or heavy-duty coatings. The goal is enough texture for mechanical bite without over‑roughening the slab.
Use diamond grinders or planetary grinders for flat areas and shot blasting where you need deeper cleaning and stronger profile. Work in passes, check the surface regularly, and keep dust down with vacuums or water where appropriate. Wear PPE and control run-off.
Final check: run your hand across the surface and use a tape test or replica media if unsure the profile is right. Mark and rework any spots that are too smooth before you move to priming and repairs.
Repair methods — patching vs. partial resurfacing vs. full overlay
For concrete garage floors, repair choices depend on damage severity: small spalls are best served by spot patching, medium damage benefits from feathered repairs that blend into the surrounding slab, and widespread deterioration calls for full garage overlays. Patching uses epoxy or cementitious patches, feathering requires careful feathered transitions and proper surface prep, and overlays need substantial bonding and curing to resist future spalling. Expect lifespans on the order of several years for spot patches, five to ten years for feathered repairs, and a decade or more for full overlays under typical use, with maintenance like sealing and joint upkeep extending those numbers.
This matters because the right method minimizes downtime, controls cost, and preserves structural performance without over-committing to a more invasive solution. A simple decision flow or checklist helps you assess area size, depth, and pattern, align materials with your budget, and plan moisture tests, crack sealing, bonding agents, and curing timelines to maximize adhesion and longevity.
Selecting the right patch material and technique
Pick materials that move with the slab and form a solid bond. The right mortar and bonding agent determine whether the repair lasts or fails fast.
- Polymer-modified mortar Use these for better flexibility and adhesion. Look for cement blends with polymers or acrylic modifiers. Avoid plain cement patching where movement or freeze–thaw occurs; it will crack and pop out.
- Bonding agent Apply a latex or acrylic bond coat to the substrate before patching. Check manufacturer instructions for cure time and dilution. Skipping a bond coat often causes weak bonds and delamination.
- Correct mix ratios Follow bag directions for water and additive amounts. Use a drill mixer for a lump-free mix and don’t add extra water. Over‑watering weakens the patch and leads to shrinkage cracks.
- Feathering technique Taper the edge back to sound concrete for a seamless transition. Keep feather layers thin and compact well. Thick feathered edges without reinforcement will chip and separate.
- Aggregate selection Match aggregate size to the repair depth and texture desired. Use fine sand or polymer fillers for thin patches; use coarser mixes for deep repairs. Wrong aggregate causes poor workability, visible staining, or weak patch cores.
- Curing practices Protect from rapid drying with damp curing or a curing compound. Maintain moisture per product guidance for at least 24–48 hours. Fast drying produces microcracks and poor strength.
- Surface prep Remove loose material, oil, and salts; roughen smooth concrete. Use mechanical cleaning or acid etch per product specs. Poor prep is the top cause of bond failure and early spalling.
- Reinforcement needs Add wire mesh or rebar for large or deep patches to control cracking. Tie reinforcement into sound concrete and cover with proper mortar thickness. Skipping reinforcement lets shrinkage and traffic forces split the repair.
When to choose a thin microtopping or 1/8″–3/8″ skim coat
Choose a microtopping when damage is shallow and you need a uniform finished look. These thin systems restore texture and hide minor pitting without adding much thickness.
Microtoppings work best over a sound, well-bonded substrate and are not a fix for structural spalling. Expect a wear layer that handles foot traffic and light vehicle use if you pick a product rated for that service. Do not rely on thin toppings to replace repairs where concrete is delaminated or deeply cracked.
Texture and finish choices range from smooth polished to broomed or non-slip. Thicker builds beyond about 3/8″ require special mixes or a scabble and rebuild approach. If you need durability under heavier traffic, consider a thicker overlay or full resurfacing instead.
Step-by-step guide to resurfacing with a cementitious overlay
This step-by-step guide shows a clear workflow for resurfacing with a cementitious overlay, starting with surface assessment and repair, continuing through moisture checks and profile conditioning, and ending with curing plans and defined return-to-service timing. It outlines prep, primer or bond coat selection, overlay mix types, mixing ratios, application methods, texture options such as stamp, broom, or skip-trowel, and the approximate times for each stage to keep the project on track. Key tasks include achieving the required surface profile, performing moisture tests (where applicable), determining working time, specifying joint treatment and control joints, and sequencing laying, texturing, and curing to minimize defects.
This approach matters for DIYers because thorough prep and moisture control help prevent adhesion failures, pinholes, and cracking, while a structured timeline reduces surprises, aligns crew efforts, and supports safe handling of materials and curing conditions. Understanding laydown thickness per area, texturing choices, and curing needs lets you plan temperatures, humidity, and drying intervals, ensures proper product performance, and avoids rework by anticipating recoat windows and safety margins. With these details, you gain confidence to complete the project efficiently, achieve a durable, professional finish, and return the surface to service in a predictable timeframe.
Step-by-Step Process
Follow these steps to take a worn slab to a durable, attractive overlay. Each step keeps the job moving and avoids common rework.
- Clear and inspect the slab. Remove dirt, oil, loose concrete, and vegetation so the overlay bonds. Check for active leaks or large structural cracks before you continue.
- Repair major damage and profile the surface. Fill large holes and use grinding or shot-blasting to create a rough profile; the overlay needs texture to grab. A simple scratch coat won’t bond on a glossy slab.
- Set up safety and site controls. Tape off edges, protect nearby surfaces, and put on PPE; dust and silica are real risks. Keep ventilation and a wet cleanup plan ready.
- Apply primer or bond coat as required. Use the product the manufacturer specifies to improve adhesion and reduce blisters. The surface should look uniformly damp but not ponding when it’s correct.
- Mix the overlay per directions and work in small batches. Follow water limits and mixing order to get the right consistency. Do a quick trowel test — it should spread smoothly without running.
- Place and screed the overlay to the target thickness. Work consistently and keep a wet edge to avoid seams. Check thickness with a gauge or straight edge as you go.
- Texture the surface while the material is still plastic. Use brooming, troweling, or stamps depending on the finish you want. A consistent stroke and pressure give a uniform look.
- Cure and protect the new surface. Follow the product’s curing window and keep foot traffic off until the minimum cure time. Cover with polyethylene or use curing compounds if temperatures or wind demand it.
- Final cleanup and inspection. Remove forms and protection, power-wash edges, and inspect for thin spots or delamination. If you find areas that failed, address them right away rather than later.
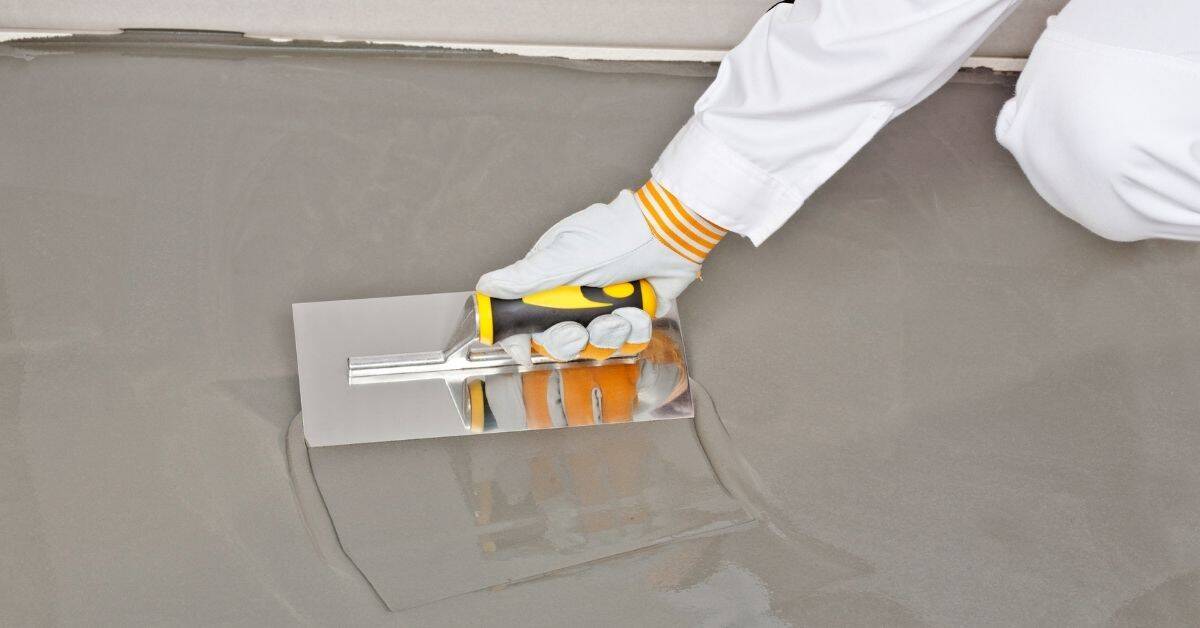
Mixing and applying polymer-modified overlays
Start by adding the liquid polymer to the mixer or bucket, then add most of the water called for. Add the dry cementitious blend slowly while mixing to avoid lumps. Keep to the manufacturer’s water limits — too much water weakens the cured overlay.
Mix until consistent, then let the slurry rest a minute and remix. Pot life is usually short; plan for continuous placement and do not exceed the stated working time. When applying, trowel or screed in even passes and maintain a wet edge to prevent cold joints.
Avoid entrapped air by mixing at moderate speed and using a margin trowel to consolidate edges. For seams, blend feathered edges and rework the joint while both sides are still plastic to hide lines and ensure bond.
Achieving a consistent finish and non-slip options
Choose the finishing tool to match the look: a steel trowel for a smooth finish, a broom for texture, or stamps for pattern. Keep tool pressure and speed consistent across the slab to avoid variations. Work the surface while it’s still plastic for the best uniformity.
For slip resistance, broadcast an aggregate like silica sand or crushed stone into the topcoat while it’s wet, then lightly broom or trowel to lock it in. Alternatively, use a textured topcoat or a fine broom finish for exterior walkways. Test a small area first so you can tune aggregate size and application rate to your preference.
Application and cure times, weather windows, and realistic project timeline
This section lays out the exact sequence of primers, patches, overlays, and topcoats, with realistic cure times and acceptable touch and overcoat windows, and it includes a practical 3–5 day DIY schedule with morning and afternoon blocks, built‑in curing periods, inspection checkpoints, and weather contingencies reflected in each phase. It also specifies minimum temperature and humidity windows, surface prep needs, substrate checks, and pot‑life guidance for adhesives, fillers, and overlays, plus recoat readiness, scuffing requirements, and clear overcoat intervals, so you can plan each stage around anticipated weather and indoor conditions.
Understanding these timelines helps avoid premature recoat failures, ensures proper adhesion, and allows for contingency planning if temperatures swing or humidity spikes, while outlining safety, ventilation, moisture‑control practices that influence cure rates, substrate moisture management, ventilation strategies, and final surface performance under varying indoor and outdoor scenarios. For DIYers, this context translates into fewer surprises on the jobsite, clearer milestone sign‑offs, and a workable approach to weather backups, material handling, daily inspections, rework time, and signaling criteria that keep the project moving toward a durable, professional finish in real project conditions.
Accelerating cures and cold-weather tips
Cold slows everything — primers, patches and overlays all take longer to firm up. Where I work, simple tricks speed things without risking the product. Warm the water you use for mixing to about 80–90°F (27–32°C) to raise reaction temps and shave hours off cure times.
Use chemical accelerators only if the product tech sheet lists them. Too much accelerator can reduce pot life or weaken the finish, so stay within manufacturer limits. For low-temperature installs, build a temporary shelter and use indirect heaters to keep the substrate and ambient air steady; avoid blowing hot air directly onto freshly applied coatings.
Keep materials warm before use — store bags and pails in a heated space overnight. If conditions are marginal, extend your weather window and plan extra cure time so you don’t walk on a surface too soon.
Hot-weather and humidity considerations
Heat and low humidity speed surface skinning while the mass underneath remains soft. That can trap solvents and cause blistering or poor adhesion. Work early in the morning or late afternoon when temps are lower and winds are calmer.
To slow rapid drying, mist the substrate lightly before application when allowed by the product spec, or use fogging/retarders the manufacturer approves. Damp-curing of cementitious patches for the first 24–48 hours helps prevent shrink cracks in hot, dry conditions.
If humidity is high, dry times lengthen and tack issues appear — keep an eye on dew point and avoid application if condensation is likely. When in doubt, follow the product’s temperature and humidity limits and give yourself extra time between coats.

Bonding agents, primers and when to use epoxy vs. latex primers
Primers improve adhesion by sealing micro-porosity, bridging tiny voids, and reducing contamination on spalled or prepared concrete so subsequent overlays can form a durable, uniform bond. They come in epoxy, acrylic, and silane chemistries, each with different bond strength, chemical resistance, cure times, and compatibility with common overlays. A clear decision framework helps: use epoxy primers for high exposure, traffic, or tough substrates, and latex/acrylic primers for quicker dry times and better tolerance to moisture, with attention to the expected finish and service conditions.
Before priming, verify essential surface conditions such as moisture content, surface profile, alkalinity, and contaminants, plus moisture vapor transmission to avoid debonding. Compatibility testing with overlays, sealers, or resurfacer materials—through spot tests and adhesion pull-off tests—helps confirm a viable path and defines recoat windows. Practical application guidelines cover dosing, ventilation, mixing, the primers’ film-building effects, and typical cure times to align smoothly with subsequent resurfacing steps for a durable, long-lasting result.
Testing adhesion before topping
Don’t guess—test. Start with simple spot checks: clean a few small areas, score the surface with a utility knife, then try to pry up a corner with a chisel or screwdriver. If the topping peels or crumbles instead of staying bonded, you’ve got a problem.
Use an adhesive tape test for a quick read: press heavy-duty tape down, rub it hard, then rip it off. If chunks come away, adhesion is poor. For a more reliable check, glue a small 2″x2″ patch of the same overlay or a construction-grade epoxy and try to pull it off after it cures. That mimics real conditions.
If you want a truly professional result and have access, rent a pull-off tester from the rental center. It measures pounds per square inch and tells you whether you meet the overlay manufacturer’s minimum. Whatever method you use, record the spot locations and results so you know where to clean, prime, or remove and repair before spreading the full topping.
Protective coatings and sealers after resurfacing
After resurfacing, the key choice is between penetrating sealers (silanes/siloxanes) and surface topcoats (acrylic or epoxy), with high‑performance options like polyaspartic or urethane offering the strongest resistance to oils, salts, and tire traffic. Penetrating sealers shield the substrate from within, while film-forming topcoats create a protective layer on the surface, and each approach has different durability, ease of inspection, maintenance cycles, and recoat needs influenced by climate and garage use. For garage floors routinely exposed to motor oil, road salts, chemical spills, and heavy vehicle use, acrylic, epoxy, or polyaspartic/urethane topcoats tend to deliver more durable abrasion resistance, clearer appearance, and more predictable long‑term maintenance compared to simple penetrants.
Applying after resurfacing requires careful surface prep, correct cure times, and compatible undercoats and topcoats, along with clear targets for film thickness, slip resistance, and sensible environmental conditions to maximize adhesion and performance over years of service. Understanding maintenance, schedule cues for recoat (typically several years between applications) and practical procedures for cleaning, spill response, mat use, and routine inspections helps DIYers extend protection, avoid premature wear, and plan timing around climate, garage usage, and seasonal temperature swings.
Choosing a topcoat for durability, chemical resistance, and appearance
Pick the coating to match how you use the garage. For heavy trucks and constant traffic, go with polyaspartic or high-solids urethane for impact resistance and fast return-to-service. For areas exposed to road salt and de-icing chemicals, a penetrating silane/siloxane sealer under a durable topcoat adds salt and moisture protection.
If you want a showroom look with color and gloss, acrylic or epoxy topcoats give the best appearance, but know that epoxies can yellow and wear faster under sunlight and heavy oils. Expect lifespans roughly like this: acrylics 3–5 years, epoxies 3–7 years depending on traffic, polyaspartics/urethanes 7–15 years, and silane/siloxane treatments provide longer-term substrate protection when used as a primer.
Plan maintenance around those lifespans: touch up high-wear spots yearly, recoat worn areas every 3–5 years for acrylic/epoxy, and consider a full refresh of polyaspartic/urethane every 7–10 years. A quick visual check after winter and oil stains treated promptly will extend any topcoat’s service life.
Costs, labor estimates, and a DIY vs. professional decision guide
This section breaks down typical material and tool costs for garage floor resurfacing—covering primers, sealers, overlays, patch compounds, and the hardware you’ll need—plus guidance on whether to rent equipment or buy it, and maintenance considerations for the finish. It also lists sample labor hours for three project sizes (small patch/overlay, medium garage, full-garage overlay), includes surface prep time (scarification, cleaning, moisture testing) and curing windows, and lays out decision criteria for DIY versus hiring a contractor so readers can compare realistic scenarios.
A contractor comparison framework is included, detailing what to request in quotes (scope of work, product brands and specs, surface prep details, contingency plans) and red flags, along with minimum licenses and insurance to verify, and how these choices affect warranty and long-term performance. Finally, the section highlights hidden costs and timing—possible extras for scarification depth, moisture mitigation, containment and cleanup, material lead times, and permitting—so readers can build quick budgets, weigh a simple DIY approach against a professional job, and justify the decision with a defendable cost plan.
Sample cost matrix (materials, tools, labor)
Numbers below are for a typical 2-car garage resurfacing. Ranges cover low, median, and high scenarios. Factors like rebar repair, deep delaminations, or heavy oil cleanup push costs up.
- Concrete primer Bond agents and primers improve adhesion. Expect $30–$120 per gallon depending on brand. Apply per manufacturer directions; skip it and your overlay likely peels.
- Cementitious overlay The main material: polymer-modified mix. Budget $2–$6 per sq ft installed for materials only. Choose the right mix for thickness—thin skim coats need stricter prep.
- Decorative toppings Color, flakes, or stains add finish and cost. Add $1–$4 per sq ft for supplies. Do a small test patch to confirm look before full application.
- Repair materials Patching mortar, epoxy for cracks, and rebar inhibitors. Typical repairs run $100–$1,000 depending on damage. Large delaminations or exposed rebar will drive the price to the high end.
- Hand tools Floats, trowels, mixers—basic set costs $100–$400. You can often borrow trowels; buy the mixer if you plan multiple jobs. Good steel floats make a big finish difference.
- Rented equipment Rotomixers, grinders, shot blasters rent for $50–$200/day. Grinders and dust control rental are worth it for proper profile and cleanup. Budget a rental pickup day to avoid surprise fees.
- Labor hours Small (spot repair) 4–8 hours. Medium (half-garage) 12–20 hours. Full overlay 24–40 hours for a two-person crew. Time changes with prep level and cure windows.
- Hiring pros Contractor bids often include warranty and cleanup. Expect $6–$15+ per sq ft for a full professional overlay. Higher bids usually reflect better prep, thicker systems, and insurance-backed warranties.
Warranty, longevity, and failure modes to expect
DIY overlays can look great at first. The common killers are poor surface prep, incorrect mix water, and trapped moisture. Those issues lead to delamination, blistering, or rapid wear within months to a few years.
Professionals reduce risk by following strict prep protocols, using industrial grinders or shot blasters, and controlling mix ratios and curing. Many contractors back their work with a limited warranty that covers adhesion and major defects for a set period. Read the fine print—warranties often exclude substrate issues or prior water intrusion.
Expect lifespan of 5–15 years for a properly installed overlay depending on traffic and exposure. Plan regular maintenance: clean, seal if recommended, and repair hairline cracks early. That routine keeps the system functional and preserves any warranty coverage.
Maintenance plan to prevent recurrence of spalling
A maintenance plan to prevent recurrence of spalling centers on a practical, repeatable routine: clean the surface regularly to remove dirt and efflorescence, respond to oil or chemical spills immediately with appropriate absorbents and cleaners, reapply penetrating sealers after resurfacing or when the prior coating shows wear, monitor cracks with simple marking and photography, and conduct seasonal inspections that reflect climate impacts. A centralized maintenance log should record dates, products used, surface conditions, photos, and reminders for upcoming tasks to track long‑term effectiveness.
For a DIY or jobsite reader, this approach translates into measurable, actionable steps that protect durability and save money over time. Following a clear schedule reduces the chance of early spalling masking signals or accelerated deterioration, while routine crack checks help you decide when sealing or more extensive repairs are needed. Keeping notes and photos across seasons builds a practical history you can reference to adjust frequency and product choices as conditions change and wear accumulates.
Seasonal checklist for freeze-thaw and coastal climates
Before cold sets in, walk the slab and deal with surface water paths, loose joints, and any active cracks. Reapply a penetrating sealer where needed to slow moisture entry—see the maintenance items above for timing and product choices.
For coastal homes, rinse salt from concrete after storms and pay extra attention to low spots where salt and spray collect. Salt accelerates deterioration, so keep surfaces clean and clear to reduce spalling risk.
After freeze-thaw events or heavy winter use, inspect for new damage and clear debris. Make small repairs promptly and schedule a follow-up check in spring to confirm the surface is stable.
Common DIY mistakes and troubleshooting guide
Common DIY mistakes in resurfacing include insufficient surface prep, incorrect mix and water management, skipping primers, weather and timing errors, and poor application discipline. These missteps can lead to weak bonds, dusting, laitance or contaminants, edge bonding failures, and curing problems that show up after the job starts. The key is to recognize the signs early—such as a dirty or slick surface, unusual film consistency, lack of tack, or unexpected sheen—and fix them with thorough grinding and etching, clean testing, correct water content, the right primer, proper weather planning, and consistent, even application.
Understanding these failure modes helps you save time and money on a jobsite by making fixes straightforward when detected early. Following product specs, performing small adhesion tests, and sticking to proven curing protocols reduces rework and improves long-term performance. This guidance emphasizes how to detect each issue, what concrete steps to take to fix it, and why timely intervention matters for a durable, professional-looking finish.
Repairing adhesion failures, pinholes, and hairline cracks post-install
First, remove loose or flaking material until you reach a sound edge. Lightly scuff glossy areas and wipe the surface clean and dry. If moisture is present, stop and dry the area before proceeding.
For pinholes and hairline cracks, force a narrow V-groove, brush out dust, apply a thin primer if the product calls for it, then fill with a compatible patching compound. Smooth and feather edges so the repair blends. Sand lightly when cured, re-prime the spot if needed, and finish with the same coating.
Consult a pro when cracks are wider than 1/8″, when adhesion failure covers more than about a square foot, or when you suspect ongoing moisture or substrate movement. Persistent or repeating failures usually mean a deeper problem that needs specialist assessment — don’t keep repainting over the symptom.
When resurfacing is NOT appropriate — signs you need full replacement or structural repair
Resurfacing is not appropriate when you see clear signs of structural trouble: wide, active cracks that repeatedly open and close, noticeable slab movement, and pronounced curling or spalling that suggests instability. Heavily corroded or exposed reinforcing steel, rust staining, or reduced rebar cross-section signal a loss of strength that can undermine a surface-only fix. A contaminated or unstable subbase, moisture intrusion, settlement, or frost heave further indicates that a full-depth repair or replacement is required rather than resurfacing, and if crack patterns show differential movement or underlying support is compromised, resurfacing will likely fail prematurely.
Understanding these signs matters because it helps you decide early and avoid costly failures. DIY work may cover minor maintenance, but serious cracks, movement, corrosion, or a compromised subbase require professional evaluation and often full-depth repair. Plan for crack monitoring over time, hammer sounding, moisture testing, and subbase sampling, plus consulting a structural engineer to confirm load-bearing capacity, outline permits, scope, the necessary actions, and how to manage access, temporary relocation, and protection of surrounding areas.
How to get a professional structural assessment
Call a structural engineer first if you see active or wide slab cracks, stepping in foundations, or any movement that affects doors and windows. For visible concrete damage, corrosion, or exposed rebar, bring in a concrete restoration contractor to evaluate repair options and methods.
When you book the visit, have clear photos, simple measurements of crack width and displacement, and any past repair records ready. Mark the areas of concern so the pro can find them quickly. These items speed up the assessment and help the engineer give a usable report.
The engineer will identify whether the issue needs structural repair or a full slab replacement—not resurfacing alone. Keep the written assessment and recommended repair scope; contractors will use that to provide accurate bids and work plans.
Appendix: quick-reference visual checkpoints, material specs, and suppliers
This appendix delivers a concise, field-friendly visual quick-check for resurfacing a garage floor, presented as a one-page workflow that pairs a targeted visual checklist with essential material specs and a starter supplier list. It enumerates surface cleanliness, absence of active spalling, uniformity of the existing slab, visible moisture signs, and crack or seam behavior after tapping tests, while detailing minimum compressive strength, flexural strength, adhesion properties, recommended CSP, cure time, and substrate moisture limits. A compact, at-a-glance compatibility checklist aligns resurfacer types, expected thickness, and substrate-prep steps (etching, grinding, patching) with the visual findings you record on site.
Having this context helps you source quality materials locally with confidence by checking certifications, batch traceability, MSDS availability, and warranty terms before purchasing. By mapping visuals to concrete specs and supplier options, DIYers can plan faster, reduce guesswork, and clearly communicate prep and performance expectations to crews. The one-page layout supports field use and easy printing, so you can verify readiness before pouring and quickly compare local suppliers and product lines at a glance.
Quick project planning timeline and printable checklist
Pick your weather window first: dry, mild temps for at least 48–72 hours. For a weekend job, plan prep Friday evening, application Saturday, and light use Sunday evening. For multi-day jobs, allow extra days between coats and surface testing.
Prep is king: clean, repair cracks, and profile the surface to the recommended CSP before you mix material. Mix and apply only when surface temperature and substrate moisture are within the product limits. Mark cure milestones on your calendar: tack-free, foot traffic, and full service times from the product data sheet.
Keep a printed checklist on site: surface prep done, primed, material batch and pot life noted, coat times, and final cure check. If anything looks off visually or during a simple thumb test, stop and re-check before proceeding.

Conclusion
By following a disciplined, safety‑first approach, you can restore a spalled garage floor without the cost and disruption of a full replacement while keeping future failures from creeping back in.
Now move step by step: verify there’s no active moisture or delamination in a small test patch, clear loose material, and clean to a solid bond surface; decide whether you’ll patch, do a partial resurfacing, or a full overlay, then apply the chosen repair with the correct bonding agent or primer; skim over the surface, install the cementitious overlay or patch, allow proper cure time within the recommended weather window, and protect the area with the right sealer or coating after it hardens. Do each step in the order that matches your plan, and document any measurements or observations so you can replicate success elsewhere in the same floor.
Common mistakes to avoid include skipping PPE and dust control, rushing cure times, and skipping small-area tests that would flag moisture, poor bonding, or incompatibilities between primer and overlay. Also avoid applying coatings over damp or dusty surfaces, and never mix or apply products outside the manufacturer’s guidelines. Keep safety at the top: use respirators or dust masks when sanding or cutting, and ventilate; work in a dry, mild weather window and monitor temps to maintain proper cure conditions.
If signs point to hidden structural issues, or you’re unsure about moisture, substrate integrity, or the appropriate repair approach, it’s wise to call a professional rather than push ahead. A strategist’s mindset—measure twice, act once—keeps you from costly mistakes and shows solid results you can stand on for years. Stay practical, stay careful, and you’ll turn a rough garage floor into a durable, dependable space you’ll trust every time you walk in.
FAQ
What does it mean to resurfacer a spalled concrete floor?
Spalling means chunks are flaking off the surface. Resurfacing fills in the pits and gives you a smooth, clean top layer. It’s not a full replacement, but it’s a sturdy fix when done right.
Can I resurfacer over old cracks and flakes in the garage floor?
You can, but you should address the big cracks first. Fill cracks with concrete crack filler or epoxy before the resurfacer goes down. If you skip cracks, they’ll come back through the new surface.
What should I do about moisture under the slab?
Check for moisture with a simple test before you start. If you’ve got hydrostatic moisture, fix that first or the resurfacer will peel. A proper moisture barrier is worth the extra effort.
What are the do’s and don’ts during application?
Do mix the resurfacer to the manufacturer’s specs and work in small sections. Don’t rush; apply evenly and avoid puddles. Don’t skip cleaning and priming—the surface needs to bite for the patch to last.