
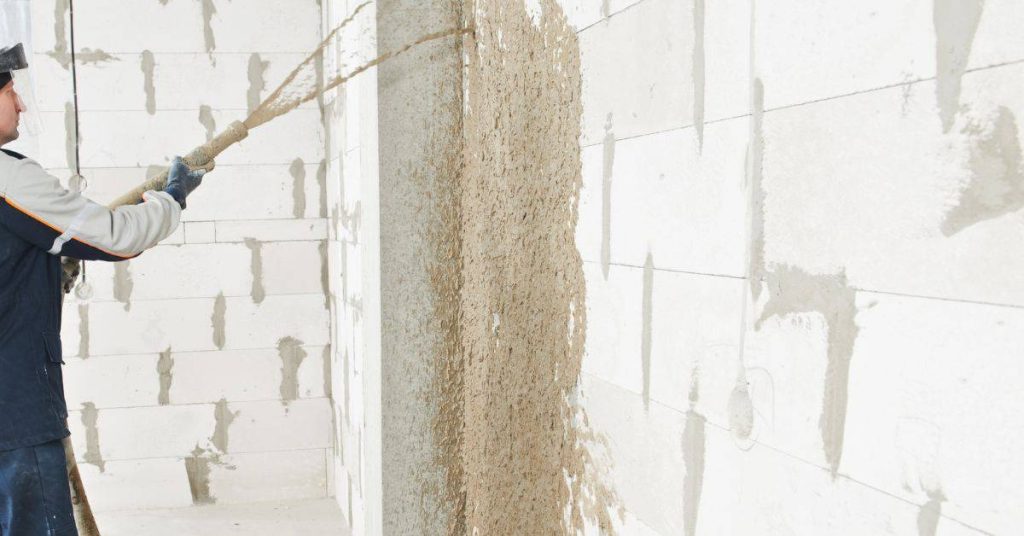
Introduction
Stucco over CMU block is a thin cement-based finish applied over masonry that needs a good bond, a proper scratch key, and planned crack control to last. Bonding agents, scratch coats, and reinforcement help the stucco grip the block and manage movement, but check product labels and local rules for compatibility and required curing times. I’ll describe practical ways to test adhesion, build an effective scratch key, and reduce cracks without inventing specs you must confirm.
Think like a foreman: inspect the block, pick a bonding approach that your materials support, and plan for control joints and reinforcement before you mix. Use mixes, sand blends, and additives recommended by manufacturers and apply by hand or spray with consistent technique while monitoring quality control as you go.
Key takeaways
- Verify bonding agent compatibility with CMU and plaster, follow manufacturer instructions.
- Conduct adhesion checks and document cure environments for reliable results.
- Use specialized stucco products to boost crack resistance and bond across CMU.
- Optimize sand blends and polymer additives for better workability and longevity.
- Choose application method based on project: hand trowel for finish, spray for base coats.
- Ensure proper curing environment and joint detailing to prevent cracking; wear PPE.
Table of Contents
- Introduction
- Key takeaways
- Why Apply Stucco over CMU: Benefits, Limitations, and Decision Criteria
- CMU Substrate Assessment and Surface Preparation
- Bonding Agents and Primers: Selection and Application
- Scratch Keys, Lath, and Mechanical Fastening over CMU
- Stucco System Choices and Fiber Base Coat Advantages
- Curing, Environmental Controls, and Quality Assurance
- Crack Control, Reinforcement Strategies, and Joint Detailing
- Tools, Materials Checklist, Cost Factors, and Safety
- Conclusion
- FAQ
Why Apply Stucco over CMU: Benefits, Limitations, and Decision Criteria
Stucco over CMU can improve appearance, shed wind‑driven rain, and enhance fire performance while also offering opportunities for added durability and thermal improvement. Those gains depend on correct system choice—traditional cement stucco or polymer‑modified mixes—and on managing moisture and movement at the block face.
Limitations include risk of cracking, moisture management challenges, and the need for proper curing, maintenance, and substrate compatibility before installation. Before committing, check manufacturer instructions and local code implications, evaluate the CMU condition, required flashing/details, budget vs. life‑cycle value, and whether retrofit or new construction better meets your goals.
When to choose stucco over other claddings
Stucco is a versatile finish for CMU blocks, but it’s not always the best choice. Here are scenarios where stucco shines and when alternatives might be better.
Choose stucco: When you want a classic, timeless look. Stucco offers a wide range of colors and textures to match any architectural style. It also provides excellent weather protection and fire resistance.
Consider alternatives: If budget is tight, vinyl siding or fiber cement may be more affordable. For low-maintenance projects, consider EIFS (Exterior Insulation and Finish Systems) or brick veneer. Stucco requires proper curing and maintenance to last.
Typical failure modes to watch for
Stucco over CMU can fail if not installed correctly or maintained properly. Here are common problems and their causes:
Delamination: Peeling or separating of the stucco from the CMU substrate is often caused by inadequate surface preparation, improper mixing, or insufficient curing.
Cracking: Cracks can form due to settlement, thermal expansion/contraction, or inadequate reinforcement. Excessive cracking may lead to water intrusion and further damage.
Efflorescence: A white, powdery deposit on the stucco’s surface indicates moisture migration through the CMU blocks. This could be due to improper flashing, lack of damp-proofing, or high moisture content in the CMU itself.
CMU Substrate Assessment and Surface Preparation
A thorough substrate assessment identifies crumbling mortar, cracked blocks, efflorescence, trapped moisture, and any delaminating coatings that must be repaired or removed prior to stucco. Confirm moisture history and perform moisture, pH, and porosity tests where indicated to establish readiness for bonding and curing.
Cleaning should remove dust, oils, and salts using pressure washing, brushing, or approved cleaners without over‑eroding the block; document repairs such as repointing or unit replacement. Create a uniform surface profile for mechanical keying—record profile depth or roughness so you can match bonding agent and application thickness to the prepared CMU.
Cleaning, degreasing, and removing contaminants
The first step to a strong bond is a clean surface. Here’s how:
Use a stiff brush or broom to remove loose dirt and debris. For oil stains, use a degreaser or mineral spirits. Scrub with a stiff-bristle brush until the stain lifts.
Efflorescence – those white salt deposits – need to go too. Use muriatic acid diluted 1:4 with water. Apply, let it sit for 5-10 minutes, then scrub and rinse thoroughly. Safety first: wear gloves, goggles, and a long-sleeved shirt.
Pro tip: Don’t use high-pressure washers on CMU. They can erode the surface.
Repairing cracked or spalled CMU and mortar joints
Before you stucco, fix those cracks and crumbles:
For small cracks, use a concrete repair caulk. For larger ones, remove loose material, brush out dust, then fill with a patching compound. Let it cure.
Spalled blocks need replacing. Remove the damaged unit, clean the cavity, insert a new block, and repoint the joints. Use a Type N or Type S mortar for best results.
Pro tip: Don’t ignore those hairline cracks. They can grow into big problems under stucco.
Managing moisture, cavity details, and through-wall concerns
Moisture is your enemy here. Here’s how to keep it in check:
First, ensure you have a proper drainage plane behind the CMU. This could be a vapor barrier or a cavity filled with insulation.
Install flashing at all openings – windows, doors, etc. – to direct water out and away from the wall.
Through-wall concerns: If you’re applying stucco directly over CMU, ensure there’s no moisture trapped inside. Use a moisture meter to check. If it’s wet, wait until it dries or address the source of the moisture before proceeding.
Bonding Agents and Primers: Selection and Application
Chemical bonding (adhesive primers, polymer modifiers) relies on adhesion to the CMU surface, while mechanical bonding uses scratch keys or lath to develop a physical lock; each method has distinct failure modes and climate or substrate scenarios where it performs better. Evaluate CMU pore structure, contamination, and expected movement to choose between a chemical bond, mechanical keying, or a combined approach.
Select bonding agents and primers per the product data sheet and verify compatibility with your chosen stucco finish and any polymer modifiers. Prepare the surface—cleaning, controlled dampening, and profile verification—and perform simple pull or scratch tests where practical to confirm adhesion before full application.
Types of bonding agents and when to use them
Bonding agents help stucco stick to CMU blocks. Here are three types:
Cementitious primers: These are thin, cement-based coatings that seal the CMU surface and promote adhesion. Use them on clean, sound CMU with minimal suction.
Acrylic bonding agents: Acrylics provide better adhesion on low-suction or smooth surfaces like painted or sealed CMU. They’re also great for humid conditions as they resist mildew.
Polymer-modified mixes: These are cement-based with added polymers for enhanced flexibility and bond strength. Use them when expecting movement in the substrate, like expansive soils or temperature changes.
Proper application techniques and compatibility checks
Apply bonding agents right to ensure a strong bond:
1. Prepare the surface: Clean, dampen (but not wet), and roughen CMU as per earlier steps.
2. Mix and apply: Follow manufacturer’s instructions for mixing and application thickness. Use a brush or roller for primers, and trowel for polymer-modified mixes.
3. Check compatibility: Ensure the bonding agent is compatible with your chosen stucco mix and finish. Consult manufacturers’ data sheets for guidance.
Simple adhesion tests and common mistakes to avoid
Before applying stucco, test the bond strength to catch any issues early:
- Pull-off test: Apply a small piece of duct tape, press firmly, then pull off quickly. If it pulls off easily, re-prepare and retry.
- Scratch test: Scratch the surface with a screwdriver or coin. If the scratch is easy to remove, re-prepare.
- Avoid applying too thickly: Excess bonding agent can weaken the bond. Follow manufacturer’s guidelines for application thickness.
- Avoid applying in extreme temperatures: Bonding agents need moderate temperatures (50-90°F/10-32°C) to cure properly.
Regular checks and avoiding these common mistakes will give you a reliable bond before stucco application.
Scratch Keys, Lath, and Mechanical Fastening over CMU
Mechanical attachment methods serve different needs: scratch keys develop embedment in the mortar or base, lath distributes loads and ties reinforcement, and mechanical fasteners anchor systems where block geometry or condition requires. Decide on the method based on CMU soundness, exposure, and movement expectations; consult product guidance for compatible lath types and fastener schedules.
Prepare the CMU by removing laitance, aligning joints, and ensuring a clean, profiled surface before cutting scratch grooves or installing lath. When installing lath or fasteners, embed the lath properly, use corrosion‑resistant components, and maintain adequate coverage and fastening cadence to avoid point loads and reduce crack initiation.
Scratch Key Methods and When to Form Them
Formed mortar keys, mortar-filled reglets, and routed/formed keys are common scratch key methods. Each has its pros and cons.
Formed Mortar Keys: Cheap but labor-intensive. Grooves are cut into the CMU surface using a grooving tool or router. Fill with mortar for strong mechanical bond.
Mortar-filled Reglets: Pre-formed grooves in CMU blocks filled with mortar. Easy to install, good bond strength. Less labor than formed keys but more expensive.
Routed/formed Keys: Grooves cut using a router or other power tool. Allows for deeper, wider keys. Best for thick stucco coats and high wind loads. More time-consuming than other methods.
Installing Lath, Fasteners, and Corrosion Protection
Choose compatible lath types – metal or fiberglass. Attach using recommended patterns to ensure even distribution of load.
Metal Lath: Strong, durable. Use 16-gauge for CMU walls. Space fasteners 7/8″ apart along studs and 6″ on center horizontally. Embed in mortar for solid bond.
Fiberglass Lath: Lightweight, corrosion-resistant. Use 1/2″ or 3/4″ wide. Fasten every 6-8″ along studs and 4-6″ horizontally. Embed in mortar as with metal lath.
Corrosion Protection: For metal lath, use galvanized or stainless steel fasteners. Apply a corrosion-inhibiting primer to CMU surface before installing lath.
Scratch Coat Thickness, Timing, and Initial Scoring
The scratch coat is the first layer of stucco that bonds to the CMU wall. Its depth and timing are crucial for a strong bond.
Depth: Apply the scratch coat at least 1/4″ thick. For thicker coats, increase depth proportionally. This provides sufficient keying surface area.
Timing: Allow the scratch coat to set but not dry out completely before applying the next layer. Scratch when it reaches a leather-hard state – firm but can still be scored with a trowel.
Scoring: Use a straight edge and trowel to score the surface at 1/8″ to 1/4″ intervals. This creates additional keying points for better mechanical bond. Re-wet the surface before applying the next coat if it starts to dry out.