
Introduction
Shrinkage-compensating cement is a concrete mix designed to offset shrinkage as it cures. In DIY projects, it helps reduce cracking on slabs and pads. Use it when you expect movement or large flat surfaces; check product instructions for mixing and cure guidance.
For rules and specifications, follow the manufacturer’s directions and any local rules. Common mistakes include skipping proper surface prep, overworking the mix, or rushing form removal. In real DIY projects, plan for a level pour, manage joints, and follow the cure time per label.
Key takeaways
- Understand shrinkage-compensating cement properties and when it’s best suited in DIY projects.
- Check manufacturer instructions for mix design, compatibility, and curing requirements.
- Plan for longer project timelines and additional joint details when using SCM.
- Ensure surface prep, proper sealer, and finishing methods to prevent cracks.
- Safety: wear PPE, ventilation, and follow disposal rules for cementitious products.
- Leave a comment Cancel reply to share experiences or ask questions.
Table of Contents
- Introduction
- Key takeaways
- What Shrinkage-Compensating Cement Is and How It Works
- Key Benefits and Practical Limitations
- Applications in Construction and DIY Projects
- Rules for Specification, Mix Design, and Admixture Compatibility
- Curing, Finishing, and Maintenance Rules
- Environmental and Site Factors That Affect Performance
- Safety, Handling, and Compliance on-Site
- Cost, Procurement, and Lifecycle Comparison
- Conclusion
- FAQ
What Shrinkage-Compensating Cement Is and How It Works
Shrinkage-compensating cement is a specialized cement mix that differs from ordinary Portland cement in how it behaves as it cures. In plain terms, it includes features that promote a small, controlled expansion rather to conventional shrinkage. This helps reduce cracks in restrained concrete elements.
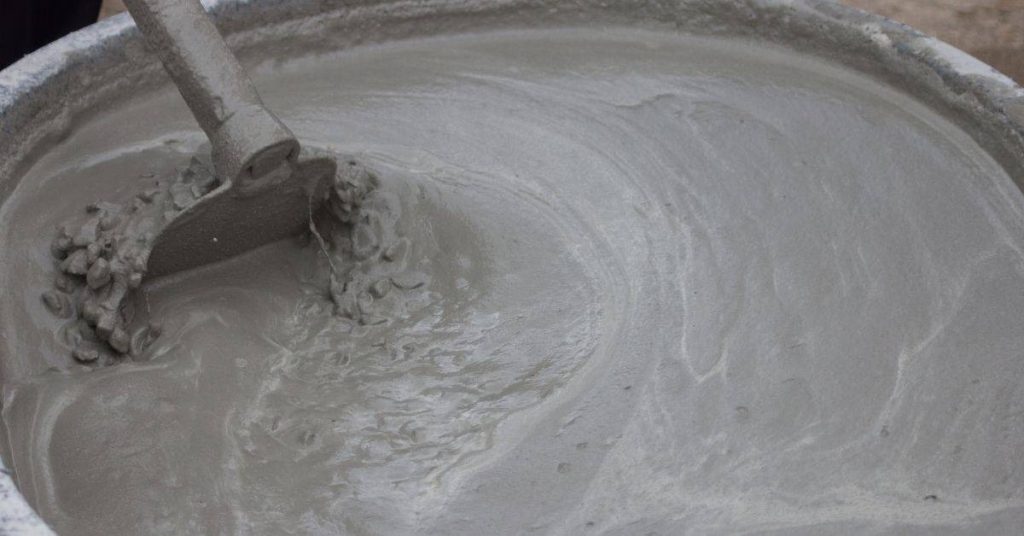
The basic mechanism relies on early hydration expansion to offset drying and shrinkage that come later. Think of it as a tiny built-in tiller that counters shrinkage. Common product forms include bagged mixes, pre-mixed concretes, repair grouts, and specialty mortars for slabs, overlays, precasts, and retrofit work.
Mechanism and types
Shrinkage-compensating cement works by expanding during early hydration to counteract drying shrinkage. It’s like having a tiny built-in ’tiller’ that counteracts shrinkage. This expansion is achieved through expansive phases created during hydration.
The main product categories you’ll encounter are:
- Bagged Shrinkage-Compensating Cement: Pre-packaged cement powder to be mixed with aggregates and water on-site.
- Pre-mixed Concretes: Ready-to-use concrete mixes that include the shrinkage-compensating cement.
- Repair Grouts: Specialty products for filling cracks or voids, often used in retrofit projects.
- Specialty Mortars: Custom blends designed for specific applications like overlays or precast work.
Standards and material specifications
Choosing the right materials is crucial for a successful outcome. Always check manufacturer technical data, local building codes, and relevant national/international standards.
- Manufacturer Technical Data: Look for product data sheets that outline performance characteristics and application guidelines.
- Local Building Codes: Ensure the chosen material complies with local regulations to avoid any issues during inspections.
- Relevant Standards: Familiarize yourself with ASTM C845 (US) or EN 14647 (EU), which cover shrinkage-compensating cement. Always confirm required lab tests before use.
- Compatibility with Aggregates: Ensure the chosen aggregate type and size is compatible with the shrinkage-compensating cement to avoid issues like weak bond or cracking.
- Curing Regime: Follow recommended curing procedures to allow for proper expansion and hydration. Inadequate curing can lead to staining, weak bond, or even cracking.
When to consider it
Shrinkage-compensating cement is particularly useful in projects where drying restraint can cause cracking. This includes:
Large Slabs: Where the slab size or reinforcement layout may restrict drying and shrinkage.
Overlays: When applying a new layer of concrete over an existing surface, which may not allow for free shrinkage.
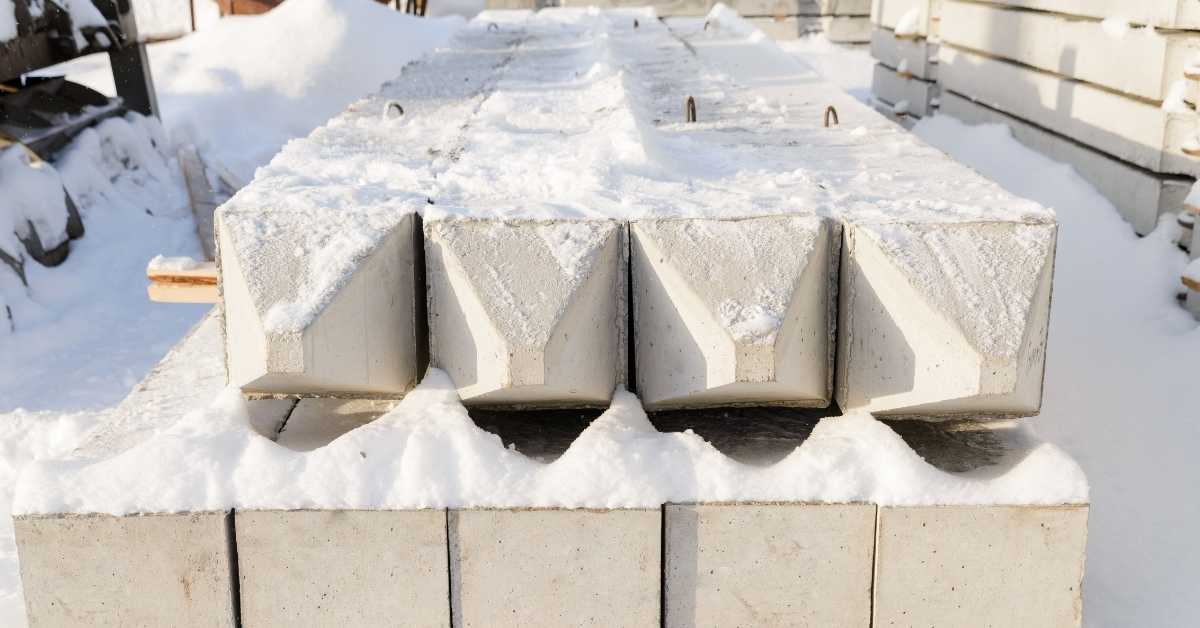
Precast Elements: Where elements are cast in forms that restrain shrinkage until they’re removed from the formwork.
Retrofit Projects: When repairing or strengthening existing structures where drying restraint is a concern.
Key Benefits and Practical Limitations
The core benefits are shrinkage control, reduced early-age cracking, and improved durability in restrained elements such as slabs and beams. You may see practical improvements in crack patterns and long-term performance when properly applied. Read product labels and data sheets to verify the scope of performance claims.
Limitations include higher material costs and sensitivity to curing conditions and mixing accuracy. There is potential for misuse if instructions aren’t followed, and availability or compatibility with your existing materials matters. Carefully consider project scale and whether the benefits justify the extra effort and expense.
Performance benefits
Shrinkage-compensating cement’s main advantage is its ability to control concrete shrinkage. This expansion offsets the natural drying shrinkage of concrete, reducing tensile stresses and early-age cracking.
In restrained elements like slabs or beams, this controlled expansion enhances durability by minimizing stress buildup. Expect up to 50% reduction in shrinkage compared to regular cement.
For overlays and repairs, it extends service life by mitigating the risk of cracking due to restraint from existing structures.
Trade-offs and limitations
The primary trade-off is cost. Shrinkage-compensating cement can be 20-50% more expensive than regular cement.
It’s sensitive to curing conditions. Under-curing can lead to excessive expansion, while over-curing may result in insufficient expansion. Accurate mixing and proper curing are crucial.
Misuse can cause issues like excessive expansion or cracking if not applied as specified. For DIY projects, consider the complexity and potential risks before proceeding.
In some cases, alternative strategies like increased reinforcement or proper jointing may be more cost-effective and simpler to implement.
Applications in Construction and DIY Projects
Commercial-grade uses include large slabs, repair mortars, decorative pours, and precast elements where shrinkage control adds value. DIY-friendly projects like overlays and small repair work can also benefit when the conditions are right. Identify where compensation makes the most sense and where standard mixes are sufficient.
Define scale limits and batch guidance for DIYers, including mixing equipment and practical project sizes. Consider curing, temperature, and workmanship factors that influence shrinkage behavior to set realistic expectations. Safety, codes, and when to call a pro should be part of the plan.
Common commercial and civil uses
Shrinkage-compensating cement shines where concrete is heavily restrained, like slabs-on-grade. It’s a game-changer for large pours, reducing curling and cracking. Precast elements benefit too – less stress means better durability.
Engineers often specify it for heavily reinforced structures, like bridge decks or massive foundations. It’s not just about size; it’s about restraint.
Think of it as a safety net. You can pour bigger, stronger concrete with less worry about shrinkage-related issues.
Feasible DIY uses and scale considerations
For homeowners, it’s great for repair mortars. It won’t shrink like regular cement, so no more cracked patches. Small slabs, like patios or walkways, are fair game too.
Specialty overlays and toppings? Yes, but keep it small. We’re talking 1-2 inches thick, max. Any thicker, you’ll need professional help to ensure proper reinforcement and curing.
Remember, DIY doesn’t mean ‘go big’. Start small, learn the ropes, then tackle bigger projects. And always check local codes before starting.
Rules for Specification, Mix Design, and Admixture Compatibility
Specify what must appear in the technical data sheet, including cement type, test methods for shrinkage, maximum aggregate size, fineness, curing conditions, and environmental exposure. Reference standard-setting documents to avoid ambiguity in bids and QA. If in doubt, verify on the label or data sheet.
Establish a robust trial-mix protocol with a plan for documenting variability across batches. Include target strength, slump, air content, and curing regime, plus shrinkage measurements under controlled conditions. Prepare an explicit compatibility plan for common admixtures and note any required mix-design changes if issues arise.
Mix design fundamentals and admixture interactions
The first step is understanding the cement’s composition. Check the manufacturer’s data sheet for binder blends, like Type I or II Portland cement.
Water control is crucial. Too much water can lead to excessive bleeding and segregation. Follow the recommended water-to-cement ratio (w/c).
Plasticizers help with workability. But beware, they can affect expansion. Check compatibility with the shrinkage-compensating cement. Air-entraining agents are usually fine but double-check.
Supplementary cementitious materials like fly ash or slag can also interact. Make sure they won’t interfere with the cement’s expansion properties.
Batching, mixing, and placement rules
Uniform batching is key. Weigh aggregates, cement, and water carefully to maintain the target mix proportions.
Mixing energy matters too. Follow the manufacturer’s guidelines for mixing time and speed. Too little can cause segregation, too much can damage the cement particles.
Placement should be quick and efficient. Avoid over-vibration as it can lead to excessive bleeding and segregation. Remember, once mixed, the clock is ticking on that expansion.
Quality control and trial batches
Before you pour, do some small controlled trial batches. This helps verify the cement’s expansion behavior under your specific conditions.
Cure these trials under the same conditions as your planned pours. Measure their expansion over time to ensure they’re performing as expected.
Onsite tests are also crucial. Check for early-age cracking and monitor temperature changes that could affect expansion.
Document everything – batch records, test results, supplier compliance. It’s your audit trail if issues arise later on.
Curing, Finishing, and Maintenance Rules
Apply practical curing methods that support expansion and adjust for ambient conditions. Moisture-control approaches and timing should align with the mix cure, avoiding premature drying or overheating. Use curing practices that fit your site and climate while keeping the goal of expansion in sight.
Finishing practices should preserve expansion benefits without delaying cure. Timing for troweling, broom finishes, and joint placement all influence performance. Include surface protection and a maintenance plan to sustain benefits over the service life.
Essential Curing Protocols
Proper curing is crucial for shrinkage-compensating cement to work as intended. Follow these steps:
Moisture Control: Keep the concrete surface consistently moist during the initial cure. This could be through continuous water spraying, covering with plastic sheets, or using curing compounds.
Temperature Management: Maintain a consistent temperature as specified by the manufacturer. Rapid drying due to high temperatures can hinder expansion.
Protection from Elements: Shield newly placed concrete from wind and sun to prevent premature drying or overheating.
Finishing and Restraint Management
Proper finishing ensures expansion benefits aren’t compromised. Here’s how:
Timing for Troweling: Allow concrete to initial set before troweling to avoid delaying cure. But don’t wait too long, or you might stress the surface.
Joint Layout: Plan joints strategically to accommodate expansion. Too few or poorly placed joints can cause cracking.
Restraint Management: Ensure structures allow for movement. Restraints that prevent expansion can lead to cracks and other issues.
Long-Term Maintenance Considerations
Regular inspection and maintenance keep your concrete performing at its best:
Inspection Points: Check for cracks, delamination, or other signs of distress every 6 to 12 months. Timely repairs prevent small issues from becoming big problems.
Repair Approaches: If you notice reduced expansion or cracking, first check your curing and finishing methods. If those were correct, consider moisture swings or other environmental factors that might require remediation.
Re-watering/Sealing: Re-apply sealers or re-water as needed to maintain the concrete’s performance over time.
Environmental and Site Factors That Affect Performance
Ambient temperature swings influence the timing of expansion, especially during early hydration. Plan pours for favorable conditions and be aware of diurnal changes that affect setting. Readily verify that conditions align with the product’s guidance before casting.
Substrate moisture, humidity, and evaporation rates play a big role. Check moisture status and use appropriate curing strategies to manage drying. Structural restraints and formwork conditions can magnify or delay expansion, so design joints and sequences accordingly.
Temperature and moisture impacts
Ambient temperature plays a big role in how your concrete behaves. In cold weather, expansion is slower. But when it warms up, that expansion kicks into gear. This can lead to timing issues if you’re not careful with your schedule.
Moisture’s just as important. Concrete needs moisture to cure properly. If it dries too fast, like in hot, dry conditions, it can’t gain strength and may even crack. That’s why we use curing blankets or misting when needed.
Scheduling matters here. You want to pour when temperatures are steady and won’t drop below freezing for a few days. And keep an eye on the weather forecast. If a heatwave’s coming, you might need extra curing measures.
Restraint and substrate interactions
Reinforcement, adjoining structures, and even the substrate itself can restrict your concrete’s expansion. This isn’t always a bad thing – some restraint helps control cracking. But too much can cause excessive stress.
Embedded elements like rebar or post-tensioning cables can restrain expansion. So can adjacent pours or tied-in slabs. If these are restrained, the concrete can’t expand freely and may crack under the pressure.
Substrate movement also matters. If your base is unstable or moves, it can cause stress on your concrete. That’s why we often use expansive grouts in joints – they can handle some movement without cracking.
Safety, Handling, and Compliance on-Site
Follow PPE requirements and exposure controls for cement and additives, including eye and skin protection and respirators where needed. Establish a clear decontamination routine after handling materials. Training and fit testing may be required for workers handling the mixes.
Develop solid handling, storage, and mixing protocols to minimize waste and harm. Use proper equipment and keep bags sealed to protect quality. Maintain clean work zones and document safety and compliance steps for warranties and inspections.
On-site safety and PPE
Safety’s our top priority. Here’s what you need to protect yourself and your crew.
Dust control: Wear a respirator rated for cement dust. Keep mixing areas damp to minimize dust.
Eye and skin protection: Use safety glasses or goggles, long sleeves, pants, and chemical-resistant gloves. Wash up after work.
Admixture handling: Follow SDS guidelines. Train your crew on proper use and storage.
Regulatory, testing, and documentation checklist
Before you pour, tick off this list to keep everyone happy – inspectors, manufacturers, and your future self.
- Material certifications: Check supplier-provided certificates for cement and additives.
- Batch records: Keep detailed batching records. You’ll need them for warranty claims.
- Shrinkage-compensating admixture compatibility: Ensure your chosen admixture plays nice with your cement type.
- Pre-pour tests: Conduct compressive strength and shrinkage tests as per ACI/ASTM standards.
- Cure conditions: Track temperature and humidity during curing. Too hot or cold can mess up your concrete.
- Code compliance: Ensure your mix design aligns with local codes (ACI/ASTM where applicable).
- As-built documentation: Keep records of what you actually built, not just what you planned. It’s useful for future repairs.
- Waste management plan: Know how you’ll dispose of concrete slurry and washout water. Follow local environmental regulations.
Quick rule: Keep all this info accessible. Inspections and warranty claims happen years after the pour, not right away.
Cost, Procurement, and Lifecycle Comparison
Think in upfront versus lifecycle terms as you compare material costs, blends, admixtures, and any required equipment. Include the impact on labor time for mixing and curing, and how that might affect your schedule. Look beyond price to long-term performance implications.
Assess procurement options, lead times, and storage needs. Weigh supplier reliability and documentation like certificates of analysis or trial results. Use practical tips to plan purchases, minimize waste, and support a clear decision framework.
Upfront versus lifecycle economics
Shrinkage-compensating cement comes at a higher upfront cost. A cubic yard might run you $10-$20 more than ordinary cement. But remember, it’s an investment.
Here’s why: Reduced cracking means less maintenance and repairs down the road. Think about it – fewer cracks mean no water seepage, no freeze-thaw damage, and no structural weakening over time.
Long-term savings can be significant. For instance, a 10,000 sq.ft slab could see $500-$2,000 less in maintenance costs over its lifespan with shrinkage-compensating cement. Plus, it’ll last longer, so you won’t need to replace it as soon.
So, while the initial cost is higher, consider the potential long-term savings and service life extension when making your decision.
Buying tips and supplier questions
When buying shrinkage-compensating cement, ask these questions:
Delivery: How soon can they deliver? Will there be any additional fees?
Storage: How long can you store it before using? What’s the best way to keep it fresh?
Trial mixes: Can they provide a small batch for trial mixing on-site? This helps ensure compatibility with your existing mix.
Warranties: Do they offer any warranties or guarantees on their product’s performance?
Conclusion
Shrinkage-compensating cement offers durable, smooth results when you use it right, and taking the safety-first approach protects people and the finished work from costly mistakes.
First, confirm the project needs and the exact mix design, check admixture compatibility, prep a clean, sound substrate, mix in proper proportions, set aside a small test area, cure under controlled conditions, seal or finish as required, and document every step so you can reproduce or adjust later. Then apply in manageable batches, maintain consistent moisture during curing, protect from weather and foot traffic, and inspect for cracks or pops during the first days to catch problems early.
Common mistakes to avoid are using the wrong mix for the job, mixing batches that are not uniform, and rushing curing or finishing. Safety rules to follow: read the product spec and safety data sheet, wear proper PPE, keep kids and pets away during mixing and curing, and never ad hoc modify the mix or substitute materials without checking compatibility. If you’re unsure about substrate suitability, large structural loads, or complex detailing, stop and test a small area or consult a pro before proceeding.
If the project involves structural loads, irregular substrates, or tight finish requirements, consider hiring a professional to verify the specification, mix design, and curing plan. With careful checks and disciplined execution, you’ll gain a durable, professional result you can be proud of—and you’ll reduce the risk of costly rework.
FAQ
What are practical DIY projects that benefit most from shrinkage-compensating cement?
Small slabs, thin slabs, and DIY repair patches are common wins. It helps reduce cracking in joints and uneven settling when you’re pouring over existing work or ground with minor movement. Check the product label for recommended uses and limitations.
What rules should I follow for using shrinkage-compensating cement in a home project?
Always read the manufacturer instructions and local rules. Use the specified mix design guidelines and compatible admixtures as written. If in doubt, contact the supplier for clarifications and keep to those limits.
What are common mistakes to avoid when applying shrinkage-compensating cement?
Avoid overworking the mix or adding extra water. Don’t misjudge timing for placement and finishing; too early or too late can defeat the benefits. Always follow curing guidance from the label and keep out of extreme temps as instructed.
How can I assess safety and ensure proper handling on site?
Wear basic PPE and follow product safety data; keep bags sealed and avoid dusty conditions. Store and mix as instructed, and never substitute materials without checking compatibility. If you see unusual reactions or smells, stop and verify with the manufacturer’s instructions.