
Introduction
For concrete keyways, you only need a small set of essential tools and can skip the rest.
This guide explains why that matters and shows practical steps, tips, and rules of thumb to choose the right tools and use them effectively.
Key takeaways
- Identify keyway purpose to ensure proper load transfer and alignment in joints.
- Essential tools include straightedge, hand saw or saw-cut tool, and gauge.
- Avoid unnecessary gear: electric hammer drill may be overkill for simple keyways.
- Formed vs saw-cut methods require distinct tooling planning and vibration control.
- Materials checklist: form release agent, backer rod, sealant, epoxy for repairs and curing compound.
- Safety and longevity: maintain tools, inspect blades, use PPE, and clean after use.
- Cost and prioritization: rent high-dollar items first, buy essentials, compare rental terms.
Table of Contents
- Introduction
- Key takeaways
- What is a Concrete Keyway and Why It Matters
- Essential Tools You Actually Need
- Tools You Don’t Need (and Better Options)
- Tools for Different Keyway Methods (Formed vs Saw-Cut)
- Materials and Consumables Checklist
- Step-by-Step Installation Workflow (Tools called out by step)
- Safety, Maintenance, and Longevity Tips
- Cost, Renting vs Buying, and Tool Prioritization
- Conclusion
- FAQ
What is a Concrete Keyway and Why It Matters
A keyway is a groove or slot cast into concrete to create a physical interlock with adjacent concrete or subsequent pours. It helps align and connect slabs, walls, and precast elements. Think of it as a built in grip that also helps with sealing and load transfer.
In practice, keyways influence joint behavior, movement control, and water intrusion. They are common where two pours meet or where formwork will be reused. Understanding their role helps you plan for proper sealing and durable connections.
Types of keyways (formed, cast-in, saw-cut)
A concrete keyway is a groove cut into the surface of concrete to create a mechanical interlock with another piece. There are three main types:
Formed Keyways: Created by using special forms during pouring. Ideal for new construction.
Cast-in Keyways: Precast keyway inserts placed before pouring. Great for precast elements or when access is limited.
Saw-cut Keyways: Cut after concrete has cured. Useful for existing structures or repairs.
Performance considerations (load transfer, movement, waterproofing)
The geometry and installation of a keyway significantly impact its performance:
Load Transfer: Keyways help distribute loads evenly across joints. Wider and deeper keyways can handle more load.
Movement: Keyways allow for some movement due to temperature changes or settlement. Tighter keyways restrict movement, while wider ones allow more.
Waterproofing: Properly installed keyway fillers prevent water intrusion. However, if not sealed correctly, water can leak through the joint.
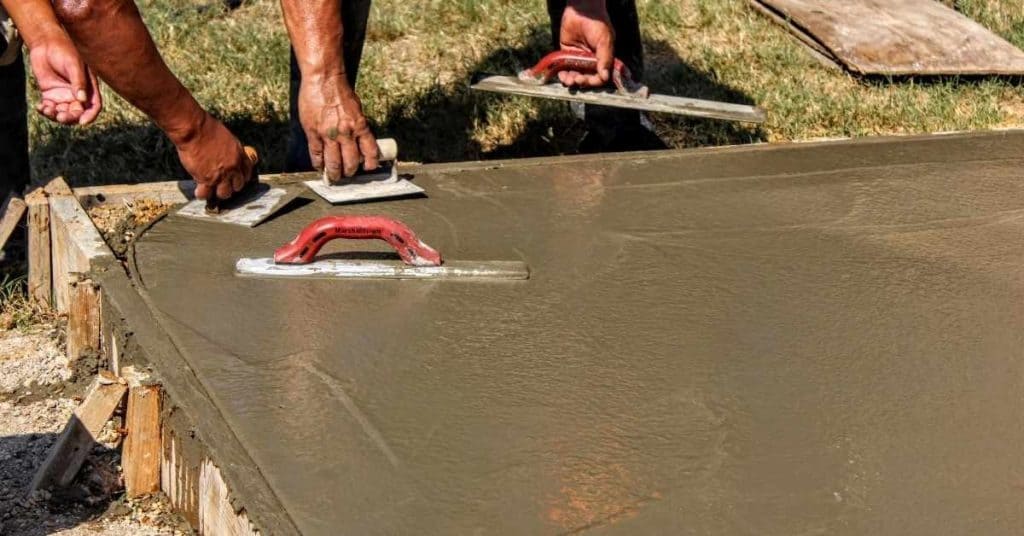
Essential Tools You Actually Need
Start with the basics that enable a clean groove and a solid setup. A straightedge or screed helps you align the keyway width with the pour surface. A hammer drill or chisel set can help prepare edges without overdoing it.
Include a concrete saw or formed groove tool if you’re shaping the keyway after the pour. A benchtop or portable compactor isn’t always necessary for DIY scale work, but a simple tamping tool can improve backfill seal contact. Safety gear should be in easy reach before you begin.
Forming tools and accessories
These are the essentials for creating a solid keyway form.
- Chamfer strips: Create smooth edges. Use 1/8″ or 1/4″.
- Keyway forms: Define your keyway shape. Wood, plastic, or metal.
- Fasteners (screws/nails): Hold form together. Galvanized for longevity.
- Form-release agent: Eases removal. Spray-on or paste.
- Tape measure: Accurate sizing. 25′ with hook and blade lock.
Cutting and finishing tools
These power tools make quick work of concrete cutting and cleanup.
- Circular saw with masonry blade: Cuts keyway. 7-1/4″ or 6-1/2″.
- Angle grinder with diamond cup wheel: Cleans up edges. 4″ or 5″.
- Hammer and chisel: Manual trimming. For tight spots.
- Vacuum (optional): Dust control. Rent for $30-$50/day.
- Safety glasses: Eye protection. Essential with power tools.
Measuring, marking, and leveling tools
These ensure your keyway is accurate and level.
- Tape measure: Accurate placement. 25′ with hook and blade lock.
- Chalk line: Mark out shape. Snap chalk lines for straight edges.
- Level (4′ or 6′): Ensure accuracy. Torpedo level for tight spaces.
- Laser level (optional): Faster, more precise. Rent for $20-$30/day.
- Keyway template: Consistent depth. Custom or rented.
Tools You Don’t Need (and Better Options)
Don’t load up on specialized formwork tools if your project fits a simple groove. Fancy adjustable groove forms can be overkill for small jobs. Consider using basic plywood guides or tape marks to keep things straight.
A full masonry rotary hammer is usually more than you need for a typical keyway. If you already own a standard hammer or chisel set, it will cover most edge finishing tasks. Choose simpler, reliable tools that match the job size and your experience.
Avoiding specialty shop equipment for small jobs
For most DIY keyway projects, you don’t need expensive, heavy-duty concrete routers or industrial machines. Here’s why:
- Concrete Router: Overkill for small jobs. Rent one if needed, around $50-$100 per day.
- Industrial Keyway Machine: Too large and expensive ($20k+) for occasional use. Consider renting or hiring a pro.
- Diamond Blade Saw: Versatile, affordable ($30-$80). Cuts keyways, slots, and more.
- Handheld Grinder: Useful for touch-ups and small areas. Around $20-$50.
- Angle Grinder with Diamond Blade: Great for larger jobs. Rent or buy ($30-$100).
Alternatives to expensive proprietary forms
Commercial keyway forms can be pricey, but there are DIY-friendly alternatives:
Rigid Plastic Forms: Inexpensive ($10-$20), easy to cut. Great for simple shapes and small jobs.
Silicone Strips: Flexible, reusable ($15-$30). Ideal for complex shapes or irregular edges.
Custom-Cut Plywood: Cheap ($5-$10 per sheet), sturdy. Perfect for large, flat surfaces. Use screws and supports to keep it rigid.
Commercial products are better when you need precision, durability, or complex shapes. But for most DIY jobs, these alternatives work fine and save money.
Tools for Different Keyway Methods (Formed vs Saw-Cut)
For formed or cast-in keyways, you’ll rely on formwork, edge chisels, and alignment aids. A groove-forming tool or edge option paired with proper release agent handling is essential. You may also use a shallow saw to shape the groove before fill where permitted.
Saw-cut keyways hinge on a concrete saw and careful timing. Keep a chipping tool handy for any cleanup along the cut, plus a straightedge to verify alignment. Plan the tool set around whether you cast the groove in or cut it after the pour.
Tool list for cast-in keyways
Cast-in keyways require careful planning and the right tools to ensure a strong, waterproof bond with the surrounding concrete. Here’s a prioritized list of essential tools:
- Form materials (wood or steel): Keyway forms must be rigid and watertight. Use 1/2″ or 3/4″ plywood for small jobs, or rent steel forms for larger projects.
- Attachment hardware: Galvanized nails, screws, or clamps to secure forms in place. Avoid rust-prone materials.
- Vibration/compaction tools (vibrator or poker): Remove air pockets and ensure a solid concrete pour around your keyway form. Rent a vibrator for larger jobs.
- Sealing prep tools: Tape, sealant, or backer rod to seal form joints and prevent water leaks during the curing process.
- Trowel or float: To strike off excess concrete and smooth the surface around your keyway after pouring.
Tool list for saw-cut keyways
Saw-cut keyways require precise cutting and dust management. Here’s a prioritized list of essential tools:
- Wet saw or hand-held saw with masonry blade: A wet saw provides cleaner cuts but is bulkier. Hand-held saws are more portable but generate more dust.
- Guide system (straight edge or track): Ensures straight, accurate cuts. Rent a track saw guide for longer, precise cuts.
- Dust suppression (water or vacuum attachment): Reduces dust and improves air quality during cutting. A wet saw comes with built-in water supply, while hand-held saws require an external water source or vacuum.
- Edge cleanup tools (chisel, hammer, brush): Remove excess concrete from cut edges and smooth rough surfaces. Rent a chipping hammer for larger jobs.
- Safety gear: Ear protection, safety glasses, dust mask or respirator, work gloves, and protective clothing to minimize risks during cutting.

Materials and Consumables Checklist
Sealants, backer rod, and form-release agents are the non-tool items that matter. Have a plan for where backer rods sit and how the sealant will perform with movement. Keep a few tubes or cartridges on hand for quick touch-ups.
Also list fasteners, wedges, and an appropriate concrete mix for fill or pocketing as needed. Check manufacturer or supplier guidelines for compatibility with your concrete and sealant choices. Always verify product labels and data sheets before use.
Sealants, bonding agents, and backer rod
Use this checklist when preparing your keyway forms to ensure proper sealing and adhesion.
- Elastic sealant: Check for an elastic range that matches your concrete’s movement. Skip this and you risk cracking or peeling.
- Bonding agent: Ensure it’s compatible with your chosen concrete mix. Incompatibility can lead to delamination.
- Backer rod size: Match the width of your keyway. Too small, and you won’t fill the gap; too large, and it’ll bulge out.
- Adhesion promoter: For better bond between sealant and formwork.
- Primer for backer rod: To prevent adhesion to formwork.
- Sealant application tool: For even, consistent application.
- Tape measure: To ensure you’ve got enough sealant and backer rod.
- Scissors or utility knife: To cut backer rod to size.
Quick rule: Always check product labels for compatibility with your specific concrete mix and keyway dimensions.
Fasteners, ties, and form-release materials
Use this checklist when selecting fasteners and preparing forms to ensure longevity and easy removal.
- Galvanized or stainless steel fasteners: For corrosion resistance. Skip this, and you’ll have rust issues down the line.
- Form ties: Match the size of your keyway. Too small, and they won’t hold forms in place; too large, and they’ll interfere with concrete flow.
- Form-release agent: Ensure it’s compatible with your chosen form material (wood, plastic, etc.). Incompatibility can lead to surface imperfections.
- Release film or paper: For easy removal of excess release agent.
- Tape measure: To ensure you’ve got enough fasteners and ties.
- Hammer or nut driver: For driving in fasteners.
- Claw hammer: For tapping formwork to release it from the keyway.
Quick rule: Always check product labels for compatibility with your specific form materials and keyway dimensions.
Step-by-Step Installation Workflow (Tools called out by step)
Start with layout and edge straightening, using a straightedge and marking tools to define the keyway path. Prepare the form or saw line and keep tools organized for quick transitions. Inspect for level and alignment before proceeding.
Cast or cut the groove, then clean the edges with a suitable tool. Insert backer rod and apply sealant as directed by the product instructions. Conclude with finishing touches and curing guidance, referencing the exact tools used at each stage.
Step-by-Step Installation Process
Follow this clear, numbered sequence to create a keyway in concrete from start to finish.
- Preparation: Wear safety gear, check weather, and gather tools. Ensure the area is clean and dry.
- Layout: Use measuring, marking, and leveling tools to mark the joint accurately.
- Forming: Set forms based on your keyway design, using forming tools and accessories mentioned earlier.
- Main Work: Pour, consolidate, and finish the concrete as described in the following steps.
- Cleanup & Final Checks: Remove forms, clean up the area, and check for any imperfections or signs of settling.
Layout, forming, and securing forms
Accurately mark the joint using measuring tools. Set forms based on your keyway design, ensuring they’re level and square.
Secure forms with appropriate fasteners and spacers to maintain consistent form spacing. Use tie rods or clamps for added stability if necessary.
Pro Tip: Double-check form alignment before pouring concrete to avoid costly mistakes.
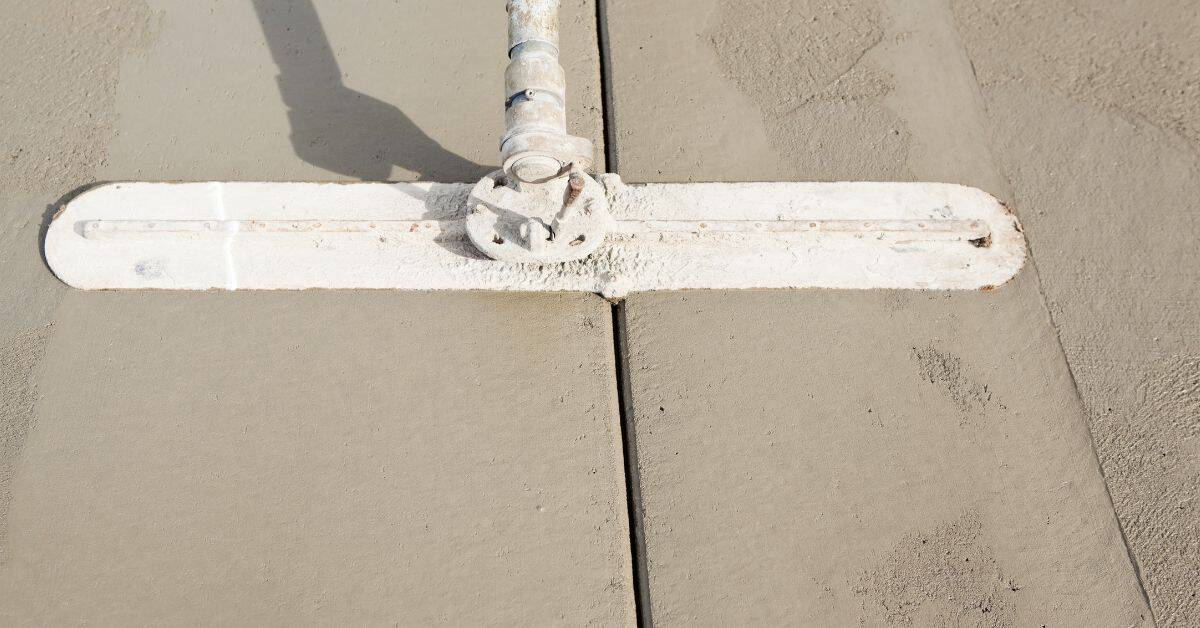
Pouring, consolidating, and finishing
Use a concrete mixer or wheelbarrow to place concrete into the forms. Ensure you have enough material for your keyway size.
Consolidate concrete using a vibrator or manual methods to remove air pockets. Be careful not to over-vibrate and cause segregation.
Finish the keyway profile with a finishing trowel, ensuring smooth edges and consistent depth. Allow concrete to cure according to manufacturer’s guidelines before proceeding.
Cutting and retrofit methods
Timing is crucial for saw-cut keyways. Wait until the concrete has gained sufficient strength (usually after 28 days) before cutting.
Select a suitable diamond blade for your saw, ensuring it’s designed for concrete cutting. Follow manufacturer guidelines for safe operation and maintenance.
Clean up the area thoroughly after cutting, removing dust and debris with a broom, vacuum, or wet/dry vac. Wear appropriate safety gear during cleanup to protect against residual concrete dust.
Safety, Maintenance, and Longevity Tips
PPE should be worn consistently: eye protection, gloves, and hearing protection where needed. Follow safe tool operation practices and secure all formwork to prevent movement. Manage dust and water flow to keep the work area clear.
Inspect tools and blades for wear, clean after use, and store properly to extend life. Regularly check joints and sealants for signs of cracking or movement and reapply as required. When in doubt, consult product guides or local requirements for maintenance intervals.
Personal protective equipment and dust control
Safety is paramount when working with concrete. Here’s what you need to protect yourself from dust and other hazards.
- Respirator: Protects your lungs from silica dust. Choose a NIOSH-certified P100 filter cartridge. Rental: $25-$50/day
- Safety glasses: Shields eyes from debris and splashes. Consider goggles for better protection. $10-$30
- Earplugs or earmuffs: Protects hearing from loud tools like saws. $5-$20
- Work gloves: Prevents hand injuries and improves grip. $10-$30
- Wet cutting: Use a diamond blade with water to control dust when saw-cutting keyways. Blade: $20-$50 each
Inspecting and maintaining keyways
Regular inspection and maintenance ensure your concrete keyways perform optimally and last longer.
Visual checkpoints: Inspect joints for cracks, gaps, or crumbling every 6 months. Check fasteners and ties for corrosion or looseness.
Resealing: If you find any issues, reseal the joint using a flexible, elastomeric sealant designed for concrete. $15-$30 per tube
Repair tools/materials: For minor cracks, use a concrete repair kit. For larger issues, consult a professional. Kit: $20-$50
Cost, Renting vs Buying, and Tool Prioritization
Assess the project scale and how often you’ll use each tool to decide what to buy versus rent. Prioritize core items that affect fit, finish, and safety for DIY to small jobs. Look for dependable, versatile tools you can reuse on future projects.
Create a simple prioritization checklist that weighs cost, frequency, and potential reuse. Always verify rental terms, warranty, and return conditions before committing. Check product labels and manufacturer guidelines to ensure suitability for your concrete work.
When to rent specialized equipment
Renting can be a smart choice for tools you won’t use often. Here are some scenarios where it makes sense:
- Walk-behind saws: For cutting keyways, these are heavy-duty and expensive to buy. Rent one for $50-$100/day.
- Heavy routers: These are powerful but pricey. Rent for $30-$60/day instead of buying.
- Precision guides: For straight, accurate cuts, these are a must. Rent for $20-$40/day.
- Concrete grinders: For prep work or removing old keyways, rent a grinder for $50-$100/day.
- Vacuums and dust collectors: To keep your jobsite clean and safe, rent a vacuum for $20-$40/day.
Starter kit for DIYers and small contractors
If you’re just starting out, here’s a list of must-have tools to get you going. We’ve also included some nice-to-haves where you can invest for better results.
Must-haves: Tape measure, level, chalk line, trowel, shovel, wheelbarrow, safety glasses, gloves, and a basic tool belt.
Nice-to-haves: A good quality circular saw for cutting forms and materials. Consider a cordless model for $100-$200. Also, invest in a solid workhorse drill for $50-$100 to help with mixing, drilling, and driving screws.
For small contractors looking to grow, consider adding a wet/dry vacuum ($30-$60) for jobsite cleanup and a concrete mixer ($200-$400) to make your own mixes on-site.

Conclusion
Getting the keyway right matters for safety, durability, and a clean look. Focus on solid setup, proper tools, and careful steps so the concrete joints perform as designed.
When you move from planning to action, think of it as a simple checklist in plain language: confirm the method you’ll use (formed or saw-cut) and clear the path for form work or layout marks, assemble the exact tools you actually need, prep the surface and forms, set the keyway to the correct depth and alignment, run a dry test or a small patch first, and then execute with steady, deliberate passes while keeping edges clean and joints protected as you go.
Common mistakes to avoid include rushing the setup, skipping form alignment or depth checks, and neglecting a final clean and test for fit before pouring. Safety rules are simple: wear eye and hand protection, keep hands and feet clear of moving forms and blades, and never force a cut or a form that doesn’t seat true. Test new methods on a small area first and document what works so you don’t repeat bad steps.
If the project involves complex formed joints, unusual depths, or you’re unsure about cut timing or sealing, call a professional rather than pushing on. Stay patient, follow the plan, and you’ll end up with a solid, long-lasting keyway that looks right and performs well.
FAQ
Do I need a keyway in every concrete project?
No. A keyway helps grip when there is a joint or edge, but not every pour needs one. If the slab is small and there’s no movement, you can skip it. For long or heavy slabs, a keyway improves strength and reduces edge spalling.
What basic tools do I actually need for a keyway?
You’ll need a chisel or a grinder with a masonry wheel, a straightedge, and a damp sponge to clean the groove. A hammer drill can help start the groove, but accuracy matters more than brute force. Don’t chase a perfect groove; keep it clean and straight.
Can I skip planning the keyway and just pour and finish?
Better to plan first. If you skip the groove, you’ll risk poor bonding at the joint and more cracking. A little prep now saves calls back later for fixes.
What mistakes should I avoid with keyways?
Don’t make the groove too shallow or too wide. Don’t roughen the whole surface thinking it adds strength. And don’t ignore joints at temperature changes or movement points. Make the groove where it’s needed, clean it well, and cure properly.