
Introduction
Choose a reliable form release method for plywood forms to ensure clean release and reusable assemblies.
You’ll learn how different releases work, when to use wax, oil, or silicone-based options, and what to avoid to prevent staining or bonding failures.
The guide walks through practical steps, common-sense rules of thumb, and examples of real-world setups so you can apply the right method to your project with confidence.
Key takeaways
- Form release prevents plywood adhesion to concrete.
- Commercial products offer ease of use and durability.
- DIY alternatives like wax, soap, or oil can work but may require reapplication.
- Apply releases evenly using spray, brush, wipe, or coat methods.
- Prepare surfaces by cleaning, sanding, and sealing plywood forms.
- Consider environmental impact and regulations when choosing a release agent.
- Tighten spacing as pours get taller to maintain form stability.
- Check local regulations for VOC limits, labeling, and disposal requirements for release agents and solvents.
- Use appropriate PPE (gloves, goggles, and respiratory protection if needed) and ensure adequate ventilation during application and cleanup.
- Dispose of used release agents, contaminated rags, and contaminated pallets according to label directions and local hazardous-waste guidelines; never pour onto the ground or down drains.
- Provide a simple ventilation and spill-response plan on site; have absorbent material and containment handy in case of leaks.
- Keep records of product types, batch numbers, and disposal steps to support compliance and audits.
Table of Contents
- Introduction
- Key takeaways
- Why form release matters for plywood forms
- Commercial products to consider (brand-type overview)
- DIY and household alternatives (what works and what to avoid)
- Application methods: spraying, brushing, wiping, and coating
- Tools and materials checklist for application
- Surface preparation for plywood forms
- Environmental and regulatory considerations
- Safety precautions during storage and application
- Cost vs. effectiveness analysis
- Choosing the right release for different project types
- Compatibility: release agents vs. concrete admixtures and form treatments
- Visual checkpoints and quality control after application
- Common mistakes and their consequences
- Maintenance and reapplication schedule for plywood forms
- Step-by-step plan for a DIY concrete pour using plywood forms
- Case studies and real-world comparisons
- Final recommendations and quick decision guide
- Conclusion
- FAQ
Why form release matters for plywood forms
Form release on plywood is not optional; it’s the bridge between a clean concrete finish and a torn, gouged panel. The core purpose is to stop concrete from sticking, to make stripping easy, and to reduce surface imperfections that ruin finish quality. Plywood’s porosity, grain, and edge behavior demand a smart release strategy, because poor choices here invite pull-in, tear-out, and staining that metal forms rarely see.
Compared with metal forms, plywood soaks up and telegraphs moisture and grain patterns, so you’ll get ghosting or edge sticking if you use the wrong product. Wax, water-based and fusion coatings, or polymer emulsions all differ in film thickness, buildup, curing time, and how they affect texture and moisture transfer. Do a few quick tests on small panels, apply uniformly, and watch for uniform release, no pull-in, and the surface finish you want, whether smooth, broomed, or textured.
How release affects concrete finish
A proper form release agent keeps the plywood from sticking to the fresh concrete, which is key for a clean pour and smooth surface. Without it, you risk staining or bugholes that can mar your finished look.
The right release also helps control texture issues. If you want a broomed finish, using too much release might leave streaks or ghosting marks. For a smoother surface, make sure the agent doesn’t build up and cause unevenness.
Test small sections first to see how your chosen release works with your concrete mix and tools. This way, you can adjust before committing to large areas and avoid costly mistakes.
Impact on form reuse and plywood longevity
The right form release helps extend the life of your plywood forms by preventing sticking and tearing. If you use a good agent, you can strip the forms more easily without damaging them.
Poor choices or overuse can lead to buildup that makes stripping harder each time. This not only wastes material but also increases labor costs from repeated repairs or replacements.
To keep your plywood in shape for multiple uses, focus on proper surface prep and consistent application of the release agent. Regularly inspect forms for wear and tear, replacing damaged panels before they cause issues during pouring.
Commercial products to consider (brand-type overview)
Commercial products break into three types: architectural releases, precast releases, and form coatings. Each behaves differently on plywood, so know what you’re buying before you mix with sealants or paints. Common options include Bio-Nox, Nox-Crete Form Coating, and Release Agent #10, and you should place them in the correct category to predict film buildup, edge detail, and release cleanliness.
Why it matters on a DIY jobsite: the wrong choice can leave sticky edges, pull adhered patches, or foul the next reuse cycle. Look for surface chemistry compatibility with plywood, film thickness, paraffin vs water-based formulations, cure times, and reapplication intervals. Use the quick buyer’s checklist—cost, coverage per gallon, compatibility with sealers, warranty or tech support, and local availability—to pick the best option and avoid costly rework.
Architectural form release agents
Architectural form release agents are designed for precision work, ensuring a clean and smooth finish on concrete surfaces. They’re typically water-based and easy to apply with brushes or rollers.
These products help prevent sticking without leaving residue behind, making it easier to remove forms after the pour. A good architectural agent will also protect your plywood from wear, extending its lifespan.
When choosing an architectural release agent for plywood, look for one that’s easy to clean up and doesn’t leave a film on the surface of the wood. This keeps your forms ready for reuse without extra work.
Precast/industrial agents
Precast or industrial form release agents are made for high-volume production environments where quick turnaround is key. They’re usually more robust and can handle heavier pours with greater ease.
These products often come in paraffin-based formulas that provide a thicker barrier against concrete, making them ideal for large-scale projects on plywood forms. However, they might leave some residue behind, which could require extra cleaning before reuse.
If you’re working with heavy-duty pours or need to strip your forms quickly, an industrial agent can save time and effort. Just be sure to test it first to ensure compatibility with your plywood and concrete mix.
Form coatings (chemically active form coatings)
Chemically active form coatings are designed to bond with the surface of your forms, creating a protective layer that simplifies stripping and protects plywood from wear. They’re particularly useful for projects where you’ll reuse forms multiple times.
These coatings work by chemically reacting with the wood or other materials used in your forms, forming a tough but flexible film. This film makes it easier to remove concrete without damaging the form surface.
When applying form coatings, make sure to follow manufacturer instructions closely for best results. They typically require thorough mixing and even application to ensure uniform coverage. Once applied, allow ample time for curing before using your forms in a pour.
DIY and household alternatives (what works and what to avoid)
This section separates DIY/household substitutes from professional release agents and explains why some options work while others fail with plywood forms and concrete finishes. Common substitutes are vegetable oil, motor oil, diesel, wax, and plastic sheeting, and here we give a quick safety verdict for each. Some are safe in a pinch but most risk staining, odor, or surface damage.
Knowing what to test, how to apply, and how to judge results helps you avoid messy pour backs and rework. The main payoff is cleaner finishes, less staining, easier cleanup, and safer disposal.
Safe household options (e.g., paraffin, used cooking oil caveats)
Paraffin wax is a safe option for plywood forms as it doesn’t damage the wood and provides good release. However, use sparingly to avoid excess buildup.
Used cooking oil can work but requires careful application. Too much can leave residue that’s hard to clean off and may affect future pours. A thin layer is best, ensuring even coverage without pooling.
Always test any household option on a small area first to check for compatibility with your plywood and concrete finish. This helps avoid issues like staining or poor adhesion.
Unsafe or counterproductive choices (e.g., some greases, latex paint)
Avoid using heavy greases and oils like motor oil or diesel. These can damage plywood by leaving hard residues that are tough to remove.
Latex paints should not be used as release agents because they can bond with the concrete surface, causing adhesion issues when you try to strip the form later on.
Stay away from anything that might contaminate your pour or leave a residue. These substances could affect the quality of your finished concrete and make future work difficult.
When temporary plastic or polyethylene sheeting is a better choice
Using plastic or polyethylene sheeting as a barrier between plywood forms and concrete can be very effective. It prevents any chemical interaction that might damage the wood.
This method ensures clean, smooth pours without worrying about residue buildup on your forms. Just make sure to secure the sheets properly so they don’t move during the pour.
Sheeting also makes cleanup easier since you’re not dealing with residues from oils or waxes. It’s a great option for one-time use projects where form reuse isn’t necessary.
Application methods: spraying, brushing, wiping, and coating
Spraying, brushing, wiping, and roller/coating each have a core purpose on plywood forms: spraying delivers a fast, uniform coat over large, flat panels but can overspray or rebound on textured surfaces; brushing and wiping give you direct control in corners and on rough or patterned ply, though they slow you down and leave more variable film thickness; roller/coating is a middle path that builds a consistent film on broad areas while still handling some texture, and it often pairs well with release agents when you want a steady, repeatable finish.
Prep and workflow matter as much as method choice. Clean, dry surfaces, proper moisture control, and appropriate cure times between coats prevent pinholes and adhesion failures, while tannin content and plywood grade can influence film durability and release performance; select spray pressures, nozzle patterns, and brush/roller types with your release agent in mind, and plan for cleanup between jobs to maximize ROI. Test patches and quick field checks should guide you to switch methods or recoat before a failure sabotages a form.
Best practices for sprayers (commercial and DIY)
When using a sprayer, start with the right nozzle size to ensure even coverage without wastage. A smaller nozzle works well for detailed areas while a larger one is better for large panels.
Maintain consistent overlap as you spray to avoid thin spots or missed areas. Aim for about 50% overlap between passes, adjusting based on how quickly the agent dries.
Keep your sprayer clean and free of debris after each use by rinsing it thoroughly with water or a mild detergent solution. This prevents clogs and ensures smooth operation in future applications.
Brushing and wiping for small jobs or touch-ups
For smaller plywood forms or touch-up work, brushing or wiping is ideal. These methods give you precise control over the release agent’s application.
Aim to cover all surfaces evenly without leaving streaks or thin spots. Use a soft-bristled brush for smooth areas and a foam applicator for textured surfaces.
Wiping can be effective too, especially when working around corners or tight spaces where brushes might not reach well. Ensure you use enough agent to leave a uniform film but avoid over-applying which could lead to drips or excess buildup.
Film-forming coatings: thickness and curing
A proper coating should form an even, thin layer that adheres well but doesn’t soak into the plywood. Aim for a film about as thick as a piece of paper.
Allow sufficient time for the coating to dry before pouring concrete. This drying period can vary from 15 minutes to several hours depending on humidity and temperature conditions at your site.
To check if the coating is properly applied, run your finger over the surface lightly; it should feel smooth without any sticky residue or bare spots showing through.
Tools and materials checklist for application
We’ll outline sprayers (handheld, airless, or gravity-fed), pumps, and portable compressors sized for plywood forms. Include nozzle sizes, flow rates, and compatibility with common form-release chemistries, plus brushes, rollers, and lint-free rags for edge work. Don’t skip PPE (gloves, goggles, respirators with organic vapor filters, coveralls) and essential measuring tools to plan coverage and batches.
The right gear matters for a smooth, even coat and safe work on plywood forms. Plan post-use cleaning with approved solvents or water-based cleaners, a maintenance schedule, and storage tips to prevent premature curing or contamination. Staying organized with measuring and batch planning saves time and avoids color or texture variation at joints.
Choosing the right sprayer for consistent coverage
Pick a sprayer that can handle your release agent without clogging or degrading over time. Adjustable pressure and pattern control are key to getting an even coat.
- Select an airless, gravity-fed, or handheld sprayer based on form size and agent viscosity.
- Choose nozzle sizes between 0.015 inches and 0.023 inches for fine mist patterns.
- Aim for a flow rate of around 4 to 6 gallons per minute for large forms.
- Ensure the sprayer is compatible with your release agent’s chemical makeup.
- Adjust pressure settings between 1,500 and 2,000 psi for optimal coverage without overspray.
- Use a fan pattern setting to cover wide areas evenly; switch to round patterns for corners.
- Regularly clean the sprayer after each use with recommended solvents or water-based cleaners.
- Check seals and gaskets before starting application to avoid leaks or clogs.
- Test on a small section first to ensure even coverage without pooling.
- Monitor weather conditions; windy days may require lower pressure settings.
- Keep extra nozzles and filters handy for quick replacements during application.
Stop spraying if you notice uneven coverage or excessive overspray, and adjust your sprayer settings accordingly.
PPE and spill containment
Protect yourself from harmful chemicals by wearing appropriate PPE. Also, take steps to prevent spills from reaching soil or water sources.
- Wear gloves made of nitrile or butyl rubber for chemical resistance.
- Use goggles with side shields to protect your eyes from splashes.
- Don a respirator with organic vapor filters to avoid inhalation hazards.
- Dress in coveralls to prevent skin contact and clothing contamination.
- Lay down plastic sheeting around work areas to catch spills or drips.
- Have absorbent materials like kitty litter on hand for quick spill cleanup.
- Keep a bucket of water nearby for rinsing tools and equipment after use.
- Ensure proper ventilation in enclosed spaces; open windows if possible.
- Decontaminate skin and clothing with soap and water immediately after handling release agents.
- Store PPE properly to maintain effectiveness between uses.
Stop application if you notice any leaks or spills that could reach soil or water, and clean up promptly to prevent contamination.
Surface preparation for plywood forms
Clean the plywood faces and edges to remove dust, debris, and concrete residue, and make sure the boards are dry. Lightly sand the faces with 120–180 grit to create a uniform, slightly rough surface for even release agent adhesion. Seal all exposed edges and end-grains to reduce moisture uptake, and treat for mold and mildew before applying any release agent. Wear appropriate PPE when using solvents or sealants (gloves, eye protection, and good ventilation).
Check moisture content and ambient conditions and follow the release-agent maker’s guidance, allowing extra drying time in humidity or cool weather. Do a small-area test with the chosen release agent to observe release performance and adjust cleaning, sanding, or sealing if needed. This prep reduces suction, helps release agents work consistently, and minimizes stuck forms or torn edges on the jobsite. Record test results and batch details for future pours to ensure consistency.
Removing dust, laitance, and form-release residues
Before applying any release agent to your plywood forms, make sure the surface is clean and free of debris. Use an air blower or a stiff brush to remove loose particles like sawdust or concrete residue. If water is available, give the plywood a quick rinse but ensure it dries completely before moving on.
For stubborn residues such as laitance—a thin layer of cement paste that can form during concrete placement—consider using a mild solvent like mineral spirits to dissolve and remove it. After cleaning with any chemical, always wash down the surface thoroughly with water and let it dry again.
Avoid applying release agents while the plywood is still damp or has standing water on it. This could lead to uneven coverage and poor performance of your form-release products.
Repairing and sealing plywood defects
Prior to applying release agents, inspect the plywood for any cracks or gaps that might allow concrete to seep through. Use a suitable filler material like wood putty or epoxy to seal these areas. Make sure the repairs are smooth and flush with the surface.
Edge sealing is crucial as it prevents moisture from penetrating the wood fibers during curing, which can cause sticking issues later on. Apply an edge-sealing product designed for plywood forms according to the manufacturer’s instructions. This step helps maintain a consistent release across all surfaces of your formwork.
Making these repairs and ensuring proper sealing will help ensure that your concrete pours go smoothly without any unwanted adhesion or leakage problems from your plywood forms.
Environmental and regulatory considerations
Environmental and regulatory considerations for concrete form release agents cover the rules on volatile organic compounds (VOC), emissions standards, and regional variations that affect what you can use on residential and commercial jobs. They also include runoff concerns, containment and filtration needs, and disposal requirements that keep soils and waterways clean, plus comparisons of biodegradability claims and third‑party certifications to cut through marketing hype. In addition, you must understand local disposal regulations for spent or contaminated agents, container handling, spill response, and how these products should be labeled and documented for inspections.
This matters because sloppy choices or overlooked rules can cost you time, fines, and a compromised form surface that wrecks the project. You’ll benefit from knowing how SDS data, labeling, and compatibility with plywood forms align with your local codes and weather conditions, so you pick safer, compliant products without surprises. If you test options on a small panel first and demand independent performance data, you can balance environmental goals with form integrity, while building a straightforward plan for containment, cleanup, and proper disposal that reduces site risk and tracks what you used for reporting.
To close the loop on regulatory compliance and worker safety, follow concrete steps for disposal, exposure control, ventilation, and documentation. Use the SDS, vendor labels, and local regulations as your reference, and build a simple, repeatable process for every job site to stay compliant and protect workers.
Low-VOC and biodegradable options
When choosing form release agents, look for low-VOC (volatile organic compound) products to minimize air pollution. These are better for the environment but might cost a bit more than regular options.
Biodegradable alternatives like Bio-Nox claim to break down naturally without harming soil or water. They’re good choices if you want to reduce your environmental impact, though they may not work as well in cold weather or on very dry plywood forms.
Check the product labels for third-party certifications that confirm biodegradability and low-VOC content. These can give you peace of mind about using greener options without compromising form integrity.
Preventing contamination of soil and water
To avoid contaminating the ground or nearby waterways, set up barriers around your work area to catch any spills or runoff. Use absorbent materials like sand or kitty litter to soak up excess release agent.
Drainage is key—make sure there’s a clear path for water away from your forms and towards containment areas. This helps prevent the release agent from seeping into soil or flowing into storm drains.
If you’re working near sensitive areas like wetlands, take extra care to contain any spills using plastic sheeting or absorbent pads. Always have cleanup supplies on hand in case of accidental leaks or overflows.
Safety precautions during storage and application
Store form release agents in clearly labeled, tightly closed containers away from heat, sparks, and incompatible substances. Keep them on a dedicated shelf or cabinet with ventilation, and segregate solvents from cleaners or paints to prevent reactions. Check labels, expiration dates, and seals before each use, and never mix containers or transfer chemicals to unmarked bottles.
Good storage means safer work, faster jobs, and fewer surprises on site. It also protects your skin, lungs, and eyes by reducing exposure risk and fire chances from solvent vapors. Use the right PPE—gloves, goggles, and a respirator if required—and follow strict handling rules, including no smoking and spark-free tools. Have a simple pre-use check, know the spill cleanup steps, and keep emergency contacts handy so you can react fast if something goes wrong.
Flammability and inhalation risks
Solvent-based form release agents can be highly flammable, especially when stored improperly or exposed to heat sources. Keep these products away from ignition sources like sparks, flames, and cigarettes.
To reduce the risk of fire, ensure proper ventilation in storage areas where solvent-based releases are kept. Use explosion-proof lighting and avoid using electrical equipment that could generate sparks near flammable materials.
When applying form release agents, always wear appropriate personal protective equipment (PPE) to protect your skin, eyes, and respiratory system from harmful chemicals. This includes gloves, safety goggles, and a respirator if needed for solvent-based products.
Proper labeling and on-site SDS access
All containers of form release agents should be clearly labeled with the product name, hazard warnings, and safety instructions. This helps everyone understand what they are dealing with and how to handle it safely.
Maintain easy access to Safety Data Sheets (SDS) for all products on-site. These documents provide detailed information about chemical hazards, first-aid measures, and emergency response procedures specific to each product.
Train your team regularly on the proper handling of form release agents and ensure everyone understands the SDS content relevant to their tasks. This training helps prevent accidents by ensuring that workers know what protective measures to take and how to respond in case of an incident.
Cost vs. effectiveness analysis
This section lays out a simple framework to weigh cost against effectiveness for form-release products, focusing on unit cost per square foot, expected coverage per can or kit, and any setup or disposal fees, with clear anchors like typical pour sizes and environmental conditions. It also guides you to estimate how often you will recoat under curing conditions, how weather and form reuse change total spend, and how finish quality and plywood life can be affected by residue, staining, moisture ingress, or edge lift. A quick 1–5 scoring rubric is included for cost, coverage, reapplication needs, finish impact, and plywood wear, plus a straightforward overall recommendation by form type or pour scenario.
For a DIY homeowner, this helps you pick a release that fits your form setup, reveals how moisture content, plywood grade, and compatibility with oil-based versus water-based products change results, and gives practical tips on estimating real usage, spotting over‑application, and avoiding costly delamination, while also showing how the right choice can cut rework and protect your concrete finish. It translates to budget and scheduling, since the right option can reduce curing delays and form damage, and it helps you decide early whether to buy a larger kit, switch products, or adjust pour size to stay on track.
Calculating total cost per pour
To figure out the total cost for a concrete pour, start by looking at how much form release you need and how often it needs to be reapplied. Consider both the initial application and any touch-ups required during curing.
Add in labor costs for applying the release agent—this includes setup time, actual spraying or brushing, and cleanup. For smaller projects, this might mean just your own time; for bigger jobs, you’ll need a team.
Also factor in how many times you’ll need to recoat forms based on weather conditions and form reuse rates. This can really add up over multiple pours, so plan accordingly.
When to pay more for specialized products
Sometimes it’s worth spending extra on high-quality form release agents, especially if you’re working with premium concrete finishes or expecting a lot of form reuse. These situations demand better protection and longevity.
Premium releases often offer superior coverage rates and longer-lasting effects, reducing the need for frequent reapplications. They also tend to be less damaging to plywood forms over time, which can save money in repairs and replacements.
For projects where concrete finish quality is critical—like architectural features or high-end residential builds—it’s wise to invest in specialized products that minimize surface defects like stains or pop-outs.

Choosing the right release for different project types
Choosing the right release for plywood forms hinges on the project type and the finish you want. For small DIY pours, start with a light wax or water-based release to minimize odor and cleanup while keeping the surface fair without imprinting heavy texture. For architectural exposed finishes, a silicone or polymer release often gives the smoothest lift with the least residue, so the surface can show bloom or veining as intended. For tilt-up and precast work, use a stronger form coat—typically a durable polymer or specialized release—to prevent sticking through multiple pours and to keep form surfaces clean during strip.
Know that each option carries trade-offs in odor, cost, cure-time impact, and environmental footprint. Always check plywood compatibility, test a scrap panel, and follow prep steps, coat thickness, and curing times exactly so you don’t push residue into the concrete or cause staining. Keep the jobsite safe with ventilation and proper cleanup, and be ready to reapply as needed for larger pours or tight forms, because a sloppy release is a cheap path to bad finishes.
Small DIY slabs and footings
For small pours like patios, driveways, or footing work, you want something simple and effective. Water-based release agents are a good choice because they’re easy to apply and clean up.
A light coat of silicone spray can also do the trick for smooth finishes. Just make sure your plywood is dry and free from dust before applying any release agent. A quick wipe with a damp cloth will help remove loose particles.
Architectural concrete with visible finish
If you’re pouring architectural concrete where the form marks are part of the design, use a release agent that won’t leave any residue. A high-quality silicone-based product can work well here.
Test your chosen release on a small area first to ensure it doesn’t affect the surface finish or color. This is especially important if you’re using colored concrete or aggregates.
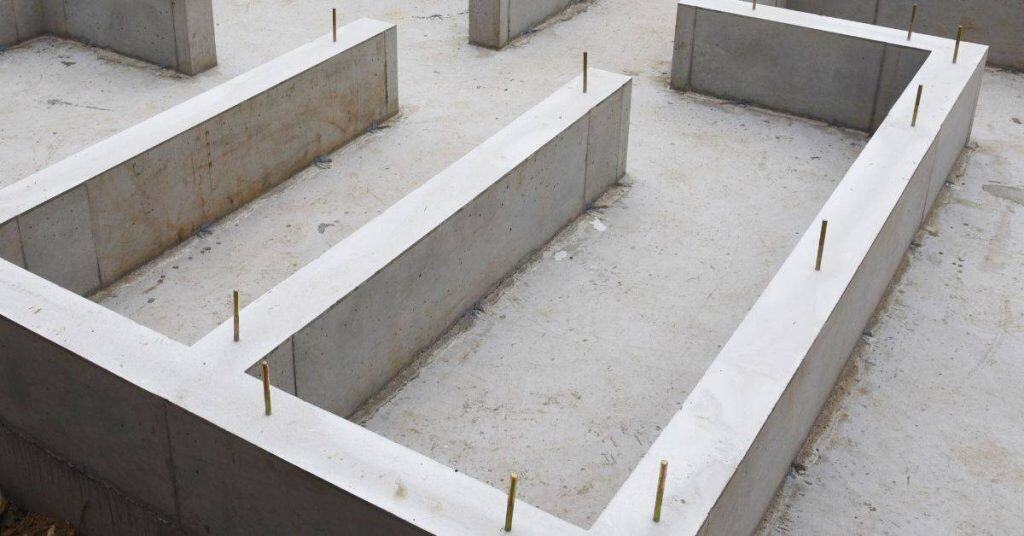
Repetitive production pours and form rental
For projects with multiple pours, like building foundations or sidewalks, durability of the release agent is key. Look for polymer-based products that provide a strong barrier against concrete sticking.
A well-applied coat can last through several pours without needing much maintenance. Make sure to clean and inspect your plywood forms regularly between uses to catch any wear early on.
Compatibility: release agents vs. concrete admixtures and form treatments
Compatibility in formwork means knowing how form release agents (oil, wax, water-based), concrete admixtures (retarders, accelerators, water reducers), and form sealers interact on plywood. Some combinations change evaporation rates, curing patterns, or how well a coating or sealer sticks later on. In practice, certain releases can hinder adhesion of sealers, while some admixtures can soften or alter the surface so you don’t get a clean release or a good surface texture.
Do small, flying tests on a couple of panels before you commit to a full set. Track ease of release, surface texture, any residue, and how the form seals or recharges for reuse. This matters on DIY jobs because a bad combo wrecks the next form, wastes material, and can force costly cleanup and rework.
Potential staining or reaction risks
When you mix form release agents with concrete admixtures, there’s a chance of chemical reactions that can cause discoloration or poor performance. For example, some oil-based releases might react poorly with retarders, leading to uneven curing and surface blemishes.
Silicone sealers on plywood forms can also create issues when paired with certain release agents, like petroleum oils. This combination may leave residues that affect the next pour’s adhesion or result in a sticky finish that’s hard to clean off.
It’s crucial to test these combinations before full-scale use. Look for signs of residue buildup, uneven surface texture, and difficulty releasing the concrete from the form after curing.
Simple on-site compatibility tests
To ensure your release agent works well with other materials, start by setting up a small test panel. Use plywood forms and apply both the release agent and any admixtures you plan to use.
Observe how the concrete sets and releases from the form over several hours. Check for residue on the surface and note if there are any issues with adhesion or curing patterns.
If everything looks good, proceed to a small test pour. This will give you a better idea of real-world performance under pressure and varying conditions. Document your findings so you can make informed decisions moving forward.
Visual checkpoints and quality control after application
After you apply the coating, inspect every panel for coverage and uniformity, focusing on edges and corners to catch skipped spots and thin patches that will telegraph through the final pour. Look for pooling, runs, sags, thin spots, and missed sections, and verify that color matches across panels and overlaps, checking that transitions between coats are seamless and that no high spots remain. Use bright lighting, run a dry roller or gloved hand to feel slick or uneven spots, and pull out a moisture meter if the product calls for it to confirm consistency and to verify that moisture readings stay within spec for wood.
Corrective steps should blend edges and feather ridges without creating adhesion issues, and you should recoat only where needed to avoid overloading any spot, keeping edges wet enough for a smooth transition into the surrounding film. Make sure the coating is dry-to-touch but not fully cured, with no solvent odor or tackiness, before pouring, and document batch, temperature, humidity, product lot, and deviations for future reference so you can reproduce successful jobs. Doing quick, careful checks saves you time, avoids failed pours, and protects the plywood from moisture intrusion and delamination, which is the whole point of a proper visual QC process.
Coverage indicators and touch-up techniques
After applying the release agent, you need to ensure full coverage without pooling or missed spots. Here’s how:
- Check for uniform color across all panels.
- Inspect edges and corners closely; these areas often miss application.
- Feel with a dry roller or gloved hand for slickness indicating proper coating.
- Look for thin spots, runs, or pooling that need touch-up.
- If you find missed spots, use a small brush to recoat without over-applying.
- Blend edges and feather them out to avoid ridges when pouring concrete.
- Use bright lighting to spot inconsistencies in coverage.
- Ensure no solvent odor or tackiness before proceeding with the pour.
- If using a moisture meter, confirm it reads within acceptable ranges for your product.
Once you’ve addressed any issues and everything feels dry but not sticky, you’re ready to proceed. If movement occurs during inspection, stop and reapply as needed.
Post-pour inspection for release effectiveness
After stripping the forms, inspect both the concrete surface and form condition to assess how well the release agent worked:
- Check if there’s any sticking or tearing of the concrete from the plywood.
- Look for signs of staining on the plywood that could affect future pours.
- Verify that no residue remains on the concrete surface, indicating proper release.
- Evaluate form condition; look for warping, cracks, or other damage.
- Note any areas where the agent pooled or was too thick, causing uneven finish.
- Inspect corners and edges of forms for missed spots or poor coverage.
- Assess concrete surface for smoothness and absence of ridges or lines from form movement.
If you notice issues during inspection, address them before reusing the forms to avoid future problems. Stop and fix any damage immediately.
Common mistakes and their consequences
The three big mistakes you’ll see on formwork are over-application, under-application, and using an incompatible release product with plywood and concrete mixes. These slip-ups cause adhesion in high spots, tearing or scuffing the plywood, surface voids, staining, and ghosting from the release film. Keeping these in check means dialing in film thickness, timing, and product compatibility before you pour.
Know the why behind it: you’ll save time and money by doing quick diagnostic checks—test plywood condition, moisture content, form cleanliness, and confirm the release product works with your concrete mix and curing environment. Use proper spray or roll technique, aim for uniform film thickness, and observe the label’s drying and cure windows to avoid future rework. If adhesion is uneven, recoat; if a coating proves incompatible, discard the form; and if staining or print-through occurs, plan post-pour cleaning or polishing and consider switching to a different release type after small panel testing.
Over-application and residue buildup
Applying too much release agent can lead to a sticky, gummy film on your plywood forms. This excess material doesn’t just waste product; it also makes the concrete stick in high spots where you don’t want adhesion.
Residue buildup over time creates an uneven surface that can cause voids or imperfections in future pours. These defects might not be noticeable until after the pour, when it’s too late to fix them without redoing the work.
Using engine oils or dirty products
Engine oils and other contaminated release agents can cause serious staining on your concrete. These stains are hard to remove and might require sandblasting or acid washing, adding extra costs and delays.
Incompatible materials like used motor oil or greasy rags can also leave a residue that interferes with the curing process, leading to weak spots in the concrete surface. Always use clean, appropriate release agents designed for concrete work.
Maintenance and reapplication schedule for plywood forms
Keep your plywood forms in top shape with a simple cadence: inspect after each project, and do quarterly checks for surface wear, stains, moisture, fastener marks, and release residue, and document findings in a simple log. Reapply release when you notice wear, reduced release, rough edges, or moisture saturation, and aim for consistent film thickness on edge profiles, including edges and corners. Clean between uses to remove debris, follow solvent rules, and dry or damp-dry as advised, then store the sheets properly, off the floor and away from damp walls.
Store dry, elevated, out of direct sun and humidity; rotate to avoid edge cracking and label for cross-site reuse, ensuring stack heights don’t crush edges. The routine saves you money by extending form life, reduces stuck concrete, and keeps crews safe with proper PPE and disposal of spent agents. A simple monthly check plus pre-assembly and post-season storage plan makes this work predictable and helps you meet VOC limits and safe-wipe disposal guidelines.
Recoat frequency based on reuse count and product type
When it comes to recoating plywood forms, the key is knowing when your release agent needs a refresh. Barrier oils like linseed oil typically need recoating after every few uses or if you notice reduced effectiveness during pouring. Film-forming products usually last longer but should be checked for wear and tear between each project.
For barrier oils, start by checking the surface after three to five pours. If the concrete sticks more than usual, it’s time to recoat. For film-formers, inspect the plywood every few projects or if you see signs of wear like rough spots or residue buildup. A fresh coat will ensure your forms release smoothly for future pours.
Remember, consistency is key. Regular checks and timely recoating help maintain the integrity of your forms and prevent costly repairs down the line.
Long-term storage tips for coated plywood
To keep your coated plywood in top condition, proper storage is crucial. After cleaning and recoating, allow the forms to dry completely before storing them away. This prevents mold growth and preserves the release agent’s effectiveness.
Cover your stored forms with a breathable material like canvas or plastic sheeting to protect against dust and moisture but ensure they aren’t sealed tightly. Store plywood in a cool, dry place away from direct sunlight and high humidity areas. Elevate them off the ground on wooden blocks to avoid contact with damp surfaces.
Rotate your stored forms periodically to prevent edge cracking and check for any signs of damage or wear before reusing. Proper storage can extend the life of your plywood significantly, saving you time and money in the long run.
Step-by-step plan for a DIY concrete pour using plywood forms
This plan gives you a clear, practical flow from site prep and form setup all the way through to stripping, with the sequence: prep, assemble, treat, pour, cure, and strip, so nothing gets skipped. Release selection depends on plywood condition, porosity, stand temperature, humidity, and cure time, and you should know the quick pros and cons of oil, water-based, paste or wax, and specialty coatings for DIY pours. On the day of pour, prep plywood surfaces, choose tools (sprayer, brush, or roller), re-apply as needed, and guard against pinholes and laps while you monitor coverage and edge buildup, then follow through with curing and the final strip.
Why it matters to you: minor mistakes show up as sticking, edges that mound, or color changes, and fixing these after the pour costs time and money. This plan also helps you lock in time blocks for form setup, pour, initial set, and strip windows, with practical contingency for weather or longer-than-expected cure. Finally, safety and best practices—PPE, ventilation, spill containment and disposal, and environmental care for concrete bleed and form residue—keep you productive, compliant, and respected on a DIY jobsite.
Step-by-Step Pouring Process
Before you start pouring concrete, make sure your site is ready and safe. Here’s a straightforward sequence to follow:
- Clear the area of debris and level the ground.
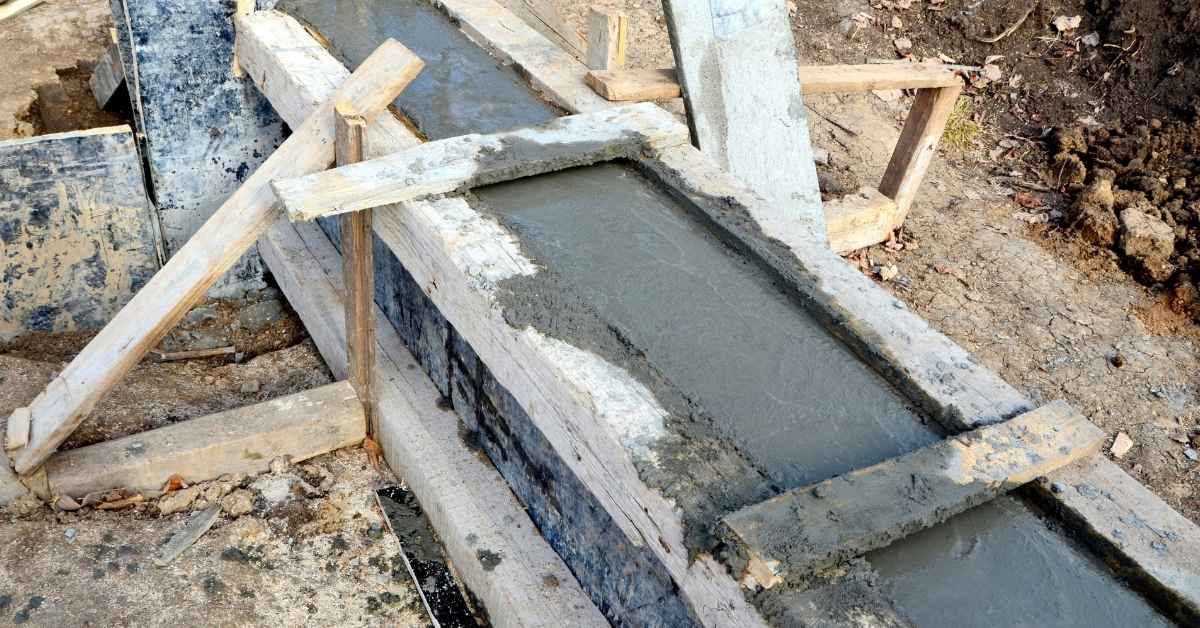
- Set up plywood forms securely with stakes and braces.
- Apply release agent evenly on all form surfaces.
- Place reinforcement bars or mesh as needed.
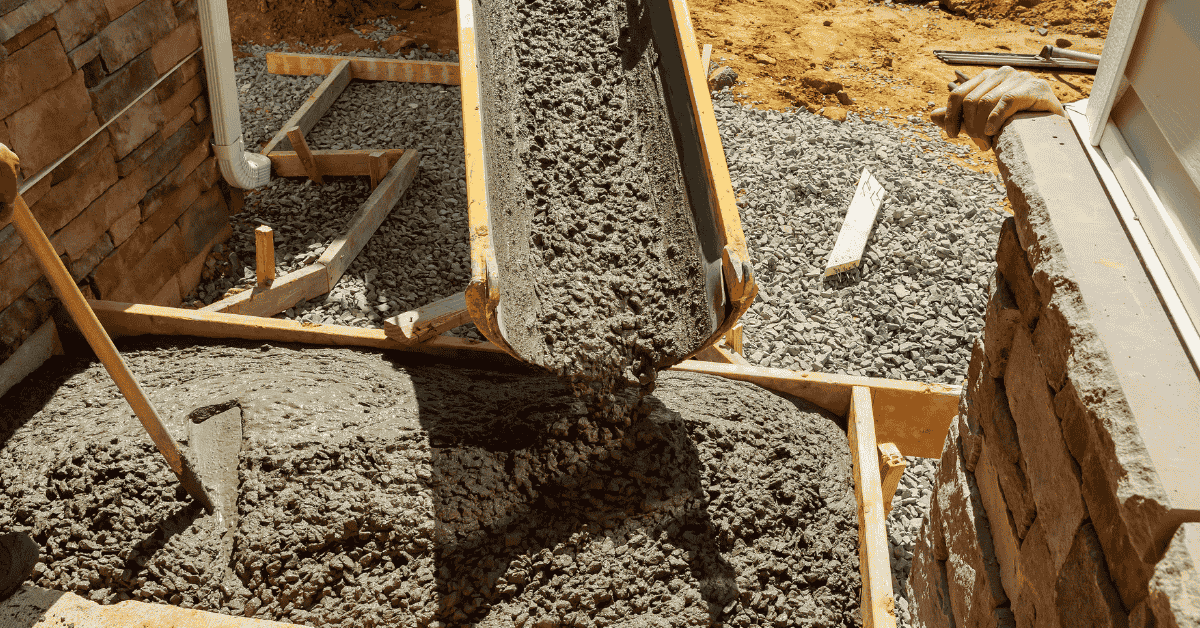
- Pour concrete in layers, using a vibrator to eliminate air pockets.
- Smooth out the surface and add any decorative touches like stamps or textures.
- Protect the pour from weather extremes until it sets.
After curing, inspect for cracks or imperfections before stripping forms.
Pre-pour Checklist
Before you start pouring concrete, ensure everything is in place and ready:
- Clean all plywood forms thoroughly.
- Apply release agent evenly on form surfaces.
- Place reinforcement bars or mesh accurately.
- Check for any gaps or leaks in the formwork.
- Verify that all tools are available and working.
- Ensure proper safety gear is worn by everyone.
- Confirm concrete delivery time with supplier.
Stop if you notice any movement in forms to prevent damage during pour.
Post-Pour and Stripping Checklist
Once the concrete has cured, it’s time to strip the forms carefully:
- Wait until concrete reaches required strength for stripping.
- Remove braces and stakes gently from outside inwards.
- Inspect form surfaces for residue or damage before storing.
- Clean tools used during pouring and stripping.
- Dispose of any waste materials properly.
- Check the finished concrete surface for cracks or imperfections.
Stop if you notice any movement in forms to prevent damaging the new concrete.
Case studies and real-world comparisons
DIY driveway slab with household alternative
Using a household alternative like cooking oil can save money upfront but may lead to poor finish quality and residue buildup on the plywood forms. The surface texture often becomes rough, with pinholes and uneven patches.
Cleaning these residues off the plywood after each pour is time-consuming and might require harsh solvents that degrade the form’s integrity over multiple uses. This can limit your form’s life to just a few cycles before needing replacement or repair.
While it seems cost-effective initially, the long-term maintenance and potential for wasted concrete due to poor release can outweigh any savings from using household alternatives.
Architectural wall cast with chem-active coating
A chemical active coating, like a polymerized release agent, provides superior finish quality and ease of stripping. It minimizes bugholes and creates a smooth surface that reflects well on the final product.
The initial cost is higher compared to household alternatives, but it offers better form life and reduces labor costs associated with cleaning and maintaining forms over multiple pours.
While setting up for the first pour might take extra time due to application requirements, subsequent uses are smoother and faster. This makes it a practical choice for projects where finish quality is critical and reuse of forms is expected.
Final recommendations and quick decision guide
This section lays out a concise, text-based flow to pick the right release method. Start with project size, then finish, budget, and environment to land on a release category and product type. It contrasts options like form coatings, wax, spray-on or brush-on releasing agents, and flags safety and environmental concerns.
Use the quick flow to avoid common mistakes like over-application or incompatibility with plywood sealer. This guide helps you move from rough to smooth efficiently, with notes on application thickness, cure times, and reapplication needs. Sticking to the flow saves time and reduces trial-and-error on the jobsite.
Quick picks: best for budget, best for finish, best for reuse
For a budget-friendly approach, opt for water-based releasing agents. They’re cost-effective and easy to apply.
If you need a high-sheen finish, go with solvent-based coatings or specialized form release sprays designed for smooth finishes.
To maximize plywood form reuse, choose biodegradable releases that don’t leave residue. These products are typically more expensive but save on long-term costs by reducing the need for recoating.
When to consult a pro or vendor tech rep
Contact a professional if you’re working with large-scale projects, unusual form shapes, or complex concrete mixes that might affect release performance.
Vendors can provide safety data sheets (SDS) and compatibility information for specific products. This is crucial when dealing with plywood forms treated with sealers or coatings.
For unique project requirements, such as high-pressure pours or textured finishes, a tech rep can offer tailored advice on the best release methods to use.
Conclusion
Choose a release method that protects the plywood, makes the concrete finish clean, and keeps you safe. The right approach saves time, reduces costly rework, and minimizes damage to forms during stripping and reuse.
Decide from here with a practical checklist: verify the form surface is clean and dry, test your release on a small area or scrap panel, apply the chosen product using the recommended method (spray, brush, or wipe) in thin, even coats, allow proper curing time per product instructions, and inspect for uniform coverage and no pooling before pouring; if using household alternatives, confirm they won’t react with your concrete mix and avoid anything that can leave sticky residues or staining, then perform a controlled pour and monitor for any form imprint or bond issues during stripping.
Common mistakes to avoid include skipping surface prep, applying too thick a coat, using incompatible products with your concrete admixtures, and neglecting safety gear or ventilation during application and storage. Always test a small spot first, keep releases away from soil or plants, and follow the product’s label for reapplication timing and disposal.
If your project involves complex forms, nonstandard mixes, or high-strength concrete, consider bringing in an experienced contractor or form-and-release specialist. Stay practical, stay safe, and you’ll finish with a clean release, sharp edges, and a form that lasts. You’ve got this—plan, test, apply carefully, and pour with confidence.
FAQ
What can I use as a form release on plywood?
Use a dedicated form release agent or a light coating of vegetable oil. Wipe it on thin and even, then wipe off excess. A clean surface helps concrete release cleanly.
Can I use soap and water as a release?
Suds and water alone often won’t prevent sticking. It can also cause uneven coating and residue on the concrete edge. Not reliable for plywood forms.
Should I grease plywood before pouring?
A small amount of release agent or oil works better. Too much grease makes the concrete slip and can ruin surface finish. Use just enough to coat the wood lightly.
What should I avoid using on plywood forms?
Avoid paraffin wax, diesel fuel, and heavy oil. They can stain concrete or leave tough residues. Don’t use products that gum up the wood or trap moisture.