
Introduction
A slab leak is a hidden water leak under a concrete slab that can cause rising bills, damp spots, and structural damage.
This guide helps you recognize common warning signs, perform quick checks to narrow down the source, and outline practical next steps to protect your home. You’ll learn how to observe for wet spots, listen for sounds of running water, test for moisture around the slab, and know when to call a professional.
Key takeaways
- Look for unusually high water bills and unexplained damp spots on floors.
- Listen for persistent hissing sounds under slabs or behind walls.
- Verify cold spots on floors and warm air escaping near vents.
- Quick tests: check meter while appliances idle, shutoff other sources first.
- Technicians use tracer wires, acoustics, and pressure tests to locate leaks.
- Repair options: slab injection, repipe, or trenching; weigh cost versus disruption.
Table of Contents
- Introduction
- Key takeaways
- Quick overview: what a slab leak is and why it matters
- Visual and physical warning signs to watch for
- Quick DIY tests to confirm a suspected slab leak
- How professionals locate slab leaks (what to expect)
- Immediate safety steps and temporary measures
- Repair options, pros/cons, and cost considerations
- Insurance, warranties, and who pays for what
- Long-term prevention and maintenance strategies
- Conclusion
- FAQ
Quick overview: what a slab leak is and why it matters
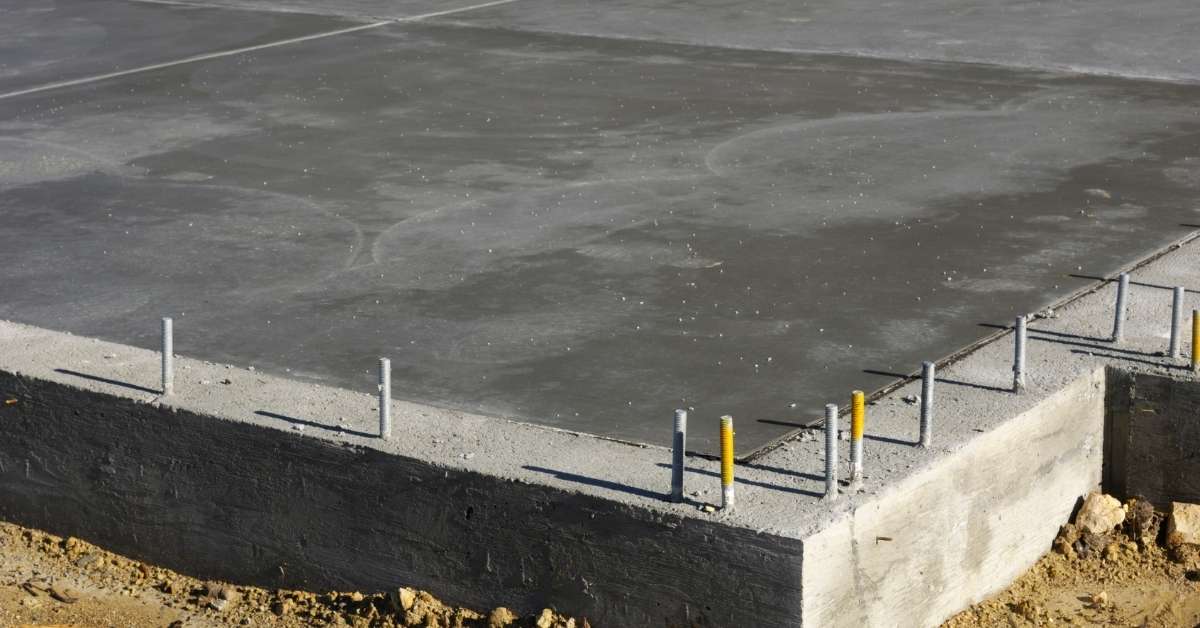
A slab leak is a hidden leak that occurs in the pipes buried under a concrete slab, and it’s different from the leaks you might see under sinks or behind walls because you don’t notice it until it shows up on the floor, in the foundation, or in the moisture around the slab. Commonly affected areas are hot water lines and cold water supply lines beneath the slab, near foundations, or in crawlspace regions, and the usual culprits are pipe corrosion, shifting or expansive soil, pressure changes, and installation defects. These leaks sneak up on you and can escalate fast if ignored.
Why it matters is straightforward: leaking water under a slab can damage structural components, promote mold and mildew growth, push your water bills higher, and pose health risks from damp living conditions. For a DIY homeowner, the payoff is practical—watch for telltale signs like unexplained damp spots, increased moisture in the foundation, warm floors, or sudden changes in water use, then perform quick checks and plan action before the problem spreads or costs spike. Prompt action saves money, reduces health risks, and minimizes the chance of major repairs later on.
How slab leaks form
A slab leak happens when the pipes under your concrete foundation start to fail. The most common reason is corrosion, where water and chemicals eat away at the pipe material over time. Another big factor is shifting soil or seismic activity that can crack pipes.
Sand and other abrasive materials in the ground also wear down pipes with constant friction. High water pressure inside the pipes can cause them to burst if they’re not strong enough to handle it. All these factors combined create a high risk for leaks under your concrete slab, leading to major issues above ground.
It’s important to catch these signs early because once a pipe starts leaking, it won’t stop on its own. The longer you wait, the more damage will spread and cost you in repairs.
Common consequences of untreated slab leaks
If you ignore a slab leak, the immediate risk is high water bills as the pipe continues to waste water. But that’s just the start. Over time, the constant flow can undermine your foundation, causing cracks and shifting in walls and floors.
Mold growth is another serious issue. The moisture from leaks creates perfect conditions for mold to thrive, which can lead to health problems like allergies or respiratory issues for you and your family.
Untreated slab leaks also damage flooring materials such as wood and carpeting, leading to costly replacements. In the long run, ignoring a leak means bigger repair bills and more extensive work to fix structural damage.
Visual and physical warning signs to watch for
Visual and physical signs like unexplained wet patches, damp or warm floor areas, and persistent dampness near foundations point to a slab leak. Look for warm spots on concrete, new or spreading floor cracks or spalling, and mold or musty odors that signal ongoing moisture intrusion. Plumbing cues such as sudden spikes in water use or a running toilet can confirm the concern.
Urgent signs include active intrusion, visible pooling, or a rapidly rising water bill, and they require quick action. If you notice the signs, shut off the main valve if you can do so safely, then call a plumber; if flooding is immediate, call emergency services. Keep notes: location of damp spots, approximate time you saw them, and which fixtures were used, plus photos if possible, so the pro can inspect fast.
Indoor signs (floors, walls, fixtures)
One of the first things to look for are sudden hot spots on your concrete or flooring. If you notice a warm patch that wasn’t there before, it could mean water is leaking through from below. Another sign is buckling or cracking in tiles and grout lines where moisture has caused expansion.
Unexplained dampness under carpets or rugs can also be a red flag for slab leaks. Check the edges of your carpeting to see if there are any signs of wetting, especially near walls or around plumbing fixtures like toilets and sinks. Water stains along baseboards are another clear indicator that water is seeping up from below.
When you spot these issues, it’s important to act fast. If the problem seems severe—like visible pooling or a rapidly rising water bill—shut off your main water supply right away and call an emergency plumber. For less urgent cases, schedule a professional inspection as soon as possible to prevent further damage.
Remember, these signs can be similar to other home issues like basement moisture or HVAC leaks. But if you see multiple of these clues together, it’s likely pointing towards a slab leak. Don’t wait—addressing the issue early saves money and hassle down the line.
Outdoor and property signs
Look for unusual changes in your lawn or garden, such as unusually lush grass patches or soggy spots that don’t dry out. These can indicate water is leaking from underground pipes and pooling up on the surface. Also check around outdoor faucets; if you notice low water pressure when using them, it might be a sign of reduced flow due to leaks.
Sinkholes are another major red flag for slab leaks. If you see any depressions or holes forming in your yard, especially near where plumbing lines run underground, this could mean significant damage has occurred and needs immediate attention.
Lastly, pay close attention to your water meter when the house is not using water. A running meter with no visible usage inside can indicate a serious leak that’s wasting water and causing structural issues beneath your home’s foundation.
If you spot any of these signs, take action quickly by shutting off your main water supply and contacting a professional plumber or emergency services if necessary. Early detection is key to preventing further damage and costly repairs.
Secondary signs people often miss
Subtle but important signs of slab leaks include unexplained higher water bills, recurring mold or mildew growth in corners or under sinks, and persistent musty odors that don’t go away. These can be easy to overlook but are strong indicators of ongoing moisture intrusion.
Noisy pipes or a running toilet without visible cause can also point towards slab leaks. If you hear water flowing through your pipes when no fixtures are in use, it might mean there’s an undetected leak somewhere underground.
When these signs appear, don’t ignore them. They often precede more obvious visual and physical damage like wet floors or cracks in walls. Addressing the issue early can save you a lot of trouble down the road.
If you notice any of these secondary signs, it’s wise to have your home inspected by a professional plumber right away. Early intervention is crucial for preventing further damage and ensuring your home stays safe and dry.
Quick DIY tests to confirm a suspected slab leak
Quick DIY tests give you a practical first read on whether a slab leak might be present, before you call a pro. Start simple: watch the exterior water meter when no water is being used and compare what you see to your typical bills over a couple of months to spot unexplained increases. Do a visual and tactile sweep of floors, walls, and baseboards for damp patches, warm spots, cracks, or mold near concrete slabs—pay special attention along exterior walls or above known plumbing runs. Listen in quiet moments for faint running-water sounds inside walls or beneath the slab, and note persistent damp odors or mustiness. Check visible pipes under sinks and near appliances for drips, and inspect toilet flanges, supply lines, and irrigation zones for silent leaks. If you need a quick diagnostic, briefly shut off irrigation to rule out outdoor leaks, and plan a simple 24-hour meter check by recording the reading overnight and then again during the day.
If you see meter movement with no water use, persistent damp spots, or sudden bill spikes, document the findings and outline a plan for a professional leak investigation. These DIY checks don’t replace a pro, but they help you build a clear case and avoid surprises. The goal is a focused discussion with a plumber or leak specialist, so you know where to start and what questions to ask, based on real observations from your home.
Water meter test (how to do it and interpret results)
To perform a water meter test, start by shutting off all water usage inside your home. This includes turning off the main valve if you have one. Then, go outside and check your exterior water meter. If there’s any movement on the meter while no water is being used, it could indicate a leak.
Next, note the initial reading of the meter at night when everything is quiet. Come back in 24 hours and take another reading. Compare these readings to see if there has been any unexplained increase in usage. A significant rise without obvious reasons like watering plants or filling pools can point towards a slab leak.
Remember, even small drips can add up over time. If you notice the meter moving slightly but water isn’t visibly coming from taps or fixtures, it might be due to a hidden pipe issue under your concrete slab.
If your test shows unusual activity, document these findings and prepare for a professional investigation. This simple test is a quick way to confirm if there’s an underlying problem that needs attention.
Hot/cold isolate test and fixture checks
To determine whether your hot-water lines are leaking under the slab, start by isolating them. Turn off the main valve for cold water and observe if there’s any change in meter readings or dampness around pipes. If no changes occur, it suggests that the issue might be with the hot-water system.
Next, check all visible plumbing connections under sinks and near appliances like washing machines and dishwashers. Look for signs of moisture, mold growth, or drips from supply lines connected to these fixtures. Also, inspect toilet flanges for any water pooling around them.
If you suspect a leak in the hot-water system but can’t pinpoint it visually, try turning off individual valves leading to appliances and observe if there’s a reduction in meter activity. This helps narrow down which section of piping might be affected.
Remember, these checks are basic steps to help identify potential issues before involving professionals who have specialized equipment for more detailed inspections.
Visual thermography and moisture mapping (DIY options)
To get a better idea of where leaks might be occurring, consider using an infrared camera attachment or renting a moisture meter. These tools can help you identify temperature differences and areas with higher moisture content.
When using an infrared camera, look for warm spots on walls or floors near concrete slabs. Warm patches could indicate water seepage from pipes beneath the slab. Similarly, use a moisture meter to scan baseboards, corners of rooms, and other likely locations where leaks might be present.
Persistent dampness or higher readings compared to surrounding areas can suggest active leaks rather than condensation issues. Document these findings as they will help professionals pinpoint problem spots during their investigation.
While DIY tools are useful for initial assessments, professional equipment is often more accurate and sensitive in detecting subtle signs of slab leaks. Use your findings to guide further steps towards resolving the issue.
How professionals locate slab leaks (what to expect)
Professional slab-leak locating hinges on a set of standard methods, chosen to match the site and the suspected problem. Acoustic listening, tracer gas, and pressure/flow tests help pinpoint where water or gas is moving without tearing into floors, while thermal imaging and ground-penetrating radar reveal hidden moisture or voids and hidden utilities, and video pipe inspection lets you see the inside of pipes when access is available. The typical visit follows a clear sequence: start with an on-site assessment, shut off and check system pressure, perform non-destructive scans, then pinpoint the leak’s location and evaluate whether access can be made without heavy demolition.
What you’ll observe on the job includes the technicians’ test equipment, calibrated sensors, moisture readings, and occasional clear sounds from listening equipment or pressure gauges, all with safety as a priority. Expect discussions about gas-line caution, water shut-off procedures, and the need for licensed technicians for gas- or pressure-related work, along with questions to confirm accuracy, time frame, potential damage, and how the cost is structured. Providing basic information in advance—system model, known problem areas, and recent symptoms—helps the tech target the search, reduces wall or slab intrusion, and speeds repairs, with documented findings useful for insurance or contractor referrals if needed.
Acoustic listening and correlation
We use acoustic devices to listen for water flow under the slab. These tools pick up sounds made by running water, helping us pinpoint where leaks are happening. Technicians wear headphones and walk around your home while monitoring sound levels.
The key is interpreting these sounds. We look for changes in pitch or volume that indicate a leak’s location. This method works best when there’s consistent water flow, like from a dripping faucet or running toilet.
Acoustic listening can narrow down the area where leaks are likely to be found but isn’t precise enough on its own. It often leads into more detailed methods like thermal imaging or tracer gas testing for exact leak spots.
Electronic leak detection and infrared scanning
We use electronic trace devices to detect leaks by sending signals through water. These tools help us map out where the water is flowing under your slab without damaging it.
Infrared cameras, or thermal imaging, are also a big part of our toolkit. They show temperature differences on surfaces, which can reveal cold spots indicating water leakage. This method works great for finding leaks in pipes that run through walls or under floors.
Both methods give us a clear picture of where the leak is coming from without needing to tear up your home. It’s non-invasive and helps us plan repairs more accurately, saving you time and money.
Sewer-line camera and pressure tests
We use sewer-line cameras to inspect pipes for blockages or damage. This is especially useful when we suspect a leak in the main sewer line, which can be hard to spot otherwise.
Pressure testing involves shutting off water supply lines and pressurizing them to check for leaks. We monitor pressure gauges closely to see if there’s any drop that indicates a break or crack somewhere along the pipe.
This method is crucial when we need to confirm plumbing integrity before making repairs. It helps us isolate the exact line causing issues, ensuring targeted fixes rather than broad replacements.
Immediate safety steps and temporary measures
When a slab leak is suspected, act immediately to reduce danger and stop further damage: evacuate occupants if you detect a gas smell, call the emergency line or utility, and avoid any flames or electrical switches until professionals clear the area. Move away from the area and do not re-enter until a qualified person says it is safe. If you can do so safely from outside, shut off the main water valve to stop further leakage, but never shut off a gas valve without clear safety from outside and guidance from professionals.
Keep electrical hazards in mind as you respond: stay away from standing water and wet electrical components, and only flip off power at the main disconnect if you can reach a dry location without risk. If water intrusion is present, contain it with towels or buckets and use plastic sheeting to limit spread while avoiding running appliances or electrical devices in the area. Then call a licensed plumber or slab-leak specialist as soon as you can, document the scene with photos for insurance, and ventilate the space without attempting permanent fixes until professionals assess the cause and extent.
Shut-off, appliances, and electrical safety
The first thing you need to do is find the main water valve. It’s usually near your water meter or in a basement or utility room. Turn it off carefully—don’t force it if it feels stuck. If there’s any chance of a gas leak, don’t touch the gas valve unless you can reach it safely from outside.
Next, turn off power to affected appliances and outlets near wet areas. Don’t risk getting shocked by standing water or damp switches. Use a flashlight to check if your main electrical panel is dry before flipping any circuit breakers. If in doubt, leave the area until you can get professional help.
Remember, safety first. Keep kids and pets away from the affected space. Call 911 immediately if there’s a gas smell or signs of a leak. Don’t use candles or light matches near suspected leaks—let professionals handle it safely.
Containment and drying basics
Once you’ve shut off the water, start containing the damage. Place towels or buckets under dripping spots to catch water. Use plastic sheeting to cover floors and walls if needed. This helps prevent further spread.
Open windows and doors to ventilate the area. If it’s safe, run fans or dehumidifiers to dry out damp spaces faster. Keep an eye on any standing water and move furniture away from wet spots to avoid mold growth.
Don’t use appliances in affected areas until a professional says it’s okay. Take photos of the damage for insurance claims. Stay vigilant but don’t try permanent repairs yourself—wait for experts to assess the situation fully.
Repair options, pros/cons, and cost considerations
There are several repair routes for leaky or failing pipes: spot repair, rerouting, repiping, and trenchless methods. Each has its own sweet spot depending on pipe material, location, and damage. Expect differences in disruption, cost drivers, and how long the fix lasts.
Choosing the right method affects mess, time, and future headaches. For DIYers, understanding when you can reroute versus when to pull new pipe, and what permits or codes may apply, helps you plan and talk sensibly with a contractor. Check the label or datasheet on materials for guidance and be prepared to adapt to local rules and site conditions.
Spot repair vs. rerouting under/concrete solutions
If you spot a leak and it’s small, spot repairs might be your best bet. You cut out the damaged section of pipe, replace it, and patch up the concrete around it. It’s quick and minimally invasive.
But if the damage is extensive or in hard-to-reach spots under your slab, rerouting pipes above ground or through walls can be a better option. This method avoids major concrete work but requires more time and disruption to your home.
The decision hinges on where the leak is located and how much of it needs fixing. If you’re dealing with multiple leaks or extensive damage, rerouting might save you from repeated repairs down the line.
Trenchless and minimally invasive methods
Epoxy relining is a trenchless method that involves inserting a flexible tube coated with epoxy into your existing pipe. Once in place, it hardens to form a new inner lining, sealing off leaks without digging.
Pipe bursting is another trenchless technique where a new pipe is pulled through the old one, breaking and displacing the old as it goes. This method works well for replacing larger pipes but can be more disruptive than epoxy relining.
While these methods are less invasive, they often come with higher upfront costs compared to traditional digging. However, they offer quicker recovery times and minimal mess, making them worth considering if you want a cleaner repair process.
Budgeting tips and financing options
Getting accurate quotes from multiple contractors is crucial. Ask for detailed breakdowns of materials, labor, and any additional costs like permits or restoration work. This helps you compare apples to apples.
Factor in the cost of restoring your home after repairs. Concrete patching and painting can add up quickly if extensive work was done. Make sure these are included in your budget estimates.
If the repair is costly, consider financing options like home equity loans or credit lines. Some contractors offer payment plans as well. It’s smart to shop around for the best rates before committing to a large expense.
Insurance, warranties, and who pays for what
Your homeowners policy may cover sudden leaks under your dwelling coverage, but it can exclude gradual leaks, maintenance issues, or earth movement. Check if you have endorsements for water/sewer backup or other structures, and learn the typical deductibles and limits that apply to repairs and water damage. In common slab-leak scenarios, who pays can swing on those coverages and on whether the leak is seen as a repair or an incident.
Typical policy coverage and common exclusions
Your standard homeowner’s insurance usually covers sudden damage from slab leaks, but it often excludes gradual wear-and-tear or maintenance issues. If the leak is due to a burst pipe or unexpected plumbing failure, you’re typically covered.
The catch? Insurance policies rarely cover leaks caused by neglect or lack of regular maintenance. Earth movement and settling are also usually excluded unless specifically added as an endorsement. So if your slab has been slowly leaking for years because you didn’t replace old pipes, that’s not going to fly with most insurers.
It’s crucial to understand these distinctions when filing a claim. If the leak is sudden and caused by something like freezing weather or a pipe break, it’s covered. But if it’s due to gradual deterioration over time, you might be out of luck unless you have additional coverage for water backup or sewer backups.
Remember, insurers look closely at whether damage was preventable with regular maintenance. So keep your plumbing in good shape and document any issues as they arise. This can help if a sudden leak occurs later on.
How to document a claim and work with adjusters
The key to getting your slab leak covered is thorough documentation from the start. Take dated photos of any visible damage, leaks, or water accumulation as soon as you notice them.
Keep all receipts for repairs, plumber estimates, and contractor bills related to the leak. This paperwork can be crucial in proving the extent of the damage and the costs incurred.
Communicate promptly with your insurance adjuster. Provide them with a detailed timeline of events leading up to the leak, along with any professional reports or assessments you have from plumbers or contractors. Be clear about what needs fixing and why it’s necessary.
If your initial claim is denied, don’t give up. Request an official review by the insurer. Sometimes additional documentation or a second opinion can make all the difference in getting coverage approved.
Long-term prevention and maintenance strategies
Long-term prevention hinges on a disciplined, homeowner-run maintenance calendar that keeps slab health and drainage in check. Establish seasonal checks for moisture, drainage performance, and irrigation or sump systems, with tasks mapped to monthly visual checks, quarterly inspections, and annual professional assessments; if a step is unclear, check the product label or datasheet for guidance.
Why it matters: good exterior water management reduces hydrostatic pressure against the slab and helps catch slow leaks before they become big problems. Regular interior and under-slab moisture monitoring establishes baselines, alarms for deviations, and helps you act early with simple fixes or pro referrals. Keep repair logs, warranty info, and contractor contacts, and have a clear, practiced response plan that tells you when to call a pro and how to coordinate with insurers.
Pressure regulation, water quality, and pipe materials
Pipe material choices can make or break your slab’s integrity over time. The wrong stuff leads to cracks, stains, and weak bonds.
- Install PRVs: Pressure-reducing valves lower stress on pipes and the slab; look for models rated for high flow rates.
- Test water chemistry: Corrosive water eats away at metal pipes; use a test kit to check pH levels and mineral content.
- PVC or PEX: Durable, flexible options resist corrosion and cracking; avoid galvanized steel due to rust buildup.
- Copper pipe: Great for longevity but prone to pinhole leaks over time; consider replacing with more resilient materials.
- Air gaps: Ensure proper air gaps between water supply lines and fixtures to prevent backflow and contamination.
Routine inspections and smart monitoring tools
Maintain your slab’s health by regularly checking for signs of leaks or damage. Use this checklist to stay ahead of issues.
- Monthly visual: Look for cracks, stains, or damp spots; address any issues immediately before they worsen.
- Quarterly drainage test: Ensure gutters and downspouts are clear and direct water away from the slab; clogs can cause pooling.
- Sensor placement: Install moisture sensors under the slab to catch leaks early; set up alerts for any deviations.
- Whole-home shutoff: Test your main valve monthly to ensure it works properly; a faulty valve means no water control in an emergency.
- Professional leak check: Schedule yearly inspections with a professional using advanced detection tools like infrared cameras.
Quick rule: Regular checks and smart sensors are your best defense against slab leaks. Stay vigilant, and you’ll avoid costly repairs down the line.

Conclusion
A slab leak can threaten safety, damage, and the look of your place if you ignore it. Stay focused on fast, safe steps to limit water waste and avoid costly fixes.
Check in this order: confirm moisture in the area with the quick tests you already did, note any visual signs like damp spots or warm floors, shut off water if you suspect a leak, call for a professional when the signs persist, and document costs, warranties, and insurance options before any permanent repair. Keep every action small and controlled, start in a small area, and never work on exposed pipes or utility areas without turning the water off first.
Common mistakes to avoid are rushing repairs without verification, ignoring hidden or rising moisture, and overexerting DIY fixes on buried pipes. Safety rules are simple: shut off the water supply before any inspection, don’t hammer or cut into a slab without confirming the location, and test a small area first to avoid creating bigger damage. Stay conservative with temporary fixes and follow the service provider’s recommendations for permanent repair.
If the signs don’t clear after quick tests, or if the leak is under a slab you can’t safely access, call a licensed pro sooner rather than later. They’ll locate the leak, scope repair options, and handle warranties and insurance questions. Take control now, act calmly, and you’ll protect your home from more damage and expense.
FAQ
What are the common signs of a slab leak?
You’ll notice damp spots on the floor, warm or damp patches, or persistent moisture near the foundation. A sudden jump in your water bill and sounds of running water you can’t find also point to a leak. If the floor feels moist or you see foundation staining, don’t ignore it.
How can I do quick tests to confirm a slab leak?
Read the water meter when no taps are on. If the meter still moves, you likely have a leak. Listen for running water inside walls or near the slab, and check for unusual warm spots on the floor.
What should I do first if I suspect a slab leak?
Shut off the main water supply to stop any more damage. Call a licensed plumber right away and avoid digging or hammering at the slab yourself. Document the signs so the contractor knows what to check.
Can I fix a slab leak myself?
No. Slab leaks are hidden and risky. Improper fixes can cause more damage to the foundation and plumbing, so treat it as a professional job.