

Introduction
Remove mold from basements safely and effectively with quick tests and durable repairs.
You’ll learn how to spot moisture sources, run quick checks, and choose proven repair approaches that stop mold from returning.
The guide walks through realistic techniques you can apply in real basements, avoiding common mistakes and prioritizing long-term dryness.
Key takeaways
- Act quickly when you smell musty odor or see visible mold growth.
- Test moisture sources: check leaks, window gaps, and condensation on walls.
- Use proper PPE and containment to prevent dust spread during cleaning.
- For small infestations, scrub with detergent and dry the area completely.
- Repair sources of moisture: fix leaks, improve drainage, and vent intermittently.
- Implement long-term prevention: seal penetrations, insulate, and monitor humidity year-round.
Table of Contents
- Introduction
- Key takeaways
- Quick overview & when to act
- Mold basics & health risks
- Identify and inspect basement mold (visual & hidden)
- Quick tests to confirm mold & moisture sources
- Step-by-step cleanup for small to medium infestations
- Safety, PPE, and containment for DIY jobs
- Repairs that stop mold from returning (short-term fixes vs. long-term solutions)
- Prevention checklist & maintenance plan
- Conclusion
- FAQ
Quick overview & when to act
Basement mold is urgent because it poses real health risks—from triggering allergies and asthma to compromising immune responses—and because ongoing moisture can silently weaken framing and structure over time. The guide aims to give you quick, actionable tests to confirm mold presence, practical removal steps you can actually do, and fixes that reduce the chance it comes back, like controlling moisture, improving ventilation, and addressing insulation and surface repairs. Act immediately if you see active leaks, if dampness sticks around, or if you notice a lot of growth, and call a professional when the area is large, materials look contaminated, or you’re unsure of the mold type.
Useful context: simple checks like visible mold, moisture or humidity readings, surface damp after cleaning, and everyday environmental clues can steer your next moves. Taking the right steps now helps protect health, keeps repairs from expanding, and makes the home safer for occupants without guessing. If any risk signals are present or testing is inconclusive, start with safety precautions and seek professional guidance; otherwise you can proceed with basic cleanup and preventive fixes.
Signs you need to act now
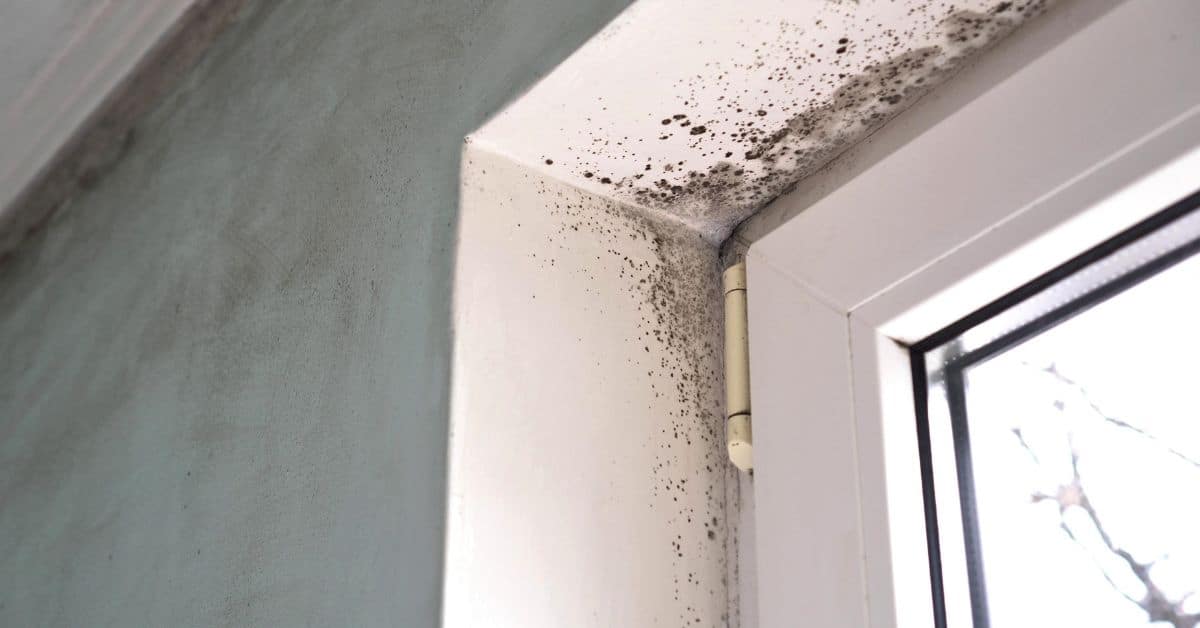
If your basement has a musty smell, it’s time to take action. A strong odor means there’s active mold growth somewhere in the space.
Visible colonies larger than 10 square feet are another red flag. This size indicates significant moisture issues and potential structural damage if left unchecked.
Water intrusion is a clear sign of immediate danger. Leaks, whether from plumbing or exterior walls, need to be addressed right away to prevent further mold growth.
If you notice health symptoms like allergies, asthma attacks, or immune system issues in residents, it’s crucial to act fast. Mold can exacerbate these conditions and may require professional intervention.
Quick safety triage
If you suspect HVAC contamination, evacuate the area immediately and call a professional. Contaminated air systems spread mold spores throughout your home.
Isolate any areas with extensive mold growth or contaminated materials to prevent further spread. Use plastic sheeting and tape to seal off affected zones.
For immunocompromised residents, err on the side of caution. Even small amounts of mold can pose serious health risks. Seek professional help to ensure a safe environment.
Mold basics & health risks
Mold is a fungus that reproduces by tiny spores floating through the air, and it thrives wherever moisture lingers long enough for colonies to form. In basements, that means humidity from leaks, condensation on cold surfaces, or poor ventilation creates the perfect conditions for mold to start and spread. Spores can travel and settle on drywall, wood, fabric, or concrete, so even unseen damp spots can become growth sites if moisture stays present.
Common basement appearances include dark or greenish patches, sometimes fuzzy or powdery, and those growth patterns can help you spot a problem without overreacting to every spot. Health effects vary from mild irritations like itchy eyes or coughing to more concerning reactions for children, older adults, and anyone with a compromised immune system, but moisture is always the root driver you should address first. Identify moisture sources, monitor humidity, and look for ongoing damp spots or leaks, because fixing the moisture is the first step before cleanup, prevention, or bringing in a pro.
How mold grows in basements
Mold thrives where there’s moisture, and basements are often the perfect breeding ground. Common sources of excess dampness include leaks from pipes or walls, condensation on cold surfaces like concrete floors, and seepage through cracks or poorly sealed windows.
High humidity levels also fuel mold growth. When relative humidity stays above 60%, spores find it easy to multiply. They latch onto porous materials such as wood, drywall, carpet, and insulation, forming colonies that spread quickly if left unchecked.
To spot potential issues early, keep an eye out for musty odors or visible signs of water damage. These are clear indicators that moisture is present and mold could be growing behind the scenes. Addressing these problems promptly can prevent a small issue from becoming a major headache down the road.
Health risks and who’s most vulnerable
Mold exposure can lead to various health issues, ranging from mild irritations to more serious conditions. Common symptoms include sneezing, coughing, itchy eyes, and skin rashes. In severe cases, prolonged exposure might cause respiratory problems or allergic reactions.
Some people are particularly at risk due to pre-existing conditions. Children, the elderly, and those with weakened immune systems face higher chances of developing serious health issues from mold exposure. It’s crucial for these groups to avoid environments where mold is present.
To protect yourself and your family, it’s important to identify and address any signs of mold growth early on. Regular inspections and proper moisture control can significantly reduce the risk of harmful exposures in your home.
Identify and inspect basement mold (visual & hidden)
Identify basement mold by doing a careful visual check and safe probing of hidden spaces. Before you start, put on PPE, turn off fans, and note electrical hazards and confined-space risks. Look for surface staining, discoloration, musty odor, water stains, and signs around plumbing, with planned probing behind drywall, in wall cavities, crawl spaces, sump pits, and around vents and appliances.
Keep a photo log with locations and indicators, note moisture sources, and set thresholds for action. Use a moisture meter, infrared/thermal imaging, borescope or flashlight probing, and simple moisture tests to spot hidden moisture. Knowing what to look for helps you plan safe remediation or decide when to call pros.
Visible mold: colors, textures, and surfaces
Mold can appear in various shades like green, black, white, or even a mix of these. It often looks fuzzy or slimy, but it’s easy to mistake for dirt or efflorescence—those powdery deposits on concrete walls. To spot the difference, look closely at surfaces where moisture tends to linger.
Wood and drywall are prime targets because they’re porous and absorb water easily. Insulation can also harbor mold if it gets wet. Carpet is another common hiding place since it traps moisture beneath its fibers. If you see stains that aren’t uniform or have a musty smell, chances are high it’s mold.
When inspecting surfaces, use a flashlight to check corners and edges where water might collect unseen. The musty odor is often your first clue. Once you spot something suspicious, take photos from different angles for documentation.
Hidden mold hotspots
Mold can hide behind drywall or paneling where water has seeped through walls due to leaks. Look around plumbing pipes and HVAC ducts, especially in corners and joints where moisture tends to accumulate.
Crawl spaces beneath stairs are another spot to check—these areas often lack proper ventilation and can be damp year-round. Sump pits and ejector pits also need attention; they’re prone to standing water which can lead to mold growth.
Behind appliances like washing machines or dryers is yet another area to probe. These spots can get wet from condensation or leaks, making them ideal for hidden mold colonies. Use a borescope or flashlight to peek into small gaps and look for signs of moisture damage.
Documenting the problem
To tackle basement mold effectively, you need clear documentation. Start by taking photos from multiple angles, focusing on areas with visible growth or water stains. Use a tape measure to mark dimensions and note any specific details like moisture readings.
Keep a log of your findings, including dates and observations. This helps track progress over time and serves as evidence if you need to involve professionals later. Label each photo clearly so it’s easy to reference during repairs or when discussing with contractors.
If mold is extensive, consider creating a baseline set of photos for comparison after remediation efforts. This way, you can see improvements and ensure the problem is fully addressed. Remember, thorough documentation is key to getting accurate bids from contractors and ensuring your DIY work meets standards.
Quick tests to confirm mold & moisture sources
For quick results, start with affordable DIY tests when you see visible mold or you suspect a hidden moisture problem, and reserve sampling for hard-to-reach pockets or suspected structural issues. Use simple tools like surface inspections, basic moisture meters, and humidity readings to spot elevated moisture zones before they grow. Know when to escalate to lab tests: if you have persistent dampness after basic remediation or suspect toxic molds, or you need contractor validation.
This approach helps you map likely moisture sources—leaks, condensation, poor insulation, or drainage issues—without jumping to complex steps. Tracking humidity over days and noting spot moisture can guide where to focus repairs and how to seal leaks or improve ventilation. Professional lab tests are useful when results aren’t clear from DIY checks, or you need formal confirmation from air, surface, or bulk samples; check the label/datasheet for what each test covers and the expected turnaround before ordering.
Do-it-yourself mold detection methods
To start, grab a flashlight and inspect every corner of your basement. Look for dark spots on walls or ceilings that might be mold growth. Use tape-lift tests to collect samples from surfaces; if the tape turns black when you peel it off, there’s likely mold present.
Another quick test is using your nose—mold often has a musty smell. If you notice this odor but can’t see any visible signs of mold, take some smartphone photos and zoom in to check for small patches or discolorations that might be hidden.
Maintaining a record with these DIY methods helps track changes over time. Keep notes on where you found issues and when they appeared. This documentation is crucial if you need to escalate to professional testing later.
Moisture testing: meters and humidity
A moisture meter can tell you where water might be hiding in your basement walls, floors, or wood. Place it on different surfaces to see if there’s elevated moisture content. Aim for relative humidity (RH) levels below 60%—anything above that suggests a problem.
Hygrometers are handy tools to track daily changes in RH. Stick them in corners and record readings regularly. If you notice spikes, especially after rainy days or when it’s humid outside, this could indicate ongoing moisture issues.
To confirm persistent dampness, use desiccant-based tests like calcium chloride kits. These measure how much water the air is holding by weight gain over time. A significant increase means there’s a lot of moisture in the air that needs addressing.
When (and how) to get professional testing
If DIY tests reveal mold growth in hard-to-reach areas or if you suspect toxic molds like black mold, it’s time for a lab test. Professional air and surface samples can pinpoint the type of mold and its concentration.
Also consider getting a pro involved if your basic remediation efforts don’t solve persistent dampness issues. A professional report will give you detailed insights into what needs fixing and how severe the problem is.
Laboratory tests are also crucial when dealing with structural concerns or health risks. They provide accurate data on mold spore counts, which can help in making informed decisions about next steps for your basement’s health.
Step-by-step cleanup for small to medium infestations
Clear the area and fix the moisture problem first, because every clean-up plan hinges on stopping the source of dampness before you touch any mold or contaminated material. For areas under ~10 sq ft, set up a simple containment zone with plastic and seal off adjacent rooms to limit airborne spores, and wear proper PPE such as an N95 mask, gloves, and eye protection. Then map out a straightforward sequence: identify what can be cleaned or kept, what must be removed, and how to dry everything thoroughly after cleaning.
This approach minimizes cross-contamination and makes the job less guesswork for a DIYer. It matters because moisture drivers drive recurrence, so documenting the fix and validating that humidity and moisture have stabilized keeps you from chasing the problem again next season. By prioritizing source control, precise material handling, and careful drying, you build a durable finish that’s safer and less prone to hidden growth, while knowing when DIY ends and a pro should step in if structural damage or extensive growth appears.
Step-by-Step Cleaning Process
This sequence helps you clean up small to medium mold infestations safely and effectively.
- Set up a containment area with plastic sheets, seal off adjacent rooms. Wear N95 mask, gloves, goggles for protection.
- Fix the moisture source first—patch leaks, drain standing water, run dehumidifiers until humidity is under 60% RH.
- Cover and protect non-porous items like metal or glass with plastic sheeting to avoid contamination during cleanup.
- Remove porous materials like carpet, drywall, insulation that can’t be cleaned thoroughly. Bag them up for disposal.
- Scrub non-porous surfaces with a mild detergent solution, rinse well, and let air-dry completely before reusing.
- If mold is extensive or you see structural damage, call in professionals to handle the cleanup safely.
What to remove vs. what to clean
Identify materials that need removal and those you can clean:
Porous items like carpet, drywall, insulation must be discarded as they trap moisture and mold spores deep inside.
Non-porous surfaces such as metal, glass, concrete can usually be cleaned with detergent and water. Scrub thoroughly until all visible signs of mold are gone.
Note: If you’re unsure about a material’s ability to retain moisture, it’s best to err on the side of caution and remove rather than risk future problems.
Cleaning Agents and Methods That Work
Mixing detergent with water is a common method for cleaning mold. Use commercial mold cleaners if you need something stronger but follow the instructions carefully.
Bleach can be used in dilutions of 1 part bleach to 10 parts water, but it’s not recommended for porous materials as it doesn’t penetrate deeply enough.
Biocides are powerful and should only be used by professionals due to safety concerns. Always wear protective gear when using any cleaning agents.
Drying and Verifying Dryness
After cleaning, drying is crucial to prevent mold regrowth:
Use dehumidifiers and fans to circulate air and remove moisture. Place dehumidifiers in the center of the room for best results.
Maintain humidity levels below 60% RH using a hygrometer to monitor progress daily until dryness is achieved.
Check with a moisture meter to ensure all surfaces are dry before sealing or finishing work. This prevents hidden mold from growing back later on.
Safety, PPE, and containment for DIY jobs
Safety, PPE, and containment means you protect yourself and others by wearing the right gear, controlling airflow, and setting up clean and dirty work zones. Use proper fitting respirators, splash goggles, nitrile gloves, disposable coveralls, and shoe covers as a baseline, and avoid DIY on toxic molds or large areas if you’re unsure. Keep decon steps in mind from the start and plan how you’ll remove gear and decontaminate surfaces.
This matters because good PPE, ventilation, and containment stop dust, spores, and chemicals from spreading to occupants and pets. It also makes cleanups quicker and safer, and helps you finish with fewer callbacks. Follow the product labels and datasheets for any specifics, and if a task feels risky, back off and recheck your plan with a pro.
What to Wear and Breathing Protection
You need the right gear to stay safe. Start with a respirator. For small jobs, an N95 mask is fine. But if you’re dealing with more than just surface mold, step up to a P100 respirator for better protection. Make sure it fits snugly around your face.
Next, wear splash goggles or chemical safety glasses to protect your eyes from spores and cleaning agents. Nitrile gloves are a must—latex won’t cut it here. They need to be thick enough to handle rough surfaces without tearing. And don’t forget disposable coveralls with booties to keep mold off your clothes.
Remember, if you see toxic molds or the infestation is large, call in pros. DIY isn’t always safe or effective for big jobs.
Containment and Negative Pressure Basics
To keep mold from spreading to other parts of your home, you need a containment plan. Start by sealing off the affected area with plastic sheeting. Use duct tape to seal seams tightly so no spores can escape.
Set up an exhaust fan with HEPA filtration in a window or door opening. This creates negative pressure inside the work zone, pulling air inward and keeping mold out of living spaces. Make sure you have clear entry and exit points marked off with signs.
Keep your tools and supplies within the containment area to avoid cross-contamination. When you’re done each day, clean up thoroughly before leaving the site. This helps prevent spores from spreading when you return.
Repairs that stop mold from returning (short-term fixes vs. long-term solutions)
Repairs that stop mold from returning come in two flavors: quick patches that stop the immediate moisture and durable, long‑term fixes that actually seal the problem and keep it from coming back. The plan should start with identifying the moisture source and stopping the leak, then progressing to proper waterproofing, better drainage, and finally addressing vapor barriers and insulation so the walls stay dry over time. Think in a clear order: find the entry points, fix them, upgrade where moisture is sneaking in, and then watch for signs of recurrence after the work is done.
This matters because short-term fixes can look good, but without addressing the root causes you’re betting the mold will reappear. By prioritizing exterior and interior seals, drainage improvements, and a proper vapor barrier and insulation setup, you reduce the odds of a repeat problem and protect indoor air quality during and after repairs. DIY work can save time and money for small issues, but you should weigh the scope and risk and know when to bring in a pro for durable, code‑aware performance and reliable dry-out progress.
Stop the water: plumbing, grading, and drainage
The first step to stopping mold is finding where the water’s coming from. Check your roof for leaks, look at your downspouts—make sure they’re extended away from the foundation—and inspect your gutters. If you see standing water near the house, it’s time to fix grading issues.
Once you’ve identified the source, start by sealing any cracks in the exterior walls or around windows and doors with a good quality sealant. For larger leaks, like those coming through basement walls, consider installing a French drain system or fixing your foundation’s waterproofing layer. Don’t forget to clear out any clogged downspouts or drains.
Improving drainage is key. Make sure the ground slopes away from your house so water flows outward instead of pooling near the foundation. If you have standing water, consider adding a sump pump and proper drainage channels around the perimeter of your home.
Basement waterproofing and vapor control
To keep mold at bay long-term, you need to seal out moisture. Start with interior sealants like epoxy coatings or polyurethane paints on your basement walls. These can be DIY projects but for larger jobs, it’s best to hire a pro.
For exterior waterproofing, consider hiring professionals who can excavate around the foundation and apply a high-quality membrane. This is more expensive upfront but lasts longer and stops water before it gets in.
Vapor barriers are also crucial. Install them between your basement walls and insulation to prevent moisture from moving through. If you have an unfinished basement, use rigid foam board with a vapor barrier on the inside of the foundation wall.
HVAC, ventilation, and humidity control
Maintaining low humidity is key to preventing mold. Start by checking your HVAC system for proper airflow and efficiency. If you have an older unit or one that’s not keeping up with the load, consider upgrading.
Continuous dehumidifiers are a great addition. Size them based on the square footage of your basement and place them strategically near moisture-prone areas like laundry rooms or bathrooms. Run these units year-round to keep humidity levels below 50%.
Ventilation is also important. Use exhaust fans in wet areas like kitchens, bathrooms, and laundry spaces to remove excess moisture. Consider installing a whole-house ventilation system if your basement has poor air circulation.
Prevention checklist & maintenance plan
Goal: keep relative humidity in the target range, promote steady ventilation, and stop moisture intrusion through the building envelope and plumbing, then back it up with a practical monthly and seasonal checklist you can actually follow. Think of it as a guardrail system: inspect for new leaks, re-seal minor cracks, clean gutters and downspouts, test sump pump operation, and confirm interior surfaces stay dry after wet weather, while practicing simple daily habits that reduce moisture buildup.
You’ll rely on a straightforward monitoring routine you can maintain: a simple humidity log, noting musty odors or visible discoloration, using affordable moisture meters in problem zones, and date-stamping photos of any mold sightings to track trends over time. A repeating cadence—monthly quick checks, quarterly deeper inspections, and seasonal pre-winter and post-rainfall reviews—with clear responsibility assigned to a household member or a DIY-savvy helper makes prevention tangible and repeatable, helping you justify running a dehumidifier when needed, using exhaust fans in moisture hotspots, and promptly drying spills before they become stubborn stains or invite mold growth.
Tools and materials checklist
Use this list before each inspection to ensure you have everything needed for a thorough check.
- Moisture meter/hygrometer: Check humidity levels; skip if unsure of current conditions.
- Humidity log book: Record daily readings; missing data can hide trends.
- Drywall patch kit: Fix small cracks and holes; delays let moisture in.
- Silicone caulk: Seal gaps around windows, doors, and pipes; leaks lead to mold.
- Vacuum with HEPA filter: Clean dust and spores from corners and vents; neglect allows buildup.
- Dehumidifier specs: Ensure capacity matches room size; undersized units won’t keep humidity down.
- PPE (gloves, mask): Protect skin and lungs during inspections; skipping risks exposure.
- Cleaning agents: Have bleach or vinegar solution ready; unprepared means delays in treatment.
Quick rule: Always have your checklist handy to catch issues early.
Seasonal checks and monitoring plan
Follow this guide for regular inspections throughout the year to prevent mold buildup.
- Spring: Gutters: Clear debris; clogs cause leaks.
- Spring: Sump pump test: Run it dry then pour water in; failure means flooding.
- Summer: HVAC intake: Check for blockages or moisture; issues lead to condensation.
- Summer: Concrete floor: Look for damp spots after rain; ignore at risk of mold growth.
- Fall: Roof inspection: Fix shingles and flashing; leaks can cause major damage.
- Fall: Downspout extensions: Ensure water moves away from foundation; improper setup leads to pooling.
- Winter: Insulation check: Look for gaps around windows, doors; cold air seepage causes condensation.
- Winter: Plumbing lines: Wrap exposed pipes with insulation; freezing can burst pipes.
Quick rule: Stick to the schedule and act fast on issues to keep mold at bay.

Conclusion
Acting now protects your health, keeps your basement usable, and prevents costly damage down the road. Stay practical, follow the steps, and hold the line on proper containment and drying so the fix lasts.
To move forward, run a simple, repeatable check in order: confirm the moisture source, verify humidity levels, perform the quick tests to confirm mold, ventilate and isolate the area, don proper PPE and containment, clean small to medium spots with a measured method, dry everything thoroughly, and then implement the repairs that stop moisture from coming back before you repaint or finish the space.
Common mistakes to avoid are skipping the moisture source test, rushing cleanup without containment or adequate air flow, and trying to “DIY” big fixes without checking for hidden mold behind walls or under carpet. Always wear the right PPE, don a respirator or at minimum a good mask, keep doors closed to limit spread, and never mix cleaners or use harsh chemicals without knowing the reaction. These simple safety rules keep you from making costly mistakes.
If you’re dealing with a large area, persistent moisture, or mold behind walls, it’s time to bring in a pro instead of pushing on alone. A professional can locate hidden sources, verify dryness, and install long‑term solutions that won’t fail with the next moisture event. Stay focused, follow the plan, and you’ll keep the basement dry, safe, and looking right.
FAQ
What causes mold in a basement?
Mold grows when moisture sticks around. Poor drainage, leaks, and high humidity are the usual culprits. Fix the water first, then deal with the mold you can see.
How can I test for mold quickly?
Look for visible growth and a musty smell. Use a moisture meter to find damp spots and fix them first. DIY mold tests exist, but they only confirm not fix the problem.
What fixes actually work to stop mold long term?
Find and fix the moisture source. Dry the area completely, clean with a mold-killer, and improve ventilation. Don’t just scrub and walk away—moisture and humidity will return if you don’t seal and dry properly.
When should I call a pro?
If mold covers a large area, there’s standing water, or you’re unsure what you’re dealing with, call a pro. A licensed mold remediator will find hidden moisture and ensure safe cleanup.