
Introduction
Use vinegar to safely remove paint from wood.
The guide walks through practical steps, how to prepare, test, and apply vinegar, plus simple rules of thumb to prevent damage.
You’ll learn how to evaluate results, handle stubborn spots, and know when to stop or switch methods.
Key takeaways
- Vinegar works best on water-based paints and unfinished softwood surfaces.
- Use warm vinegar solution to accelerate paint lifting without harsh chemicals.
- Test a small area before full removal to avoid finish damage.
- Gentle scraping and soft-bristle brushes minimize wood gouging.
- Rinse with clean water and dry thoroughly between steps to prevent warp.
- After removal, seal and finish promptly to protect underlying wood.
Table of Contents
- Introduction
- Key takeaways
- Quick overview: when vinegar is a good choice
- Safety and prep before you start
- Tools and materials checklist
- How to prepare the vinegar solution
- Step-by-step removal process
- How to check effectiveness and next steps
- Post-treatment care and finishing the wood
- Comparison: vinegar vs other paint removal methods
- Conclusion
- FAQ
Quick overview: when vinegar is a good choice
Vinegar works best on water-based or very thin coatings and on small, reachable patches of wood. Start with clean, dry wood and consider using white distilled vinegar at room or warm temperatures to help it penetrate.
Avoid old lead-based paints, thick oil-based finishes, sealants, or multilayer coatings. If the paint is softening quickly in a small test, you can proceed with cautious wipe and light scraping; if there is no change, stop and consider alternatives.
Types of paint and wood best suited for vinegar
Vinegar works best on water-based paints like latex or acrylic. These are mild acids that can soften these types of coatings.
Unfinished or sealed wood surfaces also respond well. Vinegar won’t damage the wood itself, but it might strip any existing sealants.
It’s less effective on oil-based paints and thick finishes. For these, you’ll need stronger chemicals. Stick to small areas and reachable spots for best results.
When to stop and seek professional help
If the paint is old or suspected to be lead-based, don’t attempt removal yourself. Lead paint can be dangerous if inhaled.
For large areas, structural damage, or stubborn multi-layer finishes, it’s best to call a pro. They have specialized equipment and training for these situations.
If vinegar doesn’t work after testing, stop immediately. Trying harder won’t help; you might just cause more damage.
Always test in an inconspicuous spot first. If there’s no change after 10 minutes, don’t waste time on the rest of the area.
Safety and prep before you start
Wear chemical-resistant gloves, safety goggles, and appropriate clothing. Use a dust mask or respirator if sanding or creating dust, and ensure good ventilation in the work area.
Test a small inconspicuous spot first and protect nearby surfaces with drop cloths or tape. Review local rules for disposal of used rags and wastewater before starting the project.
Personal protective equipment and ventilation
Safety comes first when dealing with paint removal. Here’s what you need to protect yourself and ensure proper airflow.
- Chemical-resistant gloves: Protect your hands from vinegar and paint residue. Opt for nitrile or neoprene gloves, around $5-$10 a pair.
- Safety goggles: Shield your eyes from splashes. A basic pair costs about $3-$5.
- Long sleeves: Cover exposed skin to prevent irritation. Wear old clothes or invest in disposable coveralls, around $10-$20.
- Dust mask/respirator: If sanding or creating dust, use a mask rated for particulates (e.g., N95). For heavy-duty tasks, consider a respirator with replaceable cartridges. Expect to pay around $15-$30.
- Ventilation: Open windows and doors for natural airflow. If fumes are strong, use a box fan in a window, blowing outwards. Mechanical ventilation systems can be rented, starting at around $50 per day.
Lead paint testing and legal/safety considerations
If your home was built before 1978, test for lead paint. It’s harmful if inhaled or ingested.
Use a lead test kit, available at hardware stores ($10-$20), or hire a professional (around $50-$300 per test). If you find lead:
Stop work immediately. Lead-safe work practices are required by law. Hire a certified lead abatement professional to continue the project safely.
Exposure to lead can cause serious health problems, especially for children and pregnant women. Seek medical advice if you suspect exposure.
Workspace protection and containment
Protect your surroundings from paint chips and vinegar drips to prevent damage and contamination.
Mask off the work area using painter’s tape and plastic sheeting. A roll of tape ($2-$5) and a large drop cloth or plastic sheet ($10-$30) will do the trick.
Cover floors and nearby furniture with drop cloths, old sheets, or towels. Contain runoff in a shallow pan or tray to prevent spills from reaching the floor.
Shield adjacent fixtures with tape and plastic sheeting. This helps keep them clean and prevents damage from paint chips or vinegar splashes.
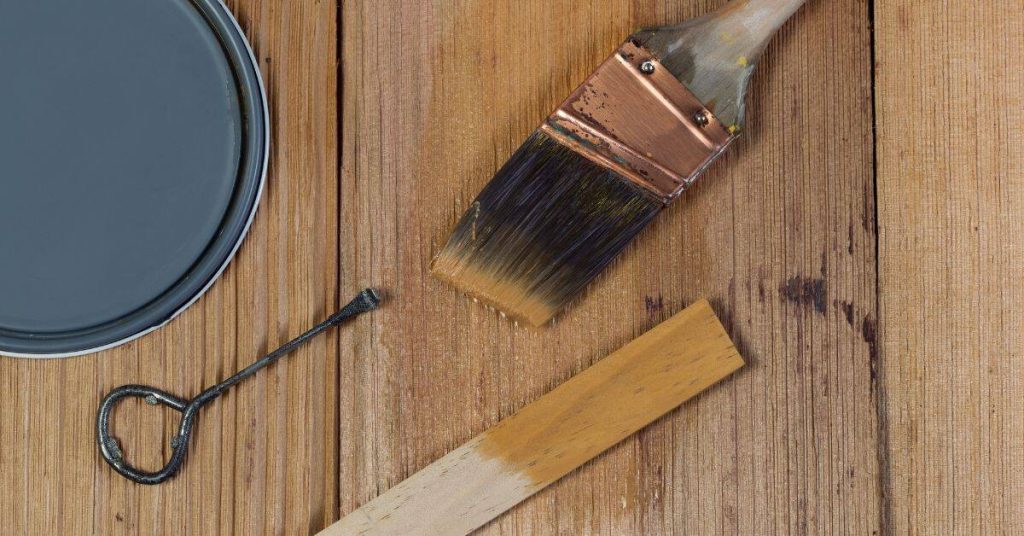
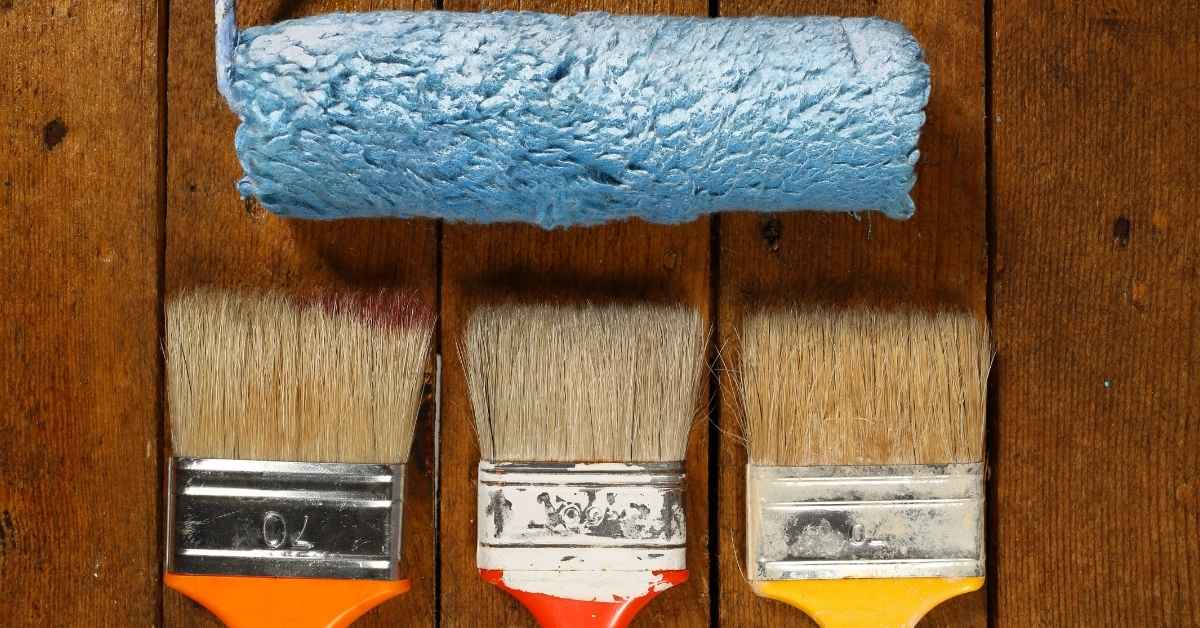
Tools and materials checklist
Have a spray bottle, a sturdy scraper, non-scratch abrasive pads or steel wool, microfiber cloths, and sturdy buckets or disposal containers ready. Keep a drop cloth or old sheet to protect surrounding surfaces.
White distilled vinegar is the baseline; test any stronger options on a small area first. For tougher layers, you may warm the vinegar slightly and have a travel bottle ready for easy application.
Vinegar and Solution Options Explained
Before you start, understand the types of vinegar to use for best results.
- White distilled vinegar (5-10% acidity): This is your baseline. It’s mild yet effective on most paints and woods.
- Cleaning vinegar: Slightly stronger than white vinegar, it may be more potent against tougher paint. Always test on a small area first to avoid damaging the wood.
- Warm vinegar: For stubborn layers, warm the vinegar slightly (not boiling) to boost its effectiveness.
- Concentration check: If unsure about the strength, dilute with water until it’s around 5-10% acidity. Too strong can damage wood.
- Avoid using: Do not use vinegar with higher than 20% acidity or boiling hot vinegar to prevent damaging the wood.
- Spray bottle size: Consider a travel-sized spray or larger refill bottle for ease of application and storage.
Quick rule: Always test on a small, hidden area first to ensure no adverse reactions with your specific wood type.
Hand Tools and Abrasives to Have On Hand
Gather the right tools for a smooth paint removal process.
- Sturdy scraper or putty knife: For scraping off loose paint. Choose one with a comfortable handle and sharp edge.
- Steel wool or non-scratch abrasive pads: For scrubbing and removing stubborn paint. Use fine-grade steel wool (0000) for delicate surfaces.
- Nylon brushes: For scrubbing etched areas gently. They won’t scratch the wood like steel wool might.
- Sandpaper: Fine-grit sandpaper (120-220) can help smooth out any remaining rough spots after scraping and scrubbing.
- Heat gun (optional): For tougher paint, use as a last resort to accelerate the softening process. Always use with extreme caution and proper ventilation.
Quick rule: Choose gentle abrasives for delicate surfaces and more aggressive ones for tougher paints on sturdy woods.
How to prepare the vinegar solution
Identify the appropriate vinegar type and note any additives to avoid. Do not use compounds that could damage the wood.
Follow simple dilution guidelines and test on an inconspicuous patch before full use. Use non-reactive containers and observe safety practices for heating and storage.
Step-by-Step Process
The following steps guide you through preparing a safe and effective vinegar solution for removing paint from wood.
- Protect your workspace with drop cloths or plastic sheets.
- Put on gloves, safety glasses, and old clothes to protect yourself.
- Choose white distilled vinegar (5% acidity) for most tasks. For tougher paint, use cleaning vinegar (6%).
- Mix your vinegar solution in a non-reactive container like glass or stainless steel. For initial cleaning, mix 1 part vinegar to 3 parts water. For softening paint, try 1 part vinegar to 2 parts water.
- Warm the solution gently using a hot water bath (see ‘Warming vs using room-temperature vinegar’ below). Check with a thermometer; keep it under 140°F (60°C) to avoid damaging wood or creating harmful fumes. If unsure, stick to room temperature.
- Add a small amount of mild dish soap if desired for better paint penetration and emulsification.
- Perform a patch test on an inconspicuous area to check for any adverse reactions with your specific wood finish.
- Confirm the solution’s compatibility with your wood finish by checking with a local hardware store or online resources. If unsure, consult a professional.
Warming vs using room-temperature vinegar
Warm vinegar works faster than room temperature due to increased chemical activity. However, it’s crucial not to overheat and damage the wood or create harmful fumes.
To warm your solution safely, place the container in a larger bowl filled with hot water from your tap (around 120°F/49°C). Stir occasionally until the desired temperature is reached. Use a thermometer to monitor progress.
Never boil or overheat the vinegar solution. Boiling can damage wood and create harmful fumes, especially in enclosed spaces. Keep the temperature under 140°F (60°C). If unsure, stick to room temperature for safety.
Adding helpers (soap, ammonia alternatives) — pros and cons
While vinegar is effective on its own, adding small amounts of other substances can enhance its paint-removing power. However, some chemicals should be avoided.
Pros
- Soap: Helps emulsify and lift paint for easier scrubbing.
- Ammonia (alternatives): Can break down tougher paints when used with vinegar. Opt for ammonia-free alternatives like lemon juice or hydrogen peroxide to avoid creating harmful fumes.
Cons
- Ammonia: When mixed with vinegar, it creates harmful chloramine gas that can cause coughing, wheezing, and chest pain. Avoid using ammonia with vinegar.
- Strong chemicals: Some harsh chemicals can damage wood or create toxic fumes when combined with vinegar. Stick to mild, non-toxic alternatives.
Use additives sparingly and only when necessary. For most tasks, vinegar alone is sufficient. If you choose to add something, start with a small amount and increase gradually if needed.

Step-by-step removal process
Begin with a small, inconspicuous patch and test a vinegar solution to see how the paint and wood respond before you commit to the full job.
Apply a vinegar solution, cover to keep moisture in, and let it dwell for a short period; if the coat is stubborn, extend the dwell using the product label or manufacturer instructions as a guide.
After dwell, gently lift the softened paint with a plastic putty knife or nylon brush, re-wet as needed, and work with the grain to avoid gouging.
If paint remains, re-apply vinegar and re-dwell, and pause to test a small edge with the scraper to gauge lift and progress.
When most of the finish comes up, wipe clean, rinse, dry, and finish with a light sanding using a progression of grits from mid to fine to blend and prep for finishing.
Step-by-Step Cleaning Process
This section guides you through the entire process of removing paint from wood using vinegar, from safety checks to final cleanup.
- Ensure good ventilation and wear gloves. Cover nearby surfaces with drop cloths or plastic sheeting.
- Prepare your vinegar solution (1 part white vinegar to 1 part warm water) in a spray bottle.
- Test the solution on a small, inconspicuous area first. If no adverse reaction occurs within 24 hours, proceed with the full process.
- Apply the vinegar solution evenly across the painted surface using the spray bottle or a cloth. Work in manageable sections.
- Cover the treated area with plastic wrap or a damp cloth to retain moisture and set a dwell time of 15-30 minutes (up to 1-2 hours for stubborn coats).
- After dwell time, use a plastic putty knife or nylon brush to gently lift softened paint, working with the grain. Re-wet as needed.
- If paint remains, re-apply vinegar and re-dwell. Periodically pause to assess progress by testing a small edge with the scraper.
- Once most paint is removed, wipe clean, rinse, and dry the area thoroughly.
- Perform a light sanding (start around 120-150 grit, finish with 180-220 grit) to blend and prepare for finishing. If you encounter any signs of wood damage or paint that won’t budge, stop and consult a professional.
Application and dwell time
The key to successful paint removal is applying the vinegar solution evenly and allowing it enough time to break down the paint. Here’s how:
Use a spray bottle or cloth to apply the solution, ensuring even coverage across the painted surface.
Dwell time varies depending on paint type and thickness. Start with 15-30 minutes for thin coats, up to 1-2 hours for stubborn ones. You’ll know it’s working when you see the paint starting to bubble or lift.
If after the initial dwell time some paint remains, reapply the solution and let it sit again. Keep checking progress until all paint is lifted.
Removal techniques: scraping, scrubbing, and sanding
Once the vinegar has softened the paint, it’s time to remove it. Here are some tips for effective removal without damaging the wood:
Use a plastic putty knife or nylon brush to scrape off the loosened paint. Work with the grain of the wood to avoid gouging.
For stubborn spots, use an abrasive pad (like a Scotch-Brite pad) dampened with vinegar solution. Apply gentle pressure and work in small circles.
After most paint is removed, sand the surface lightly using a sanding block and 120-150 grit paper to smooth out any remaining bumps or rough spots. Finish with 180-220 grit for a smooth surface ready for finishing.
Rinsing and neutralizing treated areas
After removing the paint, it’s crucial to rinse and neutralize the area to protect both the wood and any future finishes:
Thoroughly rinse the treated area with clean water using a sponge or cloth. Wipe in the direction of the grain.
Dry the surface completely with a towel or allow it to air dry.
If you notice any residual acidity (which can be identified by a faint vinegar smell), neutralize it using a solution of baking soda and water (1 tablespoon per cup). Apply, let sit for 5 minutes, then rinse and dry again. This step ensures your wood is ready for staining, painting, or other finishing processes.
How to check effectiveness and next steps
Define what a clean surface looks like and document any tackiness or sheen remaining. Perform simple tactile checks to assess adhesion and residue.
Decide whether to repeat the vinegar method, advance to a stronger approach, or schedule a switch based on the observed results. Keep notes on progress for the next steps.
Step-by-Step Process
Follow these steps to effectively check the effectiveness of paint removal using vinegar and plan your next moves.
- Prepare the area: Clear debris, wear gloves, and ensure good ventilation.
- Inspect the surface: Check for any remaining paint or glossy patches.
- Perform tactile tests: Use a fingernail scratch test and sandpaper to feel for rough spots or tackiness.
- Test adhesion: Press and lift a small scrap of tape or clean cloth to check for any remaining bond.
- Assess moisture content: Check for dampness or swelling, which may indicate incomplete drying.
- Document results: Note observations, drying times, and any prep needed before finishing.
- Plan next steps: Decide whether to repeat the vinegar method, switch to a stronger solvent, or use mechanical removal.
Visual and Tactile Checkpoints
Use this checklist after paint removal to ensure a thorough job before moving on to finishing work.
- Raised edges: Check for any remaining paint that has lifted off the surface but not completely removed.
- Color bleed: Look for areas where the original color is still visible, indicating incomplete removal.
- Glossy patches: Feel for smooth, shiny spots that may indicate missed or partially removed paint.
- Roughness: Run your hand over the surface to feel for any rough or uneven areas.
- Edges of removed areas: Inspect the borders of removed paint to ensure they are clean and even.
- Fingernail scratch test: Scratch the surface with your fingernail; if it feels tacky, more removal is needed.
- Sandpaper test: Lightly sand the surface; if it feels rough or catches, there’s still paint to remove.
- Tackiness: Press a clean cloth onto the surface; if it sticks, there’s residual tackiness.
Quick rule: If any of these checks fail, reapply vinegar or consider alternative removal methods.
When to Escalate to Chemical Strippers or Heat
If the vinegar method has failed, consider these safer alternatives before resorting to harsh chemicals or high heat.
Chemical strippers are stronger than vinegar but can be more hazardous. They may be necessary if vinegar fails to remove paint completely. Always follow safety instructions and use proper ventilation when working with chemical strippers.
Heat guns can soften and remove paint, but they require careful handling to avoid damaging the wood or causing injury. Use a heat gun on low settings, moving it constantly to prevent overheating the surface.
Pro tip: Before using any alternative method, ensure you’ve given the vinegar sufficient time to work and that you’ve followed proper application techniques.
Post-treatment care and finishing the wood
Allow the wood to dry thoroughly and assess any odor or tackiness before finishing. Monitor moisture levels to determine when finishing is safe.
Choose compatible sealers or primers and follow guidance on application conditions. Note any potential color shifts or raised grain and plan accordingly.
Sanding and preparing for stain or paint
After the vinegar treatment, give your wood a final sanding to prep it for staining or repainting. Start with 120-grit sandpaper, then progress to 150-grit or even 220-grit for a smoother finish.
Use a random orbital sander for large areas and hand-sand any hard-to-reach spots. Work with the grain of the wood, not against it.
Remove all dust thoroughly using a tack cloth or damp rag. This ensures your stain or paint will adhere evenly.
Repairing minor surface damage
Before you finish, repair any minor gouges or scratches to ensure a smooth final product. For small gouges, use a wood filler that matches your wood’s color as closely as possible.
Apply the filler with a putty knife, then let it dry completely. Sand off any excess using a sanding block and 120-grit sandpaper. Wipe away dust and inspect your work.
For larger repairs or to match grain patterns, consider using a wood epoxy or a two-part filler. Follow the manufacturer’s instructions for application and curing times.
Comparison: vinegar vs other paint removal methods
Evaluate vinegar against chemical strippers, heat tools, and sanding by considering finish type and wood porosity. Use a small test area to compare results before committing to a method.
Assess safety, cost, and environmental impact while considering time, prep, and cleanup for each option. Use the comparison to guide the best choice for your project needs.
Cost and environmental impact analysis
Vinegar is a cost-effective option for paint removal. A gallon of white vinegar costs around $2-$5, and you’ll use about half a cup per square foot. Compare this to chemical strippers that can range from $10-$30 per quart.
Environmentally, vinegar is a safer choice. It’s non-toxic, biodegradable, and doesn’t emit harmful fumes like some chemical strippers or heat guns. However, it may require more labor and time compared to other methods.
Disposal is also simpler with vinegar. Since it evaporates quickly and doesn’t leave residue, there are fewer concerns about runoff or waste. In contrast, chemical strippers need proper disposal following local regulations.
Pros and cons summary table (verbal)
Here’s a quick comparison of vinegar and other paint removal methods:
Pros
- Vinegar: Inexpensive, non-toxic, easy to use, and effective on many finishes.
- Chemical Strippers: Highly effective, can remove multiple layers, and work quickly.
- Heat Guns: Safe for multi-layered paint, no chemical residue, and can be used indoors.
- Sanding: Removes all traces of old finish, can prepare wood for new stain/paint.
Cons
- Vinegar: Slower process, may not remove tough finishes or multiple layers, requires testing.
- Chemical Strippers: Toxic fumes, harsh on skin and eyes, can damage wood if left too long.
- Heat Guns: Can scorch wood if used improperly, may require additional sanding for smooth finish.
- Sanding: Time-consuming, generates dust that requires proper ventilation and cleanup.
Choose based on your project’s scale, paint type, safety concerns, and time available. For small projects with minimal layers, vinegar might be your best bet. For larger jobs or tough finishes, consider chemical strippers or heat guns, but prioritize safety and proper ventilation.

Conclusion
Remediation with vinegar is practical, but the payoff depends on careful testing, patience, and careful handling so you don’t gouge or warp the wood. Start strong with safety and a clear plan, and you’ll finish with a good-looking, ready-to-finish surface.
First, test a small, inconspicuous spot and verify that the paint softens without harming the wood. Then gather your tools, prepare the vinegar solution as you described, apply it in manageable coats, scrub with a soft brush, wipe clean, and check progress frequently. If the paint loosens, repeat in increments until you see decent lift, then dry the area thoroughly and move to post-treatment or finishing steps.
Common mistakes to avoid are skipping the test area, using a strong or unknown finish without confirming compatibility, and letting liquid soak too long or over-wet the wood. Test a small area first and safety first by wearing gloves and eye protection, work in a ventilated space, and stop if you see staining, softening, or raised grain that could indicate damage. If you’re unsure about the wood type or finish and the surface may require deeper stripping, consider bringing in a pro rather than pushing ahead and risking costly repair.
FAQ
Can vinegar remove paint from wood?
Vinegar helps soften some paints, but it may not lift all layers. For stubborn coats, you’ll need extra steps like scraping or sanding. Start with a small test patch first.
What kind of vinegar should I use?
Use plain white distilled vinegar. Avoid flavored vinegars or mixes with additives that can stain or react poorly with wood. Hot vinegar works faster, but handle carefully.
How do I apply vinegar to the wood?
Soak a rag in vinegar and lay it on the painted area for several minutes. Wipe and check progress, then repeat if needed. Do not soak the wood endlessly; water damage will follow.
When should I stop using vinegar and try another method?
If the paint is peeling or varnish is lifting with vinegar, switch to a scraper or sandpaper. For thick layers, mechanical removal is faster and safer for the wood. Always dry the surface after treatment.