

Introduction
Wood stuck in concrete can be removed safely and effectively with the right approach. In this article you’ll learn how to assess the situation, choose a method that minimizes damage, and apply practical steps to extract or free the wood. The guide walks through common techniques, safety considerations, and practical tips you can adapt to different sizes and types of wood embedded in concrete.
Key takeaways
- Wear PPE: goggles, gloves, dust mask, and hearing protection during removal.
- Identify embedded wood by probing gaps to plan mechanical or thermal approach.
- Use proper hand tools to avoid chiseling concrete; steady strokes prevent cracks.
- Apply heat cautiously; short intervals prevent damaging surrounding concrete and avoid steam that can shatter seals.
- When solvents used, ventilate area and test compatibility with wood and concrete.
- After removal, seal and repair with compatible concrete patching material.
Table of Contents
- Introduction
- Key takeaways
- Safety Precautions and Personal Protective Equipment (PPE)
- Tools and Materials Checklist
- Preparation: Protecting the Concrete and Work Area
- Mechanical Methods (Hands-on Tools and Techniques)
- Thermal Techniques: Using Heat Safely
- Chemical and Solvent Options
- Cutting and Surgical Removal: When to Cut Out Wood
- Post-Removal Cleaning, Repair, and Prevention
- Conclusion
- FAQ
Safety Precautions and Personal Protective Equipment (PPE)
Begin with a clear safety plan that covers mechanical, chemical, and heat methods. Identify common hazards like dust, burns, cuts, and flying debris. Set up controls before you start any work.
Explain what PPE is required for each method and when to upgrade it. Include eye/face protection, respiratory safeguards, cut protection, hearing protection, heat-resistant gloves, and proper footwear. Outline emergency steps and how to recognize exposure risks.
Required PPE and setup
Before you start, gear up right. Safety goggles or a face shield protect your eyes from debris. Gloves, preferably cut-resistant, keep your hands safe. A respirator with a particulate filter guards against dust inhalation. Earplugs or earmuffs protect hearing. Steel-toe boots are a must for foot protection.
Set up barriers to control flying debris and secure the work area. If using power tools or chemicals, ensure proper ventilation. Open windows, use fans, or consider a respirator with an organic vapor cartridge if dealing with solvents.
Safety steps per method
Mechanical methods: Wear safety goggles and hearing protection. Secure the work area with barriers to prevent debris from flying. Use a dust mask or respirator to protect against silica dust.
Chemical methods: Protect skin with gloves, eyes with goggles, and wear a respirator with an organic vapor cartridge for solvent-based chemicals. Keep a safe distance from the work area to avoid splash injuries. Have a spill kit ready.
Heat-based methods: Wear heat-resistant gloves and protect your face with a shield or safety glasses. Maintain a safe distance from the heat source. Keep water mist or an extinguisher nearby for emergencies. Ensure proper ventilation to prevent fume inhalation.

Tools and Materials Checklist
Organize items by method: mechanical, thermal, chemical, and cutting. Label essentials, optionals, and what suits rough versus delicate removal. This keeps you from overbuying or underprepping.
List core tool categories and consumables, plus safety gear and containment supplies. Include options for debris control and dust extraction, plus notes on heat sources and solvent handling. Keep a disposal plan handy.
Basic toolkit for most jobs
Before you start any concrete work, ensure you have this basic toolkit. It’s essential for most tasks and will help prevent common mistakes.
- Sledgehammer: For breaking up old concrete or demolition. Check weight: 4-8 lbs (1.8-3.6 kg) is standard, choose based on your strength.
- Pry bars: For lifting and separating concrete. Ensure they’re sturdy with a secure grip to prevent slippage.
- Chisels (1/2″ & 3/4″): For cutting and shaping concrete. Inspect for sharp edges; blunt ones won’t cut effectively.
- Cold chisel: For precise cuts in hard surfaces. Check it’s the right size for your hammer, typically 1/2″ or 3/4″.
- Wire brush: For cleaning and preparing surfaces. Verify bristles are sturdy and not bent.
- Shop vacuum: For cleaning up dust and debris. Ensure it has a HEPA filter for better dust control.
- Tarps: For protecting surfaces from spills or drops. Check they’re durable, with no tears or holes.
Quick rule: Always inspect your tools before starting work to ensure they’re in good condition and fit for purpose. Skipping this can lead to injuries or poor results.
Advanced or optional tools
These tools are not always necessary but can make your job easier and faster. Use this checklist when you’re tackling more complex tasks like cutting through rebar, removing old concrete, or dealing with frozen ground.
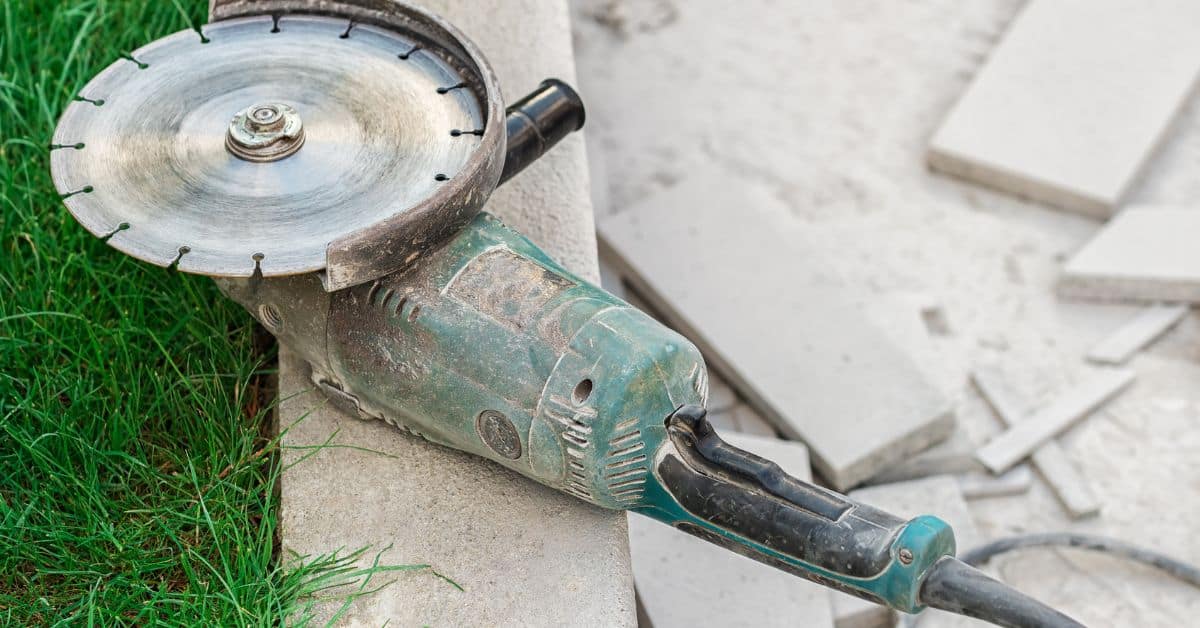
- Angle grinder with diamond blade: Check the blade’s condition – it should have visible diamonds and no major cracks (see basic toolkit for more info). Confirm it fits your grinder securely. Skip this check, and you might end up damaging the blade or your grinder.
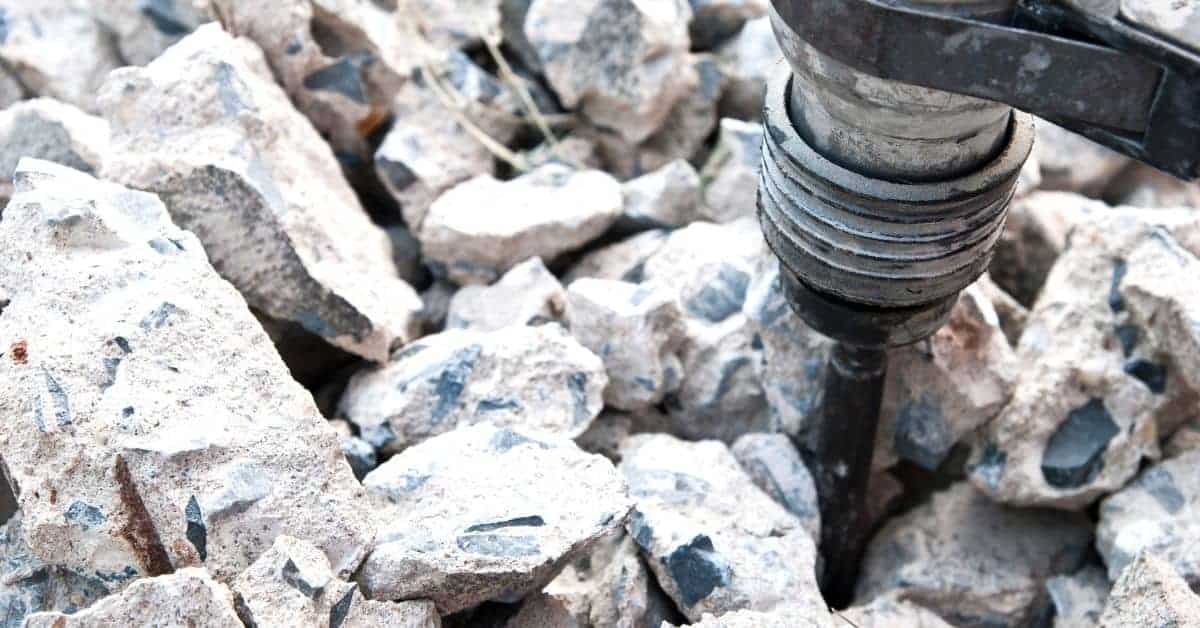
- Rotary hammer: Ensure it’s in good working order with no excessive vibration or noise. Check the chisel bit – it should be secure and undamaged. Neglecting this can lead to broken bits and damaged concrete.
- Reciprocating saw with demo blade: Inspect the blade for any signs of wear or damage. Make sure it’s securely attached and fits your saw properly. A loose or worn blade can cause kickback, leading to injuries or poor cuts.
- Heat torch: Check the fuel level and ensure there are no leaks. Test the flame – it should be steady and blue. Using a faulty torch can result in inefficient heating or even fires.
- Chemical injectors: Verify that the chemicals are within their expiration dates and have been stored correctly (see basic toolkit for more info). Check the injector’s seals and o-rings to prevent leaks. Using expired or improperly stored chemicals can lead to ineffective results.
- Safety gear: Always check your safety glasses, ear protection, gloves, and other PPE before starting any task. Damaged or missing gear can result in serious injuries.
Quick rule: Always prioritize safety checks over speed. A few extra minutes spent verifying tools and equipment can save you from costly mistakes and potential hazards.
Preparation: Protecting the Concrete and Work Area
Define the prep scope by confirming the concrete type, finish, and any coatings or contaminants. Note embedded wood positions to tailor removal without overdoing the substrate. Plan protected work zones and clear access routes.
Detail cleaning and debris control steps to prevent scratches or embedded debris. Sweep, vacuum, and wipe as needed, using mild cleaners when appropriate. Manage moisture and masking to control dust and protect adjacent surfaces.
Surface prep and visual checkpoints
Before you start removing wood from concrete, follow this checklist to ensure minimal damage and safety.
- Remove loose debris: Sweep and vacuum the surface to eliminate any loose wood fragments or concrete chips. This prevents scratches and helps avoid embedding more debris into the concrete.
- Identify rebar/anchors: Check for any exposed reinforcement bars (rebar) or anchors that could be damaged during removal. Mark them clearly with a non-residual marker to avoid contact.
- Locate wood pieces: Use a non-contact moisture meter or X-ray fluoroscopy to pinpoint the exact location of embedded wood pieces, if possible. This helps tailor your removal approach and minimize damage.
- Check for existing coatings: Inspect the concrete surface for any sealers, paints, or other coatings that could be affected by the removal process. Note their locations to protect them during work.
- Mark critical lines: Use painter’s tape and a marker to outline cut lines, safe-beam paths, and access routes for tools. This helps prevent damage to structural elements and keeps you safe while working.
- Avoid existing cracks: Identify any pre-existing cracks in the concrete. Mark them and plan your removal approach to avoid exacerbating these issues.
- Check for moisture: Determine the moisture content of the concrete. If it’s too high, allow it to dry slightly to prevent slips and ensure proper adhesion of markings.
- Protect edges: Use painter’s tape or masking paper to protect finished edges from damage during the removal process.
Quick rule: Always prioritize safety and protection of the concrete surface by following this checklist before starting any removal work.
Temporary supports and containment
To protect both your work area and the surrounding environment, set up temporary supports and contain potential hazards. Here’s how:
Shoring or bracing: If nearby structures might be affected by vibrations from wood removal, consider shoring or bracing them temporarily to prevent damage.
Cover drains: Protect floor drains in the work area with a fine mesh screen or plastic sheeting to prevent debris and chemicals from entering the drainage system.
Contain chemical runoff: If using chemicals for wood removal, contain any runoff by placing drop cloths or plastic sheets around the work area. Dispose of these materials properly after use.
Control dust: Use plastic sheeting and drop cloths to create a physical barrier around your work area. This helps minimize dust spread and keeps adjacent areas clean.
Mechanical Methods (Hands-on Tools and Techniques)
Start with a safety check and assess depth, wood type, and surrounding condition. Establish containment and dust controls before any work begins. Prepare a plan to minimize concrete disruption.
Proceed from light to more invasive tools, pausing to reassess as needed. Use chisels, pry bars, and rotary hammers with care to create clean access while protecting the surrounding concrete. Finish with cleanup and inspection notes for future reference.
Manual prying, chiseling, and hammering
Start with the least invasive methods to remove wood from concrete. Use hand tools like chisels and pry bars to minimize damage.
Angle your chisel at 45 degrees to the surface and tap gently with a hammer. This helps create a small gap between the wood and concrete without breaking the surrounding material.
Pry bars can be useful for leveraging out larger pieces of wood. Insert the pry bar into the gap created by chiseling, then apply steady pressure to lift the wood out. Work in sections to prevent spalling adjacent concrete.
Power tools: rotary hammers, grinders, and saws
For tougher jobs, power tools can speed up the process. Always wear appropriate safety gear and consider dust control measures.
- Rotary hammer with chisel bit: Use a SDS-plus or SDS-max rotary hammer with a suitable chisel bit to create clean access channels around the wood. Start at a low setting, increasing power as needed.
- Oscillating tool: With a demo blade, oscillating tools can cut through wood and concrete. They’re great for tight spaces but generate heat and dust.
- Reciprocating saw with demo blade: For larger pieces of wood, use a reciprocating saw with a demo blade. Keep the blade perpendicular to the surface to avoid damaging the concrete.
- Angle grinder with diamond blade: To cut through rebar or remove small amounts of concrete, use an angle grinder with a diamond blade. Always wear safety glasses and consider using a water-fed system for dust control.
- Rentable tools: hydraulic crackers and air hammers: For extremely tough jobs, consider renting heavier-duty tools like hydraulic crackers or air hammers. These can deliver powerful blows but require careful operation to avoid concrete damage.
Extractors and mechanical leverage tricks
Sometimes, you need extra leverage to remove stubborn wood. Screw-in anchors, wedges, and bolt extractors can help pull out embedded wood without excessive cutting.
Screw-in anchors: Drill pilot holes around the wood, then screw in expansion anchors. Tighten the screws to expand the anchor’s grip, pulling the wood out as you turn.
Alternatively, use wedges or bolt extractors. Drive wedges into the gap created by chiseling to apply pressure and leverage. Bolt extractors work similarly but use a threaded rod and nut to pull out the wood.
Thermal Techniques: Using Heat Safely
Explain which heat tools are appropriate for loosening adhesives or resinous wood without harming concrete. Compare torches and heat guns for effectiveness and safety considerations. Emphasize controlled, steady application.
Cover safe operating practices and ventilation needs. Include PPE, fire prevention steps, and ready access to water or extinguishers. Mention testing on a small area before full use.
Heat application methods and limits
Appropriate heat sources for concrete work include propane torches and heat guns. Torches provide more intense, focused heat but can be less controlled. Heat guns offer a wider, gentler heat that’s safer around concrete.
Safe temperature ranges vary by tool:
- Torch: 1200-1500°F (650-815°C)
- Heat gun: 750-1000°F (400-540°C)
Avoid overheating to prevent concrete cracking or igniting wood. Keep torch at least 2 inches away, heat gun about 1 inch. Short exposures of 30 seconds to 1 minute are best.
Combined heat and mechanical action
Moderate heat can soften adhesives, making prying or cutting easier. Start with a brief heat application (as described above), then use tools like crowbars, chisels, or saws.
Heat is contraindicated near flammable materials. If you’re unsure, test on a small area first. Always prioritize safety over speed.
After heating, allow the wood to cool slightly before applying mechanical force. This helps prevent warping and makes removal easier.
Chemical and Solvent Options
Describe chemical categories that help soften organic material or adhesives. Outline how each is typically used and what scenarios they suit best. Emphasize compatibility with concrete surfaces.
Explain how to test first on a small patch, then apply using appropriate methods and dwell times. Include safety, disposal, and environmental notes for solvents and biodegradable options where possible.
Penetrating oils and wood softeners
Start by applying penetrating oil or wood softener to the affected areas. These products seep into the wood, breaking down its structure and making it easier to remove.
Use a brush or spray bottle for application, ensuring full coverage of the wood. Let it soak in for at least 24 hours, but longer dwell times can be more effective. You’ll know it’s working if the wood starts to swell and soften.
Tip: Reapply every 12-24 hours until the wood is significantly softened.
Safer solvent choices and environmental concerns
Different solvents have varying strengths and hazards. Mineral spirits are gentle but slow-acting, while commercial penetrating fluids work faster but are harsher on the environment.
Citrus-based solvents are a safer alternative, biodegradable and less harmful to indoor air quality. Always check the Safety Data Sheet (SDS) before use, and follow disposal guidelines carefully.
Caution: Avoid using harsh chemicals like paint thinners or acetone, as they can damage concrete and pose significant health risks.
When to avoid chemicals? If you’re sensitive to solvents, have poor ventilation, or are working in a confined space, consider mechanical methods or heat instead.
Cutting and Surgical Removal: When to Cut Out Wood
Clarify when controlled cutting is the right move versus safer alternatives. Consider depth, rot extent, and potential impact on rebar or utilities. Establish criteria for proceeding.
Detail cutting tools and protective gear, plus techniques to minimize concrete damage. Address handling embedded metal and rebar, including blade choices and void management strategies.
Reciprocating Saws, Demo Blades, and Diamond Tools
Choosing the right tool for the job is crucial when cutting wood stuck in concrete. Here are your best options:
- Reciprocating Saw (Demo Saw): A versatile tool that can handle various blade types. Use a demo blade designed for wood and metal to cut through embedded wood.
- Diamond Blade for Angle Grinder: Ideal for deep cuts, use a diamond blade with a thin kerf to minimize concrete damage. Ensure the blade is rated for your grinder’s RPM.
- Oscillating Tool with Wood Blade: Great for precision work and tight spaces. Use a wood blade designed for oscillating tools to cut through embedded wood.
- Drywall Saw: A manual alternative, it can be used for shallow cuts where the wood is accessible from both sides.
- Reciprocating Saw with Metal Blade: If you encounter metal or rebar, switch to a metal blade. Be cautious not to cut into rebar as it supports the concrete’s structure.
Concrete Patch Planning Post-Cut
After cutting out the wood, prepare the cavity for repair to maintain your concrete’s integrity:
Assess Damage: Check for cracks or hollow areas around the removed wood. If found, plan to address them as part of your repair.
Temporary Supports: If removing the wood creates voids, consider temporary supports to maintain the concrete’s structure until you can apply a permanent patch.
Match Concrete Strength and Finish: When selecting your patch material (grout or epoxy), ensure it matches the strength of your existing concrete. Also, consider the finish – you may need to sand or texture the patch to match the surrounding concrete.
Post-Removal Cleaning, Repair, and Prevention
Outline cleaning steps to remove dust, residue, and moisture. Recommend safe cleaners and proper disposal, plus techniques for scraping without gouging the surface. Prioritize containment of waste.
Assess concrete damage and plan repairs with suitable patching materials and bonding agents. Include finishing, sealing, and future-proofing steps to prevent recurrence and extend life.
Cleaning and neutralizing residues
After removing the wood, you’re left with a mess of dust, debris, and adhesive residue. Here’s how to clean it up safely:
Start by brushing off loose dust and debris using a stiff-bristle broom or brush. For tougher spots, use a trowel or scraper to gently remove residue.
Solvents can help with adhesive residues. Use a safe, eco-friendly option like denatured alcohol or citrus-based cleaners. Apply it with a cloth or spray bottle, let it soak for a few minutes, then scrub and wipe away the residue. Always wear gloves and eye protection when using solvents.
For outdoor surfaces, pressure washing can help remove remaining dust and residue. Use a wide-angle nozzle to avoid damaging the concrete.
Repair options and long-term prevention
Once cleaned, it’s time to repair and prevent future issues:
Fast-set repair mortar is great for filling larger holes. Mix according to the package instructions, then trowel it into the hole, feathering the edges to blend with the surrounding concrete. For cracks, use an epoxy crack filler. Apply it with a putty knife, again feathering the edges.
Curing is crucial for proper repair. Follow the manufacturer’s instructions for each product. Typically, this involves keeping the patch moist and covered for several days to weeks.
To prevent future embedment, seal your concrete. A penetrating sealer can help repel moisture and prevent wood from adhering. If you’re pouring new concrete, consider adding fibers or mesh reinforcement to reduce cracking. Also, keep wooden objects off the concrete when possible, and store them away from damp areas.
Conclusion
Getting wood out of concrete takes discipline. Do it right and you protect the slab, keep the repair durable, and finish with a clean, neat look.
Start by donning your PPE, test your approach on a small area, and then follow a simple path: choose the least invasive method that will work, protect the concrete and nearby surfaces, keep the work area clean and ventilated, and stop if you see cracking, looseness, or unexpected movement.
Common mistakes to avoid include forcing a method that isn’t suited to the wood or the concrete, using heat or chemicals without proper protection or testing, and overcutting or gouging the surrounding concrete. Follow basic safety rules: never work without eye and respiratory protection, keep flammable materials away from heat sources, and verify a small area first before committing to the full removal.
If the wood is deeply embedded, your access is limited, or you notice cracks or hollow sounds in the concrete, it’s wise to bring in a professional instead of pushing through. Stay steady, follow the plan, and you’ll preserve durability and appearance while keeping everyone safe.
FAQ
Can I remove wood stuck in concrete with a hammer and chisel?
Yes, you can, but it can damage the concrete and the wood. Use a gentle touch and lighter blows to start. If the wood is tight, stop and plan your next step so you don’t crack the slab.
What is the safest way to pull out a stubborn piece?
Try twisting it with pliers or a pry bar while supporting the surrounding concrete. Work slowly and grip firmly. If it breaks, you may need to drill around it for easier removal.
Should I drill around the wood first?
Drilling a small pilot hole can loosen the wood and reduce risk. Use a masonry bit and keep the drill steady. Don’t drill too deep or you could hit rebar or create cracks.
What if the wood is deeply embedded and won’t budge?
Pause and reassess. Consider renting a core bit or reciprocating saw with a wood blade to cut it free. If you see cracks or loose concrete, stop and call a pro for safe removal.