
Introduction
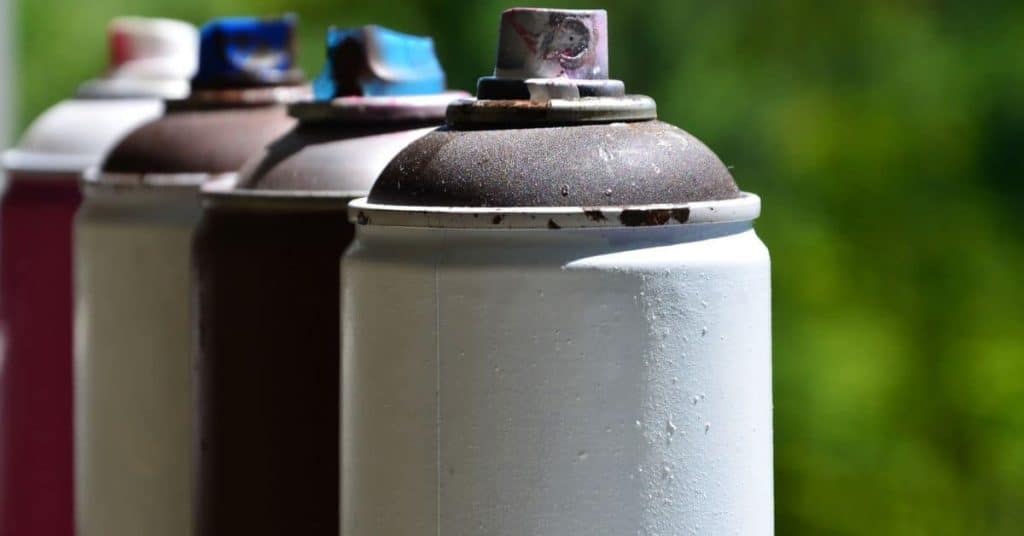
Using kitty litter to dispose of old paint cans is not recommended and is unlikely to be effective.
The guide walks you through safe, practical disposal steps, common mistakes to avoid, and sensible alternatives you can use to handle paint waste responsibly.
Key takeaways
- Kitty litter can absorb liquid paint; solidify before disposing properly.
- Choose absorbent, non-clumping litter and mix gradually to avoid clumps.
- Avoid metal cans; small openings vent fumes and ensure complete drying.
- Oil-based paints require solvent-free curing; follow local hazardous waste guidelines.
- Check local rules on landfill disposal and recycling contamination thresholds.
- Alternative methods include drying with concrete or paint hardener, then dispose.
- Overall, weigh cost, odor control, and environmental impact before choosing.
Table of Contents
- Introduction
- Key takeaways
- Quick answer and safety overview
- How kitty litter works to solidify paint — materials and science
- Step-by-step DIY: solidifying small paint cans with kitty litter
- Special handling for oil-based paints and problematic finishes
- Local rules, recycling, and environment impact
- Alternatives to kitty litter for drying or disposing paint
- Cost, convenience, and environmental tradeoffs
- Conclusion
- FAQ
Quick answer and safety overview
Kitty litter is not a universal fix for paint can disposal. It may help absorb a small solvent spill, but disposal rules depend on the paint type and local hazardous-waste laws, so don’t rely on litter as the primary method.
Water-based paints usually have looser rules than oil-based or solvent-containing cans, which are typically hazardous waste. Do safe handling, follow manufacturer or local HHW guidance, and avoid mixing paint with litter or dumping anything improperly; check local rules and use the proper disposal pathway instead.
When kitty litter is an acceptable option
Kitty litter can be a handy tool for absorbing small spills of dried-up water-based paint. If you’ve got a little bit of leftover latex paint that’s mostly dry, kitty litter might help clean it up safely.
The key here is to use kitty litter as a last resort and only when dealing with very small amounts—think tablespoons or less. It’s not meant for full cans or large spills. Make sure the paint is completely dried out before you even think about using kitty litter, because wet paint can create a mess.
Remember, this isn’t a universal fix. Always check your local household hazardous waste (HHW) rules to see if there are better ways to dispose of your old paint cans. Kitty litter might work for small spills, but it’s not the go-to solution for every situation.
When you must treat paint as hazardous waste
If you’re dealing with oil-based paints or large volumes of any type of paint, it’s crucial to know that these are typically considered hazardous materials. Oil-based paints contain solvents and other chemicals that can be harmful if not disposed of properly.
For cans that still have liquid in them—whether they’re full or partially full—you need to treat them as hazardous waste. This means you should look up your local HHW program for proper disposal methods. Don’t just toss these cans into the regular trash, because they can cause serious environmental damage if not handled correctly.
Oil-based paints aren’t the only ones that require special attention; large volumes of water-based paint also need to be treated carefully. Always check with your local HHW program or manufacturer guidelines for specific instructions on how to dispose of these cans safely and legally.
How kitty litter works to solidify paint — materials and science
Absorbent litter traps paint liquid by capillary action and immobilizes the solids. Clumping litter forms sticky clumps that can trap liquids, while non-clumping mainly absorbs and spreads. Key litter traits—absorbency, particle size, mineral makeup, chemical inertness, and additives—shape how well it works.
Think through a quick test on a small spill before committing. Check for signs of solvent release, ease of removal, and whether the litter stays dry enough to lift without spreading paint. Choose products with inert materials and no moisture-activating additives, and check the label or datasheet for guidance and local disposal rules.
Best types of kitty litter for paint
When it comes to solidifying old paint cans, the best choice is non-scented, non-clumping clay or silica crystal litter. These litters are highly absorbent and chemically inert, making them perfect for trapping liquid paints without reacting with harmful solvents.
Avoid using scented kitty litter because added fragrances can react unpredictably with paint chemicals. Biodegradable options like wood-based litter aren’t effective either since they break down too easily when wet. Oil-treated litters are also a no-go as the oil might interfere with the solidification process and leave residues.
Always check the label for absorbency ratings and particle size recommendations, which will give you an idea of how well it can handle paint liquids. Stick to pure clay or silica crystal varieties without added moisture-activating ingredients like gel or water.
Quantity and mixing basics
To solidify old paint cans, start by adding a layer of kitty litter at the bottom of your container. The general rule is to use about twice as much litter as you have liquid paint by volume. This ensures that all the paint gets absorbed without leaving any residue.
Mix the litter and paint thoroughly using a long stick or paddle. Stir until the mixture becomes thick and clumpy, indicating that the paint has been fully immobilized. Be patient; it might take some time for the litter to absorb all the liquid.
Once you’ve mixed everything together, let the solidified mass sit undisturbed for at least a day before disposing of it. This gives the litter enough time to completely absorb any remaining paint and prevent leaks or spills during disposal.
Step-by-step DIY: solidifying small paint cans with kitty litter
This section shows a practical, step-by-step approach to solidifying small or partially full paint cans using kitty litter, from initial prep to final packaging for curbside trash where allowed, with a clear emphasis on safety and containment to prevent spills and airborne dust. It walks you through readying the workspace, emptying as much liquid as feasible, applying an appropriate kitty litter absorbent, and verifying that the can has become solid enough before moving to packaging. It also highlights labeling and storing the solidified cans properly, so you meet local disposal rules and minimize mishaps during handling and transport.
Why it matters to you as a DIYer: solidifying paint reduces leak risk, limits exposure, and makes curbside pickup workable when permitted, as long as you follow PPE guidelines such as gloves, eye protection, and a mask if needed, plus good ventilation and enclosure to contain waste during the process. The guidance keeps you honest about what to use and how much to absorb, while providing a practical checklist for signs of insufficient solidification, corroded or leaking cans, and what to do if a container shows damage. By sticking to these steps and verifying local household hazardous waste rules, you avoid dangerous mistakes and make the disposal step part of a responsible, clean job-site routine.
Step-by-Step Process
This sequence ensures you safely solidify small paint cans using kitty litter, ready for disposal.
- Put on PPE: Wear gloves and goggles. If needed, use a mask to avoid inhaling dust or fumes. Check that your workspace is well-ventilated.
- Empty the can: Pour out as much paint as possible into another container for reuse if it’s still good. Confirm there’s no dripping paint left in the original can.
- Add kitty litter: Use a small scoop to add non-scented kitty litter to the empty can, stirring until the remaining paint is absorbed. Ensure the mixture looks dry and clumpy.
- Cover with more litter: Add another layer of kitty litter on top of the solidified paint. Stir again to ensure thorough absorption. Check that no wet spots remain in the can.
- Seal the container: Use a sturdy trash bag or similar sealable container to wrap up the sealed paint can. Make sure there are no leaks before sealing it tightly.
Tools and materials checklist
This list helps you gather everything needed for solidifying small paint cans safely and efficiently.
- Gloves: Ensure they fit properly to avoid skin contact with chemicals. Missing gloves can lead to chemical burns or irritation.
- Masks: Use if dust or fumes are present. Confirm it fits snugly around the nose and mouth for full protection.
- Goggles: Protect your eyes from splashes or spills. Ensure they fit securely over your glasses, if worn.
- Kitty litter: Non-scented type is best. Check that you have enough to cover all paint cans thoroughly.
- Scoop: A small scoop for adding kitty litter to the cans. Confirm it’s clean and dry before use.
- Tape or ties: For sealing bags securely. Ensure they are strong enough to prevent leaks.
- Trash bags: Sturdy, sealable containers. Check that they’re large enough for your cans but not too big to handle easily.
- Permanent marker: To label the sealed cans or trash bags. Confirm it writes clearly and permanently on plastic surfaces.
Quick rule: Always double-check all tools are ready before starting work to avoid interruptions or safety risks.
Disposal-ready packaging and labeling
Ensure the solidified paint is completely dry and stable, then place it in a sealed container or bag for disposal according to local rules.
First, let the sealed cans sit undisturbed overnight to ensure all moisture has been absorbed. Check that there are no wet spots or leaks before proceeding.
Next, wrap each can individually with a sturdy trash bag and seal it tightly using tape or ties. Make sure there’s no chance of leakage during transport.
Finally, label the sealed cans clearly as hazardous waste if required by local regulations. Use a permanent marker to write “Paint Waste” on the outside of the bags for clear identification.
Special handling for oil-based paints and problematic finishes
Oil-based paints, varnish, and lacquer can’t be safely managed with kitty litter the way some water-based products can. They are flammable, and soaking or absorbing them with litter can trap vapors or cause self-heating, so litter is not a safe disposal method. Always check the product label or datasheet and follow local hazardous-waste guidelines for disposal.
Contaminated litter can ruin an entire batch and complicate recycling for households. Keep oil finishes in sealed, dedicated containers and follow local HHW programs for drop-off or booked pickup, including any labeling requirements. This matters because improper disposal creates fire and contamination risks, so have a simple decision plan ready to determine when litter use is inappropriate and professional disposal is needed.
Safe interim storage and transport to HHW
When dealing with oil-based paints, it’s crucial to store them safely until you can take them to a hazardous-waste facility. Keep the cans upright, tightly sealed, and away from any heat sources or ignition risks.
If you need to transport these cans, make sure they are securely packed in a box with padding to prevent spills during transit. Label the box clearly as ‘hazardous waste’ so everyone knows what’s inside.
Check your local regulations for specific drop-off days and times at HHW facilities. Some places may require you to pre-book a pickup, especially if you have large quantities of hazardous materials.
Remember, safety first. If you notice any leaks or spills during storage, clean them up immediately using absorbent material like kitty litter but only for small amounts. For larger spills, contact your local emergency response team right away.
When paint thinner or solvents are involved
Solvents and used rags present a significant fire risk due to their flammability. Never attempt to solidify these materials with kitty litter; instead, follow your local hazardous-waste guidelines for proper disposal.
If you have leftover solvent in containers, seal them tightly and store away from heat sources until you can take them to an HHW facility. Used rags soaked in solvents should be placed in a metal container with a tight lid and kept separate from other waste materials.
Never mix different types of hazardous chemicals or paint products together before disposal. This increases the risk of contamination and makes proper handling more complicated.
If you’re unsure about how to handle specific items, consult your local HHW program for guidance on safe disposal methods. They can provide detailed instructions tailored to your situation.

Local rules, recycling, and environment impact
The key point is to check your municipal guidance first to see what home hazardous waste disposal is allowed and which paints are eligible for drop-off or special collection events. Government sites and local recycling centers help you understand whether your paint is treated as latex or oil-based and what disposal route to use. Don’t improvise—follow the approved paths and avoid unsafe practices.
Improper disposal can pollute soil and groundwater, release solvents into the air, and waste resources when cans aren’t properly emptied or sealed. To make it count, locate your local HHW program, confirm hours and appointment needs, gather paint types and quantities, and bring proof of residency, using the recommended disposal methods rather than quick-fix tricks like dumping or drying paint in place.
How to find local disposal rules and HHW events
To get the right guidance on disposing of paint cans, start by visiting your city or county’s official waste management webpage. Look for sections like Hazardous Waste Management, Household Hazardous Waste (HHW), or similar keywords.
You can also call local transfer stations or recycling centers directly. They often have information on upcoming HHW collection events and drop-off days. Check their calendars online for specific dates, times, and locations.
If you’re unsure where to start, search your city’s name followed by terms like HHW, Hazardous Waste Disposal, or Paint Recycling. These searches will lead you to the most up-to-date information on what’s allowed and how to proceed.
Once you find a local HHW program, make sure to gather all your paint cans and follow their specific guidelines for drop-off. This ensures everything is handled safely and legally.
Environmental risks of improper paint disposal
Improperly disposing of old paint can have serious environmental consequences. When you dump liquid or semi-liquid paint into regular trash, it can seep into the soil and contaminate groundwater.
The solvents in oil-based paints are particularly harmful. They can volatize—turning from a liquid to gas—and release toxic fumes that pollute the air. This not only harms wildlife but also affects human health.
Recycling streams also suffer when paint isn’t disposed of correctly. If you mix wet paint with recyclables, it can ruin entire batches and waste valuable resources. The goal is to keep all hazardous materials out of regular trash and recycling bins.
To avoid these risks, always check your local HHW program for proper disposal methods. They’ll guide you on how to safely handle and dispose of old paint cans without harming the environment.
Alternatives to kitty litter for drying or disposing paint
There are safer, practical options to kitty litter for drying or disposing of paint, and they depend on paint type. Latex paints can often air-dry small amounts or be hardened with a commercial product; oil-based paints or enamels usually require a different approach and may need a drop-off program. Never pour or mix paints down drains and always check the label or local rules for specifics.
Choosing the right option matters because disposal rules vary and product types differ in handling. By planning ahead—secure lids, decide early whether to dry, harden, donate, or drop off, and locate the nearest HHW or paint-recycling program—you save trips and headaches.
Donation and reuse programs
If you have leftover paint that’s still good, consider donating it to community paint exchange programs or local Habitat for Humanity ReStores. These places can take your usable paint and give it a second life in homes that need it.
Municipal reuse centers also often accept leftover paint. Check with your city’s waste management department to see if they have such a program. Donating paint is not only environmentally friendly but also helps reduce the amount of waste going into landfills.
Before donating, make sure the paint hasn’t dried out or separated and that it’s still in good condition. Labeling each can clearly with its contents and any relevant information will help ensure it’s used properly by someone else.
Commercial hardeners and absorbents
For a more professional approach, commercial paint hardeners are available at hardware stores. These products can solidify both latex and oil-based paints quickly and effectively, making them easier to dispose of as regular trash.
Oil-absorbent products designed for solvent waste are also useful when dealing with stubborn oil-based paints or solvents. They work by absorbing the liquid and turning it into a solid mass that’s safe to throw away in your regular garbage bin.
While these commercial options can be more expensive than kitty litter, they offer better performance and faster results. Check the label for specific instructions on how much product is needed per gallon of paint or solvent.
Cost, convenience, and environmental tradeoffs
Here’s a practical cost snapshot: kitty litter, commercial solidifiers, and HHW disposal fees, with typical container sizes and wasteload to help you estimate total project cost. Beyond the upfront price, you’ll face hidden costs like environmental impact and the risk of fines for improper disposal. Weigh convenience against these factors to decide what fits your job and your tolerance for risk.
Think about accessibility, storage space, time, and safety steps that affect your DIY timeline. Labeling requirements and rules on absorbents, plus choosing compliant disposal routes, matter to avoid penalties. A simple flow or checklist can help you decide based on paint volume and proximity to HHW facilities so you stay legal and eco-friendly.
DIY cost estimate and time investment
When you’re looking at kitty litter versus commercial solidifiers, the upfront costs can vary. Kitty litter is generally cheaper, often costing around cost varies to cost varies per pound for a large bag that might cover several cans of paint. Commercial solidifiers tend to be more expensive, with prices ranging from cost varies to over cost varies per quart depending on brand and volume.
Time-wise, kitty litter takes longer since you need to mix it thoroughly with wet paint until the mixture is dry enough to handle safely. This process can take several hours or even days for large quantities of paint. Commercial solidifiers work faster; they typically require just a few minutes of mixing before setting up within an hour or two.
Both methods have their convenience factors. Kitty litter requires more space and patience but is readily available at most grocery stores. Solidifiers are quicker to use but may need special ordering if not found locally, adding time for delivery or travel.
Long-term environmental and legal costs
The long-term costs of improper paint disposal can be significant. If you choose to use kitty litter without proper understanding or adherence to local regulations, there’s a risk of fines from environmental agencies for violating waste management laws.
In addition to potential penalties, improperly disposed paints can cause serious environmental damage. Spilled oil-based paints and solvents can seep into groundwater, harming wildlife and contaminating drinking water supplies over time. Cleanup efforts for such spills are costly and complex, often requiring professional intervention that could run into thousands of dollars.
It’s important to weigh these long-term risks against the short-term savings from using kitty litter or other cheaper methods. Ensuring compliance with local regulations not only protects your wallet but also helps safeguard our environment for future generations.
Conclusion
Solidifying small paint cans with kitty litter can be a safe, durable way to dispose of leftovers when you follow the steps and respect local rules. The key is to keep control of the process and not rush through anySafely—this isn’t a messy DIY; it’s a containment job with real safety stakes.
First, check the paint type and your local rules, then gather the basics: kitty litter, a sealable container, gloves, and a sturdy surface. Prep the area, pour litter in the right amount, add the paint and stir until it firms, test a small spot for solidification, and then place the mixture in the approved disposal container per your guidelines. Do the steps in order, ventilate the space, and keep children and pets away until it’s fully set and documented as required.
Common mistakes to avoid: using too little litter or skipping the test step, assuming all paints solidify the same way, and ignoring oil-based or problematic finishes that need special handling or professional disposal. Safety rules are simple—work in a well-ventilated area, wear gloves, keep fire sources away, and follow local rules for disposal and recycling. If you’re unsure, don’t guess—stop and verify before proceeding.
If the paint is oil-based, the can is large, or the finish is unknown or hazardous, call a professional or your local waste authority for guidance. When you can proceed safely, you’ll finish with a clean, compliant disposal path and real confidence in the job you did. You’ve got this—keep it tight, stay safe, and move on with your project.
FAQ
Can kitty litter help dispose of old paint cans?
No. Kitty litter alone won’t make disposal safe. Let latex paint dry, then check local rules for trash disposal. Oil-based paint stays hazardous and needs proper disposal.
What should I do before disposing of latex paint?
Open the can and spread the paint out thinly on cardboard or use cat litter to dry it. Once solid, you can place the can and the hardened material in the trash if allowed by local rules.
Is kitty litter a good method for oil-based paints?
No. Oil-based paints are toxic and require hazardous waste collection. Don’t try to harden them with litter for regular trash pickup.