
Introduction
Concrete carbonation is the natural process where carbon dioxide penetrates hydrated cement and neutralizes the alkaline environment. This change can influence how rebar corrodes and how the surface holds up. In plain terms, it’s the carbonation front moving inward and changing the chemistry you relied on for durability.
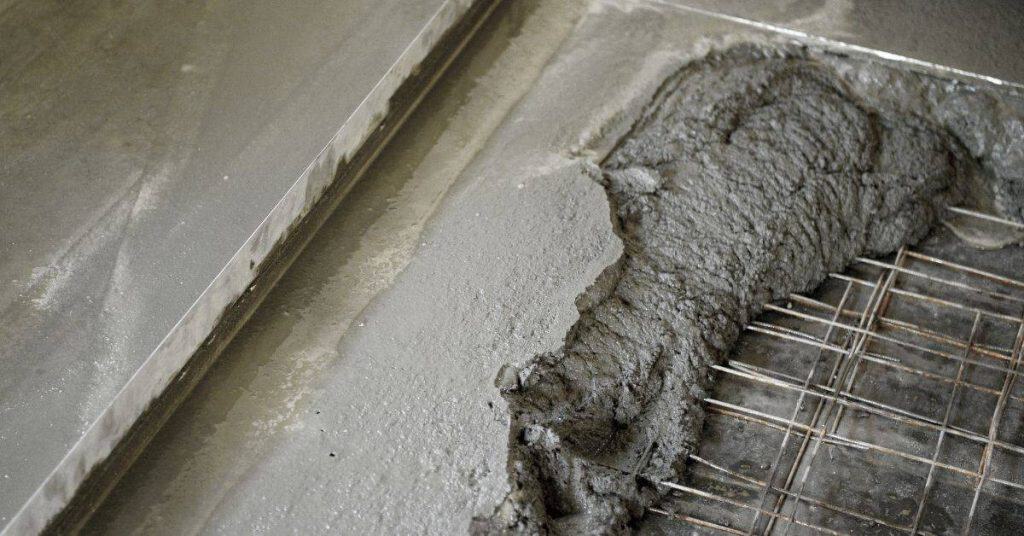
The mechanism involves CO2 diffusing through pores, reacting with calcium hydroxide, and lowering the pH of the concrete. When the pH drops, steel reinforcement is more prone to corrosion, especially near cracks where moisture and chlorides can sit. Cracks in beams or slabs can accelerate stiffness loss and durability decline, so inspect visible cracks and note their size and location, then follow manufacturer instructions and local rules for remediation, checking labels for any cautions or limits.
Key takeaways
- Understand carbonation as CO2 penetration lowering pH and promoting steel corrosion risk.
- Rebar corrosion accelerates once carbonation reduces protective passive film and cracks form.
- Cracking from beam loads magnifies durability loss and stiffness reduction over time.
- Use multi-physics approaches when modelling deterioration to capture coupling effects.
- Inspect carbonation zones with surface tests and verify rebar coverage before repairs.
- Prioritize safety: confined spaces, dust, and epoxy/repair resin handling precautions.
Table of Contents
- Introduction
- Key takeaways
- What Is Concrete Carbonation?
- How Carbonation Interacts with Rebar and Causes Corrosion
- Environmental and Material Factors That Accelerate Carbonation and Reduce Surface Durability
- Inspecting and Assessing Carbonation and Rebar Condition
- Structural Integrity Assessment and Modelling Approaches
- Case Studies and Real-World Examples (Including Heavy-Haul Railway Beams)
- Mitigation, Repair Options, and Long-Term Maintenance Strategies
- Practical, Safety, and Cost Considerations for Owners and Maintenance Teams
- Conclusion
- FAQ
What Is Concrete Carbonation?
Concrete carbonation is the chemical reaction where atmospheric CO2 diffuses into concrete and reacts with hydration products. The main reaction forms calcium carbonate and lowers pore solution alkalinity. Carbonation depth describes how far CO2 has penetrated over time, progressing from the surface inward through diffusion.
Key factors driving the rate include humidity, temperature, concrete porosity, water-to-cement ratio, cement type, curing conditions, and exposure environment. These drivers influence how quickly the carbonation front moves and how deep it travels in structural elements. The consequences for rebar and surface durability come from reduced pH and potential changes to sealants and coatings when carbonation reaches certain depths.
Chemical process and key products
The heart of concrete carbonation is a chemical reaction. Atmospheric CO2 diffuses into concrete, reacting with hydration products – primarily calcium hydroxide (Ca(OH)2). This decalcification forms calcium carbonate (CaCO3), reducing alkalinity.
Here’s the key reaction: Ca(OH)2 + CO2 → CaCO3 + H2O. As carbonation progresses, pore solution pH drops, altering cement paste chemistry over time.
The loss of alkalinity is crucial. It can affect long-term durability and passive film on steel reinforcement.
Progression and influencing pathways
Carbonation progresses through concrete via diffusion. CO2 moves through pores and cracks, gradually penetrating deeper over time.
There’s a difference between surface carbonation – where CO2 reacts with the outer layer – and deeper penetration into structural elements. Factors like humidity, temperature, porosity, water-to-cement ratio, cement type, curing conditions, and exposure environment drive carbonation speed.
Understanding this progression helps in assessing concrete durability and planning maintenance or repair work.
How Carbonation Interacts with Rebar and Causes Corrosion
CO2 dissolves in pore water to form carbonic acid, driving a pH drop from high alkaline values toward neutral. The depth of carbonation and the moisture regime determine how fast this pH change occurs at the steel surface. A lower pH can compromise the protective oxide film on rebar, leading to passivity loss.
Differential moisture and oxygen availability then drive anodic and cathodic reactions that initiate electrochemical corrosion. Rust formation expands and can create internal pressures, microcracking, and increased permeability, which further accelerates degradation. Localized initiation often happens at interfaces or in cracked regions where moisture paths concentrate.
Loss of passivation and corrosion initiation
The carbonation process brings down the pH of concrete, from its usual ~12-13 to near neutral. This is a problem for our steel rebar because it relies on this high alkalinity to stay passive – that’s when it forms a stable, protective oxide/hydroxide film.
When the pH drops, this film gets disrupted. Fresh steel is exposed and now susceptible to electrochemical attack. Here’s how it works: oxygen and moisture create differential aeration between the exposed steel and the rest of the rebar. This drives anodic and cathodic reactions, starting corrosion.
Key takeaway: Reduced alkalinity exposes steel to corrosion, and oxygen and moisture sustain this process.
Corrosion propagation and mechanical consequences
Once started, corrosion doesn’t stop. Rust forms on the steel, but it takes up more space than the original metal. This causes internal pressure within the concrete, leading to microcracking.
The cracks let in more moisture and oxygen, accelerating corrosion. The rust also weakens the bond between the concrete and rebar, reducing the overall cross-sectional area of steel. All this leads to reduced structural capacity – your concrete could lose strength and eventually fail.
Signs to watch for: Rust staining, scaling, or spalling on the surface can indicate corrosion propagation inside.
Environmental and Material Factors That Accelerate Carbonation and Reduce Surface Durability
External drivers include climate conditions, CO2 exposure, humidity, temperature, and pollutants. Internal factors cover porosity, water-cement ratio, cover depth, cement type, and admixtures that influence diffusion and moisture handling. The mix design and protective measures set the baseline for carbonation risk.
Diffusion interacts with moisture to shape the rate, and high humidity can have dual effects at different stages. Elevated CO2 at the surface often affects the outer zone first, while embedded steel responds to the combination of porosity and moisture. Practical indicators include surface changes and potential crack patterns that warrant closer inspection.
Climate and exposure conditions
Carbonation speed varies with climate. Here’s what to consider:
Relative Humidity (RH): RH affects carbonation in two ways. Below 60%, it slows down the process as moisture is needed for CO2 to react. Above 60%, it speeds up carbonation. Check local RH ranges.
CO2 Concentration: Higher CO2 levels accelerate carbonation. Urban areas have higher concentrations due to traffic and industrial activities. Check local exposure classifications (e.g., XS, XD, XC) to understand your structure’s risk.
Wet-Dry Cycles: Frequent wet-dry cycles can speed up carbonation. Areas with distinct wet and dry seasons should be aware of this.
Concrete composition and workmanship
The way concrete is made and worked affects its resistance to carbonation:
Porosity: Lower porosity means less space for CO2 to enter. Well-compacted, low water-cement ratio concretes have lower porosity.
Curing: Proper curing keeps moisture in the concrete, allowing hydration to continue and reducing porosity. Inadequate curing increases carbonation risk.
Admixtures & Defects: Fly ash can slow down carbonation due to its pozzolanic properties. Construction defects like honeycombing or incomplete compaction increase porosity and accelerate carbonation.
Structural factors and crack influence
Cracks and poor detailing create fast pathways for CO2, accelerating deterioration:
Load-Induced Cracks: Cracks from loading or shrinkage allow CO2 to penetrate deep into the concrete, reducing alkalinity at rebar faster.
Joint Openings: Poorly designed or maintained joints can let in CO2 and moisture, increasing carbonation rates.
Poor Detailing: Inadequate cover depth, lack of proper reinforcement detailing, or poor concrete placement can lead to increased carbonation risk. Regular inspections can help identify these issues early.
Inspecting and Assessing Carbonation and Rebar Condition
Start with a practical inspection plan that moves from non-destructive checks to targeted sampling. Define the areas to evaluate and establish a plan for cores or lab tests as needed. Use clear criteria to decide when remediation or monitoring is required.
Visual and surface assessments look for color changes, crusting, exposed rebar, drift marks, cracks, and moisture exposure. Simple in situ tests like a quick pH check on chipped concrete can gauge near-surface carbonation, while more advanced NDT helps map the extent. Document findings to guide next steps.
Visual checkpoints and quick field tests
Before you start any major inspection, grab a flashlight and walk the site. This checklist helps spot obvious signs of trouble.
- Cracks: Check width, length, and pattern. Hairline cracks may seem harmless but can hide bigger issues.
- Rust stains: Red or brown spots around joints or on the surface indicate exposed rebar, which could be corroding.
- Spalling: Flaking or chipping concrete means something’s wrong beneath the surface. Could be corrosion, honeycombing, or other defects.
- Efflorescence: White powdery deposits on the surface hint at moisture problems within.
- Joint discoloration: Dark gray or brown patches around joints could signal carbonation.
- Drift marks: These tell you where water flows. Check for signs of corrosion in these areas.
- Moisture exposure: Look for wet spots, dampness, or water stains. Moisture accelerates carbonation and corrosion.
- Phenolphthalein test: Spray this on freshly chipped concrete. Pink color indicates active carbonation within the last 50 years.
Quick rule: Don’t skip any signs. Even small issues can hide big problems.
Non-destructive and electrochemical tests
These tests let you peek inside concrete without drilling holes or breaking surfaces. Use them to map conditions and prioritize areas for further inspection.
Covermeter: Measures cover thickness non-destructively. Helps identify zones with insufficient cover, where corrosion is more likely.
Half-cell potential: Measures corrosion risk by comparing the electrical potential of embedded rebar to a reference electrode. Use it to rank areas based on corrosion likelihood.
Ultrasonic pulse velocity (UPV): Sends sound waves through concrete to detect voids, cracks, or other defects. Slower velocities indicate more damage.
Rebound hammer: Measures concrete strength by bouncing a spring-loaded mass off the surface. Helps identify areas with reduced strength due to corrosion or other factors.
Standards, sampling, and laboratory confirmation
After non-destructive tests, take targeted cores for lab analysis. This confirms your findings and provides deeper insights.
Carbonation depth profiling: Measures the depth of carbonated concrete to determine if rebar is at risk of corrosion. ASTM C1578 outlines this test.
Chloride content testing: Determines if chloride levels exceed thresholds that could cause corrosion. ASTM C1202 and ASTM C1152 are relevant standards.
Petrographic analysis: Examines concrete’s internal structure under a microscope. Helps identify defects, voids, or other issues that might affect durability. Follow ASTM C856 for sampling and preparation.
Quick rule: Always follow relevant local/industry standards to ensure accurate results and reliable interpretations.
Structural Integrity Assessment and Modelling Approaches
Outline how carbonation-induced corrosion affects member performance, from initiation to potential strength loss. Translate these effects into practical criteria for evaluating existing structures. Use simple decision rules to support field planning and asset management.
Describe testing and monitoring tools, including surface carbonation depth, half-cell potential, resistivity, and moisture profiling. Compare modelling approaches from basic rules to advanced coupled simulations, choosing based on data availability and required accuracy for decisions.
Simplified assessment and serviceability checks
When you’re out there on the jobsite, you don’t always need a PhD to assess concrete carbonation. Here’s how to do quick, practical checks for maintenance planning.
Condition-based thresholds: Look at visible cracks, spalling, or delamination. If more than 10% of the surface shows signs, it’s time to dig deeper.
Corrosion indicators: Check for rust stains or efflorescence. These can tell you where corrosion is happening. If they’re widespread, act fast.
These checks help prioritize repairs and decide when to call in the experts for detailed analysis.
Advanced modelling and sequential coupling
For long-term predictions, you need more than just a tape measure. That’s where advanced models come in.
Multi-physics approaches: These models couple cracking, CO2 diffusion, and corrosion. They predict how structures will perform over decades, not just years.
They require inputs like concrete composition, environmental conditions, and initial damage. The more accurate your data, the better the prediction.
These models help plan for future maintenance, but they’re no substitute for regular inspections.
Interpreting results for intervention planning
So, you’ve got your assessment results. Now what? Here’s how to turn that data into actionable steps.
Repair timing: If corrosion is just starting, you might have years before major repairs are needed. But if it’s already causing significant damage, act now.
Expected performance loss: Models can tell you how much strength and stiffness will decrease over time. Use this to plan for increased loads or reduced serviceability.
Inspection intervals: Regular inspections are key to catching problems early. Base your inspection schedule on the severity of corrosion and expected progression rates.
Case Studies and Real-World Examples (Including Heavy-Haul Railway Beams)
Provide 3–4 representative cases that show how heavy loads, cracks, and exposure accelerate carbonation and corrosion. Each case highlights different exposure and structural conditions. Keep the stories compact and comparable for practical takeaway.
Report key metrics such as carbonation depth trends, cover measurements, reinforcement details, crack behavior, and signs of corrosion. Summaries should connect observed progression to maintenance implications and repair considerations.
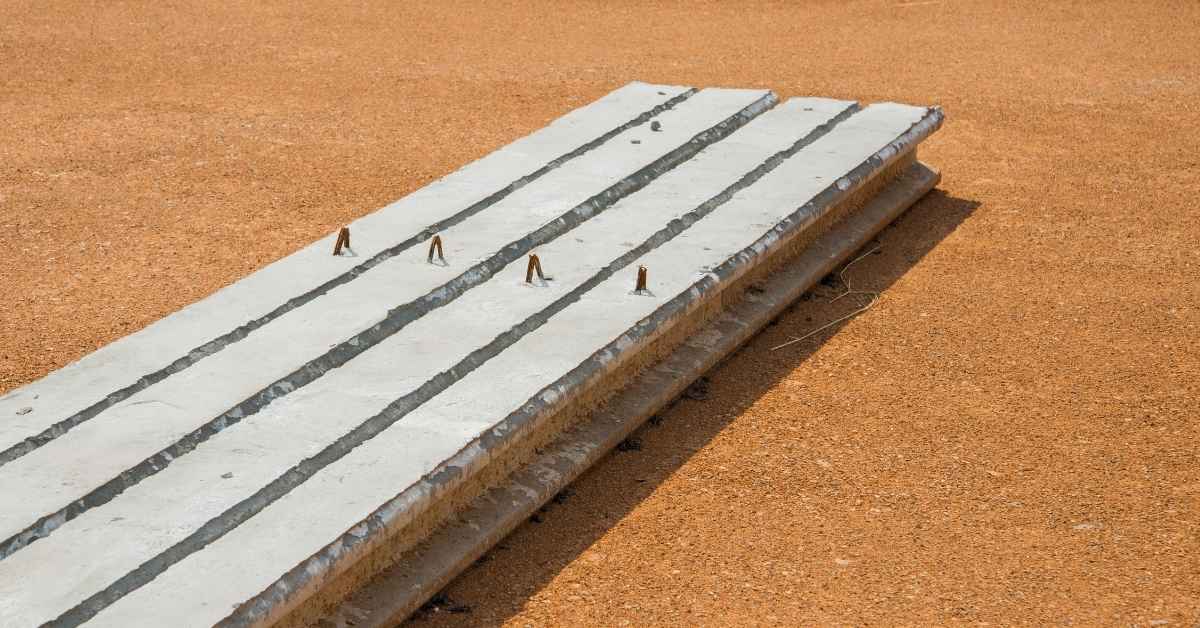
Heavy-haul railway beams — typical findings
High-load bridge beams often show common deterioration patterns. Cracks, inevitable under heavy loads, let in moisture and CO2, speeding up carbonation near these cracks.
Carbonation eats away at the concrete’s protective layer, exposing rebar to air and moisture. This starts corrosion, which causes further cracking and stiffness loss.
Stiffness loss is a big deal. It means your beam can’t hold its shape as well under load. That’s why you see more deflection and increased stress on supports over time.
Coastal, urban, and industrial comparisons
Carbonation isn’t the only game in town. Exposure matters too. Here’s how:
Coastal areas: Chlorides from seawater speed up corrosion. So, you’ll see more aggressive deterioration near coasts. Regular washing with fresh water can help slow this down.
Urban environments: High CO2 levels and air pollution accelerate carbonation. Plus, temperature swings cause cracks that let in moisture. Proper curing and sealing are crucial here.
Industrial zones: Acidic gases from factories can eat away at concrete. Regular inspections and protective coatings are a must to keep deterioration in check.
Mitigation, Repair Options, and Long-Term Maintenance Strategies
Describe a preventive design foundation with mix choices, adequate cover, corrosion-inhibiting additives, proper curing, and surface sealing. These elements aim to minimize carbonation ingress from the start. Emphasize planning alongside durability goals.
Cover surface protection, detailing, crack control, and timely repairs. Include in-service options like injections, grouts, inhibitors, and cathodic protection, with guidance on when each is appropriate. Provide a decision framework that aligns interventions with damage extent and life-cycle planning.
Surface protection and repair techniques
The first line of defense against concrete carbonation is a robust surface protection strategy. This involves applying coatings, sealers, overlays, or crack-injection methods to minimize moisture and CO2 ingress.
Coatings: These are typically applied on the surface to create a barrier against external agents. They work best when the concrete is sound and clean, but they can peel off if not properly prepared or if the substrate is weak.
Penetrating sealers: These penetrate deep into the concrete to block moisture and gas transmission. They’re great for new construction, but may not be effective on damaged surfaces. Always check product compatibility with your existing surface before application.
Electrochemical and structural interventions
When carbonation has caused significant damage, more invasive measures may be necessary. These include cathodic protection (CP), impressed current systems, and structural strengthening.
Cathodic Protection: This involves applying a small electrical current to the reinforcing steel to protect it from corrosion. It’s most effective when the concrete cover is sound and the rebar is accessible. CP systems should be monitored regularly to ensure they’re working properly.
Impressed Current Systems: These are similar to CP but use an external power source to drive a higher current through the steel. They’re used for larger structures or when the concrete cover is damaged. Like CP, they require regular monitoring.
Maintenance planning and inspection scheduling
Regular inspections are crucial to catch carbonation issues early. Here’s a simple checklist to help you schedule your maintenance:
- Annual Inspection: Check for cracks, delamination, or other signs of distress. Look for any changes in the concrete surface.
- 5-Year Inspection: Perform more detailed visual checks and consider non-destructive testing (NDT) methods like half-cell potential or linear polarization resistance (LPR).
- 10-Year Inspection: Consider taking core samples for laboratory analysis. This is also a good time to reassess your surface protection strategy.
- As-Needed Repairs: Address any issues found during inspections promptly to prevent further damage.
Quick rule: Always consult local building codes for recommended inspection frequencies and repair guidelines.
Practical, Safety, and Cost Considerations for Owners and Maintenance Teams
Offer actionable DIY actions for mitigating carbonation impact, with step-by-step workflows and decision trees for when professional help is needed. Prioritize clear, staged approaches to repair and monitoring. Address safety and compliance throughout.
Provide a tools and materials checklist, safety precautions, budgeting guidance, and common mistakes to avoid. Emphasize proper surface preparation, compatibility of products, and documentation to track progress and outcomes.
Tools and materials checklist
Before you start, make sure you have these tools and materials on hand for a thorough assessment or small repairs.
- Phenolphthalein solution: To test for carbonation. Apply, rinse with water; if it turns pink, there’s carbonation.
- Covermeter: Measures concrete cover over rebar. Minimum 25mm recommended.
- Camera: Document initial conditions, track progress, and record evidence for insurance purposes.
- Basic crack repair kit: Epoxy filler, putty knife, trowel, brush, safety glasses.
- Surface cleaner: Removes dirt, grease, and loose material. Use before applying any treatment.
- Concrete inhibitor: Slows down carbonation process. Apply after cleaning, before sealing.
- Sealant: Protects surface from further water ingress. Choose one suitable for your climate and exposure conditions.
- Rebar coating options: Corrosion-inhibiting paints or wraps to protect rebar in severe cases.
- Diagnostics: Thorough testing upfront prevents costly surprises later. Don’t skip this step to save a few bucks.
- Remediation method: Cheaper isn’t always better. Choose the right method for your situation, not just the cheapest.
- Access: Difficult access increases labor costs. Plan accordingly or consider alternative repair methods.
- Downtime: Minimize disruption to your daily life by scheduling work during off-peak hours or days.
- Delaying repairs: Small problems become big, expensive ones if left untreated. Fix issues promptly to avoid costly escalations.
- Incompatible materials: Using the wrong sealant or inhibitor can cause more harm than good. Always choose products suitable for your specific situation.
Quick rule: Always check and double-check your tools and materials before starting any work. Missing something can lead to poor results or safety hazards.
Safety precautions and permit/insurance notes
PPE: Wear gloves, safety glasses, and a dust mask when handling chemicals or working with concrete. Long sleeves and pants protect your skin.
Confined spaces: Be aware of low-ventilation areas like basements or under decks. Use proper ventilation equipment if needed.
Traffic safety: If working near traffic, use cones, signs, or barriers to keep everyone safe. Follow local regulations for roadwork.
Permits and insurance: Structural interventions may require permits. Always consult local codes. Consider getting engineering oversight for major repairs. Check your homeowner’s insurance policy; some cover concrete repair costs.
Cost drivers, prioritization, and common maintenance mistakes
Understanding these cost factors and avoiding common mistakes can save you time and money in the long run.
Regular maintenance and timely repairs are key to keeping costs down. Prioritize assets based on their importance, usage, and condition. Don’t wait until it’s too late – address issues early to save time, money, and stress.
Conclusion
This work boils down to protecting safety, durability, and appearance by acting on carbonation risks before they bite. Start with a clear plan, verify what is happening at the surface, and fix issues now rather than later when repair costs rise.
First, run a practical check by inspecting a small, representative area for surface cracking, color change, or signs of rebar exposure, then confirm the condition with simple tests or measurements you can safely perform, document findings, and map a short, ordered action list for mitigation, repair, and ongoing maintenance.
Common mistakes to avoid are guessing about carbonation depth, skipping surface cleaning or preparation before patches, and applying repairs without confirming rebar safety or structural impact. Safety rules are simple: test in a small area first, wear eye and skin protection, keep the area stable and well lit, and never rush repairs that might trap moisture or hide corrosion in hard-to-see layers.
If the surface shows widespread corrosion, uncertain structural effects, or if the project involves heavy-haul beams or complex modelling, call a professional for a formal assessment and tailored mitigation plan. Stay disciplined, follow the checks, and you’ll keep the concrete durable and safe for years to come.
FAQ
What is the mechanism behind concrete carbonation and how does it start?
CO2 from the air dissolves into the concrete’s moisture and reacts with calcium hydroxide. This slows the pore chemistry and reduces the alkaline strength, which can push carbonation deeper when the concrete is porous or damp. The rate depends on moisture, porosity, and exposure, not a fixed number you’ll see on a label.
How does carbonation lead to rebar corrosion in plain language?
When the concrete becomes less alkaline, the protective oxide film on the steel breaks down. Moisture and oxygen then reach the rebar through cracks and pores, and rust starts. The rust expands and can spall surrounding concrete, making the problem worse over time.
How do beam cracking and surface cracks affect durability and stiffness?
Cracks give carbonation and water a clearer path into the concrete. That speeds deterioration of the surface and can reduce stiffness and load-carrying capacity locally. Cracking also makes inspections tougher; you’ll want to assess crack width, depth, and how the beam is loaded.
What is a practical way to think about assessing deterioration without fancy tests?
Use a simple, multi-step check: look for exposed rebar or corrosion signs, measure crack patterns, and note moisture or efflorescence. If in doubt, check the concrete and rebar data from the manufacturer or local guidelines, and consult an engineer for any structural modelling or complex analysis.