
Introduction
Centering tile layout means aligning the grid so the room’s center becomes the starting point for tile placement.
You’ll learn practical steps to find that center, establish reference lines, and plan grout lines for a balanced look.
The guide walks through handling edge tiles, making adjustments for cuts, and applying simple rules of thumb to achieve a professional, even result.
Key takeaways
- Centering relies on a constant reference line from door or room midpoint.
- Full-field centering uses a centered grid across the whole tile field.
- Feature-based centering highlights focal elements like cabinets or fixtures nearby.
- Measure edges and establish reference lines before dry-fitting tiles across area.
- Allow grout joints and tile size variation in layout planning.
- Plan for waste: 10% extra tiles for cuts and breakage.
Table of Contents
- Introduction
- Key takeaways
- Why Centering Tiles Matters for Final Appearance
- Choosing a Centering Strategy: Full-Field vs. Feature-Based
- Measuring and Establishing Reference Lines
- Accounting for Tile Size, Pattern, and Grout Joints
- Planning for Obstacles: Doors, Cabinets, and Fixtures
- Cut Layouts, Waste Calculation, and Tile Buying
- Tools, Materials, and Visual Checkpoints
- Installation Tips, Troubleshooting, and Final Inspection
- Conclusion
- FAQ
Why Centering Tiles Matters for Final Appearance
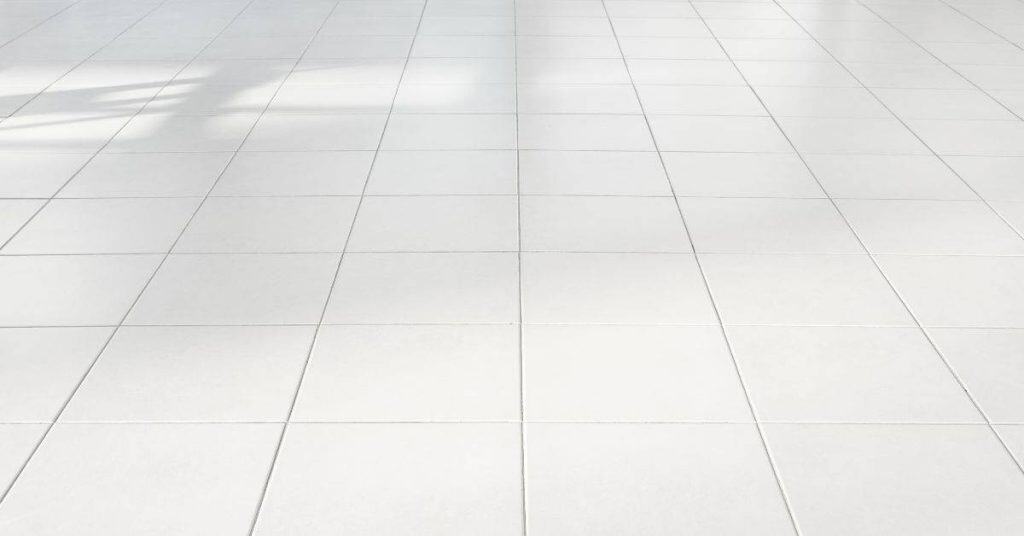
Centering tiles isn’t fancy; it’s the visible frame of the room. When you line up the center and keep edges balanced, the pattern looks clean and the layout feels right.
Mis centered tiles lead to narrow edge cuts and broken patterns that shout sloppy work. Taking a little extra time to find the center keeps symmetry, room balance, and your final result looking professional.
Visual balance and symmetry basics
Centering tiles is all about making your space look balanced. When you place a focal point in the middle, it feels right to the eye because people naturally gravitate towards center points. Think of a fireplace or a big window—most folks want their tile layout to frame these features symmetrically.
Visual symmetry means that both sides mirror each other perfectly around a central axis. This creates harmony and makes your room feel more organized. If you’re working with an odd-shaped space, finding the center can be tricky but it’s worth the effort. Use string lines or chalk to mark out where your tiles should go before laying them down.
Remember, symmetry isn’t just about looks; it also guides how people move through a room. A centered design helps create a clear path and reduces cluttered visual effects. So take time to measure twice and cut once—getting the center right from the start saves you headaches later on.
Practical consequences of off-center layouts
If you don’t center your tiles right from the start, you’ll end up with some real headaches later on. Tiny edge tiles are a common issue; they look odd and can be tricky to fit properly without gaps or cracks. Another problem is awkward cuts—when tiles need to be cut into weird shapes just to fit around pipes or corners. This not only wastes material but also takes more time, which means extra money out of your pocket.
Misaligned grout lines are another big no-no. When your layout isn’t centered, the grout lines won’t line up across different walls and floors, making everything look messy and unprofessional. Before you start laying tiles, check base compaction to ensure it’s level and stable. This step is crucial for keeping your tiles straight and avoiding any off-center issues down the road.

Choosing a Centering Strategy: Full-Field vs. Feature-Based
Full-field centering places the center in the middle of the room. Feature-based centering targets a focal point like a fireplace, vanity, or doorway. Choose full-field for a balanced, room-wide feel; choose feature-based when a focal point should dominate.
Right choice matters because it affects how people move and what they notice. If you mis-center, you’ll fight space, traffic flow, and the look of key features. Plan around where people pause and what you want to highlight.
When to center on the room midpoint
If you’re dealing with a large open space, like a big living room or an expansive basement area, centering your concrete pour at the midpoint of the room can give you a balanced look. This approach works well when symmetry is key and there are no major obstacles in the middle.
Avoid centering on midpoints if you have irregularly shaped rooms or walls that aren’t straight. In these cases, sticking with feature-based centering might be better to keep your pour neat and aligned properly.
Remember, before pouring concrete at the midpoint, make sure your room is level and compacted correctly from base to top. This means checking base compaction and ensuring that any formwork or supports are stable and secure. A solid foundation prevents issues later on when you’re dealing with a large pour in the middle of an open space.
When to center on a focal feature
If your kitchen has a sink, stove, or main entrance, consider centering the concrete slab around these features. This approach makes the space feel more balanced and intentional.
Aligning with a key element like a sink can also help in planning additional fixtures and cabinets around it efficiently. Just remember to measure twice and mark your layout clearly before pouring any concrete.
When you decide on a focal feature, check base compaction around this area extra carefully. A solid foundation here is crucial for the longevity of your slab.
Measuring and Establishing Reference Lines
Measure carefully from fixed references and mark centerlines, diagonals, and control points. These lines guide tile placement and keep rows straight. Use a tape measure, straightedge, and a sharp pencil.
Accurate reference lines prevent wasted tile and crooked edges. They give you a reliable frame to start with and help you spot errors early.
Accurate measurements and layout math
When you measure your room, make sure to double-check those numbers. A few millimeters off can mean a lot of wasted tiles later on. Start by measuring the length and width at multiple points—don’t just rely on one measurement. If you’re working with an irregular space, break it down into smaller sections for easier handling.
Once your measurements are solid, calculate how many full tiles will fit in each direction. Don’t forget to account for half-tiles or cuts around edges and obstacles like pipes or walls. Plan where these cuts should happen so you’re not wasting too much material. A good rule is to start from the center of the room moving outwards; this helps hide any minor misalignments.
Offsets are another key part of your layout math. They help ensure a clean, professional look by staggering joints between rows. Calculate offsets based on your tile size and spacing. If you’re unsure about how to calculate these, refer back to the basics covered earlier in measuring and establishing reference lines. Remember, getting this right upfront saves headaches later.
Marking center and diagonal lines with chalk or laser
To mark the center of your concrete slab, start by measuring from all four corners to find the midpoint on each side. Snap a chalk line across these midpoints for accuracy. If you’re dealing with a large area, consider using a laser level. It’s faster and more precise.
Once you have your centerline marked, draw diagonal lines from corner to opposite corner. This helps ensure that your slab is perfectly square. Double-check these lines against the measurements you took earlier. If they’re off, adjust them now before proceeding.
Laser levels are great for marking diagonals too. Just make sure the laser beam hits all four corners accurately and consistently. Chalk lines work fine but can be harder to see on dark surfaces or in bright sunlight.
Accounting for Tile Size, Pattern, and Grout Joints
Tile size, pattern, and grout width shape how you center a layout. Small changes can shift edge tiles from full to partial, changing the visible balance. Plan for these factors before you set the first tile.
If you ignore grout width or pattern repeats, edges look uneven and you waste cuts. Knowing this helps you avoid awkward partial tiles and saves time on the job. It makes the job look clean and professional.
Tile modularity and pattern repeats
To keep your tile patterns centered, you need to calculate offsets right from the start. For subway tiles or grids, measure the wall width and divide by the tile length plus grout joint size. If it doesn’t fit perfectly, adjust with a half-tile offset at one end.
For herringbone or large-format tiles, mark out your pattern on paper first. Lay it out from center to edge, then check if you need to shift rows up or down to keep the design centered and balanced. Don’t start tiling until you’ve got this right; otherwise, you’ll end up with an off-center mess.
Remember, a little extra time spent planning now saves headaches later when you’re halfway through laying tiles and realize something’s not lining up as expected. Take your measurements twice, cut once.
Grout joint planning and visual spacing
The width of your grout joints can make or break the look of your tile installation. A narrow grout line gives a sleek, modern appearance but requires precise cutting to avoid gaps. Wider joints are more forgiving on cuts but can make small tiles look chunky.
When planning your grout joint width, consider how it interacts with the size of your tiles and the overall pattern repeat. For instance, if you’re using a large tile, go for a narrower grout line to keep things looking sleek. With smaller tiles, a slightly wider gap can help prevent the space between tiles from dominating.
Maintaining consistent visual spacing is crucial. Measure and mark your joints carefully before laying any tiles. Use spacers that match your chosen joint width exactly. This ensures uniformity across the entire surface, giving you a professional finish without any awkward gaps or overlaps.

Planning for Obstacles: Doors, Cabinets, and Fixtures
Centering a layout means you adapt when fixed elements block your plan. Doorways, cabinets, floor vents, and transitions can throw off symmetry. Move your starting point, adjust spacing, or trim around obstacles to keep things balanced.
Measure carefully before cutting or sticking anything. Adapting early saves material, avoids gaps, and prevents damage to doors and fixtures. It matters on a DIY job because bad fits cost time, money, and frustration.
Centering near doorways and thresholds
When pouring concrete near a doorway, make sure to plan for the door swing. If you’re setting up forms on either side of a doorway, check base compaction around the threshold area to avoid weak spots where doors meet the floor. Don’t forget about threshold strips; they need clearance and won’t work if your concrete is too high.
If you have to center your slab right over a door or threshold, make sure to leave room for cuts later on. A balanced cut at the threshold can save headaches down the road when installing doors or thresholds. Avoid pouring directly under hinges as it’ll mess up your door alignment and could cause future issues with water seepage.
Working around built-ins and fixtures
When cabinets, islands, or other built-in elements are in the way of your concrete pour, you’ll need to adjust your plan. First, check base compaction where these obstacles sit since they can affect how level your slab ends up.
If a cabinet or island is off-center but essential for your layout, shift your centerline accordingly. Mark new control lines on the ground that account for this fixture’s position. This way, you ensure everything aligns properly once construction continues.
For doorways and thresholds near your pour area, make sure to create secondary control lines. These help keep your concrete edges neat and prevent any damage to existing structures during the pour. Remember, precision here saves headaches later on.
Cut Layouts, Waste Calculation, and Tile Buying
Plan your cuts on a centered layout to minimize waste and buy the right amount of tile. Measure twice, cut once, and lay out the pattern before you start. Allow for spacers and special patterns so you don’t surprise yourself with offcuts later.
Good planning saves money and keeps the job moving. It helps you order extra for breakage and matches any border or tile direction, so you don’t end up with mismatches.
Estimating waste for centered patterns
When you’re doing a centered pattern, you need to plan for more waste than with straight runs. For large tiles (12×24 inches and up), aim for about 10% extra material. Smaller tiles can get away with around 5-7%. The tighter your pattern, the higher that number goes.
Remember, if you’re working in a space where the layout isn’t perfectly square or rectangular, like an L-shaped room, you’ll need even more waste allowance. Don’t forget to factor in cuts around obstacles and edges too.
Before you start cutting, check your base compaction. A solid foundation means less chance of cracks from shifting ground, which can save you a lot of headaches down the line. Also, measure twice, cut once—don’t rush into making cuts without double-checking your layout.
Planning cut sequences to minimize visible small pieces
When laying tiles, plan your cuts so the smallest pieces end up in less noticeable spots. Start by measuring and marking where you’ll need cuts along opposite walls first. This way, you balance out smaller pieces on both sides of the room.
Avoid cutting too many small pieces; it’s a rookie mistake that can make your floor look messy. Instead, try to place these in corners or behind furniture. If you see yourself making lots of tiny cuts, rethink your layout and adjust tile placement before starting.
Remember, good planning saves time and material. Take the extra minute to sketch out where each piece goes. This helps avoid waste and ensures a neat finish without small tiles sticking out like sore thumbs.
Tools, Materials, and Visual Checkpoints
Tools and materials checklist
Use this checklist before starting any concrete work to ensure you have everything needed for a smooth pour.
- Tape measure: Check all dimensions match your plans. Measure twice, cut once.
Avoid: Misaligned forms due to incorrect measurements. - Chalk line: Ensure lines are straight and clearly marked on the subgrade for form placement.
Avoid: Crooked concrete edges from inaccurate layout. - Laser level: Verify all forms are plumb and level. Use it to check your work frequently.
Avoid: Uneven surfaces due to improperly set forms. - Spacers: Confirm spacers are evenly placed between form boards to maintain thickness of the pour.
Avoid: Thin spots or thick areas in the concrete slab. - Notched trowel: Check for proper notching on edges and corners before pouring. Ensure it’s clean and ready to use.
Avoid: Uneven surface finish due to improper tooling. - Wet saw: Test the wet saw to ensure it’s operational and has fresh blades for cutting rebar or form boards.
Avoid: Delays in concrete work due to equipment failure. - Masking tape: Use to temporarily anchor forms. Check that tape is securely applied without gaps.
Avoid: Forms moving during pour, causing leaks or misalignment. - Concrete mix design: Confirm the correct ratio of water, cement, sand, and aggregate as per your project specs.
Avoid: Poor concrete quality due to incorrect proportions. - Rebar: Ensure rebar is correctly placed in forms before pouring. Check spacing and alignment with plans.
Avoid: Structural weaknesses from improperly installed reinforcement.
Quick rule: Always double-check your tools and materials to avoid costly mistakes on the jobsite.
Visual checkpoints and mockups
Use this checklist when laying out your concrete project to ensure everything lines up correctly before you start pouring.
- Dry-lay rows: Lay out bricks or pavers without adhesive. Check that each row is straight by using a level. Confirm spacing with measuring tape.
- Making mockups: Create small-scale versions of your project to catch mistakes early. Take photos for reference.
- Masking tape lines: Use masking tape to mark where concrete should be poured. Double-check dimensions against plans.
- Multiple angle shots: Take pictures from different angles to verify centering and alignment before pouring concrete.
- Check corners: Ensure all corners are square using a 3-4-5 triangle method. Misaligned corners lead to wasted materials.
- Level the surface: Use a long straightedge or laser level to ensure your base is flat before pouring concrete.
- Foundation depth: Measure and mark where foundation should start. Shallow foundations cause structural issues later.
- Drainage slope: Check that the surface slopes correctly for proper drainage. Flat surfaces can lead to water pooling.
- Grid layout: Lay out a grid with string lines or chalk lines to guide concrete placement. Missing marks mean misaligned pours.
Quick rule: Always double-check your measurements and alignments before applying any adhesive or pouring concrete.
Installation Tips, Troubleshooting, and Final Inspection
Keep the work straight from the start. Focus on maintaining alignment during install, correct common centering mistakes, and check symmetry and grout as you go.
Why it matters: good alignment saves time, prevents rework, and shows a clean finished edge. If you spot misalignment early, adjust before grout sets; measure often and test with a level and straightedge.
Keeping control lines and avoiding drift
This checklist helps you maintain accurate layout throughout your concrete pour. Use it whenever setting up spacers, battens, or short runs.
- Set Control Lines First: Lay out the main control lines before placing any formwork. Confirm they are straight and level with a laser level or string line. Skip this and your pour may drift off center.
- Use Spacers Correctly: Place spacers at regular intervals to keep forms in place. Check that each spacer is firmly against both sides of the formwork. Neglecting this can cause uneven slab thickness.
- Install Battens Tightly: Secure battens around corners and edges with screws or nails. Ensure they are snug but not over-tightened to avoid warping forms. Inadequate tension causes formwork to shift during pour.
- Check Form Alignment: Verify that all forms align perfectly with your control lines. Use a straightedge and level to confirm. Misaligned forms lead to uneven edges.
- Mark Short Runs Clearly: For shorter sections, mark the center point clearly on both sides of the formwork. Double-check this mark is accurate before pouring. Inaccurate marks cause misalignment issues.
- Test Spacers and Battens: Before pouring, give spacers and battens a gentle tug to ensure they are secure. Confirm no movement occurs when tested. Loose connections can lead to formwork collapse.
- Monitor Control Lines Continuously: Keep an eye on your control lines as you pour. Adjust them if needed to maintain accuracy throughout the job. Failing to monitor can result in significant rework.
- Use Leveling Pads: Place leveling pads under spacers and battens for added stability. Ensure they are evenly distributed and secure. Lack of support causes form movement during pour.
Quick rule: Always double-check your control lines, spacers, and battens before pouring to avoid costly mistakes.
Common problems and corrective measures
This checklist helps you spot common issues during installation or final inspection. Use it to ensure your concrete work looks great and functions well.
- Lippage Check: Ensure the edges of adjacent slabs are level with each other. Measure across joints; any difference should be less than 1/8 inch. Skip this, and you’ll see a noticeable step between slabs.
- Uneven Cuts: Verify cuts are straight and consistent. Use a chalk line to mark cuts before making them. Confirm with a straight edge or level. If cuts aren’t straight, your joints will look messy.
- Drift Correction: Realign rows if they’ve drifted from control lines. Measure the distance between control lines and slab edges; adjust as needed. Ignoring this can lead to misaligned slabs throughout the project.
- Width Adjustments: Ensure cut widths match your layout plan. Check dimensions with a tape measure. Confirm cuts are consistent across the entire area. Inconsistent width leads to uneven joints and poor aesthetics.
- Level Surface: Use a long straight edge or laser level to check for flatness. Any high spots should be ground down, low areas filled in. A bumpy surface can cause tripping hazards.
- Proper Grout Joints: Ensure grout joints are consistent and properly filled. Measure joint width; it should match your design specs. Inconsistent or missing grout can lead to water damage.
- Edge Forming: Check that edge forms are straight and level. Use a spirit level along the form edges. Confirm no gaps between forms and concrete. Gaps mean weak edges prone to cracking.
- Concrete Spalling: Inspect for signs of spalling (crumbling) on corners or edges. Look for cracks or flaking. Address by patching with a suitable repair mix. Neglect can lead to structural issues over time.
Quick rule: Always double-check your measurements and layout before moving forward, ensuring everything lines up perfectly.
Final inspection checklist
Use this checklist before grouting to ensure your concrete work is ready for the next step.
- Edge cuts even? Check that all edge cuts are consistent and straight. Use a ruler or straightedge to verify. Uneven edges can cause water leakage and look unprofessional.
- Grout lines uniform? Ensure grout lines between concrete pieces are the same width throughout. Measure several sections with a tape measure for consistency. Inconsistent grouting looks messy and reduces durability.
- Pieces aligned properly? Confirm that all pieces align correctly with your focal points or control lines. Use a laser level to check alignment accuracy. Misaligned pieces can throw off the entire design.
- Clean transitions? Inspect joints for clean, sharp edges without debris or excess concrete. Cleanliness ensures proper bonding and aesthetic appeal. Skipping this step leaves room for future issues like cracking.
- No gaps visible? Look for any noticeable gaps between pieces that could allow water to seep through. Use a flashlight at an angle to highlight any potential leaks. Gaps can cause serious structural problems over time.
- Surface level? Confirm the surface is flat and even across all areas. Use a long straightedge or spirit level to check for high spots or low spots. Uneven surfaces make grouting difficult and look unprofessional.
- No cracks present? Inspect each piece carefully for any hairline cracks that could expand over time. Cracks can weaken the structure and allow water penetration, leading to costly repairs later on.
- Control lines straight? Verify control lines are still straight and in place as originally planned. Use a laser level or string line to check alignment. Drifted control lines mean misaligned concrete pieces.
Quick rule: If it looks off, measure it. Measure twice, grout once.

Conclusion
Centering tiles correctly makes your final room look straight, balanced, and professional, and it protects against cracks or grout failures that show sooner than they should. Do the work safely, double‑check references, and don’t rush the layout—the payoff is durable, clean lines that last.
Run this quick check in plain language: set a clear center reference, confirm field and feature tiles fit with your chosen strategy, map around doors and cabinets, test a small area with your cutter and grout, lay out dry runs to confirm patterns, and then proceed in short, careful steps starting from the center outward, checking level and alignment as you go, with eye level and a quick square at key joints before you commit to adhesive and grout.
Avoid these common mistakes: skipping a proper center or misaligning reference lines, ignoring tile size gaps or grout joints in the layout, and rushing cuts near obstacles without rechecking fit. Safety rules are simple: wear eye protection when cutting, cut away from yourself, dry‑fit first, and only mix enough adhesive and grout for the immediate work to prevent waste and weakened joints.
If you hit oddly sized areas, heavy obstructions, or persistent misalignment after a dry run, it’s smart to call a professional rather than forcing a poor layout. When in doubt, step back, reassess your reference lines, and plan a small, safe test area before continuing. Stay steady, stay patient, and you’ll finish with solid lines and a job that lasts.
FAQ
How does centering a tile layout work?
Start by finding the center of the room. Snap chalk lines to mark the center lines. Work from the center outward so the first tile sits perfectly in the middle.
Do I need to find the center point of the room before starting?
Yes. If you skip it, you’ll end up with uneven borders and awkward cuts. Find the center and align from there to keep the edge clean.
What tools help keep tiles centered during work?
Use a laser level or two straight edges and chalk lines. A square and tile spacers help maintain equal gaps. Check frequently as you lay to avoid drift.
What common mistakes ruin a centered layout?
Bad measurement, starting from a corner, or rushing the layout causes skew. Don’t rely on feel—double-check distances and lines before sets go down.