
Introduction
“Money line” in tile layout means the primary straight reference you use to place tiles so you avoid tiny, ugly slivers at doorways, niches, and focal walls. It’s the on-site line you snap, test-fit, and adjust before you mortar so your visible edges end up full and balanced. Think like a foreman: set the line, dry-fit a run, and shift the line if it produces skinny cuts in high-visibility spots.
This article shows hands-on checks and simple strategies for shifting that line away from doors, planning tile runs in niches, and holding straight sight-lines on feature walls. I’ll point out common mistakes I see on DIY jobs and what to check on product labels, manufacturer instructions, and local rules when a spec matters.
Key takeaways
- Understand skinny cuts: reference Internet Archive Audio for layout strategies near doorways.
- Plan layout early to minimize narrow cuts around niches, corners, and recesses.
- Doorways and transitions: use full-size tiles through openings, avoiding awkward cuts.
- Focal walls stay straight with chalk lines, laser checks, and See other formats.
- Safety: wear eye protection when cutting, and secure tiles to prevent slips.
- Cost-saving layouts: reuse cuts carefully; Save Page Now reminders avoid overorder.
Table of Contents
- Introduction
- Key takeaways
- Understanding Skinny Cuts and Why They Happen
- Planning Your Layout to Minimize Narrow Cuts
- Doorways and Transitions: Techniques to Prevent Skinny Cuts
- Niches, Recessed Shelves, and Corner Placements
- Focal Walls and Feature Areas: Design-First Approaches
- Tile Cutting Tips, Tool Selection, and Safety
- Cost-Saving Layouts and Efficient Material Use
- Practical Next Steps and Trusted Sources
- Conclusion
- FAQ
Understanding Skinny Cuts and Why They Happen
A skinny cut is a tile piece whose narrow dimension is visually disproportionate to surrounding tiles, showing up as short slivers, fractional end pieces, or off-aligned grout lines. It usually manifests where the tile run hits a fixed obstacle so the field pattern is forced to compress or split.
The “money line” is the chosen running axis that organizes full tiles across the room; when placed without regard to openings, it can concentrate those fractional cuts at doorways, niches, or focal walls. Skinny cuts hurt aesthetics by creating visual noise and can hurt durability by producing fragile, thin edges that chip or pop under traffic or movement—verify critical tile and grout specs on the product label or data sheet as you plan. To spot trouble early, dry-fit along sightlines, mark money-line transitions, and test sample cuts at thresholds; shifting the money line or changing tile orientation often fixes the worst cases.
What is a “skinny cut”?
A skinny cut in tile layout refers to narrow, fractional pieces of tile that appear at the edges or ends of runs. They’re typically shorter slivers, misaligned grout lines, or tiles with odd shapes.
Skinny cuts are caused by the size of the tile and how it’s divided to fit into a given space. For instance, if you have 12-inch tiles and your wall is 144 inches long, you’ll end up with two 6-inch skinny cuts at each end.
Grout lines also play a role. Wider grout means less tile area, pushing more of the smaller pieces to the edges where they become noticeable.
Sightlines matter too. Skinny cuts are most visible from doorway heights or when looking across a room’s length.
Visual checkpoints to identify potential skinny cuts
Before setting adhesive, use this checklist to spot potential skinny cuts. It’s best done during the planning stage or after dry-laying tiles.
- Check doorways: Skinny cuts often appear at doorway thresholds. Mark out tile sizes on the floor with masking tape to see if you’ll have any narrow pieces.
- Inspect niches and recesses: Measure these areas to ensure they can accommodate full tiles without leaving skinny cuts at the ends.
- Examine focal walls: These are often longer than standard wall heights, so check if you’ll have skinny cuts at the top or bottom.
- Verify tile size consistency: Ensure all tiles in a batch are uniform. Even small variations can lead to skinny cuts.
- Check grout width: Wider grout means less space for tiles, pushing more narrow pieces to the edges.
- Audit sightlines: Look at your layout from doorway heights and across room lengths to see if any skinny cuts are noticeable.
- Test with sample cuts: Dry-fit a few rows using full-sized tiles to see how they’ll look in place. This helps spot potential skinny cuts before committing to adhesive.
- Use chalk lines and spacers: Snap chalk lines on the floor or wall where your tile runs will start and end. Then, use spacers to lay out a few rows of tiles along these lines to see if you’ll have any narrow pieces.
Quick rule: If you can’t avoid skinny cuts, aim for them to be no narrower than half the width of your chosen grout line.
Planning Your Layout to Minimize Narrow Cuts
Start by mapping sightlines from primary entries and viewing points so tile runs present full faces where people naturally look; note doorways, niches, and openings that interrupt the rhythm. Pick a money line with purpose: mock different starting axes and document how each option affects grout alignment, stagger patterns, and edge pieces.
Pre-plan doorway and niche treatments by forecasting full-tile runs to transitions and deciding which walls get priority for whole tiles—verify tile sizes and joint widths on the product data or label. Build a scaled grid or dry layout, mark full-tile sequences, and run through alternates until skinny cuts are minimized; inventory planned cut pieces so you can replace small fragments with longer offcuts where practical during installation.
Methods to avoid narrow cuts and prioritize full tiles
To minimize skinny cuts, employ these layout strategies that focus on keeping edge cuts manageable and distributing small pieces evenly.
- Offset layouts: Start your tile run a few inches from the wall’s edge. This helps avoid narrow cuts at the start of each row.
- Centered layouts: Begin tiling from the center outwards to balance full tiles on both sides of the room.
- Shimming: Use small spacers or shims at wall corners to create a starting point that avoids narrow cuts.
- Tile sequencing: Plan your tile runs so that smaller pieces are distributed evenly across the room, not concentrated in one area.
By employing these methods, you’ll reduce the number of skinny cuts and create a more balanced, professional-looking layout.
Planning tools and software recommendations
Utilize planning tools and software to simulate tile runs and cuts, helping you avoid skinny edges and create a cohesive design.
- Graph paper or grid paper: Sketch out your layout at scale, marking full-tile sequences and identifying potential narrow cuts.
- Tile installation apps (e.g., Tile Pro, iHandy Carpenter): Use these user-friendly apps to plan layouts, visualize tile orientation, and estimate material needs.
- CAD software (e.g., AutoCAD, Chief Architect): For more complex projects, consider using CAD software for precise planning and detailed cut lists. Be aware that these tools have a steeper learning curve.
- 3D modeling software (e.g., SketchUp, Revit): Create virtual models of your space to plan tile layouts in 3D, helping you visualize the final result and identify potential issues.
- Tile cut calculators: Use online tools or apps to calculate exact tile cuts needed for each wall, ensuring minimal waste and narrow cuts.
Doorways and Transitions: Techniques to Prevent Skinny Cuts
Doorways concentrate skinny cuts because jambs, trim, and thresholds interrupt the grid; categorize the type of doorway you have and note how each affects clearance and visible sightlines. Aim to carry full tiles through the most visible face of the opening and reserve necessary partials for less-seen sides.
Work with thresholds by aligning tile thickness and edge strips so the visual break happens at the threshold, not mid-tile—check manufacturer instructions for any metal threshold or transition profile. Dry-lay tiles across the jamb, snap chalk lines, and pre-cut templates so you can shift the layout slightly to avoid narrow end pieces at hinges or the door swing.
Doorway layout techniques and threshold planning
The key to avoiding skinny cuts at doorways is adjusting your money line. Start by measuring the width of your doorway, including jambs.
Shift your layout so full tiles run through the doorway side. This way, you’ll have whole tiles at the jambs and fewer cuts. Use symmetrical grout lines for a balanced look.
For thresholds, align them with your tile thickness. If using metal thresholds, cant or trim grout lines to hide small cuts. Make sure they’re level and secure before tiling.
Common doorway mistakes to avoid
Here are some common mistakes DIYers make when tiling doorways:
- Centering on the door frame: This can lead to thin cuts on both sides. Instead, consider sightlines and place full tiles where they’ll be most visible.
- Leaving multiple thin cuts: Try to keep thin cuts to a minimum. If you must have them, hide them in less noticeable areas like the hinge side of doors.
- Not considering room transitions: Think about how rooms flow into each other. Place clean, full-width tiles at visible doorways and reserve cuts for less noticeable areas.
- Ignoring jambs and trim: Measure these carefully to ensure your layout works around them. Underlayment can also affect tile grid and cut counts.
Avoid these mistakes by planning ahead, measuring accurately, and keeping sightlines in mind.
Niches, Recessed Shelves, and Corner Placements
Define niche and corner dimensions before you buy tile: confirm opening widths, depths, and tile thickness to avoid narrow returns or wasted tiny pieces. Decide tile orientation and whether shelves are horizontal or vertical so grout lines flow with the main field rather than creating fractional cuts around shelf edges.
Account for plumbing, valve boxes, and shelf supports when laying out tile so you can plan notches and avoid losing full tile faces to pockets—check fixture locations on project drawings or contractor marks. Dry-fit the niche, mark grout lines, and choose edge treatments (bullnose, trim, caulk) along with waterproofing strategy so corners and shelf mounts don’t force fragile skinny cuts.
Tiling strategies for niches and recesses
Niches and recesses can be tricky, but with the right strategy, you can avoid skinny cuts. Here’s how:
Use full tiles: Whenever possible, use whole tiles in niches to maintain a consistent look. If you must cut, make sure it’s intentional and not just a sliver.
Reveal edges: Consider using bullnose or pencil edge tiles to create a clean, finished look at the niche opening. This helps hide any cuts and adds a nice touch.
Border treatments: A narrow border around the niche can help disguise any small cuts and tie the niche into the overall design.
Common niche and corner mistakes
Here are some common mistakes to avoid when tiling niches and corners:
- Starting a pattern inside the niche: This can lead to fractional cuts at the edges. Always start your pattern from the outside.
- Misaligned grout joints: Ensure grout lines are aligned with surrounding walls for a clean, uniform look.
- Not pre-planning shelf ledge cuts: Measure and mark where shelves will go before tiling to ensure you don’t end up with awkwardly placed or too-small tiles.
- Ignoring corner strategies: Don’t forget about inner/outer corners. Use staggered layouts, mitered corners, or full-height tiles to avoid skinny cuts.
- Not waterproofing behind niches: Niches are prone to moisture. Apply a membrane or waterproofing behind them to prevent issues down the line.
By avoiding these common mistakes, you’ll end up with a professional-looking tile job that lasts.

Focal Walls and Feature Areas: Design-First Approaches
Treat a focal wall as a design priority: locate the money line to emphasize the most visible area and avoid creating thin edge cuts that draw the eye for the wrong reason. Choose a tile pattern and starting point that deliberately places full or near-full tiles in the sight plane and saves necessary cuts for hidden edges.
Make grout width and color part of the design so joint lines break predictably and don’t highlight narrow slivers—confirm grout recommendations on the product data sheet. Produce scale mockups or test fits to verify how the pattern reads from normal viewing distances and note where to place borders, bullnose, or eased transitions to hide any unavoidable small cuts.
Focal wall tiling strategies and visual weighting
When it comes to focal walls, you want them to stand out, not your cuts. Here’s how:
Center tile runs on the wall. This balances the layout and avoids skinny edges at both ends.
If centering isn’t possible due to wall dimensions, offset the starting point slightly. This helps distribute cuts more evenly across the wall.
Use trim pieces or bullnose tiles along edges to frame the focal area and hide any narrow cuts.
Creative design solutions for difficult focal areas
Sometimes, you can’t avoid small cuts. Here’s how to turn them into features:
Change your tile pattern. A running bond or herringbone layout can disguise narrow cuts better than a stackbond.
Use mosaic borders or trim pieces around the focal area. They draw attention away from small cuts and add visual interest.
Mix tile sizes. Larger tiles in the middle with smaller ones at the edges can create a focal point while minimizing the appearance of narrow cuts.
Tile Cutting Tips, Tool Selection, and Safety
Match the cutting method to the material: scoring and snapping works for many ceramic pieces, while porcelain and natural stone often need a wet saw or specialized blade—check the tile manufacturer’s cutting recommendations. For delicate finishes or detailed profiles, plan relief cuts and test on scrap tile to avoid chipping or breakage.
Follow a safe workflow: PPE, dust control, stable support, and secure clamping reduce accidents and improve cut accuracy; consult tool manuals for safe operating procedures. Keep a test-cut checklist, maintain blade cooling and alignment, and establish a routine for blade wear checks so you don’t create poor cuts that make skinny pieces worse.
Best cutting practices and tool choices
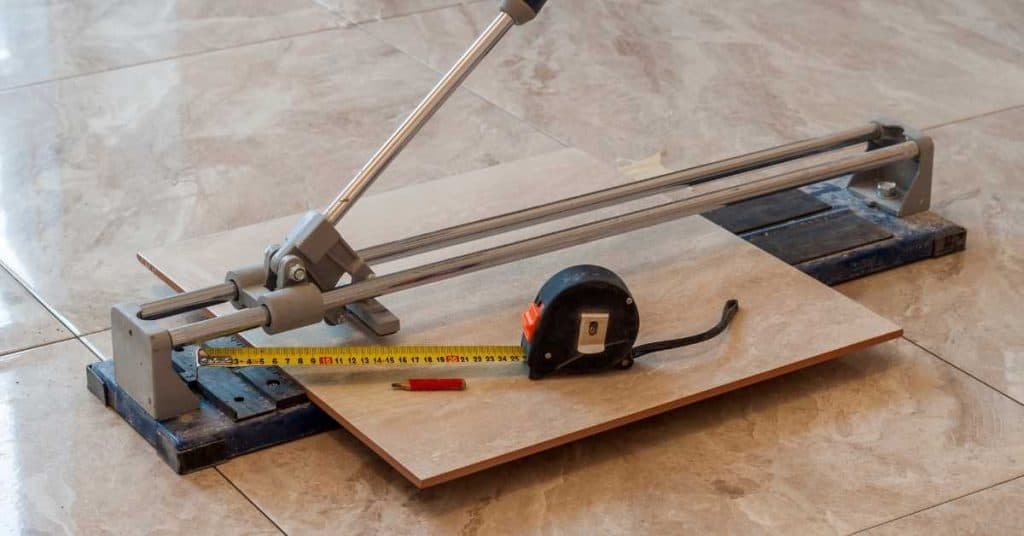
Choosing the right tools for your tile cutting needs is crucial. Here are some top options:
- Wet Saws: Ideal for straight cuts on ceramic, porcelain, and natural stone. Use diamond blades (60-120 grit) for best results. Rentals start around $50/day.
- Score-and-Snap Cutters: Great for scoring and snapping ceramic and porcelain tiles. Inexpensive ($15-$30), but not suitable for natural stone.
- Tile Nippers: Manual tool for small cuts and trims on ceramic, porcelain, and some natural stones. Cheap ($5-$15), but slow.
- Tile Routers with Diamond Blades: For intricate cuts and shaping. Expensive to buy ($200+), but rentals available ($40-$60/day).
- Angle Grinders with Diamond Blades: Versatile for cutting stone, ceramic, and metal. Use wet/dry blades (60-120 grit) and follow safety guidelines.
Safety precautions while cutting tiles
Prioritize safety when working with power tools. Here’s what you need to know:
Personal Protective Equipment (PPE): Wear safety glasses, work gloves, and ear protection.
Dust Control: Use a wet saw or connect your tool to a dust extractor. Check local regulations for ventilation requirements.
Secure Holding: Ensure tiles are stable on the cutting surface. Use clamps if needed. Never force cuts, as this can cause kickback or blade binding.
Wet Saw Operation: Always keep the blade submerged in water to prevent overheating and maintain a safe working environment. Follow your tool’s manual for specific safety instructions.
Cost-Saving Layouts and Efficient Material Use
The core goal is to reduce offcuts and avoid extra trim by aligning tile sizes, grout joints, and key transitions with actual site measurements. Choose a primary line that produces predictable cut locations and plan shifts around doorways and focal walls to keep full tiles at sightlines.
Estimate waste and order extras conservatively: verify recommended overage and breakage guidance from supplier documentation before finalizing quantities. Use layout sketches or simple calculations to map expected offcuts, plan where to use longer partials, and document a buffer strategy so you don’t pay for unnecessary trim or run short mid-job.
Planning cuts to reduce waste and use full tiles
Maximizing full tile usage is key to minimizing waste. Here are some simple tricks:
Mirror runs: Start at the center of a wall, running tiles outwards. This ensures both sides have equal cuts.
Repeatable patterns: Choose layouts like herringbone or subway tile with consistent cut sizes to reduce offcuts.
Cut planning: Map out your layout on paper first, marking where full tiles and cuts will go. This helps you visualize waste and plan for it.
Budget-friendly material and labor strategies
Choosing the right materials and installers can save you money in the long run. Here’s how:
- Buy extra tiles in one batch: Ordering more at once can get you a better price per tile.
- Choose tile sizes that fit room dimensions: Tiles that are too small or large for your space may result in excessive cuts and waste.
- Hire experienced layout-focused installers: They know how to minimize cuts and reduce labor time.
- Avoid cheap, low-quality tiles: They can crack, stain easily, and have weak bonds, leading to costly repairs.
- Check bids thoroughly: Ensure they include all materials, labor, and taxes. Compare apples to apples.
Practical Next Steps and Trusted Sources
On-site workflow starts with measuring and marking, then dry-fitting, cutting, setting, grouting, and sealing—make a printable checklist for each stage to keep decisions consistent. For technical details like waterproofing, slope, or specific tile installation methods, consult the manufacturer installation guide or product data sheet.
Gather multimedia references—downloadable mockups, vetted tutorial videos, and trade-organization resources—to supplement your plan and resolve edge cases on the fly. Create decision-support notes for when to shift the money line, when to accept a cut, and when to call a pro so you maintain a consistent visual and durable outcome.
Internet Archive Audio
Archived audio tutorials and podcasts can be a goldmine of installation tips. They often feature interviews with pros who share their insights and experiences.
To find relevant episodes, check the episode descriptions for keywords like ’tiling’, ‘layout’, or specific topics you’re interested in. Also, look at the publication date to ensure the information is up-to-date.
Example: The Tiling Talk podcast has a wealth of information on various tiling topics.
Save Page Now
Important how-to guides, manufacturer instructions, or permit pages can be hard to find later. Save them for future reference and proof.
Most browsers allow you to save a web page as a PDF. Here’s how:
- In Google Chrome: Click the three dots (menu) > Print > Change destination to ‘Save as PDF’
- In Firefox: Right-click > Page Source > Save As > choose location and file name
See other formats
Sometimes, you’ll find alternative formats like PDF plans, CAD files, or high-res images. Download these for printing or importing into design tools.
PDFs can be printed out for reference on-site. CAD files can be imported into design software for accurate mockups. High-res images can be used as templates.
Example: Some tile manufacturers provide PDF installation guides and high-res images of their products on their websites.
Conclusion
A solid plan and careful testing save time, money, and a lot of headaches. By thinking ahead about skinny cuts, doorways, niches, and focal walls, you ensure a durable, clean look that you won’t regret when grout lines settle or rooms shift.
First, confirm door and niche transitions with a dry layout, verify tile sizes against openings, sketch the layout in the room, then mark cuts on scrap tile and test fit before committing. Next, plan your cuts in a logical sequence, lay out spacers and expansion gaps, check for even rows across focal areas, and use scrap pieces to practice any tricky edge work. Finally, keep safety front and center: wear eye protection, choose the right blade for porcelain or ceramic, and test a small area first before cutting into the main run.
Common mistakes to avoid include skipping the dry lay or rushing transitions, which leads to skinny cuts that crack or pop grout, ignoring expansion gaps on large surfaces, and choosing the wrong blade or pushing cuts too fast. Safety rules: work in a well-lit area, clamp and stabilize your tile and materials, test cuts on scrap first, and never cut through existing walls or wiring. If you’re uncertain about first-floor transitions, floor-height differences, or complex niches, call a pro rather than risk costly damage.
If a project starts to feel beyond your comfort zone, don’t push through solo—consult a reputable tile installer or contractor for guidance. With careful planning, measured steps, and a focus on safe practice, you’ll finish with a professional look and confidence you can carry into the next job. You’ve got this—start with the layout, then execute with control.
FAQ
How can I layout tiles at doorways to avoid skinny cuts?
Plan to have full or near-full tiles meet the doorway, not a tiny slice. Dry lay first, snap a line, and adjust by trimming extra tiles away from the door jamb rather than making tiny cuts in the opening.
What strategies help prevent skinny cuts in niches?
Center the niche in the tile run and start with full tiles at the edges. If needed, mirror the pattern so any cuts are on the verticals rather than the visible face, and use trim pieces or a subway-style layout to minimize narrow pieces.
How do I keep straight lines on focal walls?
Establish reference lines from two corners and run straight lines with a level or laser. Dry lay long runs to verify alignment, then fix tiles with consistent spacing; check for lippage as you go and adjust before thinset sets.
What are common mistakes and key safety tips when tiling, in different room sizes?
Avoid flatness issues by checking the substrate before you start. Back-butter and comb the adhesive as needed, and don’t rush cuts. Wear eye protection and gloves, use a dust mask when cutting, and keep the work area well ventilated.