
Introduction
Styrofoam insulation, while affordable and easy to install, hides significant risks when used behind stucco. This guide explores these dangers, focusing on fire hazards and moisture traps.

Key takeaways
- Identify foam types (EPS, XPS, EIFS) and their compatibility with stucco.
- Inspect installation flaws: gaps, flashing failures, or improper fastening that trap moisture.
- Fire risks require immediate assessment for ignition sources and code-compliant retrofits.
- Moisture traps accelerate mold, rot, and insulation degradation behind the foam.
- Schedule professional diagnostics with moisture meters and infrared cameras before remediation.
- Evaluate total lifecycle costs before repairs or recladding: obtain multiple bids, compare upfront retrofit costs, ongoing maintenance and replacement intervals, insurance implications and potential premium changes, permit fees, and resale value impact; develop a phased remediation plan with a realistic budget and funding timeline.
Table of Contents
- Introduction
- Key takeaways
- What “Styrofoam Behind Stucco” Means: EPS, XPS, EIFS vs Traditional Stucco
- How Foam Is Installed Behind Stucco and Where Failures Begin
- Fire Risks: Combustibility, Ignition Sources, and Code Basics
- Moisture Traps: How Foam Can Make Stucco Fail Faster
- Health & Structural Consequences: Mold, Rot, and Insulation Degradation
- Detecting Problems: Visible Signs and Diagnostic Tools
- Immediate Safety Triage: When to Evacuate, Shut Down, or Call Specialists
- Remediation Options: From Targeted Repairs to Full Re-clad
- Fire-Safety Retrofits: Practical, Code-Aware Mitigations
- Costs, Timeline, Permits, Insurance, and Resale Impacts
- DIY vs Professional: Who to Hire and What to Require in Bids
- Practical Planning Checklist and Decision Flowchart for Homeowners
- Case Studies and Before/After Examples (What Happens When You Ignore vs Fix)
- Conclusion
- FAQ
What “Styrofoam Behind Stucco” Means: EPS, XPS, EIFS vs Traditional Stucco
When you hear about “styrofoam behind stucco,” it’s likely referring to foam insulation materials like EPS (expanded polystyrene) or XPS (extruded polystyrene). These offer varying insulation values and compressive strengths, influencing the wall’s long-term performance. They’re often compared with traditional cement stucco and EIFS (Exterior Insulation and Finish Systems), which typically rely on a foam backing.
Understanding these terms helps identify installed materials, potential replacement needs, and what installers should disclose in permits and product literature. Foam behind stucco alters vapor permeability and drainage patterns, risking moisture trapping and hidden mold growth if not properly designed and maintained. Always verify labels, installation details, and professional involvement to ensure fire safety and compliance with regional codes.
Types of foam insulation and their use in wall assemblies
EPS and XPS are common “styrofoam” boards used on job sites. EPS is lighter, has lower compressive strength, and comes in panels from about 1″ to 4″. XPS is denser, stronger, and often used where higher load resistance or continuous insulation is required.
EPS is commonly used behind non-structural veneers or as cavity fill; XPS is used for rim boards, below-grade walls, or as continuous exterior sheathing. Both reduce vapor permeability compared with open assemblies, so thickness and placement matter. Installers must seal joints and follow manufacturer details to avoid gaps that become moisture traps.
EIFS vs traditional stucco: assembly differences
EIFS uses foam board as the core of its cladding system, with a thin synthetic finish coat bonded to it. Traditional cement stucco is a three-coat mortar applied over a lath or over foam sheathing as a separate substrate.
The difference matters for moisture and fire: EIFS is typically impermeable and relies on careful flashing and drainage details to keep water out. When foam is simply sheathing beneath cement stucco, there can be a vented drainage plane if installed correctly. Failure to provide proper drainage or fire-stopping changes risk profiles and can create hidden moisture or combustible pathways.
How Foam Insulation is Installed Behind Stucco and Where Failures Originate
Foam insulation behind stucco is installed using adhesives, mechanical fasteners, or direct application. Each method interacts with the presence of a drainage plane, edge detailing, and water/air movement through the assembly. This helps identify potential failure points like transitions, improper fastening patterns, or inadequate foam thickness that can create hidden moisture channels.
Understanding these interactions highlights how substrate preparation, foam type (EPS or XPS), thickness, and edge detailing influence moisture migration, fire risk, and the need for a continuous drainage and air barrier system. Workmanship errors like missing flashing, gaps at transitions, improper fastening patterns, uneven foam, and neglecting continuous drainage increase delamination, blistering, cracking, and hidden condensation or mold behind the stucco.
Typical Wall Assembly Layers and Flashing Details
A proper stucco wall with foam consists of: structural sheathing, a continuous water-resistive barrier (WRB), flashings at intersections, a weep screed at the base, foam board, and stucco coats. A dedicated drainage plane behind the foam redirects water out at the weep screed or flashed joints.
Installers may skip or compress these layers. Missing or improperly lapped WRB, absent or poorly seated flashings, and no weep screed allow water to run behind the foam and collect. Continuous flashings and correct lapping direction are critical for moisture shedding. Edge detailing at corners and rooflines must be tight to prevent bridging the flashing.
Ensure proper sequence: WRB first, then integrated flashings, then foam with continuous seal at transitions. This prevents hidden channels and reduces both moisture and fire exposure risk.
Contractor Mistakes That Hide Foam Risks
The following are common workmanship errors that turn a safe assembly into a moisture- and fire-prone wall:
- No drainage plane — Allows water to be trapped behind foam; provide a clear path to a weep screed or vented gap.
- Improper flashing — Flashings not tied into the WRB let water bypass the drain; integrate flashings and lap in the correct direction.
- Continuous sealants over penetrations — Caulking over gaps can hide leaks and block drying; use flashed, functional joints instead.
- Sparse or uneven fasteners — Leads to gaps and thermal bridging; follow manufacturer patterns for consistent contact.
- Too-thin or torn foam — Reduces thermal performance and creates voids where water pools; use specified thickness and repair damaged boards.
Fixes are straightforward: Follow manufacturer instructions, maintain continuous WRB and flashings, and allow a drainage path. This keeps foam from becoming a hidden hazard.
Fire Risks: Combustibility, Ignition Sources, and Code Basics
Expanded Polystyrene (EPS) and Extruded Polystyrene (XPS) used behind stucco are combustible to varying degrees. Ignition risk is influenced by surface exposure, thickness, and discontinuities that can trap heat, smoke, and flames in concealed cavities. Common residential ignition sources—deck or porch fires near openings, vent and exhaust openings, electrical fixtures, lighting, and HVAC components—pose higher risks when foam-backed assemblies are present, as foam can soften, emit fumes, and delay critical fire detection.
High-level code basics mandate defined fire-resistance ratings, fire barriers or separations, and enclosure rules that foam-insulated stucco assemblies may trigger in model codes or local amendments. DIY readers should understand that foam can alter fire behavior by trapping heat and creating concealed gaps, making safer alternatives such as mineral wool, metal lath, or ventilated rainscreens worth considering. Consulting with code officials early can help ensure a compliant, safer design.
How easily foam ignites and burns behind stucco
Expanded and extruded polystyrene can ignite at relatively low heat when exposed in a gap behind a stucco shell. Lab tests and fire investigations show flame spread can be rapid in a concealed cavity. The foam can melt, drip, and produce hot embers that travel along studs or lintels.
Smoke from burning EPS/XPS is dense and toxic, reducing survivable egress time. Even thin pockets or gaps in the stucco create channels for flames and smoke. When heat is trapped by the stucco, temperatures climb quickly and detection is delayed, turning a small ignition into a fast-moving hidden fire.
Building codes and required fire barriers or tests (ASTM, ICC)
Model codes (ICC) and ASTM standards require thermal or ignition-resistant barriers where combustible foam is used on exterior walls. Common rules call for fire-resistance ratings, limited combustible use near openings, and tested assemblies that meet ASTM E84 or similar flame-spread criteria. Some installations must provide a continuous noncombustible layer or a tested 1-hour separation.
Ask your inspector or contractor for the specific assembly test reports and which code section applies to your jurisdiction. Request documentation showing the foam-stucco detail is part of a tested, code-compliant assembly — or choose noncombustible alternatives when officials require extra clearance or barriers.
Code confirmation checklist for DIY readers
- Identify your jurisdiction’s applicable codes and amendments (IBC/IECC, local amendments, or state energy/building codes) and confirm which version is in force.
- Determine the required fire-resistance rating for the exterior wall assembly based on location and occupancy.
- Confirm whether an exterior foam-stucco system requires a tested assembly with a listed product name, model, and report (include the test standard, such as ASTM E84, and the effective flame-spread rating).
- Verify if a continuous noncombustible layer or a specified air/thermal barrier is required behind or within the foam-stucco assembly.
- Check openings and penetrations for required clearances and barriers to prevent foam exposure or failure near openings.
- Obtain a stamped or written determination from the building official that the proposed assembly is compliant, or obtain an approved alternative method.
- Ask for exact assembly name, product data sheets, and test reports to accompany permit paperwork and field inspections.
- Document all inspections with dates, inspector names, and issued approvals; keep digital and hard copies accessible for future renovations or resale.
- Budget for potential changes: if confirmation requires replacing foam with noncombustible materials or adding barriers, factor in material and labor costs early in planning.
- If in doubt, consult a licensed code official or a fire-rated assemblies specialist before purchasing materials or drafting details, and request a written plan review.
Moisture Traps: How Foam Can Accelerate Stucco Failure
Foam insulation behind stucco can trap moisture, leading to capillary rise and stagnant water pockets. Without a continuous drainage plane and vented cavity, water lingers, saturating base materials and accelerating deterioration of coatings, substrate, and interior framing over time.
For DIY or jobsite readers, key takeaways include implementing a continuous drainage/vented layer and ensuring proper detailing at edges, penetrations, and openings to shed water and allow evaporation. Foam type matters—EPS and polyiso differ in adhesion and permeability, and surface coatings or thin stucco can trap moisture if not paired with correct detailing.
Lack of Drainage Plane and Drying Potential
When rigid foam sits tight against the sheathing, it eliminates the air gap that allows water to run down and walls to dry out. Without a drainage plane, water stays in contact with cladding and sheathing instead of shedding away.
Foam also hinders convective drying; evaporation must work through the stucco or foam itself, which can be slow or impossible depending on the product. The result is long-term saturation, higher hydrostatic pressure, and increased risk of freeze-thaw damage and delamination.
In summary: using foam without a proper vented cavity or continuous drainage plane trades short-term insulation gains for long-term moisture failure.
Interaction with Cracks, Penetrations, and Failed Flashings
Cracks, window penetrations, and bad flashings are common entry points for water in stucco. When foam is behind the stucco, it can hide these leaks; moisture tracks into pockets behind the foam where it sits undetected.
Because foam can adhere tightly and sometimes seal over flashings, small leaks turn into chronic wetting. You lose telltale surface signs, and the wall stays wet longer, allowing rot and mold to migrate into framing and trim.
Quick takeaway: inspect flashings, penetrations, and weep details carefully; don’t assume foam-covered areas are dry just because the exterior looks intact.
Health & Structural Consequences: Mold, Rot, and Insulation Degradation
When foam is installed behind stucco, it can trap moisture through vapor drive, capillary action, and blocked drainage. This creates persistent damp conditions that feed wood rot, encourage fungal growth, and invite a range of hidden degradation problems. Moisture also erodes insulation performance, reduces R-value, promotes foam deterioration, and allows energy losses to compound over time, while creating ongoing indoor air quality concerns from mold spores and volatile organic compounds. Left unchecked, hidden moisture can undermine framing, corrode fasteners, cause stucco debonding, and quietly weaken the structure long before surface symptoms appear.
DIYers should understand these signs to catch problems early: staining, soft spots, efflorescence, musty odors, and rising moisture readings that signal a hidden moisture problem behind the siding. Diagnostic steps like moisture meters, infrared imaging, and professional assessments guide safe containment and appropriate remediation choices, including targeted drying, mold remediation, selective foam replacement, re-sealing, drainage improvements, and moisture-management system upgrades. Addressing both moisture management and insulation restoration now saves longer-term energy costs, preserves structural integrity, improves comfort, and protects indoor air quality for occupants, especially children and allergy-sensitive individuals.
Mold growth and occupant health risks
Foam behind stucco can trap moisture against sheathing and framing. When materials stay damp, mold and mildew colonize within days to weeks. Warm, dark pockets created by failed flashings and blocked drainage are ideal for fungal growth.
Homeowners may notice musty odors, persistent damp stains, or allergy-like symptoms: sneezing, congestion, watery eyes, headaches, and worsening asthma. Children, the elderly, and anyone with immune issues are more vulnerable. Visible mold on walls or ceilings is a late sign; invisible growth can still affect indoor air quality and trigger chronic symptoms.
If you notice recurring odors, unexplained health complaints tied to time at home, or signs of water intrusion, get a moisture check and consider professional mold testing. Early action reduces exposure and limits spread.
Structural decay and repair escalation
Moisture trapped by foam doesn’t just grow mold — it rots wood and corrodes fasteners over months to years. Surface staining and soft spots can progress to delaminated stucco, weakened sheathing, and compromised framing if ignored.
Small repairs become major jobs fast. Removing damaged stucco and foam to dry and replace framing is labor-intensive. Hidden rot often means removing interior finishes, replacing studs, and reinstalling insulation and cladding. Delays multiply costs because decay spreads and more components need replacement.
Catch it early by probing suspicious soft spots, checking for rusted nails, and using a moisture meter or infrared scan. A focused repair now often avoids full wall reconstruction later.
Detecting Problems: Visible Signs and Diagnostic Tools
Identifying issues with your stucco exterior involves a combination of visual clues and diagnostic tools. Start by inspecting the exterior for visible signs such as cracks, spalling, loose or hollow sections, bubbling paint near corners or windows, efflorescence staining, and any soft spots that may indicate moisture or substrate problems. If your home has Styrofoam-backed insulation, look for exposed foam, gaps between stucco and substrate, degraded edges, and temperature differences suggesting insulation failures.
For DIY checks, inspect flashings for dampness, use a pinless moisture meter on exterior test patches and interior suspect areas, and note any musty odors or mold growth inside near ceilings or walls. Documenting these findings with photos, sketches, and notes helps you decide whether to proceed with repairs yourself or consult professionals. When signs point to hidden moisture or structural concerns, consider hiring licensed inspectors or building envelope specialists to perform infrared thermography, calibrated moisture mapping, and wall cavity assessments.
Surface clues you can spot today
Walk around your home and look for visible damage: hairline cracks, spalling stucco, bubbling or peeling paint, efflorescence (white staining), and any soft spots when tapped with a hammer. Check seals and finishes for failed caulk, crazed or blistered paint, and exposed or degraded foam backing. Inside, note high humidity, musty odors, or mold growth near the top of walls and ceilings. Photograph each issue, date it, and mark locations on a sketch.
Professional diagnostics: moisture meters, IR, borescopes, and invasive probes
A professional uses various tools to confirm your observations. A pinless moisture meter scans surface moisture without damage, while pin meters provide deeper point readings but leave tiny holes. Infrared thermography maps temperature anomalies that often indicate trapped moisture or air gaps behind stucco.
Borescopes allow inspectors to look into wall cavities through small drill holes. For definitive answers, calibrated moisture mapping or core probes (invasive samples) reveal the extent of rot or wet insulation. Each tool has limitations: IR shows patterns, not concentration; meters can be fooled by surface salts; invasive tests require repair. Consult a licensed building-envelope specialist when noninvasive tests are inconclusive.
Immediate Safety Triage: When to Evacuate, Shut Down, or Call Specialists
Safety triage prioritizes human safety above all else. If you detect active heat, smoke, or flames behind stucco, evacuate immediately. Secure the area to prevent re-entry and take these initial actions:
- Shut off electrical power at breakers and outlets in the affected zone.
- Avoid using water on active heat sources.
- Move people and pets to a safe distance.
If the situation is urgent, escalate by calling your local fire department or emergency services. Also, contact licensed contractors or restoration specialists for post-incident assessment.
Fire-suspect signs requiring urgent action
Warm spots on exterior walls, melted finishes, and sudden black staining are red flags. If the wall feels hotter than surrounding areas or you detect a persistent, acrid smoke odor, treat it as an active safety hazard:
- Evacuate occupants and keep everyone clear of the area.
- Call emergency services immediately.
- Secure the perimeter to prevent re-entry until professionals arrive.
Do not poke or pry at suspected smoldering spots, as disturbing embers can reignite hidden fires.
Moisture-suspect signs prompting urgent inspection
Rapid-onset interior mold, musty air, or visible mildew signals serious moisture intrusion behind the stucco. Bulging or softened walls, peeling paint, and cupped baseboards indicate substrate saturation:
- Document damage with photos.
- Stop water sources if safe (shut off valves, apply roof tarps).
- Call a licensed restoration contractor for moisture mapping and drying.
Avoid tearing into wet assemblies yourself to prevent mold spore release and further damage. Share your observations and photos with responders and your insurer.
Remediation Options: From Spot Repairs to Full Re-clad
Addressing foam-stucco issues involves a decision tree based on damage extent, safety concerns, moisture risk, and fire considerations. Start with spot repairs like crack sealing or patching, then add a drainage plane and replace foam as needed. Advance to full cladding only when failures are widespread or concealed moisture is significant.
Each option has pros and cons, affecting cost, disruption, warranties, and long-term moisture control. Consider vapor barriers and drainage efficiency. Retrofitting can trap moisture, creating mold risks and potential fire hazards if foam isn’t replaced with fire-rated materials. Sequencing involves assessment, containment, removal, drainage plane installation, foam replacement or cladding, and finishes, with permits and inspections at key checkpoints.
Retrofitting Drainage and Ventilation (Best-Value Fixes)
When damage is limited, adding a rainscreen gap or furring strips behind the stucco can stop hidden moisture. A 3/8″–1/2″ ventilated cavity with a permeable drainage layer prevents rot and mold without full wall replacement.
Install continuous flashings at the bottom, ventilated head and sill vents, and compatible weep holes. Use corrosion-resistant fasteners and a vapor-permeable membrane between foam and new furring if needed. These fixes are cost-effective but only suitable when inspections show no deep water damage or significant fire risk from the foam.
Partial vs Full Removal and Re-cladding Decisions
Decide based on inspection findings: partial removal and targeted foam replacement plus localized stucco repair can be practical if moisture intrusion is isolated, structural sheathing is sound, and fire risk is low. Patch out ruined sections, install proper flashing and a drainage plane at those zones, then reapply compatible insulation and finish coats.
Go full removal when damage is widespread, sheathing is compromised, or the foam creates an unacceptable fire hazard. Full re-clad installs a full drainage plane, continuous air barrier, and fire-rated insulation. It costs more and takes longer but is the only reliable long-term fix when multiple failure indicators exist. Include permit checks and an inspection stage before closing walls to avoid warranty and safety gaps.
Fire-Safety Retrofits: Practical, Code-Aware Mitigations
This section guides homeowners through practical, code-compliant fire-safety retrofits for stucco-on-foam assemblies. It focuses on maintainability and predictable code alignment, offering options like installing fire barriers, adding mineral wool layers or seamless boards, and applying intumescent coatings.
The retrofit sequence begins with moisture assessment, followed by foam evaluation, barrier installation, penetration sealing, and finish reapplication. Safety guidance for DIYers is provided, along with clear thresholds for hiring licensed professionals. Understanding local fire-resistance ratings, permits, inspections, and documentation supports warranties, insurance, and resale.
Installing compliant fire barriers and mineral wool
Place non-combustible barriers at high-risk areas: tops and bottoms of foam panels, around soffits, floor lines, and wall-to-roof intersections. The goal is a continuous, code-rated stop layer to halt flame spread behind the stucco. Install barriers tightly against framing and seal fasteners to preserve the rated assembly.
Mineral wool is an effective retrofit layer due to its non-combustibility, water resistance, and compressibility for tight fits. It can be installed as batts or rigid boards directly over foam. However, it adds thickness, may complicate drainage systems, and requires careful flashing detail to prevent moisture trapping.
Practical note: Maintain a drainage/air gap strategy when adding mineral wool. Fasten for future inspection and replacement. If stacking layers, prioritize tested assemblies or consult the local code official for acceptable configurations.
Coatings, inspections, and third-party verification
Intumescent coatings can slow flame spread on exposed foam but are not a standalone solution for stucco-on-foam. They require suitable products for substrates, measured dry-film thickness, and full cure time before enclosure. Coatings can seal vapor paths, so use only where detail drawings show adequate drainage and drying.
Schedule an on-site inspection after application and before re-cladding. Inspectors will check surface prep, thickness readings, anchor patterns, and clearance to heat sources. Keep product data sheets, test reports (ASTM, NFPA/IBC references), and contractor affidavits for permit and insurance satisfaction.
Query your contractor for third-party lab reports, documented application logs, and a follow-up maintenance checklist. For higher-risk walls, request a certified fire-resistance evaluation or field verification by an approved testing agency to protect resale value and insurance compliance.
Costs, Timeline, Permits, Insurance, and Resale Impacts
When addressing foam behind stucco issues, consider costs, timelines, permits, insurance, and resale impacts. Here’s a breakdown:
- Inspections (moisture tests, infrared scans): $300–$1,500.
- Targeted repairs (sealant, flashing fixes): $500 – $5,000.
- Drainage retrofits (weeping channels, grading): $2,000 – $15,000.
- Full re-clad: $15,000 – $75,000 or more.
Timelines vary based on project scope and weather. Expect:
- Initial assessment: 1–3 weeks.
- Testing: 1–2 weeks.
- Design/quote: 2–6 weeks.
- Permitting: 2–6 weeks.
- Mitigation work: 2–8 weeks.
Understand required permits (building, mechanical drainage, fence/yard work) and inspector milestones to avoid delays. Secure adequate liability coverage and warranties for long-term maintenance ease. Document a maintenance plan and potential resale credits or concessions.
Rough cost ranges and ROI considerations
Costs vary based on damage extent, access, labor rates, and materials. For ROI, focus on risk reduction:
- Diagnostics: $300–$1,500.
- Targeted repairs: $500 – $5,000.
- Drainage retrofits: $2,000 – $15,000.
- Full re-clad: $15,000 – $75,000 or more.
Drivers pushing costs higher include extensive rot, multi-story scaffolding, historic details, and tight urban access. Documented repairs and transferable warranties offer the best resale payback and lower long-term liability.
Insurance, disclosure, and resale implications
Notify your insurer early about foam behind stucco issues. During remediation, expect premium adjustments or temporary endorsements. Contractors should carry general liability and pollution/fire endorsements if hot work is involved.
Sellers must follow state disclosure laws. Buyers may request credits, escrowed repairs, or contractor-verified fixes. Obtain permits, final inspections, and written warranties for a smoother resale process.
DIY vs Professional: Who to Hire and What to Require in Bids
Know your limits. DIY is suitable for visual checks like cracks, stains, mold indicators, or corrosion. However, tasks involving structural assessment, drainage integrity, fire-rated assemblies, or behind-stucco inspections require licensed specialists. When Styrofoam is involved, consider potential fire-seasoning, moisture entrapment, and hidden decay that DIY might miss.
To hire wisely, demand the following from professionals: licensing and insurance, experience in stucco/EIFS systems, fire-rated assemblies, and moisture/air barrier installations, local code compliance, references and project photos, warranties and product data sheets, and a written testing plan before work begins.
A clear bid checklist—scope, materials including insulation type and fire-rated assemblies, moisture/air barrier details, drainage considerations, permits, warranties, and post-work testing—helps compare proposals and avoid gaps. Engage building envelope specialists first for air/moisture barrier upgrades, then licensed contractors for removal/replacement work, and finally fire inspectors for code compliance.
Vetting contractors and common red flags
These contractor behaviors predict poor outcomes. Ask targeted questions and watch for:
- No WRB plan: Can’t describe the weather-resistive barrier and drainage strategy? They likely won’t prevent moisture. Demand drawings and product names.
- Vague scope: One-line bids hide change orders. Require a clear scope with removal limits, inspection points, and re-clad details.
- No stucco/EIFS experience: General carpenters may miss key details. Ask for project photos, references, and specific remediation examples.
- No permits or inspections: Avoiding permits is a red flag for code shortcuts. Insist on permit pulling and scheduled inspections.
- Refuses testing: Contractors who balk at moisture meters or infrared scans may be hiding problems. Make testing a contract milestone.
Trust actions over claims: written proof, clear milestones, and references reduce risk. Walk away from contractors who dodge specifics.
Practical Planning Checklist and Decision Flowchart for Homeowners
This section provides a comprehensive, step-by-step guide to help homeowners tackle exterior moisture issues effectively. It begins with an initial check of your home’s exterior for signs of moisture, progresses through indoor symptom mapping, and culminates in a prioritized remediation list that considers severity, budget, and safety.
The process involves a homeowner-friendly audit flow, risk screening, a diagnostic decision tree, budgeting and sequencing, remediation pathways, and required permits. It emphasizes documentation throughout to ensure long-term maintenance and compliance with building codes and warranties.
Initial Triage Flow: DIY Checks → Hire Inspector → Choose Repair Path
Begin by conducting a visual inspection of your stucco exterior. Look for bulging, staining, soft spots, or scorch marks near vents and joints. If no visible issues are found and interiors remain dry with no odor, schedule seasonal checks.
However, if you discover discoloration, soft areas, or signs of heat or soot, act promptly within 48-72 hours to minimize damage. Use moisture meters or simple probes to check for high readings; if found, stop work and hire a licensed inspector or fire-safety contractor within seven days. For ambiguous results, book an infrared scan and non-destructive testing before proceeding with any demolition.
Decide repair path based on the severity of damage and your budget. Small localized rot or isolated foam removal may be DIY-safe with proper guidance; however, compromised drainage planes, large foam areas, or fire exposure require partial or full re-clad and licensed trades. Document all findings and timelines to facilitate permit applications and insurance claims before any major work begins.
Tools, Materials, and Visual Checkpoints Homeowners Can Use
Assemble a compact kit to document problems and provide clear evidence for contractors. Consider renting expensive items as needed.
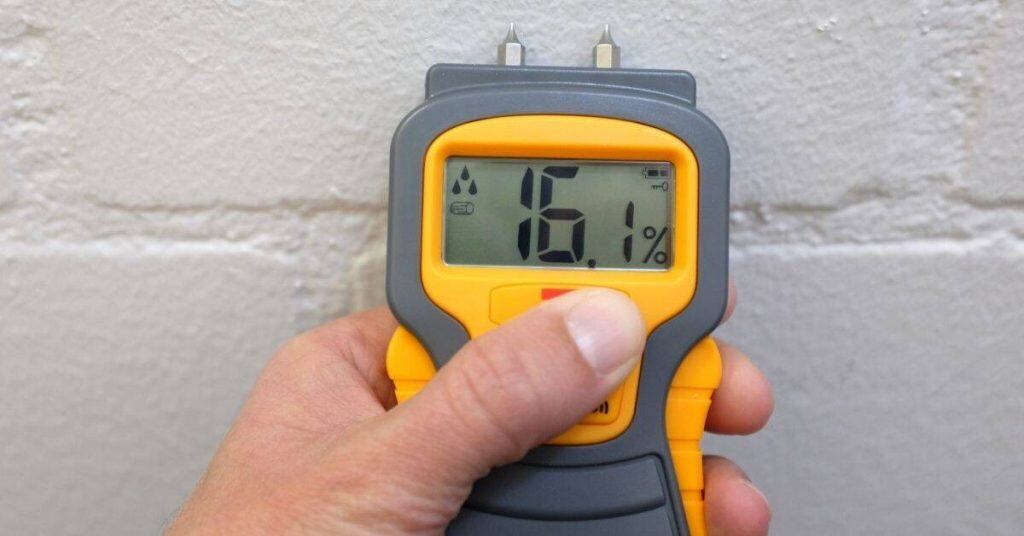
- Moisture meter — Detects elevated moisture in sheathing and studs. readings above 20-25% warrant further investigation. Basic models cost $30-$150; higher-end models can be rented.
- Infrared camera (rent) — Reveals cold/wet pockets behind stucco without cutting. Useful for scanning entire elevations. Daily rental rates range from $40 to $100.
- Bright flashlight — Highlights hairline cracks, efflorescence, and hides. Use a focused beam at a low angle to reveal depth. A shop light costs between $10 and $40.
- Long probe/awl — Tests the softness of stucco and sheathing. Probe gently to avoid enlarging holes. Keep a camera ready to photograph any failures.
- Hygrometer — Tracks indoor humidity trends over days. Spikes after rain indicate intrusion. Budget-friendly units range from $15 to $50.
- Tape measure & camera — Record locations, crack lengths, and elevations. Photos and measurements expedite bids and insurance claims.
- Notebook or app — Log dates, readings, and actions. Clear records improve permit and warranty outcomes.
Case Studies and Before/After Examples (What Happens When You Ignore vs Fix)
Real-world case studies demonstrate the progression of common failure modes when using Styrofoam insulation behind stucco, including fire risk indicators, moisture traps, and stucco cracking. Each case outlines the build type, initial red flags, observed failure mechanisms, remediation choices, and outcomes to illustrate the stakes and lessons learned.
These examples provide practical context for DIY/worksite readers: how to identify potential issues before fixing, why specific material changes matter, and how early intervention can save time and money. By comparing pre- and post-fix indicators and outlining approximate costs, readers learn to plan, prioritize safety, and avoid repeating costly mistakes.
Case A — Hidden moisture uncovered during remodel
During a kitchen remodel of a 1960s wood-frame bungalow, contractors removed stucco and discovered 3–4 inches of degraded Styrofoam sheathing soaked behind the lath. Early clues were surface staining and soft sheathing; an invasive probe and moisture meter confirmed excessive moisture in framing. Time had turned a moisture trap into active rot and mold in a corner bay.
The fix involved removing wet foam, cutting out affected sheathing and rotten studs, installing pressure-treated replacement studs where needed, adding a code-compliant drainage plane and rainscreen, and replacing insulation with mineral-wool and exterior gypsum sheathing. Permits and inspections took two weeks; on-site work ran 7–10 days. Direct costs landed around $8k-$14k depending on structural repairs.
Lesson: small staining or soft spots deserve quick investigation. Early intervention cuts repair scope, cost, and prevents hidden mold and framing loss.
Case B — Fire-linked foam boards and successful retrofit
A townhouse suffered an exterior ignition starting near a balcony light where exposed XPS foam butt-joined an electrical box. Flames spread within the foam cavity; fortunately occupants escaped and firefighters knocked it down, but char extended into the wall cavity. Post-fire inspection flagged noncompliant combustible foam in a combustible wall assembly.
Remediation replaced the foam with fire-rated mineral wool and installed 1/2″ Type X gypsum sheathing as an exterior continuous fire barrier where required. Contractors added proper vented cladding channels and sealed service penetrations. Work and inspections spanned three weeks; costs were around $6k-$12k. After retrofit, the insurer removed a pending surcharge and resale disclosures became straightforward.
Lesson: exposed foam near heat sources is a real ignition vector. Use fire-rated materials and continuous barriers to satisfy code and protect insurance and resale value.
Conclusion
Prioritize safety and longevity by addressing foam behind stucco issues promptly. Ignition sources and moisture can compromise the system quickly, so clear next steps are crucial.
First, assess your situation: identify foam type (EPS or XPS), confirm if it’s EIFS or traditional stucco, and note any signs of moisture, cracks, or mold. Then, plan your approach: halt nearby exterior work, outline remediation steps, obtain necessary permits, budget for repairs, and gather bids from qualified professionals. If unsure about material interactions, conduct a small-area test, document results, and maintain a written plan with timelines, relevant codes, and insurance implications.
Avoid common pitfalls such as attempting to patch or skim-coat foam without addressing moisture or fire risks, skipping required permits or inspections, and rushing repairs without checking for hidden damage. Always isolate the area and use proper containment to prevent dust or debris spread. Don’t overlook visible signs of moisture, mold, or rot, and don’t assume a quick fix won’t impact structure or code compliance.
When in doubt, consult professionals, especially for moisture diagnosis, fire-safety retrofits, or full recladding. They should provide a clear scope, required permits, and a realistic timeline. Focus on safety, avoid irreversible DIY mistakes, and proceed with a solid plan you can document and defend.
FAQ
Why is foam insulation behind stucco risky for fire?
Polystyrene can burn and melt, feeding flames instead of stopping them. When behind stucco, flames can spread faster through gaps. It’s not a fire-resistant barrier you can rely on.
How does foam trap moisture behind stucco?
The foam seals poorly against vapor and allows water to wick in from gaps. Trapped moisture leads to rot, mold, and rotten studs. Stucco alone won’t dry it out effectively.
What should I use instead of foam behind stucco?
Use solid sheathing with proper venting and a drainage plane. Consider mineral wool or fiberglass insulation with a compatible weather barrier. A rain screen helps keep the wall dry and happy.
How can I fix an existing foam-backed stucco setup?
Remove the foam and assess the framing for damage. Replace damaged wood, dry out the wall, and install proper insulation and drainage. Then finish with a code-compliant stucco system.