
Introduction
Surfactant damage on stucco coatings happens when cleaners leave residues that affect adhesion and finish. In plain terms, you might see streaks, halos, or softness where the coating meets the wall. Before repainting, check for residue depth, film buildup, and any moisture issues that could be aggravated by detergents.
Then do a simple test area: damp it, scrub gently with a neutral cleaner, and rinse; let it dry completely. If you notice soft spots, chalky patches, or lingering residues, note them and adjust your prep accordingly. Always check the cleaner’s label for surfactants, follow manufacturer instructions, and verify local rules before repainting.
Key takeaways
- Check for shiny patches, mottling, or hazy film indicating surfactant migration in stucco.
- Wear PPE, avoid skin contact with residues during inspection and cleaning.
- Perform patch tests and shallow scrapes to assess contamination depth and adhesion risk.
- Use approved cleaners and neutralizers; avoid aggressive solvents that damage plaster.
- Prime and seal with compatible coatings designed for contaminated surfaces; follow label guidance.
- If in doubt, pause repainting and consult local codes, manufacturer instructions, or a pro.
Table of Contents
- Introduction
- Key takeaways
- What Surfactants Are and How They Interact with Stucco Coatings
- Visual Checkpoints: How to Recognize Surfactant Damage on Stucco
- Root Causes and Environmental Contributors to Surfactant Migration
- Pre-Repaint Inspection: Tests, Sampling, and When to Hold Off Painting
- Surface Preparation and Cleaning Strategies That Address Surfactant Residues
- Choosing Primers and Coatings for Previously Contaminated Stucco
- Repair and Remediation Options: Patching, Re-Coating, and Full Removal
- Tools, Materials, and Safety Checklist for DIY Inspections and Prep
- Conclusion
- FAQ
What Surfactants Are and How They Interact with Stucco Coatings
Surfactants are water-loving and oil-loving molecules that help liquids spread and wet surfaces. They can move through stucco and coatings, carrying compounds with them as they migrate. The movement can leave visible signs like staining or changes in how the coating bonds to the wall.
When surfactants meet the stucco chemistry, they can alter surface tension and adhesion, leading to coating breakdown over time. Homeowners can observe these effects as dull spots, streaks, or soft areas where the coating seems to lose grip. Understanding these interactions helps explain why certain walls behave differently after repainting.
Sources of surfactants in building materials
Material choices can bring surfactants into your stucco. Here’s what to watch out for:
- Cement additives: Some cements have added surfactants for better workability. Too much can cause staining and weak bond.
- Admixtures: These liquid additives can contain surfactants. Check the specs to avoid excess. Wrong ones lead to cracking.
- Cleaning agents: Surfactants in cleaners can be absorbed by stucco. Use pH-neutral, surfactant-free cleaners.
- Waterborne contaminants: Rainwater or irrigation can carry surfactants from nearby surfaces. Ensure good drainage to avoid absorption.
- Plasticizers: These make stucco more flexible but too much can cause staining and poor curing. Check the mix design.
How surfactants affect paint adhesion and drying
Surfactants can mess with your paint job in a few ways:
Reduced surface tension means paint doesn’t spread or adhere as well. You’ll see poor coverage and weak bond.
Surfactants can also cause blistering. Paint forms bubbles under the surface, leading to unsightly bumps.
Lastly, surfactants can interfere with curing. This means your paint doesn’t harden properly, leading to easily damaged coatings.
Visual Checkpoints: How to Recognize Surfactant Damage on Stucco
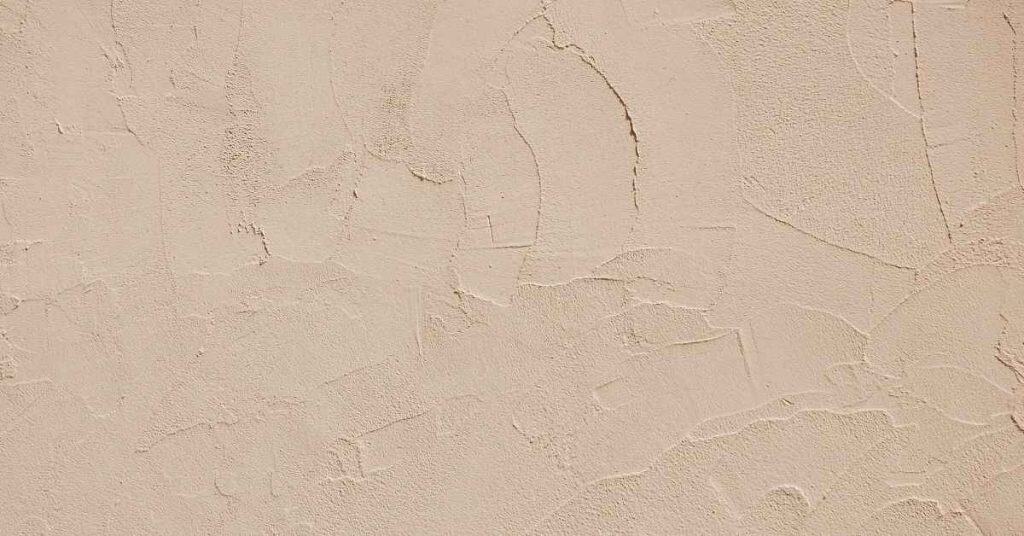
Start with a visual sweep of the base, joints, and any over-sprayed areas where finish may pool. Look for staining, streaking, and changes in sheen that don’t follow the expected pattern of aging. Note any places where the coating feels thin or detached from the substrate.
Recognize patterns that point to surfactant issues, such as irregular patches that don’t match other walls or areas with sudden edges around fixtures. Prioritize areas near fresh repairs or newly applied coats, since these can reveal migrating residues first.
Stain and exudate patterns to note
Before you start repainting, use this checklist to spot surfactant damage. It’s crucial to identify these issues early to avoid costly repairs later.
- Amber or brown streaks: These are telltale signs of surfactant contamination. They often appear during or after rain, as surfactants get activated by moisture.
- Oily residues: Surfactants can leave oily residues on the surface. If you see these, it’s a red flag for potential adhesion problems.
- Soluble vs embedded residues: Soluble residues will dissolve in water or alcohol, while embedded ones won’t. Test with a cotton swab dampened with water to check.
- Streaks around joints and edges: Surfactants often accumulate here due to over-spraying during application.
- Dark spots or patches: These can indicate areas where surfactants have concentrated, leading to poor adhesion.
- Uneven sheen: Surfactants can cause the stucco’s sheen to vary, appearing shiny in some areas and dull in others.
- Streaking after washing: If you see streaks after washing your stucco with water, it could indicate surfactant contamination.
- Mildew or mold growth: Surfactants can encourage mildew and mold growth, especially in humid conditions.
Quick rule: If you notice any of these signs, it’s best to test for surfactant contamination before repainting.
Adhesion failures and blistering that suggest contamination
Check for these adhesion problems before you paint. They’re often signs of surfactant contamination that could cause your new paint to fail.
- Flaking or peeling paint: If you see paint lifting off in small pieces or strips, it’s a sign of poor adhesion due to surfactants.
- Localized peeling: Surfactants can cause paint to peel in specific areas, often around joints or edges.
- Soft, spongy areas: These indicate that the paint is not adhering properly to the stucco due to contamination.
- Blisters under the paint: If you see bubbles forming under your paint, it’s a sign of poor adhesion caused by surfactants.
- Cracking or alligatoring paint: These are signs of paint failure due to poor adhesion, often caused by surfactant contamination.
- Delamination: This is when the paint peels off in large sheets, like wallpaper. It’s a clear sign of severe surfactant contamination.
Quick rule: If you find any of these adhesion problems, test for surfactant contamination before repainting to avoid costly repairs.
Root Causes and Environmental Contributors to Surfactant Migration
Underlying curing, improper mixes, or cleaners that contain surfactants can accelerate movement through stucco. High moisture levels can transport residues toward the surface and into the coating. Freeze and thaw cycles can stress the surface and promote migration of residues.
Climate factors and building details like shade, sun exposure, and wall orientation influence risk and timing. Local product choices and compatibility with existing substrates play a big role in how much surfactant migration occurs.
New construction and curing-related migration
When stucco is first applied, it’s like a big science experiment happening on your walls. It’s releasing all sorts of stuff – salts, additives, surfactants – as it cures.
These are natural byproducts of the curing process. But here’s the thing: they can migrate to the surface and mess with your paint job. That’s why it’s crucial to let your stucco cure properly before you start painting.
Now, how long is ‘properly’? Well, that depends on the weather and the specific mix of your stucco. But a good rule of thumb is to wait at least 28 days. This gives the stucco time to dry out and release most of those nasty surprises.
Water management and detailing that worsen issues
Water’s a big player in this game, folks. It can move through your stucco like it’s on a Sunday stroll, carrying surfactants and salts along for the ride. This is called capillary action, and it’s why you see those nasty stains and exudates sometimes.
But here’s where things get tricky: if there are any gaps or cracks in your flashing, or if your roof runoff isn’t directed properly, water can start to pool. And when that happens, all those surfactants and salts get concentrated in one spot. It’s like a party they don’t want to leave.
So, before you start painting, make sure your water management is on point. Check your flashing, ensure your gutters are directing runoff away from the walls, and fix any cracks or gaps that might be letting water through. Your paint job will thank you for it.
Pre-Repaint Inspection: Tests, Sampling, and When to Hold Off Painting
Conduct a visual survey to identify obvious problem areas and suspicious patches. Perform simple surface wipe tests to see if residues transfer to a clean cloth. Use adhesion spot tests or consult a professional for controlled tests if you’re unsure.
Document all findings with notes and photographs to track changes over time. Delay repainting if tests show coating failure, soft adhesion, or persistent residue that might require remediation first.
Simple Wipe and Solvent Tests to Detect Residues
Before you start any repaint work, use these simple tests to check for surfactant residues that could hinder paint adhesion.
- Dry wipe: Use a clean, dry cloth to wipe the surface. If it comes away dirty or leaves marks, surfactants might be present.
- Water wipe: Wet a cloth with water and wipe. Surfactants can cause the water to bead up or leave streaks.
- Household solvent wipe (e.g., isopropyl alcohol): Apply some solvent on a cloth, then wipe. If it removes residue, surfactants are likely there.
- Check for foam: Spray water onto the surface. Surfactants can cause excessive foaming.
- Look for stains or exudates: These could indicate surfactant migration from within the stucco.
- Test multiple areas: Residues might not be evenly distributed, so check several spots.
- Avoid testing on freshly painted surfaces: Wait until paint is fully cured before testing.
- Document findings: Photograph and note results for future reference.
Quick rule: If tests show residues, hold off painting until the surface is properly cleaned or remediated.
Adhesion Pull-Off or Tape Tests (DIY Alternatives)
These DIY tests help assess paint adhesion before repainting. If results are inconclusive, consider hiring a professional for a pull-off test.
- Tape test: Apply painter’s tape to the surface, press firmly, then pull off quickly at a 90-degree angle. If paint peels off, adhesion is poor.
- Check multiple areas: Adhesion issues might not be uniform, so test several spots.
- Avoid testing on freshly painted surfaces: Wait until paint is fully cured before testing.
- Compare to known good areas: Test both affected and unaffected zones for comparison.
- Observe results: Look for peeling, flaking, or reduced adhesion.
- Document findings: Photograph and note results for future reference.
Quick rule: If tests show poor adhesion, hold off painting until the surface is properly prepared or remediated. Failing these tests indicates that surfactants might still be present, affecting paint performance.
Surface Preparation and Cleaning Strategies That Address Surfactant Residues
Plan a low-pressure rinse to start, followed by detergent washes to lift residues. Rinse multiple times until the surface shows no more transfer of residues to rinse water. If needed, apply neutralizing steps only when appropriate per product instructions.
Avoid aggressive scrubbing or high-pressure methods that can damage the stucco texture or permeate the substrate. Work systematically in sections and keep an eye on moisture levels as you go.
Cleaning agents and methods to try first
Start with mild alkaline cleaners designed for stucco. They’re gentle yet effective against surfactant residues. Check the product datasheet to ensure it’s suitable for your specific stucco type.
Dwell time is crucial. Let the cleaner sit on the surface for 15-30 minutes to break down residues. Then, rinse thoroughly with fresh water using a low-pressure sprayer or soft brush.
Rinse until no more residue transfers onto a clean cloth or paper towel. This might take several rinses. Patience is key here, folks.
When to use stronger chemical remediation or stripping
If mild cleaners aren’t cutting it, you might need heavier duty stuff. Look for signs like persistent residue, heavy staining, or exudates that won’t budge.
Before you go all out, test a small, hidden area first. Strong chemicals can damage stucco if not used correctly. Apply the cleaner, let it dwell, then rinse and check for any adverse effects.
For tough cases, consider poultices or stripping solutions. These are aggressive, so always follow safety guidelines and manufacturer instructions to a T. And remember, if in doubt, consult a pro before you proceed.
Choosing Primers and Coatings for Previously Contaminated Stucco
Explore primer options that block stains, resist alkali, and allow breathability without sealing in moisture. Check how primers interact with the existing substrate and whether they are compatible with the intended topcoat. Follow manufacturer instructions for application and environmental limits.
Match coating properties to the substrate’s needs, paying attention to adhesion and compatibility with the wall’s texture. Verify that the selected products meet your local rules and are suitable for the climate and substrate condition.
Stain-blocking primers and when they are appropriate
Stain-blocking primers are designed to seal the surface and prevent stains from showing through. They’re great for covering up old stains or discoloration on your stucco.
They can’t fix surfactant damage, though. Surfactants weaken adhesion, so even if you block the stain, paint might still peel off later.
Think of stain-blocking primers as a temporary fix. They buy you time to address the root cause – surfactant contamination – before repainting with compatible coatings.
Breathability and moisture-vapor transmission considerations
Stucco is a porous material that needs to breathe. This means it needs to be able to release moisture vapor trapped inside.
Non-breathable coatings, like some latex paints, can trap this moisture. When this happens, surfactant residues can migrate towards the surface again, causing more damage.
Breathable primers and coatings allow moisture vapor to pass through, preventing this issue. They’re usually labeled as ‘breathable’ or ‘low VOC’.
Repair and Remediation Options: Patching, Re-Coating, and Full Removal
Weigh options from targeted patches and partial re-coating to full removal and re-application based on inspection results. Consider the extent of damage, substrate integrity, and expected outcomes. Each choice has trade-offs in labor, time, and finish durability.
Use decision criteria that reflect visible damage, test results, and future performance expectations. When in doubt, check product labels and local guidelines to confirm the most reliable path forward.
Localized repairs vs. full surfacing replacement
If you’ve found surfactant damage, first decide if localized repairs or full surfacing replacement is needed.
Localized repairs are best for isolated stains or small failed areas. It’s like fixing a pothole – you only replace what’s damaged.
But, if contamination is widespread or there are structural issues, full surfacing replacement might be safer. It’s like replacing the entire road when it’s crumbling everywhere.
Remember, localized repairs can hide underlying problems. If in doubt, consult a pro before proceeding.
Recoat protocol after remediation
After you’ve remediated surfactant damage, follow this recoat protocol to ensure your new coating adheres and performs well.
1. Confirm dryness and cleanliness: Ensure the substrate is completely dry and free of any residue using the tests mentioned earlier.
2. Apply compatible primer: Use a primer suitable for your stucco type and new coating. This helps adhesion and seals the surface.
3. Apply specified topcoats: Follow the manufacturer’s instructions for your chosen paint or finish. Typically, you’ll apply multiple thin coats, allowing adequate cure time between each.
4. Cure and inspect: Let the final coat cure fully as per the manufacturer’s guidelines. Then, perform a thorough visual inspection to ensure everything looks good before considering the job done.
Tools, Materials, and Safety Checklist for DIY Inspections and Prep
List the practical gear you’ll rely on, from cleaning tools to moisture meters and PPE. Keep supplies organized and ready for stepwise work. Prioritize safety and proper use of any solvents or cleaners.
When renters or non-professionals are involved, identify safe substitutions and know when to bring in qualified help. Always refer to product instructions, labels, and local requirements for proper use and disposal.
Visual checkpoints and documentation tools
Before you start inspecting, document the current state of your stucco. This helps track progress and supports warranty claims.
- Take photos: Use a camera or smartphone to capture images from various angles. Close-ups help show details.
- Annotate photos: Mark issues directly on the photo or in the notes field. This helps contractors understand what needs fixing.
- Measure dimensions: Note down sizes of affected areas. This aids in estimating repair costs and material needs.
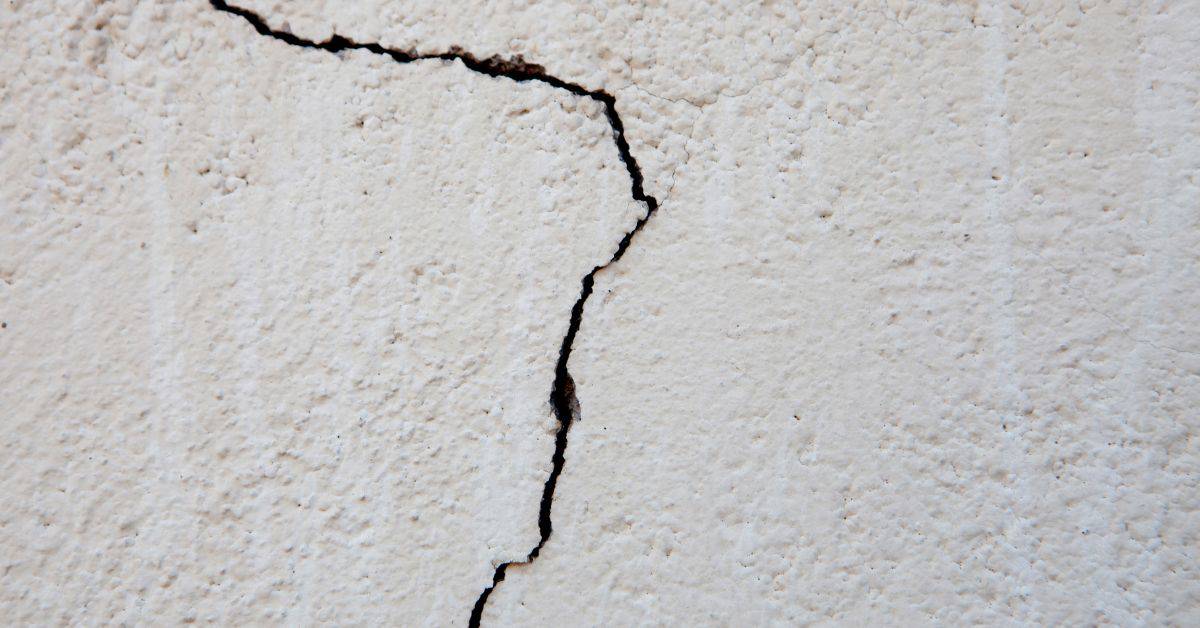
- Record observations: Jot down any visible problems, like cracks, discoloration, or soft spots.
- Date your records: Keep track of when you made these notes for future reference.
- Avoid assumptions: Don’t guess what’s wrong; document everything to be sure.
Quick rule: The more details you capture, the better equipped you’ll be to tackle repairs and make claims if needed.
Safety and disposal guidance
Safety comes first when handling chemicals and cleaning. Follow these guidelines to protect yourself and the environment.
- Wear gloves: Protect your hands from harsh chemicals and residues.
- Use eye protection: Goggles or safety glasses shield your eyes from splashes.
- Respirator (if needed): Wear a respirator when dealing with strong fumes or dust.
- Dispose of chemicals properly: Follow local regulations for disposing of cleaning agents. Never pour them down drains.
- Avoid mixing cleaners: Some combinations can create harmful gases. Always check labels first.
- Store chemicals safely: Keep them in their original containers, tightly sealed, and away from heat sources and children.
Quick rule: Always prioritize safety. It’s better to take extra precautions than risk injury or environmental damage.
Conclusion
The key is to fix any surfactant carryover now, so the repaint sticks, looks good, and lasts without costly touch-ups. Prioritize safety, and don’t rush past the inspection steps that prove a surface is truly ready.
Proceed with a simple, practical check: start with a small patch to test for residues, perform a basic adhesion or scrape test, clean the area with a compatible cleaner, rinse and dry completely, then re-test. If anything still feels slick, powdery, or dull after cleaning, hold off on coating and address the residue thoroughly before moving forward. Use primers and coatings that are specified for previously contaminated stucco, and follow the manufacturer’s guidance for application and cure times. Keep testing in stages and document results on a single wall before expanding to the whole surface.
Common mistakes to avoid are skipping the small-area tests, applying cleaner too aggressively or leaving residue, and painting over residual contaminants without proper cleaning or a compatible primer. Don’t skip the safety checklist, over-wet the wall during cleaning, or use a product not intended for surfactant-contaminated stucco. If in doubt, slow down, verify the surface with a test patch, and re-check adhesion before proceeding.
If the job involves uncertain contamination, questionable substrate condition, or multiple coatings already failing, it makes sense to call a pro instead of pushing ahead. A seasoned contractor can confirm contamination levels, choose the right primer system, and perform repairs or full remediation safely. Stay deliberate, stay safe, and when you’re ready, you’ll have a durable finish that looks right and lasts.
FAQ
What should I look for on product labels to know if a surface has surfactant residues?
Check the label for cleaner recommendations, residue testing, and any warnings about migration. Look for notes on rinse and neutralization steps. If the label isn’t clear, check the manufacturer’s data sheet or call their tech line.
How do I test a small patch to see if surfactants will bleed through a repaint?
Do a simple spot test with a clean cloth and mild cleaner. Wipe a small area, rinse, and dry. If staining or slick feel returns after drying, more cleaning or coating guidance is needed.
What are safe cleaning steps to reduce surfactant residues before priming?
Use a non-residue cleaner or a cleaner recommended by the coating maker. Rinse thoroughly with clean water and let the surface dry completely. Do not rush this step or skip rinsing, or you’ll transfer residues to the new coating.
When choosing primers or coatings for previously contaminated stucco, what should I verify first?
Verify that the primer is labeled for surfaces with surfactant complications or efflorescence issues. Check the manufacturer instructions for surface preparation and dry time. If in doubt, ask for an alternative product or a specific prep sequence in writing.