
Introduction
Replacing a subfloor means removing and installing new plywood or OSB underlayment to repair damaged flooring. It involves pulling up the affected area, inspecting for rot and water damage, and replacing the subfloor so the new layer sits flat. Plan to support the area and reset fasteners as you go, keeping everything square and level.
Before you start, check for moisture sources and weak joists, and decide if the whole room or just a patch needs work. Fixes for squeaks usually mean re-fastening and shimming where needed, while rot requires removing the bad sheet, treating the area, and installing new material per instructions. If in doubt, check product labels, manufacturer guidance, or local rules to choose the right materials and methods.
Key takeaways
- Assess moisture and rot before removing panels to prevent unseen damage.
- Decide repair versus replacement with extent of damage and load needs.
- Use a moisture meter and probe for hidden rot behind subfloor.
- Document findings and follow manufacturer and local code guidance for repairs.
- Plan ventilation during work and wear eye protection, gloves, and dust mask.
- When in doubt, hire a pro for structural or extensive rot work.
Table of Contents
- Introduction
- Key takeaways
- Decide: Repair Vs Full Replacement
- Initial Inspection and Diagnostics
- Common Causes of Squeaks and Rot
- Tools and Materials Checklist
- Step-by-Step Replacement Workflow
- Fixes for Squeaks Without Full Replacement
- Preventing Future Rot and Recurring Squeaks
- Codes, Safety, Costs, and When to Hire a Pro
- Conclusion
- FAQ
Decide: Repair Vs Full Replacement
Weigh signs of damage against project scope and long term needs. Look for widespread rot, soft spots that extend beyond a single panel, and finish-floor compatibility. Consider how a partial repair would affect stability and future access to structure.
Durability and hidden damage risk should guide your choice. If structural members are compromised, expect higher long term risk with partial fixes. Verify finish-floor requirements and acceptable subfloor thickness with the manufacturer or local code guidance.
Clear indicators for full replacement
If your subfloor shows any of these signs, it’s time for a full replacement. These issues compromise the structure and safety of your floor.
Pervasive structural weakness: If joists or other support members are sagging, cracked, or broken in multiple areas, they can’t be relied upon to support your floor.
Widespread rot: Rotten wood is weak and unstable. If it’s spread across large areas of your subfloor, it’s best to replace the whole thing to ensure a solid base for your finish flooring.
Contamination: If your subfloor has been contaminated by chemicals, mold, or other substances that compromise its integrity, it’s usually safer and more cost-effective in the long run to replace it entirely.
When targeted repairs are acceptable
In some cases, you can save time and money by performing targeted repairs instead of replacing your entire subfloor. Here’s when to consider this approach.
Localized damage: If the issues with your subfloor are confined to a small area, such as a single joist or a few floorboards, you might be able to repair just those parts.
Sistering joists: If some of your joists are damaged but others are still sound, you can reinforce the weak ones by attaching new lumber alongside them (a process called sistering). This can restore their strength without requiring a full replacement.
Fastening repairs: Sometimes, all that’s needed is to secure loose or squeaky floorboards. You can do this by driving screws through the subfloor into the joists below. This method is quick and easy but won’t address structural issues.
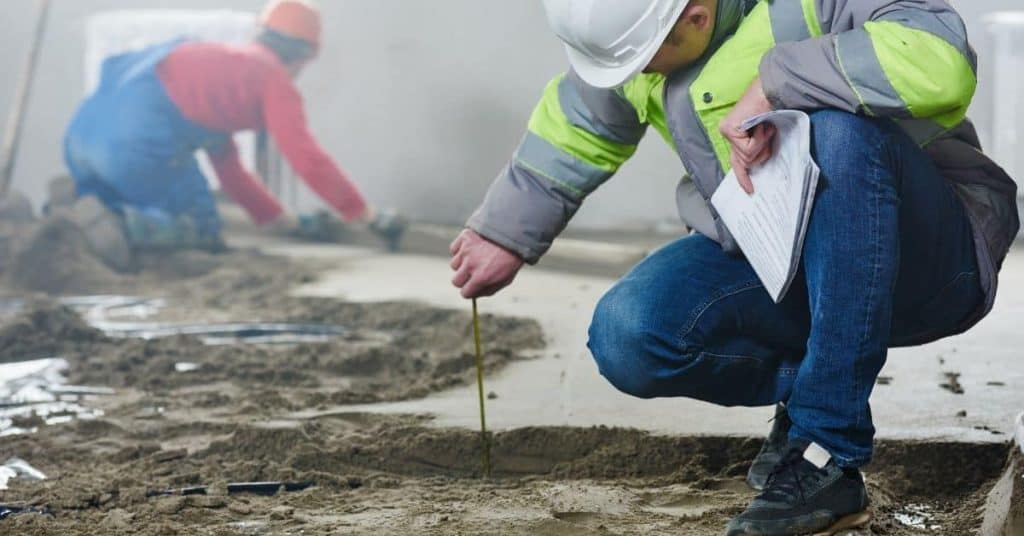
Initial Inspection and Diagnostics
Start with a systematic scan of the area, noting any soft spots, spongy feel, or creaks. Check for moisture indicators around leaks, stains, or dry rot signs. Document findings with notes and photos for reference.
Prioritize safety by turning off utilities if needed and wearing protective gear. Use simple tests to locate movement or deflection, and identify sources of moisture or infestation. Keep the inspection organized to guide repair decisions.
Visual and tactile checkpoints
Before you start, use this checklist to visually and physically inspect your subfloor for signs of damage or wear.
- Stains: Look for discoloration on the floor surface. Dark spots could indicate moisture.
- Soft spots: Press down with your foot. If it feels spongy, there might be rot underneath.
- Bulges: Check for any humps or bumps in the floor. They could signal delamination.
- Gaps: Wide gaps between boards can cause squeaks and let moisture in.
- Delamination: Tap the floor with a hammer. A dull sound might indicate the subfloor has separated from the joists.
- Flex under load: Try to twist or bend the floor. Too much give could mean damaged joists.
- Cracks: Check for hairline cracks, which can worsen over time and lead to bigger problems.
- Warping: Look for cupped or twisted boards, which can cause squeaks and make it hard to walk on.
Quick rule: Don’t skip any of these checks. Each one helps you pinpoint different issues that need fixing.
Moisture testing and environmental clues
Use this checklist to find moisture sources and active dampness in your subfloor.
- Moisture meter: Use one to measure the moisture content of your subfloor. readings over 15% could indicate a problem.
- Relative humidity: Check the RH level in your home. High levels can cause moisture issues.
- Mold: Look for signs of mold growth, which thrives in damp environments.
- Efflorescence: White powdery deposits on concrete or masonry could indicate water intrusion.
- Water stains: Check for stains on the ceiling below, which might signal a leak above.
- Condensation: Look for water droplets on cold surfaces, like pipes or ducts.
- Plumbing leaks: Inspect your plumbing for any signs of leaks that could be causing moisture issues.
- Gutters and downspouts: Ensure they’re directing water away from your home’s foundation.
Quick rule: If you find moisture, don’t just treat the symptoms. Find and fix the source to prevent recurring problems.
Assessing joists, beams, and supports
Use this checklist to inspect your subfloor’s framing for any issues that need repair.
- Joist alignment: Check if they’re level and evenly spaced. Misaligned joists can cause squeaks and structural problems.
- Rot: Look for signs of rot, like soft or crumbly wood, on your joists and beams.
- Deflection: Measure the deflection of your joists under load. Too much could mean they need sistering or replacement.
- Bearing points: Ensure your joists are properly supported at bearing points. Improper support can lead to sagging and squeaks.
- Connectors: Check that all connectors, like hangers and screws, are secure and in good condition.
- Sagging: Look for any signs of sagging or drooping, which could indicate damaged framing.
- Gaps at supports: Check for gaps between your joists and their supports. Gaps can cause squeaks and allow moisture in.
- Termite damage: Look for signs of termite activity, like mud tubes or damaged wood.
Quick rule: Don’t overlook framing issues. They can lead to bigger problems down the line if not addressed.
Common Causes of Squeaks and Rot
Many issues stem from loose fasteners, floor movement, or insufficient support, which can create squeaks as boards rub or shift. Moisture intrusion often drives rot and softening of the subfloor materials. Material degradation compounds both problems over time.
Causes often interact, so repair plans should address multiple factors at once. For example, moisture control helps fasteners stay tight and reduces future rot risk. Align fixes with the root cause to improve longevity.
Fastening and movement-related squeaks
Squeaks often happen when nails or screws loosen over time. This allows the subfloor to shift slightly, creating friction with the joists below.
Inadequate screw length can also cause squeaks. If screws aren’t long enough, they won’t grab the joist properly and will allow movement.
Another culprit is movement between layers of the subfloor itself. If the subfloor isn’t secured well to the joists, or if it’s warped or cupped, it can move against adjacent sheets, causing squeaks.
Moisture sources and decay processes
Water is the enemy of subfloors. Leaky pipes, poor drainage, or high humidity can all lead to rot.
Capillary action can draw moisture up into the subfloor from the ground below. This is why it’s crucial to have a vapor barrier between your slab and subfloor.
Once moisture gets in, it starts breaking down the wood fibers. This weakens the subfloor, leading to squeaks and eventually rot.
Material limitations and age-related failures
The material you choose for your subfloor can greatly affect its lifespan. Different materials have different strengths and weaknesses.
- Plywood: Known for its strength and stability, but can delaminate if exposed to too much moisture or if the wrong adhesive was used.
- OSB (Oriented Strand Board): Strong and dimensionally stable, but can swell if exposed to too much moisture. Look for exterior-grade OSB for better moisture resistance.
- Older materials: These may have been treated with preservatives that have since broken down, leaving the wood susceptible to rot. They also may not meet modern building codes.
Tools and Materials Checklist
Put together a basic, DIY friendly toolkit with safety gear, cutting tools, fasteners, and replacement panels. Include moisture meters or moisture indicators if available. Have disposal options ready and follow local rules for waste handling.
Renters should focus on non destructive or reversible steps where possible, while owners can plan for more permanent fixes. Always verify material compatibility and installation instructions from the label or manufacturer before proceeding.
Diagnostic and demolition tools
Before you start, make sure you have the right tools to inspect and safely remove your subfloor.
- Probe: Check for rot and delamination. Miss this, risk structural damage.
- Moisture meter: Detect hidden moisture. Skip it, can’t spot decay.
- Pry bar: Carefully remove subfloor. Without it, risk damaging joists.
- Reciprocating saw: Cut through nails and screws. Don’t use, removal’s tougher.
- Safety glasses: Protect your eyes from debris. No goggles, risk injury.
- Work gloves: Handle materials safely. Without them, risk cuts.
- Dust mask: Protect against dust and mold. Skip it, risk respiratory issues.
- Hearing protection: Shield ears from power tool noise. Don’t use, risk hearing damage.
Quick rule: Always wear safety gear when removing subfloor.
Replacement materials and selection guidance
Choose the right materials for your new subfloor to ensure durability and code compliance.
- Subfloor panels: Select OSB or plywood. Check local codes for thickness requirements.
- Underlayments: Consider radiant heat barriers if needed. Skip it, may affect floor coverings.
- Adhesives: Choose construction adhesive for panel attachment. Wrong one, panels might lift.
- Fasteners: Use screws or nails. Check local codes for spacing and type.
- Vapor barrier: Include if required by code. Miss it, risk moisture issues.
- Furring strips: Consider for uneven surfaces. Skip it, may cause squeaks.
- Joist tape: Use to seal joist ends. Don’t use, risk air gaps and drafts.
Quick rule: Always check local codes before selecting materials.
Fasteners, adhesives, and specialized repair products
Select the right fasteners, adhesives, and repair products for your subfloor replacement or repair.
- Screws: Use for attaching panels. Wrong size, risk panel warping.
- Construction adhesive: Apply between panels. Don’t use, reduces bond strength.
- Repair clips: Consider for squeaky floors. Skip it, squeaks persist.
- Sistering materials: Use to reinforce joists. Wrong material, risk structural failure.
- Epoxy wood filler: Fill gaps and holes. Don’t use, risk further damage.
- Wood hardener: Stabilize rotted areas. Skip it, rot may progress.
- Sealer/primer: Apply before painting or finishing. Miss it, paint adhesion poor.
Quick rule: Always use the right product for the job to ensure lasting repairs.
Step-by-Step Replacement Workflow
Plan a logical sequence from prep and demo to joist repair and new panel installation. Align work areas to keep dust down and stay aware of utility locations. Check that each stage meets safety guidelines before proceeding.
Do quality checks as you go: confirm joists are solid, panels are square, and fasteners are correctly positioned. Use proper sequencing to avoid rework and ensure a solid, finished surface.
Step-by-Step Process
This sequence will guide you through replacing a concrete section, ensuring safety, efficiency, and a lasting result.
- Prepare the area: Clear debris, remove any vegetation, and ensure there’s nothing under the old concrete that shouldn’t be there. Why: A clean surface ensures proper bonding of new concrete. Check: Visually inspect the area.
- Safety first: Wear appropriate PPE (gloves, safety glasses, ear protection if using power tools). Why: Safety is paramount on any jobsite. Check: Ensure all equipment is in good working order.
- Break out old concrete: Use a sledgehammer and pry bar, or rent a jackhammer if the area is large. Why: You need to remove the old concrete to prepare for new. Check: Ensure all old concrete is removed down to stable base.
- Prepare the base: Compact the exposed soil using a plate compactor, then add a layer of gravel and compact again. Why: A stable base ensures your new concrete won’t crack over time. Check: Ensure the base is level and well-compacted.
- Formwork: Install forms (wood or metal) around the area, ensuring they’re square and level. Why: Forms hold the concrete in place while it sets. Check: Use a level to ensure forms are properly aligned.
- Lay rebar (if needed): Place rebar within the forms according to local codes or manufacturer instructions. Why: Rebar adds strength and durability to your concrete. Check: Ensure rebar is properly placed and secured.
- Mix and pour concrete: Follow mixing instructions on the bag, then pour into forms. Why: Properly mixed concrete ensures a strong final product. Check: Ensure concrete is poured to the correct level.
- Finish and cure: Use a bull float to smooth the surface, then cover with plastic sheeting to cure for at least 72 hours. Why: Curing prevents cracking due to rapid drying. Check: Ensure concrete is kept consistently moist during curing.
Pro tip: Always follow manufacturer instructions when mixing and pouring concrete. Different types of concrete have different requirements.
Preparation, demo, and safe removal
First off, protect those surrounding areas. Lay down some plastic sheets or drop cloths to keep dust and debris at bay.
If you’ve got finish flooring like hardwood or tile, remove it carefully. You might need a pry bar and a lot of patience. Keep those pieces in good condition if you can, they might come in handy later.
Now, let’s cut and remove those old concrete panels. Use a diamond blade on your circular saw to make clean cuts. Wear safety gear – glasses, gloves, and ear protection. Remember, safety first, buddy!
When you’re done, look at what you’ve got. If there’s damaged material, segregate it. You don’t want to mix good with bad when you’re disposing or recycling.
Joist repair, sistering, and leveling
Before you start, check joists for damage. Tap them; if they sound hollow or give, they need attention.
For minor damage, use joist tape and wood filler. For bigger issues, consider sistering – nailing a new joist alongside the damaged one. Ensure both are level and aligned.
To correct sag or twist, jack up the joist temporarily, then sister it. Use temporary supports while the glue dries. If you’re unsure about jacking, consult a pro or your local building department.
Once repaired, level the joists. Use shims if needed. Ensure they’re level before installing new subfloor. Don’t rush this step; it’s crucial for a solid floor.
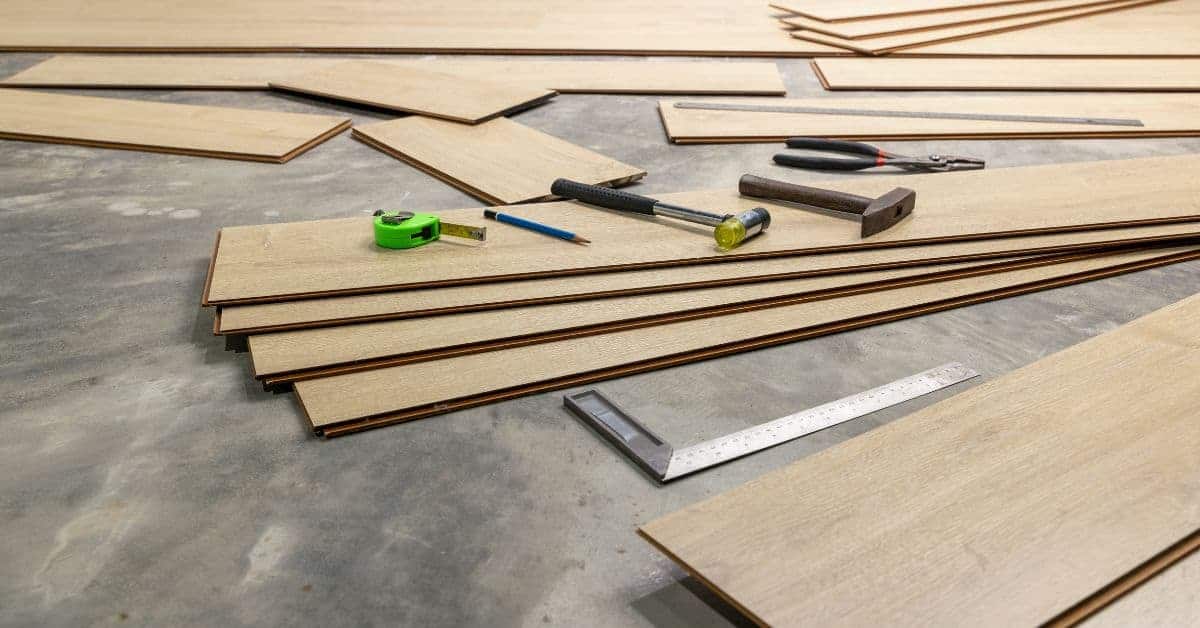
Installing new subfloor and fastening pattern
Now that you’ve prepped your joists (check repairs here) and removed the old subfloor, it’s time to lay down a solid base for your new one. First things first:
Check base compaction. Your subfloor needs a firm foundation. If you’ve got a concrete slab or plywood on top of joists, great. If not, consider adding a layer of compacted gravel before laying your new subfloor.
Next, lay out your new subfloor panels. Stagger joints like you would with flooring to minimize movement and future squeaks. Leave a 1/8″ to 3/16″ gap between panels for expansion. Use a spiral or ring-shank nail (check manufacturer’s recommendations) and follow this fastening pattern:
Start at the center of each panel, working your way outwards in a ‘stair-step’ pattern. This helps distribute stress evenly across the subfloor. Apply adhesive (follow manufacturer’s instructions) along the panel edges and field, then fasten with nails or screws every 6″ to 8″. Keep it simple: more isn’t always better.
Fixes for Squeaks Without Full Replacement
Apply conservative, field tested methods that stop squeaks in place, starting with tightening, shaving, or shimming as appropriate. Target the exact location with the smallest practical intervention to reduce risk to surrounding areas. Expect results to vary with condition and load.
Document where each fix is applied and monitor for changes over time. Reserve full replacement for areas with extensive rot or structural failure where repairs won’t restore stability.
Targeted screwing and adhesive injections
When squeaks are caused by loose subfloor panels rubbing against joists, you can fix them with a simple, targeted approach. Grab some long screws – I’d recommend 2-1/2″ to 3″ – and drive them through the subfloor into the joist below.
But wait, don’t just start drilling willy-nilly! First, use a stud finder to locate your joists. Then, mark their centers on the subfloor. This way, you’ll know exactly where to drill.
Once you’ve got your marks, drill pilot holes into the subfloor. This prevents the wood from splitting when you drive in your screws. Now, grab a screwdriver – or better yet, an impact driver for some extra oomph – and drive those screws home. Tighten them until the subfloor is snug against the joist, but be careful not to over-tighten and split the wood.
For really stubborn squeaks, you can also use construction adhesive. Apply a bead of adhesive under the loose area before screwing it down. This will bond the layers together and eliminate movement. Let it cure according to the manufacturer’s instructions before walking on it again.
Repair clips, shims, and local reinforcement
Sometimes, you don’t need to tear out half your subfloor to stop squeaks. Localized repairs can do the trick. Subfloor clips, metal plates, or shims can stabilize panels or joist connections right where they’re needed.
First, identify the source of the squeak. It could be a loose panel rubbing against a joist, or a gap between two panels that needs filling. Once you’ve found the culprit, mark it out so you know exactly where to work.
For loose panels, subfloor clips can be a lifesaver. They’re easy to install and provide extra support right where you need it. Just drive them through the subfloor into the joist below. You might need to use a few screws as well for added security.
If there’s a gap between panels causing the squeak, shims can fill the void and stop the noise. Cut your shim to fit snugly in the gap, then secure it with screws or adhesive. For larger gaps, you might need to use a metal plate instead of a shim.
Remember, these repairs are only as good as the materials you use. Don’t skimp on quality – buy the best clips, plates, and shims you can afford. And always follow the manufacturer’s instructions for installation and safety.
Preventing Future Rot and Recurring Squeaks
Adopt moisture control practices, including proper ventilation and drainage, to slow or prevent future issues. Use materials rated for moisture exposure and ensure correct installation to minimize gaps and movement. Establish a routine inspection plan to catch problems early.
Choose installation practices that promote long life, such as proper fastener patterns and ensuring no standing water near the subfloor. Maintain a regular maintenance schedule and address drips or leaks promptly.
Moisture control and drainage best practices
First, tackle water intrusion sources. Seal any cracks or gaps around plumbing fixtures, windows, and doors with caulk or foam sealant.
Install a proper vapor barrier on the exterior walls to prevent moisture from entering your subfloor. Use 6-mil polyethylene sheeting, stapling it every 4-6 inches along the studs.
Ensure your gutters are clean and directing water away from your home’s foundation. Consider installing downspout extenders if necessary.
Grade your yard so water flows away from your house. This simple slope can prevent a lot of moisture issues.
Underlayment, finish-floor compatibility, and ventilation
Choose an underlayment that’s compatible with your subfloor material and finish flooring. For example, use a 1/4″ or 1/2″ plywood underlayment for hardwood floors.
Ensure your finish flooring is also compatible. Check the manufacturer’s recommendations to avoid issues like excessive expansion or contraction due to humidity changes.
Ventilation is key in reducing humidity. If you have a crawlspace, ensure it has proper ventilation by installing foundation vents or using fans. In basements, consider using dehumidifiers if needed.
Maintain good airflow under your home. Keep any insulation away from the vapor barrier to allow moisture to escape.
Codes, Safety, Costs, and When to Hire a Pro
Follow essential safety steps and check for permit or code requirements that may apply locally. Look for indicators that professional help is needed, such as extensive rot or structural instability. Use reliable sources to verify credentials and references.
When evaluating bids, compare scope, warranty, and expected timelines rather than just price. Confirm local rules and requirements with the authority having jurisdiction and rely on manufacturer instructions for installation specifics.
Local Code, Permits, and Structural Criteria to Confirm
Before you start any subfloor replacement project, check your local building code. It’s the law of the land, and it keeps your home safe.
Subfloor thickness: Your local code will specify the minimum thickness for your type of subfloor. Don’t skimp on this; it affects your floor’s stability and longevity.
Fastening patterns: The code will also dictate how you should fasten your new subfloor to the joists. Follow these guidelines to ensure a strong bond.
Lastly, permits. Some projects trigger permit requirements. Check with your local building department to avoid fines or delays.
Safety Risks and Protective Measures
Subfloor replacement can be dangerous if you’re not careful. Here are some safety risks and how to protect yourself:
Electrical hazards: Before you start, turn off the power at your main electrical panel. Test wires with a multimeter to ensure they’re dead.
Asbestos/lead: If your home was built before 1980, it might contain asbestos or lead. Have your subfloor tested before you start work. If positive, hire a professional for removal.
Load-bearing walls: Be extra careful around load-bearing walls. Disturbing them can cause serious structural damage. If unsure, consult an engineer.
Always wear appropriate safety gear: gloves, goggles, and a dust mask. And never work alone; have someone nearby in case of emergencies.
Hiring a Contractor or Structural Engineer
Sometimes, DIY isn’t enough. Here are signs it’s time to call a pro:
Extensive rot: If you find extensive rot in your subfloor or framing, it’s time to bring in an expert. They can assess the damage and ensure your home’s safety.
Complex plumbing/loads: If your project involves moving walls, changing loads, or dealing with complex plumbing, hire a structural engineer. They’ll ensure your changes are safe and structurally sound.
When hiring, vet carefully. Check licenses, insurance, and references. Get multiple bids and compare them line by line. Don’t be afraid to ask questions; it’s your home on the line.
Conclusion
Fixing a subfloor is about safety, durability, and a solid finish. Decide early whether you can repair or if full replacement is needed, then follow a careful plan so you don’t waste time or money or damage framing.
Make your move with a simple check: verify moisture and rot in a small, logical area, confirm joists and supports are sound, gather the right tools and materials, walk through the step-by-step workflow, test each fix in a controlled way, and seal or air-seal to stop future moisture from taking hold. Do all of this with the right codes and safety in mind, and you’ll keep the project on track and avoid costly surprises.
Common mistakes to avoid are rushing the diagnosis, cutting structural members without confirming their condition, and skipping moisture control. Keep Safety first at all times, test in a small area before full commitment, and never force a fix that doesn’t fit the underlying problem. If you encounter uncertain rot, questionable framing, or persistent moisture, don’t press on blindly—calling a pro can prevent a bigger mess and higher costs.
When a pro is warranted, it’s usually for serious framing damage, widespread rot, or if you’re unsure about codes and proper loads. Otherwise, stay disciplined, follow the plan, and you’ll restore a solid, quiet floor with confidence and a clear path to a durable finish.
FAQ
How do I spot rot or water damage in the subfloor before I start?
Look for soft spots when you press with a screwdriver or your foot. You’ll feel spongy boards or hear a hollow sound when you tap along the joists.
Check for staining, dark rings, or a musty smell in the crawl space or underneath the finished floor. If you see mold or a lot of moisture near the joists, treat it as a red flag.
What are practical fixes for squeaks that don’t require full subfloor replacement?
Tighten or re-secure loose boards with ring-shank nails or deck screws driven at a slight angle. Use a wood glue or silicone seam filler under localized squeaks to stop movement.
If the squeak comes from joist-to-subfloor gaps, insert shims or plywood patches behind the area to firm it up, but only in limited, accessible spots. Avoid overloading the area with filler or sealant that can trap moisture.
How should I prep the area before removing or replacing a subfloor?
Clear the workspace, protect surrounding finishes, and turn off utilities in the area if needed. Remove baseboards or trim carefully to avoid tearing them.
Mark the scope with a plan so you don’t accidentally cut into pipes or wires. Have the proper safety gear and a plan for waste disposal ready before you start.
When should I consider full replacement and/or hiring a pro?
If you find extensive rot, mold growth, or widespread soft spots across multiple panels, replacement is usually the safer route. A pro can verify framing condition and ensure proper ventilation and moisture control afterward.
If you’re unsure about joist integrity, connections, or building code implications, consult a licensed professional. Getting a clear assessment early can save time and risk later on.