
Introduction
Enhanced plywood and subfloor products are upgraded materials that resist wear, moisture, and movement in typical floor setups. They aim to provide a stiffer, more stable base for finishes while remaining install-friendly for DIYers. When choosing, check labels and manufacturer guidance to match your project needs.
If you notice issues like squeaks, flex, or moisture signs, start with a careful diagnosis before fixes. Use compatible fasteners, patch materials, and follow the product instructions for repair steps. If any detail is unclear, verify requirements with the label, the manufacturer, or local rules before proceeding.
Key takeaways
- Understand enhanced plywood vs OSB options, and how each handles moisture and load.
- Match selection to installation method, environment, and intended flooring type.
- Verify product specs and certifications on label; confirm compatible underlayment.
- Install with clean substrate, fasten per manufacturer, and maintain proper gaps.
- Inspect for ply delamination, fastener backout, or moisture staining before and after.
- Keep a written maintenance plan and periodic re-evaluation of subfloor health.
Table of Contents
- Introduction
- Key takeaways
- Understanding Enhanced Plywood and Modern Subfloor Product Types
- How to Choose Based on Installation, Environment, and Flooring Type
- Material Specs, Standards, and What to Verify Before Purchase
- Installation Best Practices and Common Pitfalls to Avoid
- Troubleshooting and Fixes for Common Subfloor Problems
- Tools and Materials Checklist for Selection, Installation, and Repairs
- Visual Checkpoints and Inspection Guide (Before, During, After)
- Cost, Lifecycle Expectations, and Maintenance Plan
- Conclusion
- FAQ
Understanding Enhanced Plywood and Modern Subfloor Product Types
Start with the big categories: treated and enhanced plywood, engineered panels, OSB variants, and specialty underlayment. Each group has its own balance of strength, stiffness, and moisture handling. This intro lays out what people mean by “enhanced” in practical terms.
Typically, enhancements involve coatings, surface treatments, or engineered cores that aim to improve performance in real jobs. When shopping, look for how these features are described on the label, in the product data sheet, or in manufacturer instructions to avoid surprises on site.
Enhanced Plywood Varieties
When it comes to enhanced plywood, you’ll find a few common enhancements that boost performance. Let’s dive into each:
Moisture-Resistant (MR) Treatments: These are ideal for bathrooms, kitchens, or any room prone to moisture. The treatment prevents warping and delamination.
Phenolic or Polymer Surfacing: This adds durability and resistance to wear and tear. It’s great for high-traffic areas like hallways or living rooms.
Structural Reinforcements: These are for when you need extra strength, like in load-bearing walls or floors with heavy equipment. Look for ‘structural’ or ‘I-joist’ rated plywood.
Engineered Subfloor Panels & OSB Options
Engineered panels and Oriented Strand Board (OSB) both have their strengths. Here’s how they stack up:
Engineered Panels: These are made from layers of wood glued together at right angles for strength and stability. They’re great for large spans without support, like in open-concept homes.
OSB: This is made from compressed wood strands. It’s cheaper but less stable dimensionally than engineered panels. It’s best used where support is close by, like in typical residential construction.
Choose based on your budget and the span between joists.
Specialty Underlayments & Overlays
Sometimes, you need more than just a subfloor. Here are some specialty products to consider:
Cement Backer Board: This goes above the subfloor in areas with high moisture or heat, like showers or fireplaces. It’s waterproof and resistant to cracking.
Fiber-Cement Underlayment: This is durable and resistant to pests and rot. It’s great for outdoor applications or where you need extra protection.
Sound-Control Products: These help reduce noise transfer between floors. They’re made from materials like recycled rubber or foam.
Waterproof Membrane Products: These go below the subfloor to prevent moisture from rising up. They’re crucial in basements or other areas prone to dampness.
How to Choose Based on Installation, Environment, and Flooring Type
Match the product to installation conditions: moisture exposure, span and load, and the type of finished floor planned. Consider how the subfloor will carry daily traffic and furniture movement. This helps you narrow down the right category early.
Use manufacturer guidance and the product label to confirm suitability for your environment and floor type. Check the data sheet or installation instructions for any limits or recommendations before buying.
Step-by-Step Installation Process
Follow these practical steps to choose the right enhanced plywood and subfloor products based on your installation, environment, and flooring type.
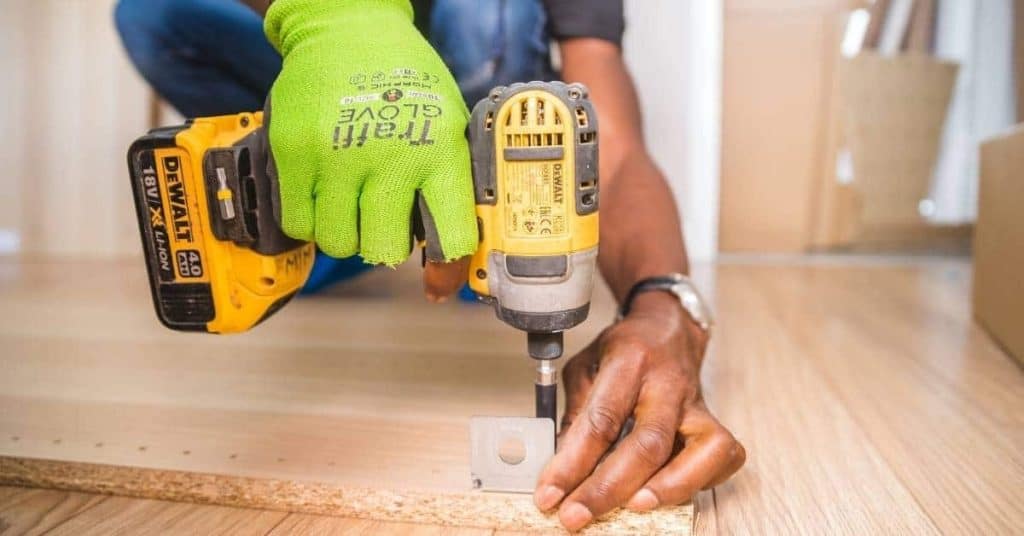
- Preparation: Check safety guidelines, gather tools (saw, screws, level), and ensure a clean work area.
- Measure and cut: Accurately measure and cut panels to fit your space. Remember, it’s better to cut too little than too much.
- Installation: Start from the center of the room, laying perpendicular to joists. Secure with screws every 6 inches along joists and edges.
- Leveling: Use shims if needed to ensure panels are level. A slight slope can cause issues later on.
- Final checks: Inspect your work, ensuring all panels are secure and level. If unsure, don’t hesitate to call a pro.
Moisture and climate considerations
Humidity and wet locations can wreak havoc on your subfloor. Here’s how to protect against moisture damage:
In high humidity areas, consider waterproof or moisture-resistant products. Green tag indicates resistance to moisture-related issues.
For wet locations like bathrooms or basements, use Exposure 1 rated panels. These are designed for constant moisture exposure.
In drier climates, standard enhanced plywood and subfloor products should suffice, but always check the manufacturer’s recommendations.
Load, span, and traffic factors
Heavy loads, long spans, and high traffic can stress your subfloor. Here’s how to choose products that can handle the pressure:
For heavy loads (like appliances or furniture), opt for panels with higher load-bearing capacity. Check the APA Engineered Wood Association’s span tables for guidance.
Long spans between joists require stronger, stiffer panels. Consider engineered subfloor panels or OSB options.
High traffic areas (like hallways or kitchens) need durable products. Check the product’s traffic rating before purchasing.
Flooring finish compatibility
Different flooring finishes require compatible subfloor products. Here’s how to match them up:
Hardwood and engineered wood floors need a flat, stable surface. Enhanced plywood is an excellent choice.
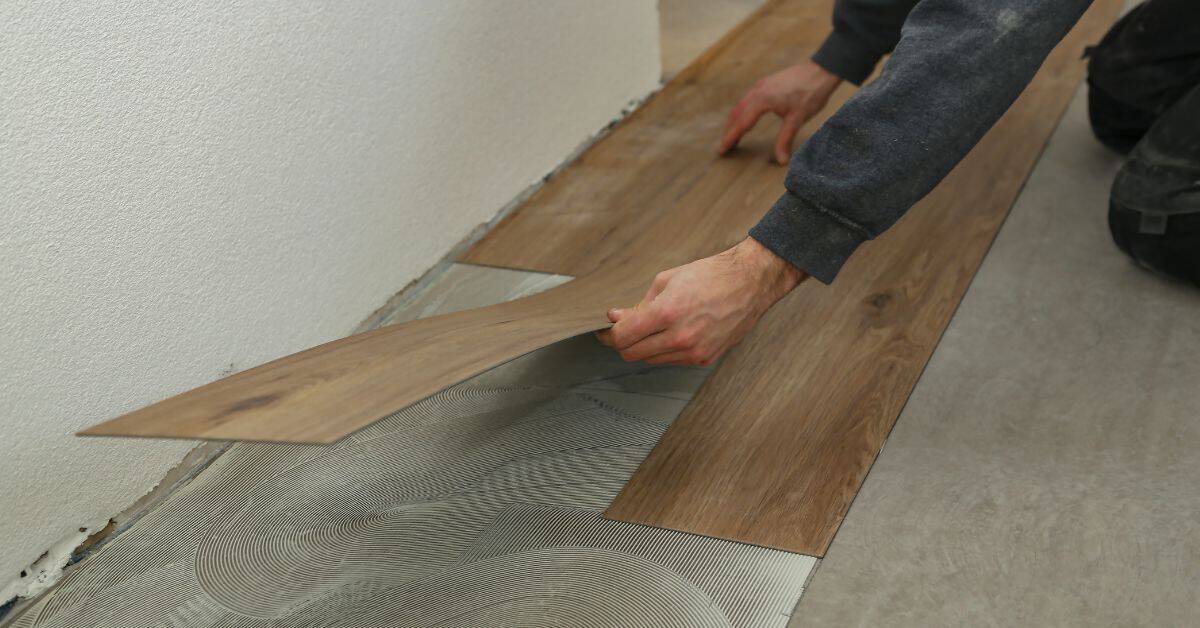
Tile and vinyl floors need a smooth, level surface. Consider using underlayment or decoupling layers for added stability and soundproofing.
Carpet can be installed over most subfloor products. However, ensure the panels are securely fastened to prevent bunching or wrinkling.
Material Specs, Standards, and What to Verify Before Purchase
Key specs to note are grade, exposure rating, and emissions or formaldehyde treatments. Also look at any performance claims and warranty scope. These details guide how well the product will perform long-term.
Always cross-check these items on the product data sheet, label, or manufacturer performance statements. If something isn’t clear, ask for the exact standard or test method used and verify with the supplier before committing.
Grades, edges, and thickness considerations
The grade of plywood or OSB tells you about its strength and durability. For subfloors, choose CDX (C-D-X) or better. ‘C’ stands for the face grade, ‘D’ for the core, and ‘X’ for exposure rating.
The edge type affects how panels connect. S4S (smooth 4 sides) is best for subfloors as it ensures tight joints and easier installation.
Thickness matters too. Most subfloors are 3/4″ or 1/2″. Thicker panels handle heavier loads but may not be needed if your joists are close together.
Standards, certifications, and exposure ratings to check
Look for products meeting PS2 (Plywood Standard) or APA (American Plywood Association) standards. These ensure quality and consistency.
Third-party certifications like SFI (Sustainable Forestry Initiative) or FSC (Forest Stewardship Council) indicate eco-friendly practices.
The exposure rating (‘X’ in CDX) tells you how long the panel can be exposed to moisture before installation. For subfloors, choose ‘X’ for interior use only.
What to confirm with the manufacturer or code officials
Before buying, ask manufacturers about allowable spans. This tells you the maximum distance between joists for your chosen panel thickness.
Verify recommended fastener patterns and required expansion gaps. These ensure a solid, stable subfloor that won’t warp or buckle over time.
Check with local code officials to confirm your chosen product meets building codes. Also, review any warranty stipulations to avoid voiding coverage.
Installation Best Practices and Common Pitfalls to Avoid
Plan for proper acclimation of materials and check flatness tolerance before laying panels. Use correct fastening patterns and spacing as dictated by the system you chose. Skipping steps here shows up as squeaks or gaps later.
Always follow the manufacturer instructions for your products. If you’re unsure about a step, pause and verify the specified procedure on the data sheet or installation guide before proceeding.
Subfloor prep, acclimation, and flatness checks
Before you start laying concrete, there’s some crucial prep work to ensure your slab lasts. Don’t skip these steps or you’ll regret it later.
Check moisture levels. Concrete loves water, but too much in the subgrade can cause problems. Use a moisture meter to ensure it’s below 4 lbs per 1000 sq ft (2 kg/m2). If it’s higher, consider a vapor barrier or dry out the subgrade.
Ensure your base is solid. Check that your base compaction is up to par. It should be at least 95% of maximum density. If not, recompact or add more material. Now’s the time to fix any issues, not after you’ve poured.
Acclimate and level your concrete. Concrete loves consistency. Keep it covered in the shade, keep it damp, and let it cure at a steady temperature. For flatness, use conventional finishing techniques or consider using self-leveling concrete for larger areas.
Fastening, adhesive, and layout tips
First things first, always follow the manufacturer’s recommended patterns for your specific concrete mix. They’ve done the testing, so trust their advice.
When it comes to fastening, use the right screws or nails. Galvanized ones are best as they won’t rust. Drive them in at an angle if you’re using a nail gun, but keep it around 45 degrees. Any more and you’ll split your boards.
For adhesive, again, follow the label. You don’t want to end up with too much or too little. A good rule of thumb is to apply it in a zigzag pattern, ensuring even coverage. And remember, once you’ve applied it, you’ve got a short window to work before it sets.
Soundproofing and Underlayment Installation Tips
Before you start laying your finished flooring, you need to get the base right. That means checking your subfloor’s compaction first.
Check base compaction. You don’t want any soft spots or voids under your underlayment. Use a damp-proof membrane (DPM) if needed, but make sure it’s compatible with your flooring type.
Now, let’s talk about soundproofing and underlayment. You’ve got options here: foam, rubber, cork, or even recycled materials. Choose one that fits your budget and needs.
When installing, make sure you’re not compressing the underlayment too much. That can reduce its effectiveness. Follow the manufacturer’s guidelines for installation thickness and overlap. And remember, no voids! Check every piece to ensure it’s flat and fully adhered.
Troubleshooting and Fixes for Common Subfloor Problems
Address common issues like squeaks, gaps, buckling, warping, and moisture damage with a methodical plan. Start with the simplest adjustment and move toward panel replacement if needed. Document what you find to prevent recurrence.
Repair options should align with what the manufacturer supports and what the site conditions allow. If moisture is involved, identify and fix the source before making cosmetic fixes.
Fixing squeaks and movement
First, locate the squeak by walking on your subfloor. Mark the spot. Now, check if it’s a loose board or just needs more fasteners.
If loose, drive screws from above into the joist below. Use long screws, at least 2-1/2″ long, spaced every 6″ along the joist. If that doesn’t fix it, check the underside. You might need to sister a joist or add blocking.
If it’s still squeaking, try using shims between the joist and board. If all else fails, you may need to replace the entire panel.
Addressing buckling, cupping, and warping
These issues happen when plywood dries out or gets too wet. First, check your moisture levels. If it’s too dry, acclimate more humid air to the room. If it’s too wet, find and fix the source.
For cupping, you might need to replace a few panels. For buckling or warping, check your joist spacing. It might be too wide for your load. Consider adding more support or using thicker plywood next time.
Installing an appropriate underlayment can also help prevent these issues in the future.
Repairing rot, mold, and moisture-damaged areas
Inspect for decay. If you find any, mark it and contain the area to prevent spread. Cut out the damaged section, making sure to remove all rotted material.
Dry the area thoroughly. Use fans if needed. Once dry, treat with a wood preservative. Then, replace the panel using pressure-treated lumber if moisture is an ongoing issue.
To prevent recurrence, ensure proper ventilation and consider installing a vapor barrier or underlayment.
Tools and Materials Checklist for Selection, Installation, and Repairs
Assemble a core set of inspection, layout, cutting, fastening, and fastener driving tools. Include a few consumables like adhesive, fasteners, and shims suitable for the chosen panels. Having the right basics saves trips to the box store mid-project.
Note when to rent specialty equipment—such as edge screeds or moisture meters—based on job size and panel type. Always verify tool compatibility with the product instructions and warranty requirements.
Essential inspection and installation tools
Before you start, make sure you have the right tools to ensure a solid subfloor. Here’s a checklist.
- Moisture Meter: Check for excess moisture before installation. Too much can cause problems later on.
- Level: Ensure your subfloor is flat and level. A 4′ or 6′ level works best.
- Circular Saw: For cutting plywood to size. Use a sharp blade for clean cuts.
- Jigsaw: For making irregular cuts, like around pipes or outlets.
- Pry Bar: To remove old flooring and prepare the surface.
- Hammer: For tapping down any high spots and ensuring a flat surface.
- Tape Measure: Accurate measurement is key to a good installation.
- Chalk Line: Snapping lines helps keep your layout square.
- Pneumatic Nailer or Screwdriver: For fast, secure fastening. Follow manufacturer’s guidelines for spacing and depth.
Quick rule: The right tools make the job easier and ensure a lasting result.
Recommended adhesives, fasteners, and sealants
Choosing the right adhesives, fasteners, and sealants is crucial for a strong bond and long-lasting subfloor.
- Adhesive: Choose one suitable for your substrate. Follow manufacturer’s guidelines for mixing and application.
- Fastener (Nails or Screws): Use the right size and type based on plywood thickness and manufacturer recommendations.
- Sealant: Apply a bead along edges to prevent moisture from wicking in. Use a paintbrush for smaller areas.
- Construction Adhesive: For additional bonding strength, apply between panels before nailing or screwing.
- Expansion Joint Filler: Fill gaps at walls and other expansion joints to prevent movement.
- Sealant for Expansion Joints: Apply a flexible sealant over filled joints to keep moisture out.
- Vapor Barrier (optional): If using in a high-moisture area, apply a vapor barrier before installing the subfloor.
Quick rule: Always follow manufacturer’s guidelines for best results.
Temporary fixes versus permanent replacements
Knowing when to patch and when to replace can save you time, money, and effort. Here are some guidelines.
- Minor Damage (e.g., small holes, scratches): Can be patched with wood filler or a repair kit.
- Water Damage: If caught early, it can often be dried out and repaired. But if left too long, replacement may be necessary.
- Rotten Areas: Replace any rotted panels immediately to prevent further damage.
- Cupping or Warping: Often requires replacing the affected panel(s).
- Squeaks (minor): Can be temporarily fixed by adding a dab of construction adhesive between joists. But if squeaks persist, replacement may be needed.
- Structural Damage (e.g., delamination, major cracks): Always replace these panels to maintain structural integrity.
Quick rule: If in doubt, err on the side of caution and replace. A small repair now can turn into a big problem later.
Visual Checkpoints and Inspection Guide (Before, During, After)
Use a concise checklist to review products at purchase, during installation, and in routine maintenance. Look for flatness, straight edges, and consistent gaps or alignment. Early detection helps you fix issues before they compound.
Include measurable cues from your chosen system’s guide and perform periodic reviews after key milestones. If a score or threshold isn’t defined, rely on the manufacturer’s visual and tolerance references and your own professional judgment.
What to look for at delivery and prior to installation
Before you start installing, use this checklist to ensure your subfloor panels are in good condition.
- Check moisture content: Use a moisture meter. Too much (< 12%) or too little (< 8%) can cause issues.
- Inspect manufacturer markings: Ensure they match your order and are within date.
- Look for physical damage: Check for cracks, holes, or delamination. Any defects should be rejected.
- Check storage/stacking: Panels should be flat, not warped from improper storage.
- Inspect panel edges: Ensure they’re straight and smooth for proper seaming.
- Verify panel size: Measure to ensure they match your layout plans.
- Check panel thickness: It should be consistent across all panels.
- Inspect underlayment (if applicable): Ensure it’s intact and compatible with your flooring type.
Quick rule: If in doubt, don’t install. Contact the supplier for replacements or refunds.
During-install inspection checkpoints
Regular checks during installation prevent costly callbacks later on.
- Check panel orientation: Ensure they’re laid out according to your layout plan. Wrong orientation can cause issues with expansion and contraction.
- Inspect seam treatment: Check that seams are properly glued and clamped. Skipping this can lead to squeaks and movement.
- Verify fastening quality: Ensure screws or nails are driven flush, not too shallow or deep. Incorrect fastening can cause squeaks and delamination.
- Check flatness: Use a level or straight edge to ensure the subfloor is flat. High or low spots can cause issues with flooring installation.
- Inspect panel alignment: Ensure panels are properly aligned and butted together. Misaligned panels can cause gaps or warping.
- Check for moisture intrusion: Wipe seams with a damp cloth. If it’s too wet, stop installation until the issue is resolved.
Quick rule: Regular checks during installation are key to preventing callbacks and ensuring your floor’s longevity.
Post-install and seasonal inspection signs
Regular inspections after installation help catch issues early, before they become major problems.
- Check for movement: Gently walk on the floor. If it squeaks or feels spongy, further investigation is needed.
- Inspect seams and edges: Look for gaps, cracks, or delamination. These can indicate moisture intrusion or improper installation.
- Check for moisture intrusion: Inspect under appliances and in corners where water might accumulate. Moisture can cause rot and warping.
- Verify finish integrity: Check for scratches, dents, or other damage. These can be repaired to prevent further deterioration.
- Inspect underlayment (if applicable): Ensure it’s still intact and not allowing moisture to pass through.
- Check seasonal expansion/contraction: Inspect the floor after temperature changes. This can help catch issues before they become major problems.
Quick rule: Regular inspections, especially during seasonal changes, are crucial for maintaining your subfloor’s longevity and performance.
Cost, Lifecycle Expectations, and Maintenance Plan
Understand how long the enhanced plywood and subfloor system is expected to perform with your climate and usage. Factor in maintenance tasks that keep performance consistent over time. This helps with planning and budgeting for renovations or replacements.
Compare lifecycle expectations and maintenance costs with alternative subfloor options to inform value-based decisions. When in doubt, review the supplier’s stated maintenance recommendations and any warranty caveats.
Comparing lifecycle and maintenance needs
Upfront cost isn’t the only factor to consider when choosing subfloor products. Durability, maintenance frequency, and performance vary greatly.
Enhanced plywood: Tougher, stiffer, and more resistant to moisture. Needs less frequent maintenance but costs more upfront.
Alternative systems (like OSB or engineered wood): Cheaper initially, but may require more maintenance and have shorter lifespans in harsh conditions.
Consider your climate and home’s demands before making a decision.
Budgeting for upgrades, repairs, and contingencies
Plan for the future to avoid costly surprises. Here’s how:
1. Repairs: Allocate funds for expected wear-and-tear and minor issues.
2. Replacements: Account for full subfloor replacement every 30-50 years, depending on material and environment.
3. Upgrades: Consider investing in higher-performance materials if they’ll save you money long-term (e.g., enhanced plywood in high-moisture areas).
Preventative maintenance schedule and best practices
A solid maintenance routine extends your subfloor’s life and keeps warranties intact. Here’s a simple plan:
1. Inspections: Check your subfloor annually, paying special attention to moisture-prone areas.
2. Moisture control: Keep relative humidity between 30-50%. Use vapor barriers and proper ventilation to prevent excess moisture.
3. Timely repairs: Address small issues promptly to prevent them from becoming big problems (e.g., fix minor squeaks before they turn into major structural issues).
Conclusion
Get your subfloor right and you protect the whole floor, plus your safety and wallet. The goal is a stable, smooth surface that holds fast and lasts through daily use without squeaks, gaps, or moisture problems.
First, verify you’ve picked the right enhanced plywood or modern subfloor product for your installation, environment, and flooring type, and then confirm you understand the material specs and standards before you buy. Next, plan the job with a clear sequence: check the site and moisture, lay out the panels with proper gaps, install per the manufacturer’s instructions, and perform a visual and tactile inspection before and after each step. Test a small area first, follow the installation best practices, and keep nails or fasteners at the correct depth to avoid damage.
Avoid these common missteps: rushing layout or skipping moisture checks, using the wrong fasteners or under- or over-tightening, and ignoring edge or seam treatment. Always wear PPE, keep your work area clean, and recheck levels and fastener patterns after any swelling or shrinkage. A simple safety rule is never proceed if anything seems cracked, water-damaged, or out of plane; stop, reassess, and correct before continuing.
If you encounter persistent cupping, soft spots, or unusual odors after moisture exposure, or you’re unsure about a product’s compatibility with your flooring type, call in a pro. When the project exceeds your comfort zone or local code requirements, professional help saves time and prevents costly mistakes. Stay controlled, follow the steps, and you’ll finish with a durable, safe, and good-looking floor you can trust.
FAQ
How do I tell if my enhanced plywood or subfloor needs replacement rather than a fix?
Look for extensive rot, soft spots, or widespread cupping that won’t flatten with load. If fasteners pull easily or the panel has cracks through to the core, replace the affected section. Check labels or manufacturer instructions for allowable repair methods before proceeding.
What should I ask or check when choosing panels for a high-moisture area?
Verify the panel type is rated for moisture exposure on the label or datasheet. Look for manufacturer guidance on installation in damp environments and whether a moisture barrier or underlayment is required. Local rules or site conditions can also affect what’s acceptable.
How can I fix minor cupping or squeaks before finishing the floor?
Tighten securing fasteners and reset any raised edges with proper nails or screws per the product instructions. If cupping persists, you may need to acclimate panels or add fasteners in the sagging zones, following the manufacturer’s fastening pattern. Avoid overdriving fasteners, which can damage the panel.
What are the key fastening and adhesive considerations to avoid flatness and noise problems?
Use the recommended fastener type, spacing, and depth from the label or instruction sheet. Apply any approved adhesive only as directed and under the correct conditions. If you’re unsure, check the product instructions or call the manufacturer for the exact pattern and sealant requirements.