

Introduction
Cutting and cobbling rim joists with insulating foam sealant means sealing the rim joist area by trimming and packing foam to block drafts. It’s a hands-on fix aimed at reducing air leaks and improving energy efficiency in exterior walls. Check local rules and product labels for install limits and curing times.
The method can involve choosing between rigid foam boards and spray foam and using foam sealant to fill gaps after cutting. Plan your cut-and-cobble steps carefully, test for drafts, and confirm that the foam forms a continuous seal at rim heights. Always follow the manufacturer’s instructions and local code guidance for expansion, curing, and compatibility; if unsure, check the product label or manufacturer instructions for safe ranges and proper application.
Key takeaways
- Quick overview: identify rim-joist issues, moisture, and energy loss sources.
- Cut-and-cobble method steps: dry-fit foam, sealant, and finish joints around rim.
- Materials: rigid foam types, spray foams, sealants, and compatibility checks.
- Tools, safety precautions, and a practical exterior-wall sealing checklist with respirator reminder.
- Tests and diagnostics to verify air sealing and performance in practice.
- Engagement and sources: Weekly Newsletter, login to post, Recent Questions, Featured Blogs, Musings, and Removing Particulates.
Table of Contents
- Introduction
- Key takeaways
- Quick Overview and Common Causes of Rim‑joist Problems
- The Cut‑and‑cobble Method Step‑by‑step for Rim Joists
- Materials: Rigid Foam Types, Spray Foams, Sealants, and Compatibility
- Tools, Materials Checklist, and Safety Precautions
- Tests and Diagnostic Tools to Verify Air Sealing and Performance
- Common Mistakes, Fixes, and Long‑term Maintenance
- HVAC Interactions, Indoor Air Quality, and Particulate Control
- Practical Next Steps and Trusted Sources
- Conclusion
- FAQ
Quick Overview and Common Causes of Rim‑joist Problems
Rim joists sit at the outer edge of the floor framing and help define the building envelope. They are a key path for heat loss, moisture, and air leakage, so problems here have outsized effects on comfort and efficiency.
Common failure modes include air leaks, missing or aged insulation, gaps in framing, moisture intrusion, and frost or condensation. Look for cold spots, drafty rooms, damp areas, and signs of mold as diagnostic cues. Use a simple decision framework to decide between DIY cut‑and‑cobble work or calling a pro, based on safety, accessibility, and the scope of air sealing needed.
Typical pathways for air, moisture, and pests
Rim joists are the horizontal framing members that sit on top of your foundation. They’re a common entry point for air, moisture, and even pests due to their location at the intersection of your home’s interior and exterior.
Air leaks usually occur:
- At sill plate gaps, where the rim joist meets the top of your foundation.
- Along band joist seams, where two pieces of lumber meet.
- Around plumbing and electrical penetrations, like pipes and wires that pass through the rim joist.
How underinsulation and air leaks affect the building system
Rim-joist leaks can wreak havoc on your home’s comfort, efficiency, and even structural integrity. Here’s how:
Underinsulated rim joists let heat escape in winter and enter in summer, driving up HVAC loads and energy bills.
Air leaks bring in cold air, promoting condensation on cool surfaces – a breeding ground for mold and mildew. They also let in allergens and pollutants, degrading indoor air quality.
Moisture intrusion can soften insulation, further reducing its effectiveness, and even cause structural damage over time.
The Cut‑and‑cobble Method Step‑by‑step for Rim Joists
Start with cavity prep: check for moisture, clean all surfaces, dry damp areas, and inspect for timber damage before foam installation.
For cutting rigid foam, determine panel sizes and account for stud bays, then trim to fit around openings while aiming for tight joints. Install pieces so they sit firmly without compressing the foam, keeping edges aligned with framing. Seal joints and edges with insulating foam to form an airtight backstop with minimal finish disturbance.
Preparing the cavity and measuring for tight fits
Before you start cutting foam, prep your rim joist cavity right. Check for moisture – if damp, dry it out.
Measure carefully. Mark each stud bay’s width on your rigid foam panel. Account for piping/vent openings. Aim for minimal gaps at edges.
Use a straight edge and utility knife to score the foam. Snap along the scored line, then trim any rough edges with scissors or a razor blade.
Cutting, tacking, and sequencing installations
Start at one end of the rim joist. Cut your foam strips to length, then tack them in place with a few dabs of construction adhesive or small nails.
Work across the bays in sequence. Fit each piece tightly against its neighbors and the studs. Avoid compressing the foam – it reduces insulation value.
If you’ve got irregular joists or openings, cut those pieces last. They’re trickier but follow the same principles: measure, mark, fit snugly.
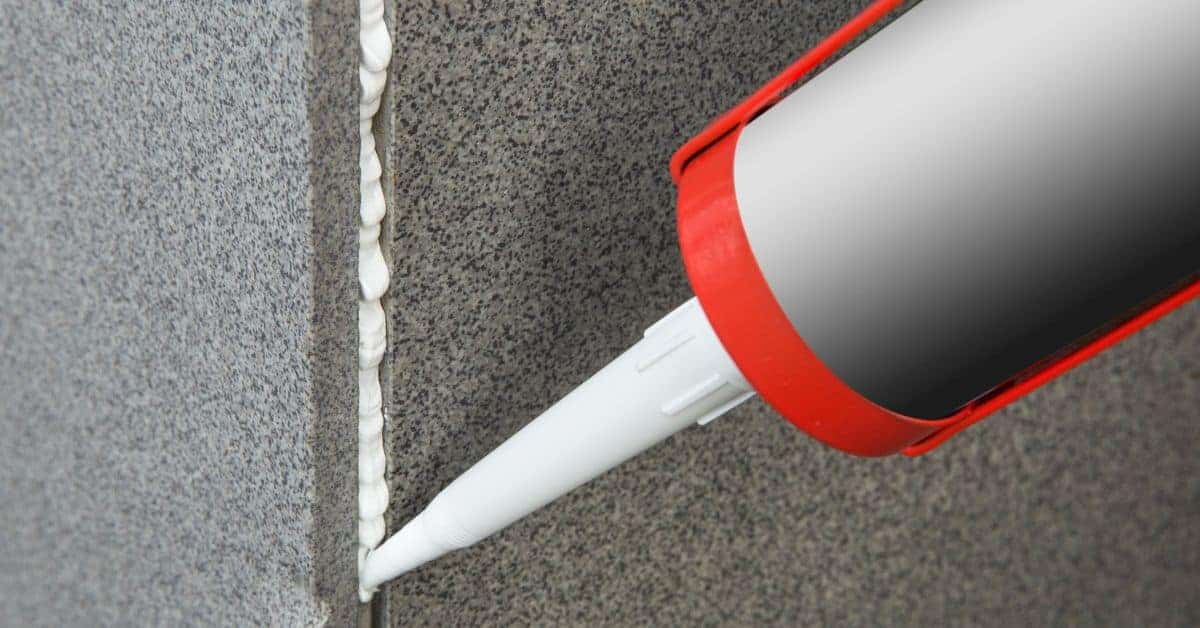
Applying insulating foam sealant and finishing the seal
Once all pieces are in place, it’s time to seal. Use a one-part or two-part foam sealant. Apply along joints, seams, and perimeter gaps.
Follow manufacturer’s instructions for application temperature, coverage, and cure time. Keep the area clean and free of dust while applying.
After foam has cured (usually 24 hours), trim any excess flush with surfaces using a utility knife or razor blade. This creates an airtight backstop that interfaces smoothly with your sheathing and finishes.
Materials: Rigid Foam Types, Spray Foams, Sealants, and Compatibility
Knowing the rim‑joist context helps you pick materials with moisture resistance, adequate compressive behavior, and good sealant compatibility. Read labels for notes that affect use in wood framing and insulation performance without assuming exact specs.
When comparing rigid foams, look for moisture tolerance indicators and the implications of closed‑cell versus open‑cell varieties, along with typical thickness suitability for rim‑joist cavities. For spray foams, consider cure stability in cold or condensation‑prone conditions and how they interact with framing and fasteners. Check sealants for adhesion to foam types, solvent content, and any primer needs. Use a label checklist to verify moisture resistance, thermal notes, and warranty caveats, and decide whether a mix of rigid and spray foams is appropriate for your project while avoiding common pitfalls like gaps or overexpansion.
Rigid foam options and when to use each
When it comes to rigid foams for rim-joist insulation, you’ve got a few options. Each has its own strengths and weaknesses.
Extruded Polystyrene (XPS) is a popular choice due to its high R-value per inch and good moisture resistance. It’s great for exterior applications where it won’t be exposed to direct sunlight, which can degrade it over time.
Expanded Polystyrene (EPS) is cheaper but has lower R-values and less moisture resistance than XPS. It’s best used in interior or protected exterior applications.
Polyisocyanurate (Polyiso) offers high R-values and excellent moisture resistance. It’s a great choice for both interior and exterior use, especially in areas prone to moisture issues.
Spray foam and insulating foam sealant types
Spray foams come in different formulations to suit various needs. Here’s a quick rundown:
One-part can foams are easy to use, expand quickly, and set fast. They’re great for small touch-up jobs or filling gaps. However, they don’t provide as much insulation value as other types.
Two-part spray foams require mixing at the nozzle but offer better insulation values and adhesion. They’re ideal for large areas like rim joists. Be sure to follow safety guidelines when using these products.
Low-VOC formulations are designed to emit fewer volatile organic compounds, making them a healthier choice, especially in enclosed spaces. They perform just as well as standard foams but may cost a bit more.
Adhesives, tapes, and gasketing products for perimeter seals
To ensure a tight seal around your rim joists, you’ll need more than just foam. Here are some product categories to consider:
Adhesives can help bond foam to wood or other surfaces. Choose ones compatible with your foam type and suitable for the job’s temperature conditions.
Tapes can bridge gaps between foam pieces and provide additional air sealing. Opt for ones that stick well in cold temperatures and are compatible with your foam and sealant types.
Gasketing products like backer rod or closed-cell foam tape can fill larger gaps before applying foam. They help ensure even foam application and better adhesion.
Tools, Materials Checklist, and Safety Precautions
Have a core tools list ready: measuring and marking tools, a saw or utility knife for foam, pry bars, hammer, framing square, level, rasp or grinder, shims, caulking gun, and a utility knife with spare blades.
Stock materials and consumables such as rigid foam or foam sealant with adhesive, backer rod or caulk for joints, rim‑joist insulation products, concrete‑safe sealants, expanding foam, a trowel or putty knife, and cleanup supplies like rags and plastic sheeting. Include PPE: eye protection, respirator or dust mask, gloves, ear protection, long sleeves, and sturdy footwear, plus a ventilation plan and containment measures. Follow code‑aware checks and lock out power as needed, inspect for moisture and mold, and document disposal requirements per local rules.
Tools and consumables you’ll need
Before you start, make sure you have all the necessary tools and materials to ensure a smooth cut-and-cobble rim-joist job.
- Measuring/marking tools: Tape measure, speed square, pencil – To accurately mark and measure your cuts.
- Saw or utility knife for foam: Hand saw, utility knife with replacement blades – For cutting rigid foam and expanding foam.
- Pry bars & hammer: Pry bar, claw hammer – To remove old insulation and prepare the cavity.
- Framing square & level: Framing square, torpedo level – To ensure accurate cuts and proper installation of rim-joist insulation.
- Grinder or rasp: Grinder with sanding disc, rasp – For smoothing edges and removing excess foam.
- Shims & caulking gun: Shims, caulking gun – To create a tight fit and seal gaps before applying foam.
- Spray bottle for water: Spray bottle filled with water – To keep tools clean and prevent dust while cutting foam.
- Trowel or putty knife: Trowel, putty knife – For spreading adhesive and smoothing out foam.
Quick rule: Always double-check your measurements before making cuts to avoid waste and rework.
Personal protective equipment and safe handling
Safety should always be a priority when working with foam, solvents, and power tools. Here’s what you need to protect yourself and your workspace.
- Eye protection: Safety glasses or goggles – To protect your eyes from debris and chemicals.
- Respirator/mask: Compatible respirator or mask – For dust containment and protection against chemical fumes.
- Gloves: Work gloves – To protect your hands from cuts, burns, and chemicals.
- Ear protection: Earplugs or earmuffs – To safeguard your hearing when using power tools.
- Long sleeves & safety footwear: Long-sleeved shirt, steel-toed boots – For overall body protection and to prevent injuries from falling objects.
- Drop cloths & plastic barriers: Drop cloths, plastic sheeting – To contain dust and protect finished surfaces from damage.
- Ventilation plan: Temporary fans or exhaust – For proper ventilation during foam application to avoid buildup of fumes.
- Clean-up supplies: Rags, mineral spirits (if allowed) – For cleaning tools and workspace after the job is done.
Quick rule: Always follow manufacturer guidelines for proper use, storage, and disposal of foam products and solvents.
Visual checkpoints and completion criteria
Before closing up your finishes, perform these simple checks to ensure a proper airtight seal has been achieved.
- Piece seating: Inspect each piece of rim-joist insulation – Ensure they are properly seated and secured in place with adhesive or fasteners.
- Foam expansion: Check foam application areas – Verify that the foam has expanded evenly without gaps or voids.
- Air leaks: Perform a smoke test or use a thermal imaging camera – To detect any air leaks around your rim-joist insulation.
- Cure time: Allow foam to cure according to manufacturer guidelines – Before applying finishes, ensure the foam has fully cured and is ready for painting or finishing.
- Cleanliness: Inspect workspace – Ensure that the area is clean and free of debris before closing up finishes.
Quick rule: Never rush through these checks. Taking the time to inspect your work ensures a quality job and prevents costly rework.
Tests and Diagnostic Tools to Verify Air Sealing and Performance
Before starting, establish a baseline for air leakage and performance by noting likely trouble spots such as rim joists and framing gaps. Plan where you will seal more aggressively based on observed conditions.
Use smoke pencil or fog machine for visual leaks, and an infrared camera to spot thermal bridges and hidden gaps. After sealing, repeat a quick check of surface gaps and consider a blower‑door test if you have access to it. For IAQ, have portable gas monitors and particulate monitors on hand and know when to involve a pro for formal testing.
Simple on-site tests (smoke, hand, thermal)
Before you start sealing your rim joists, do some quick tests to find drafts and thermal bridges. You don’t need fancy equipment for this.
Smoke Pencil: On a windy day, hold the smoke pencil near suspected leaks. Smoke will be pulled into the house where there are gaps or cracks. This helps you pinpoint areas that need sealing.
Hand Test: Feel around with your hand to find cold drafts. If it’s cold outside, you’ll feel a noticeable difference at leaky spots. In warm weather, use a damp hand – the evaporation will cool your skin and you’ll feel drafts as they cool your hand further.
Thermal Imaging: If you have access to an infrared camera, use it to find thermal bridges. These are spots where heat is transferring through the building envelope faster than normal. You’ll see these as cold or hot spots on the screen compared to surrounding areas.
When to use blower door, thermal imaging, or monitors
Advanced tools like the blower door test, thermal imaging camera, and portable monitors can give you more detailed information about your rim joist fixes. But when should you use them?
Blower Door Test: This is best done after all sealing work is complete. It quantifies air changes per hour and overall envelope tightness. It’s like a final exam for your air-sealing efforts.
Thermal Imaging Camera: Use this before and after sealing to find hidden gaps and check the effectiveness of your fixes. It can reveal thermal bridges that you might miss with other methods.
Portable Monitors (CO, Methane, Particulates): These are useful for checking indoor air quality post-work. If you’re concerned about combustion safety or IAQ, use these to ensure your fixes haven’t created any new issues.
Portable and wearable diagnostic tools overview
After your rim joist work is done, it’s a good idea to check indoor air quality. Portable monitors can help with this.
- CO Monitor: Checks for carbon monoxide, a colorless, odorless gas that can be deadly in high concentrations. Key spec: 0-1000 ppm range. Tip: Place it near combustion appliances like furnaces or fireplaces.
- Methane Monitor: Detects natural gas leaks. Key spec: 0-20% LEL (Lower Explosive Limit). Warning: Methane can explode if it builds up in enclosed spaces.
- Particulate Monitor: Measures airborne particles like dust, pollen, or mold spores. Key spec: PM10, PM2.5, or PM1 levels. Tip: Run it for 24 hours to get a true average of particle levels.
- VOC Monitor: Detects volatile organic compounds, many of which are harmful to health. Key spec: PPM (parts per million) range. Warning: Some VOCs have no smell but can still be harmful at high concentrations.
- Thermal Camera (optional): Rental or purchase. Checks for thermal bridges and insulation gaps. Tip: Use it seasonally to ensure your fixes are holding up.
Common Mistakes, Fixes, and Long‑term Maintenance
Be aware of frequent errors such as leaving gaps, compressing foam, improper sequencing, material incompatibilities, and sealing before moisture sources are addressed. Prioritize a logical sealing order to avoid trapping moisture.
When issues arise, remediate by reinstating gaps, re‑foaming without over‑compression, and ensuring proper foam expansion and adhesion. Establish a maintenance schedule to inspect seasonally or quarterly for moisture, mold, pests, and foam integrity, and perform spot sealing or re‑caulking as needed. If leaks persist or rot appears, consult a professional for assessment and repair guidance.
Troubleshooting leaks and foam failures
Leaks and foam failures can happen, but don’t panic. Here’s how to find and fix them without tearing out the whole job.
Locating air paths: Use a smoke pencil or incense stick to trace drafts. Seal any gaps you find with caulk or foam.
Fixing foam pull-away: If foam is pulling away from the joist, it’s likely due to improper adhesion. Scrape off loose foam, clean the surface, and reapply adhesive before reflashing.
Filling voids: If you find gaps or voids in the foam, use a backer rod or expandable foam to fill them. Ensure proper expansion and adhesion for an effective seal.
Routine inspection and care
Annual inspections help catch issues early. Here’s your checklist:
- Check foam integrity: Look for cracks, shrinkage, or signs of deterioration.
- Inspect caulking: Check for gaps or cracks in perimeter seals. Re-caulk if needed.
- Examine for moisture: Watch for water stains, mold, or musty odors indicating intrusion.
- Scan for pests: Look for signs of nesting or entry points for insects or rodents.
- Verify air seal: Recheck your air-sealing efforts with a smoke pencil or blower door test.
- Inspect drainage: Ensure gutters and downspouts are clear, and water is directed away from the foundation.
- Check flashings: Make sure they’re intact and properly sealed at all joints and penetrations.
- Examine vapor barriers: Ensure they’re continuous and undamaged to prevent moisture buildup.
Quick rule: If you find any issues, address them promptly to prevent further damage or energy loss.
Cost considerations and when to hire a pro
Factors driving cost include access (e.g., high ceilings), foam type, and remediation scope. Here’s when to consider hiring a professional:
Complexity: If your home has complex architecture or extensive damage, it might be best left to the pros.
Health concerns: If you suspect mold growth or asbestos, hire professionals with proper training and equipment to ensure safety.
Persistent issues: If you’ve tried DIY fixes but problems persist, it’s time to call in an expert. They have specialized tools and experience to diagnose and solve tough issues.
HVAC Interactions, Indoor Air Quality, and Particulate Control
Sealing rim joists changes envelope tightness and can affect overall HVAC load, ventilation needs, and distribution. Plan for adequate outdoor air and filtration to keep comfort and IAQ in balance.
Watch humidity implications and potential condensation at the rim, and consider filtration strategies such as appropriate MERV filters or portable units. When selecting HVAC approaches, think about whether to pair air sealing with mechanical ventilation, and how solutions like ERVs or dehumidifiers fit into your plan. Use quick checks after sealing to gauge IAQ impacts and plan any follow‑up testing.
Impact on HVAC Sizing and Dehumidification
Sealing rim joists with insulating foam tightens your home’s envelope. This reduces heat loss/gain, but it also changes how your HVAC system works.
HVAC Load: Your system won’t need to work as hard to maintain temps. So, you might consider downsizing your unit. But be careful – too small, and it’ll run constantly, wearing out parts faster.
Dehumidification: Tighter envelopes can trap moisture, leading to condensation at the rim joist. This increases latent loads. Your HVAC system may struggle with humidity control. Consider adding a dehumidifier or upgrading to an ERV/HRV system that handles both temperature and humidity.
Before making changes, consult with an HVAC professional. They can calculate your new heating/cooling load and recommend the best solution.
Ventilation, Filtration, and Particulate Removal
Sealing up your home reduces natural air exchange. This can lead to increased indoor pollutants if not managed properly.
Mechanical Ventilation: Consider installing a mechanical ventilation system (ERV/HRV) to bring in fresh air while exhausting stale air. These systems also help control humidity and remove pollutants.
Filtration: With reduced natural air exchange, filtration becomes even more important. Upgrade your HVAC filter to a MERV 13 or higher for better particulate removal. Consider using portable air purifiers in high-traffic areas as well.
Remember, it’s not just about sealing – you need to balance that with adequate ventilation and filtration to maintain good indoor air quality.
Addressing Material Health Concerns
Choosing the right foam sealant is crucial. Some products contain chemicals that can off-gas and affect your indoor air quality.
- Low VOC: Look for foams with low volatile organic compounds (VOCs). These are less likely to emit harmful gases into your home.
- Avoid Formaldehyde: Some foams contain formaldehyde, a known carcinogen. Check the product safety data sheet and avoid these if possible.
- Check Safety Data Sheet: Always review the safety data sheet before purchasing. It’ll tell you what’s in the product, any potential hazards, and how to handle it safely.
- Proper Installation: Ensure the foam is applied correctly. Improper application can lead to cracking, staining, or weak bonds, which can compromise your seal and potentially release chemicals into your home.
Practical Next Steps and Trusted Sources
Plan code and permitting steps that may apply to rim‑joist work, including inspections, vapor barriers, and ventilation considerations for foam sealants. Check what local rules require before starting.
Identify key product data sheets and technical guides for insulating foam sealants, rigid foam inserts, and suitable fasteners to compare curing times, VOCs, fire ratings, and framing compatibility. Outline a simple inspection and testing plan that includes a pre‑work envelope assessment and a post‑work air‑sealing check. Build a reference set of trusted sources such as builder guides and manufacturer guides, and note how to interpret data sheets without following direct linking. Consider joining forums or newsletters for ongoing guidance and updates.
Permits, code considerations, and documentation to check
Before you start cutting and cobbling rim joists with insulating foam sealant, it’s crucial to understand your local building codes. Contact your local code officials to confirm if permits are required for this work in your jurisdiction.
They can also provide guidance on any specific requirements for rim-joist work, such as:
- Required inspections during and after the job
- Vapor barriers that need to be installed or considered
- Ventilation considerations when using foam sealants
Keep all product data sheets and technical specifications for your chosen insulating foam sealant, rigid foam inserts, and compatible fasteners. You’ll need these for inspections.
Community Q&A, comments, and learning resources
Don’t hesitate to reach out to the DIY community for advice. Many homeowners have tackled similar projects and can provide valuable insights.
Look for comment sections on relevant blog posts or forums where you can ask questions and share your experiences. Some popular platforms include:
- HomeTalk
- This Old House Community Forums
- Fine Homebuilding’s Q&A Forum
Also, check out featured blog posts and expert musings on these sites for in-depth articles and step-by-step guides.
Weekly newsletter, product guides, and continuing education
Stay updated with the latest trends, best practices, and new materials by subscribing to relevant newsletters. Some trusted sources include:
- Fine Homebuilding’s e-newsletter
- This Old House’s newsletter
- BuildingGreen’s Newsletter
Many manufacturers also offer product guides that can help you make informed decisions. These guides often include detailed installation instructions, troubleshooting tips, and maintenance advice.
Additionally, consider attending local workshops or webinars on air sealing and insulation to further your learning. These events are often hosted by building supply stores, local trade organizations, or energy efficiency programs.
Conclusion
Take control with a safe, durable seal you can trust. The right cut-and-cobble approach protects the structure, reduces drafts, and keeps interior air quality from slipping over time.
First, inspect for visible damage, choose compatible rigid foam and sealants, cut carefully to fit, install and seal gaps in a logical sequence, run the recommended tests to verify air sealing and performance, and then monitor after weather changes. Do each step in small, controlled moves and document what works so you can repeat it next season.
Common mistakes to avoid include using the wrong foam or sealant for the opening, cutting too deep and hitting framing, and skipping diagnostic tests or after‑care checks. Follow safety rules: work in a well-ventilated area, wear eye and skin protection, test in a small area first, and verify a solid seal with the approved tools before closing up for good.
If you uncover hidden rot, significant framing damage, or you’re unsure about vapor and HVAC interactions, call a professional instead of pushing forward. Stay steady, work clean, and you’ll keep the project on track without costly missteps. You’ve got this—finish strong and seal it right.
FAQ
What’s the simplest way to insulate rim joists with foam sealant without turning it into a mess?
Clean and dry the cavity first. Apply foam sealant only to gaps and edges, then trim excess flush once cured. Follow the product label for curing times and ventilation.
How does the cut‑and‑cobble method apply to rim joists with insulating foam?
Cut rigid foam to fit snugly between joists and press it in flat. Seal edges with compatible spray foam or caulk to block drafts. Don’t leave voids; gaps invite moisture and air leaks.
Which insulating materials are safe to use around rim joists, and how do I choose?
Rigid foam boards and spray foams are common. Check the label for compatibility with each other and with sealants. If unsure, read manufacturer instructions and local rules before mixing products.
What signs tell me the air sealing is failing, and what fixes should I try first?
Look for drafts, cold spots, or increased utility bills. Re‑seal obvious gaps with appropriate foam or caulk, and ensure there’s a solid fit for any added foam pieces. If problems persist, recheck fit and product compatibility.