

Introduction
Rebar couplers are threaded or mechanical connections that join two bars end-to-end. Use them when you need to extend bar length or connect bars in tight spaces where overlap is hard. Check manufacturer instructions and local rules to ensure proper fit and alignment.
There are different types of couplers for different rebar sizes and thread types. Choose based on bar size, material, and the load you expect to transfer. Always verify alignment with a straightedge and avoid forcing misaligned joints or bending the coupler area during installation.
Key takeaways
- Definition of rebar couplers and their basic purpose in structural connections for continuity.
- Benefits include faster unions, cleaner joints, reduced corrosion risk at splices.
- Common types cover mechanical and threaded options for beams, columns, and slabs.
- Select by rebar size, embedment length, load path, and manufacturer guidelines.
- Align couplers precisely, verify clean threads, and wear eye and hand protection.
- Inspect joints for misalignment, verify engagement depth, and document nonconforming work.
Table of Contents
- Introduction
- Key takeaways
- What Rebar Couplers Are and When They Matter
- Types of Rebar Couplers and Their Typical Applications
- Material Specifications and Standards to Check
- Design and Planning Considerations for Reinforcement with Couplers
- Purchasing, Cost, and Vendor Selection
- Tools, Materials, Fabrication, and Site Readiness
- Installation Best Practices to Avoid Alignment Problems
- Troubleshooting, Inspection, Testing, and Safety
- Conclusion
- FAQ
What Rebar Couplers Are and When They Matter
Rebar couplers are mechanical or grout-in devices that join bars to form a continuous reinforcement. They are different from lap splices and from welded connections. Understanding this distinction helps you decide when a coupler is the right choice.
Couplers create a continuous load path by transferring shear, tension, and compression through the joint, which can be beneficial in dynamic or seismic loading scenarios. They are often preferred in spaces where traditional splices are hard to achieve due to crowded reinforcement zones or limited cover. Common drivers for using couplers include constructability, spacing constraints, and design requirements that favor a continuous path through the joint.
Definition and basic mechanics
Rebar couplers are mechanical devices that join reinforcing bars (rebar) to form a continuous reinforcement. They’re different from lap splices, which rely on the concrete around them for strength, and welded connections, which fuse bars together.
Couplers transfer load through various methods: mechanical interlock, where teeth or ribs grip the bar; bearing, where pressure is applied along the bar’s length; welding, for some types; and grout, which fills voids to create a solid bond.
A typical coupler system includes the coupling device itself, sometimes with additional components like sleeves or spacers. Each type has specific physical features that enable these load transfer methods.
Key benefits of using couplers
Using rebar couplers brings several advantages. They reduce congestion in the reinforcement layer, making it easier to place and align bars. This is particularly useful in crowded reinforcement zones.
Couplers create a continuous load path, improving structural continuity. This means forces can be transferred more efficiently between bars, reducing stress concentrations and potential failure points.
They also allow for shorter development lengths, as the coupler effectively extends the bar’s embedded length. This can save material and reduce construction time.
Couplers enable faster assembly on-site. Once aligned, they can be quickly secured, speeding up reinforcement installation.
Limitations and when not to use couplers
While rebar couplers offer many benefits, they’re not always the best solution. On low-cost small projects, the additional expense of couplers might not be justified.
Inaccessible site conditions can also make using couplers impractical. If bars can’t be properly aligned or the coupler can’t be securely seated, it’s better to use an alternative reinforcement method.
Even with couplers, certain factors can negate their advantages. Inadequate clear cover, for instance, can prevent proper seating and engagement of the coupler, reducing its effectiveness.
Always consider the specific needs and constraints of your project before deciding whether to use rebar couplers.
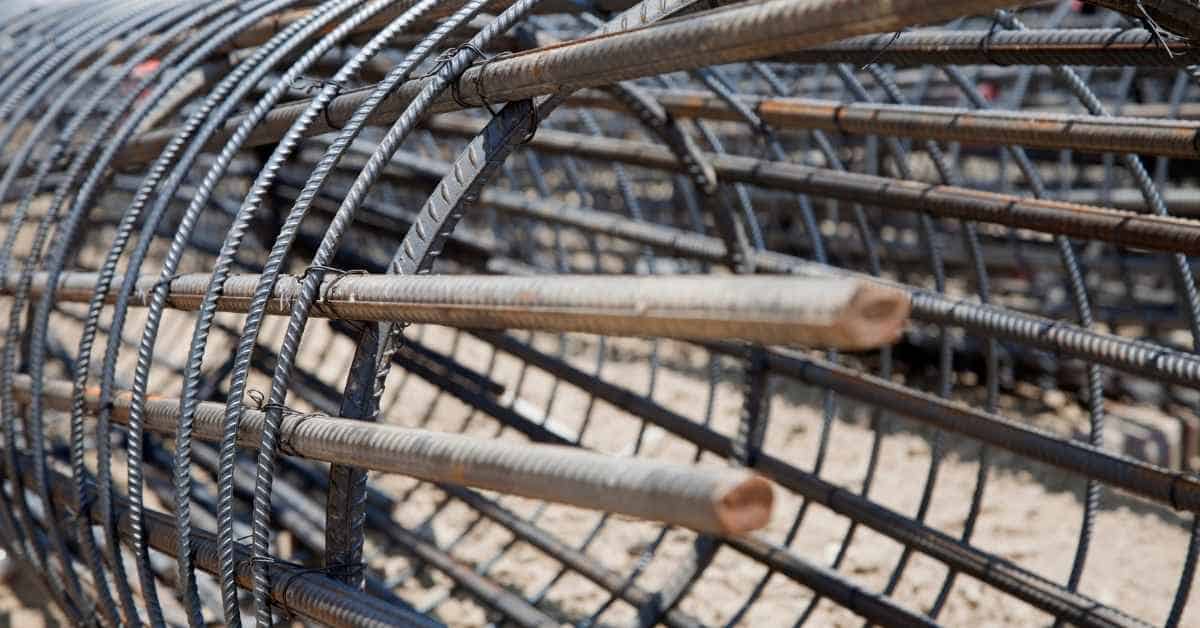
Types of Rebar Couplers and Their Typical Applications
Catalog the main coupler families and define how each installs and what materials they require. Typical families include mechanical compression, threaded mechanical, swaged or expanded, epoxy-bonded or grout-filled, and precast-approved connectors. Each has its own installation concept and limitations.
Pair each family with representative applications such as columns, beams, drilled shafts, and precast connections, and explain why a given type excels in those contexts. Consider tradeoffs like cost, speed of installation, and alignment tolerance, along with key installation and QC steps such as surface prep and curing requirements. Include references to code guidance and any limitations for specific couplers, plus a practical decision checklist to aid selection by project type and budget.
Threaded and bolted mechanical couplers
Threaded and bolted mechanical couplers are a popular choice due to their simplicity and ease of installation. They consist of a nut, washer, and coupler sleeve with internal threads that screw onto the rebar ends.
Installation: First, clean and prepare the rebar ends. Then, align the bars and slide on the coupler sleeve. Screw on the nut and washer, tightening them securely using a wrench or torque tool.
Use cases: These couplers excel in vertical column splices where alignment is critical. They’re also great for repair work as they allow easy disassembly if needed. However, they require more space than some other types and may not be suitable for tight spaces.
Swaged/press-fit and friction-type couplers
Swaged or press-fit couplers work by cold-deforming a sleeve onto the rebar ends, creating a strong mechanical bond. Friction-type couplers use a combination of friction and mechanical interlock to join rebars.
Installation: These couplers are quick and easy to install. Simply clean the rebar ends, align the bars, slide on the coupler sleeve, and use a press or hammer to swage or crimp it into place.
Advantages: Their low profile makes them ideal for tight spaces, like beam pockets or where concrete cover is minimal. They’re also fast to install, reducing labor costs. However, they may not be suitable for high-capacity joints due to their lower strength compared to other types.
Grout-filled sleeves, welded and special-purpose couplers
Grout-filled sleeves provide temporary continuity during construction. They consist of a sleeve filled with grout that’s poured in after the rebar is placed.
Welded couplers: These are high-capacity connections used where strength is paramount, like in bridge construction or high-rise buildings. They involve welding the coupler to the rebar ends, creating a strong, permanent bond.
Specialty couplers: Some couplers are designed for specific applications, like seismic or fatigue-sensitive structures. These include couplers with energy dissipation features or those that allow for movement under load.
Material Specifications and Standards to Check
Identify which steel grades and mechanical properties are permissible for coupler use, and remind readers to verify current standards for exact values rather than quoting numbers here. Emphasize consulting the applicable standards for yield, tensile behavior, and ductility.
List relevant standards and codes to verify compatibility with project specifications, including how to review mill test reports and product certificates. Outline tolerances and fit requirements, and address environmental and coating considerations that affect compatibility with epoxy or protective coverings. Include a practical checklist to confirm material suitability before installation and note when substitutions may be warranted according to project guidance.
Steel grades and mechanical properties
The steel grade of your rebar is crucial for coupler performance. Don’t quote values, check the standards like ASTM A615 or ACI 318.
Tensile strength affects how much load your rebar can take before breaking. Ductility determines how much it can bend without snapping.
Supplier mill certificates should confirm these properties. Match them to your project specs.
Corrosion protection and coatings
Rebar couplers need corrosion protection, especially in harsh environments. Options include:
- Galvanizing: Zinc coating for mild exposure.
- Epoxy coating: Thicker protection for severe exposure.
- Stainless steel: High-end option for extreme conditions.
Choose based on your project’s exposure category and required service life.
Dimensional, thread and tolerance standards
Matching dimensions is key to avoid fit issues. Check ASTM or local codes for:
- Rebar diameters: Ensure couplers match.
- Thread geometry: Correct pitch and depth for proper engagement.
- Bar deformation profiles: Confirm coupler design accommodates rebar shape.
Acceptable tolerances vary, but tighten them if critical alignment is needed.
Design and Planning Considerations for Reinforcement with Couplers
Define optimal splice locations and alignment tolerances, taking into account load paths, gravity and lateral forces, and practical field constraints. Consider how these factors influence development length and concrete placement.
Outline strategies to reduce development length when using couplers, such as adjusted bar lengths and cover considerations, while noting implications for placement and compaction. Emphasize coordination with rebar cages and formwork to prevent interference and plan for prefabrication versus in situ work. Promote early design–fabrication–field collaboration using BIM or 3D modeling and preconstruction meetings to resolve conflicts. Establish an inspection and QC plan that covers coupler type verification, seating, torque or installation checks, embedding length, and orientation, including any post-pour testing requirements aligned with project standards.
Splicing strategies for longitudinal reinforcement
Placing splices correctly is crucial to maintain load path continuity. For long cages, stagger your splices. Don’t concentrate them in one spot.
Staggered splices: Spread out your couplers along the length of the cage. This helps distribute forces evenly and prevents stress concentrations.
If bars exceed stock lengths, use lap splices with sufficient development length on both sides of the coupler. Follow ACI 318 or local codes for lap splice requirements.
Interactions with transverse reinforcement and cage geometry
Couplers should fit within the cage geometry without interfering with hoops, ties, or clear cover. Maintain proper spacing and alignment of transverse reinforcement.
Hoops: Ensure couplers don’t block hoop placement. If needed, use smaller diameter couplers or adjust hoop spacing.
Consider cage stiffness. Too many couplers can weaken the cage, so balance splice needs with maintaining cage integrity.
Connections to columns, drilled shafts, and precast elements
Coupling at interfaces requires careful planning. For shaft-to-column connections, use couplers that match the column rebar size and spacing.
Cage-to-column: Ensure couplers align with column reinforcement. Use temporary supports to maintain alignment during concrete placement.
Precast-to-cast-in-place interfaces need proper detailing. Use couplers designed for these applications, and ensure they’re embedded adequately in both elements.
Purchasing, Cost, and Vendor Selection
Balance upfront cost with installation time and long-term performance, considering potential labor savings and durability factors such as corrosion resistance. Do not rely on price alone; weigh lifecycle implications in your decision.
When reviewing bids, focus on unit price, quantities, accessory costs, lead times, and on-site handling requirements. Compare warranty coverage, service support, and availability of training or field supervision. Verify vendor qualifications, traceability, and compliance with material standards, and require documentation such as mill test reports and installation guidance to support procurement decisions.
Cost vs performance and lifecycle considerations
The cheapest couplers aren’t always the best choice. Upfront cost matters, but consider labor savings too.
Faster installation means less time spent on-site, saving you money in the long run. Plus, couplers that reduce congestion let you pour concrete faster and with fewer issues.
Durability’s key. Corrosion-resistant couplers can extend your structure’s lifespan, reducing maintenance costs down the line. Don’t skimp here; it’s a false economy.
Procurement checklist and vendor vetting
Before you buy, use this checklist to ensure you’re getting quality couplers from reliable vendors. Use it when comparing quotes or selecting a supplier.
- Material standards: Check ASTM/CSA/CE compliance. Wrong standards mean poor performance.
- Traceability documentation: Verify each batch’s origin and production process. No traceability? You can’t trust the product.
- Supplier quality management systems: Ensure they have a robust system in place to maintain consistency.
- Third-party testing results: Independent tests prove coupler performance. Don’t rely on vendor claims alone.
- Mill test reports: Verify steel grade and mechanical properties meet your project’s needs.
- Installation instructions: Ensure clear, detailed guidance is provided to avoid installation errors.
- Field support capability: Confirm vendors can provide on-site assistance if needed. No support? You’re on your own.
- Sample assemblies or references: Request samples or references to inspect coupler quality and performance firsthand.
Quick rule: If a vendor can’t provide these, keep looking. Your project’s success depends on it.
Tools, Materials, Fabrication, and Site Readiness
Create a practical tools list for coupler work, including measurement, cutting, deburring, surface prep, and torque control. Specify required gear and protective equipment to keep the crew safe and productive. Stock sufficient spares to avoid downtime.
Outline material and coupler specs, surface prep steps, and on-site stock levels. Describe the fabrication workflow from pre-cut rebar to dry-fitting, marking joints, and ensuring straightness. Discuss storage and transport considerations to prevent damage and contamination, and establish a simple on-site QC routine tied to manufacturer instructions.
Tools and materials checklist
Before you start, make sure you have all the necessary tools and materials on hand. This will save you time and prevent delays.
- Tape measure: To ensure accurate measurements for cutting rebar.
- Marker: For marking rebar and couplers.
- Square: To check straightness of cut ends.
- Rebar cutter/recutter: For clean, precise cuts. Burrs cause corrosion.
- Deburring file: To remove burrs from cut ends.
- Wire brush: To clean rebar and couplers before installation.
- Impact driver or drill: For driving coupler pins (if applicable).
- Torque-controlled coupler wrench: To tighten couplers to the correct torque. Too loose, too tight – both cause problems.
- Acceptable torque range: Check manufacturer’s specs to avoid over/under-tightening.
- Level or string line: To ensure rebar is straight and plumb.
- Magnetic tray for fasteners: Keeps small parts handy, reduces loss.
- Battery protection and spare batteries: Keep tools charged and ready to go.
Quick rule: Check everything before you start. Missing a tool or material can halt progress.
Fabrication, storage, and transport tips
Off-site cage assembly saves time on-site. Here’s how to do it right:
Protect threads/coatings: Keep couplers clean and dry during storage and transport. Moisture and dust can damage threads.
Plan your logistics: Label batches, keep track of quantities. Running out mid-job causes delays.
Handle with care: Use forklifts or ladders safely. Damage in transit means rework on-site.
Installation Best Practices to Avoid Alignment Problems
Focus on establishing clear alignment controls such as centerlines, string lines, and plumb gauges. Pre-check each coupler orientation to maintain vertical alignment along the run. Plan a methodical approach to placement that preserves alignment.
Use temporary supports and elevation aids like chairs and spacers to keep bars at the correct height during placement. Deploy centering devices and templates to keep bars parallel and evenly spaced, and perform dry-fit checks at every joint to confirm straightness and clean engagement surfaces before pouring.
Pre-assembly and trial fit procedures
Before you start mixing concrete or cutting rebar, take the time to do some pre-assembly checks. This step might seem like extra work, but it’ll save you from costly mistakes later on.
First off, check your forms and reinforcement. Make sure they’re all in good shape and fit together snugly. Any gaps or cracks could lead to leaks and weak spots in your final pour.
Next up, do a dry-fit of your rebar. Lay out your reinforcement bars just like you would if you were pouring concrete. This helps you confirm that everything fits together properly and that you’ve got the right amount of overlap between bars.
Lastly, don’t forget to confirm thread engagement and axial alignment. If you’re using bolts or other hardware, make sure they engage properly with their corresponding parts. And check that everything’s lined up nice and straight – you don’t want any nasty surprises when it comes time to pour.
Field alignment methods and temporary supports
Once you’ve done your pre-assembly and trial fit, it’s time to get those bars in place. Here’s how to keep ’em straight:
Centering devices are a must. They keep your bars centered in the forms. Check their condition before use – no cracks or damage.
Use braces and lifting arrangements to hold bars in place while concreting. Tie them off securely, but not so tight they bend the bars. Remember, you’re just holding ’em straight, not trying to snap ’em in half.
For real-time measurement, use a level and measuring tape. Check bar alignment at multiple points – top, middle, bottom. If it’s off more than 1/8″, adjust those braces or lifting arrangements.
Visual checkpoints and acceptable fit indicators
Before you pour concrete, use this checklist to ensure your joints are correctly aligned. It’s crucial to do this after you’ve completed the pre-assembly, trial fit, and field alignment procedures.
- Check thread engagement: Ensure rebar ties and anchor bolts are fully engaged in their respective sleeves or pockets. Incomplete engagement can lead to weak joints and structural issues.
- Measure joint gaps: Use a straight edge and feeler gauges to ensure gaps between forms, walls, and slabs are within acceptable limits (typically 1/8″ to 3/16″). Too wide or narrow gaps can result in weak joints or excessive concrete usage.
- Verify flushness: Ensure all form faces are flush with each other. Any misalignment here can cause visible defects and uneven surfaces after the pour.
- Check plumb and level: Re-check that forms, walls, and slabs are plumb (vertical) and level (horizontal). Misaligned elements can lead to structural problems and unsightly results.
- Confirm proper spacing: Ensure all reinforcement is properly spaced and aligned. Improper spacing can result in weak concrete and potential structural failures.
- Inspect form ties: Check that all form ties are secure, evenly spaced, and correctly tensioned. Loose or incorrectly installed ties can cause forms to shift during the pour, leading to poor joint alignment.
- Check for obstructions: Ensure there are no foreign objects (e.g., trash, tools) in the joint area that could interfere with proper concrete flow and consolidation.
- Verify temporary supports: Confirm that all temporary supports, such as shores or falsework, are secure and correctly positioned. Failure to do so can result in structural collapse during the pour.
Quick rule: Always double-check your work and re-measure critical dimensions before pouring concrete. A few extra minutes spent verifying can save hours of rework and costly mistakes.
Troubleshooting, Inspection, Testing, and Safety
Identify common failure modes such as misalignment, mis-seated sleeves, or surface corrosion, and understand how these affect performance. Develop a diagnostic workflow based on field observations and template checks.
Implement inspection practices using visual checks, dimensional verifications, and go/no-go gauges. Plan testing approaches for joints when applicable, and document results for QA/QC. Emphasize safety, including PPE, proper handling, lockout/tagout where needed, and training on torque limits and equipment use.
Common faults and stepwise troubleshooting
When you’re having issues with your rebar couplers, use this checklist to diagnose and fix problems on-site.
- Misaligned threads: Check thread alignment using a template. If misaligned, adjust the coupler’s position or replace it if damaged.
- Damaged threads: Inspect threads for wear, corrosion, or damage. Replace couplers with damaged threads to maintain structural integrity.
- Incorrect coupler type: Ensure you’re using the right coupler for your rebar size and application. Mixing types can cause alignment issues.
- Insufficient seating: Check insertion depth. If insufficient, adjust or replace couplers to ensure proper grout or epoxy seating.
- Corroded surfaces: Inspect for surface corrosion. Clean and treat affected areas to prevent further deterioration.
- Loose clamps: Verify clamping force. Tighten if loose to maintain grip on rebar.
- Improper insertion: Ensure rebar is fully inserted into the coupler. Partial insertion can lead to alignment problems.
- Wrong sleeve type: Confirm you’re using the right sleeve for your application (e.g., standard, tapered). Using the wrong one can cause alignment issues.
Quick rule: Always double-check coupler types and sizes against project specs to avoid common mistakes.
Inspection, non-destructive testing, and documentation
Regularly inspect your couplers during installation to ensure they meet quality standards. Use this checklist for visual checks, torque tests, and NDT.
- Visual check: Inspect couplers for damage, corrosion, or misalignment before and after grouting.
- Torque test: Verify clamping force using a torque wrench. Check it’s within project specs to ensure proper grip.
- NDT for sleeves: Use ultrasonic testing (UT) or radiography (RT) to check sleeve integrity without damaging them.
- Thread inspection: Inspect threads visually and using go/no-go gauges to ensure they’re within tolerance.
- Grout quality: Check grout or epoxy seating quality. Ensure it’s well-compacted and free of voids.
- Centerline alignment: Verify centerline alignment of couplers with rebar using a plumb bob or laser level.
- Gap tolerance: Measure gaps between coupler and rebar. Ensure they’re within project specs to avoid misalignment.
- Documentation: Record all measurements, test results, and any remediation steps taken for out-of-tolerance joints.
Quick rule: Always compare your findings with project QA/QC plans and tolerance bands to ensure compliance.
Site safety and procedural precautions
Safety should always be a priority when handling rebar couplers. Use this checklist to keep your site safe.
- PPE: Wear appropriate PPE, including hard hats, safety glasses, gloves, and steel-toed boots.
- Safe lifting: Use proper lifting techniques and equipment (e.g., slings, hoists) to prevent injuries.
- Lockout/tagout: Implement LOTO procedures when working with power tools or energized equipment.
- Avoid pinch points: Be aware of potential pinch points. Keep loose clothing and jewelry away from moving parts.
- Hot works: Follow safety protocols for welding, including fire watches and proper ventilation.
- Heavy cage handling: Use temporary supports and proper techniques when handling heavy rebar cages to prevent collapse or injury.
- Training on torque limits: Ensure all workers are trained on proper torque limits and equipment use to avoid damage and injury.
- Emergency procedures: Establish clear emergency procedures for accidents, spills, or other incidents.
Quick rule: Always prioritize safety over speed. Take the time to follow protocols and use proper equipment.
Conclusion
Using rebar couplers correctly matters for safety, durability, and a clean finished look. Do the checks now so you don’t pay later with cracks or failed joints.
First, confirm the correct coupler type for your rebar size and follow the manufacturer’s specs. Dry-fit everything to check alignment and there is enough room for the couplers and any grout or bedding. Then plan fabrication and site readiness in logical steps: verify design, prepare materials and tools, set up a true, clean joint, and install in the specified order with proper alignment and seating before you move to the next joint. Finally, seal the job with a quick, practical inspection and a basic test if allowed by code, and keep notes for future work.
Common mistakes to avoid are using the wrong size or type of coupler, skipping alignment checks, and rushing through installation or testing. Always verify size and type first, do a careful dry-fit, and respect alignment tolerances. Wear proper PPE, keep the work area tidy, and never force a joint or bend that contradicts the design. If in doubt, stop and reassess rather than pushing ahead and risking a costly failure.
If the project involves critical structural loads, complex layouts, or you’re unsure about design compliance and local codes, call a professional to review plans and perform the install. When you do finish, you’ll have a solid, safe connection you can trust, and you’ll know exactly what to tackle next with confidence.
FAQ
What is a rebar coupler and why should I care?
A rebar coupler is a device that joins two pieces of rebar end-to-end so they act as one bar. It transfers load through internal threads or mechanical grip without tying knots. It helps create continuous reinforcement with fewer weaknesses at splices.
What are the benefits of using rebar couplers?
Couplers make stronger, cleaner splices than traditional lapping. They save space and reduce congestion around the joint. They also provide a verifiable, inspectable connection when installed correctly.
How do I choose the right rebar coupler for my project?
Match the coupler to the rebar size and grade you’re using. Check the manufacturer’s instructions for load path, installation torque or grip requirements, and any special alignment notes. Verify labels or datasheets and follow local rules or constraints from the job site.
What are good practices for construction work involving rebar splicing?
Keep reinforcement continuous where possible and ensure clean, straight ends before coupling. Align bars carefully so the splice sits in the correct orientation, and avoid creating gaps or misalignment during installation. Inspect the joint before concrete goes in; if in doubt, pause and verify with the label/instructions.