
Introduction
Painted plywood floors can be durable and stylish with proper preparation and technique.
You’ll learn how to identify common problems, explore practical ideas for finishes and aesthetics, and follow best‑practice steps to install, maintain, and repair painted plywood floors.
Key takeaways
- Assess plywood levelness and moisture before painting to prevent future buckling.
- Sand smooth, dust-free surface to maximize primer adhesion and finish uniformity.
- Use a compatible concrete or wood primer designed for floor paints.
- Apply thinning guidelines per product to avoid peeling and long cure times.
- Seal edges and seams to reduce water ingress and hide gap variations.
- Plan design to continue seams with color blocks and border trim.
Table of Contents
- Introduction
- Key takeaways
- Planning the Project: Is a Painted Plywood Floor Right for You?
- Preparing Plywood Subfloors for Painting
- Choosing Primer, Paint, and Sealers
- Step-by-Step Application: Primer, Paint, and Finishing
- Design Ideas and Concealing/Embracing Seams
- Tools, Materials Checklist and Cost Considerations
- Common Problems and How to Fix Them
- Finishing Touches, Trim, and Transitions
- Conclusion
- FAQ
Planning the Project: Is a Painted Plywood Floor Right for You?
Planning the project starts with a clear understanding of where painting plywood subfloors makes sense. In low- to mid-traffic rooms with short- to mid-term use, painting can be cost-effective and offer a fresh, durable surface when done correctly. In other cases, replacement or a different finish may be wiser, especially where moisture, heavy use, or long-term durability are concerns.
Consider room functions, traffic patterns, and expected lifespan to set realistic maintenance expectations. Check for permits, HOA or condo rules, and local building codes that may affect moisture barriers, ventilation, or ventilation requirements. A practical plan should outline underlayment choices, primer and paint types, and a maintenance routine to keep the finish looking responsible longer.
Intended use and traffic assessment
Before you start, consider the room’s function and expected wear. Painted plywood floors work best in low- to mid-traffic areas like bedrooms, living rooms, or playrooms.
Heavy traffic zones, such as entryways or kitchens, may see excessive wear and tear, requiring more frequent touch-ups or even replacement.
Also, think about cleaning routines. High-moisture areas like bathrooms or laundry rooms might not be ideal for painted plywood floors due to potential water damage.
Budget, timeline, and scope
A painted plywood floor is a cost-effective solution, but it’s essential to consider the entire project scope. It might be a temporary fix if you’re planning to sell your home soon or want to test out a color before committing to a permanent finish.
The timeline depends on prep work and drying time. Expect around 3-5 days for the whole process, including moisture testing, sanding, priming, painting, and sealing.
Material costs are low compared to other flooring options. You’ll need primer, paint, sealer, and possibly underlayment or leveler. Don’t forget to factor in labor if you’re hiring help.

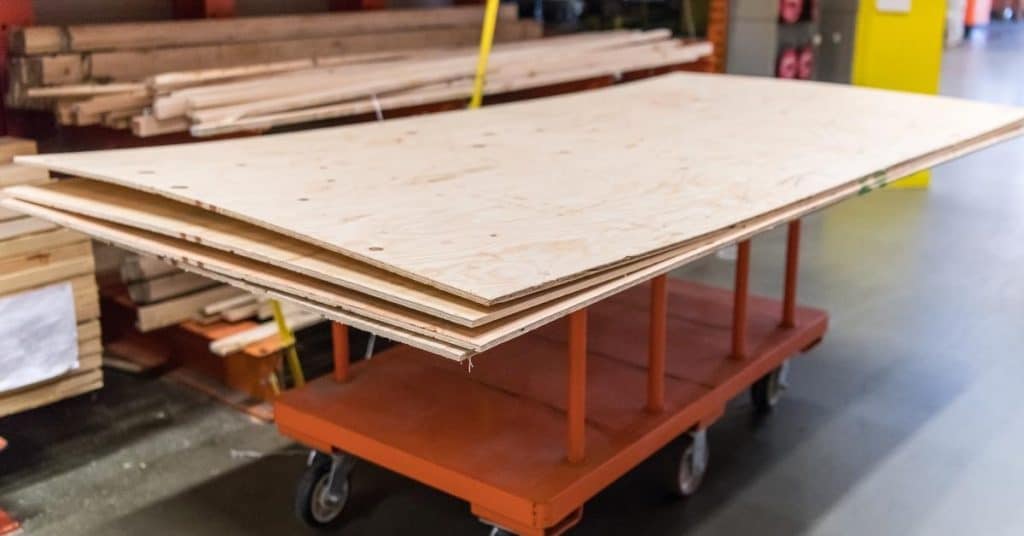
Preparing Plywood Subfloors for Painting
Start with a clean, dust-free surface to ensure the coating adheres properly and lasts. Remove debris, vacuum thoroughly, and wipe down with a mild cleaner before any sanding or filling begins. A fresh, uniform base helps prevent issues down the line.
Inspect for loose or damaged boards, fill gaps and nail holes, and address cupping or warping before proceeding. Test moisture and plan for proper ventilation during prep and application to keep safety and drying conditions in check.
Inspecting and repairing structural problems and seams
Before you start painting, it’s crucial to ensure your plywood subfloor is structurally sound. Here’s how:
Check for loose panels: Tap each panel with a hammer. A dull thud indicates a solid connection; a hollow sound means the panel might be loose.
Find squeaks: Locate squeaks by walking on the floor and listening. Once found, drive screws through the subfloor into the joists below to secure the panels.
Fill gaps and level uneven areas using wood filler or self-leveling compound. Ensure all seams are tight and even for a professional finish.
Cleaning, sanding, and removing contaminants
A clean surface promotes better paint adhesion. Start by removing any adhesives, nail/screw heads, or staples using a flathead screwdriver or pliers.
Vacuum thoroughly to remove dust, then wipe down with a mild cleaner like TSP (trisodium phosphate) mixed with water. Rinse and let dry.
Sanding is next. Start with 120-grit sandpaper to remove any remaining contaminants and create a smooth surface. Follow up with 150-grit for a fine finish. Always wear a dust mask and safety glasses.
Moisture check and moisture mitigation
High moisture content can cause paint failure. Use a moisture meter to test your subfloor. Acceptable moisture levels are typically below 12-15%.
If moisture is high, address the source: ensure proper ventilation, fix leaks, or consider using moisture-resistant plywood or coatings.
If drying out is needed, open windows, use fans, or consider renting a dehumidifier. Once moisture levels are acceptable, proceed with painting.
Choosing Primer, Paint, and Sealers
Evaluate primer and paint options suitable for plywood subfloors and how they influence durability, color retention, and slip resistance. Understand how each product works in the long run and what to expect from a given finish on a plywood substrate. This helps tailor choices to your room and traffic.
Follow proper sequencing and compatibility notes, then consider safety and VOC concerns, opting for low-VOC or water-based options where possible. Assess surface prep needs and how they affect moisture-related failures, wear, and overall performance over time.
Primer selection and when to use stain-blocking or bonding primers
Priming is crucial for painted plywood floors. It improves paint adhesion, seals the wood, and enhances color retention.
For plywood: Use a primer that bonds well with wood fibers. Oil-based primers are great for this. They penetrate deep into the wood and provide excellent adhesion.
Consider using tinted or stain-blocking primers if your plywood has tannins (natural compounds in wood) that can bleed through paint, causing discoloration. These primers prevent that by blocking stains and providing a uniform base for painting.
Paint types and sheens for floors
Choose paints designed for floors or porches. These are durable, long-lasting, and withstand foot traffic. Acrylic latex is a popular choice due to its durability, ease of application, and low VOCs.
Sheen matters too. For floors, consider sheens between 0 (flat) and 10 (high-gloss). Lower sheens hide imperfections better but are harder to clean. Higher sheens are easier to clean but show every scratch.
Slip resistance is also important. High-gloss paints can be slippery when wet, so consider satin or semi-gloss for safety.
Topcoat/sealer options and when to add one
A topcoat or sealer isn’t always necessary, but it can boost durability and longevity. It protects your paint from scuffs, scratches, and moisture.
Consider using a polycrylic or water-based polyurethane. These are durable, low-VOC options that provide excellent protection without yellowing over time.
However, if you’re happy with the durability of your paint alone and don’t mind occasional touch-ups, a topcoat might not be necessary. It’s up to you and your specific needs.
Step-by-Step Application: Primer, Paint, and Finishing
Define the exact workflow from prep to final cure, keeping a steady rhythm between steps to avoid laps or overlap issues. Emphasize the importance of proper cutting-in, rolling technique, and the role of drying times in achieving a durable finish. A well-ordered process helps prevent common paint defects.
Prepare primer guidance, choosing the right option for plywood subfloors and applying it with the correct thickness. Follow with careful painting steps, including temperature and humidity considerations, ventilation, and a final seal or topcoat as needed for abrasion resistance and moisture control.
Step-by-Step Process
This sequence will guide you through applying primer, paint, and finishing on your concrete surface. It’s crucial to follow these steps for a durable, long-lasting result.
- Gather materials: Have your primer, paint, brushes, rollers, tape, and safety gear ready. Check product labels for specific application requirements.
- Safety first: Put on gloves, goggles, and a respirator. Ensure the area is well-ventilated or use fans to direct fumes away from you.
- Prepare surface (briefly): If not already done, clean, repair cracks, and let it dry. A quick sanding can help paint adhesion. Check for any missed spots before proceeding.
- Apply primer: Using a roller or brush, apply a thin, even coat of primer. This seals the surface, improves paint adhesion, and helps prevent moisture damage. Let it dry as per manufacturer’s instructions (usually 1-2 hours).
- Tape off edges: Use painter’s tape to protect adjacent surfaces from overspray or drips. Press down firmly to ensure a good seal.
- Apply paint: Using a roller, apply the first coat of paint. Work in small sections, maintaining a ‘wet edge’ to avoid visible lines. Let it dry as per manufacturer’s instructions (usually 2-4 hours).
- Inspect and touch up: Check for any missed spots or imperfections. Lightly sand any raised grain with fine-grit sandpaper, then wipe off dust. Apply a second coat if needed, following the same drying time.
- Remove tape: Carefully pull off the painter’s tape while the paint is still wet to avoid pulling off dry paint. Check for any residue and clean it immediately.
- Final check and cure: Inspect your work for any defects. Allow the paint to fully cure as per manufacturer’s instructions (usually 24-72 hours) before exposing it to heavy foot traffic or harsh weather conditions.
Pro tip: Always follow the ‘rule of thumb’ – if you can’t see your thumbprint in the paint, it’s too thick. Apply thin coats for better adhesion and longevity.
Best practices for priming and first coat
Before you start, let the concrete cure for at least 28 days. This ensures it’s strong enough to paint.
Choose a primer designed for concrete. It should be tack-free in 1-4 hours, so you can apply your first coat without waiting too long. Check the label or manufacturer instructions if unsure.
Apply the primer using a roller or sprayer, working in small sections at a time. This helps prevent it from drying out before you’re done. Aim for a coat thickness of about 2-3 mils. Too thick and it’ll drip, too thin and it won’t protect.
Pay special attention to edges and seams. Use a brush or small roller to apply primer here, working it into the crevice. This helps prevent peeling later on. Don’t rush – take your time to do it right.
Painting techniques and multi-coat strategy
Alright, listen up. You’ve primed your surface, now it’s time to paint. Here’s how you do it right.
First off, choose the right roller cover. For most jobs, a 9-inch roller with 3/8 or 1/2 inch nap works best. Check your paint label for specifics. Now, grab a good quality brush for those corners and edges. A 2-inch angled sash brush is usually your friend.
When you start painting, work in manageable sections. Cut in the edges first with your brush, then use your roller to fill in the middle. Remember, two thin coats are better than one thick one. Aim for even coverage, not opacity in a single pass. Let the first coat dry according to the manufacturer’s instructions, usually around 4 hours or more.
Before you slap on that second coat, check for any missed spots or imperfections. Fix them now before they become bigger problems later. Then, apply your second coat using the same technique as the first. Let it dry and cure according to the paint’s instructions. And there you have it. A job well done.
Curing, recoat windows, and first-use timeline
After your final coat, you’re eager to use your space. But hold on a sec, mate. Curing ain’t just about waiting for it to dry.
Curing is when the paint film builds strength and durability. It takes time, usually around 21-28 days, depending on humidity and temp. Check your paint’s label for specifics. During this time, keep windows open for air circulation.
Now, about those windows. You can recoat them after the initial drying time, which is typically 6 hours. But remember, that ain’t curing time. So, be gentle with ’em until the full cure’s done.
As for walking and heavy use, give it a day or two after each coat to be safe. For furniture, wait till the final cure’s complete. Patience is key here, mate. Rushing can mess up your hard work.

Design Ideas and Concealing/Embracing Seams
Explore creative patterns and finishes that suit different spaces, from solid color blocks to decorative stripes or faux-plank looks. Each design choice carries its own maintenance considerations and suitability for the room’s use. Tailor the look to balance aesthetics with durability and cleaning needs.
Address seams by design when appropriate, using color strategies, subtle shading, or deliberate alignment techniques to achieve the desired effect. Prepare and finish the surface to support longevity, including moisture considerations and the right sealer or topcoat for abrasion resistance.
Techniques to hide seams and fasteners
Once you’ve sanded your plywood floor smooth, it’s time to tackle those pesky seams and fasteners. Here are a few tricks to minimize their visibility:
Seam filling: Use a lightweight spackling compound or wood filler to fill gaps between panels. Apply with a putty knife, let dry, then sand flush with the surface.
Caulking: For larger gaps or around edges, use paintable caulk. Smooth it out with your finger or a damp cloth for a seamless look.
Feathering primer/paint: Apply primer and paint in thin layers along the seam, gradually building up to match the surrounding surface. This helps blend seams into the rest of the floor.
Directional painting: Paint along the grain of the wood or in the direction of your pattern (if applicable). This draws the eye away from seams and makes them less noticeable.
Decorative finishes and patterns
Ready to add some pizzazz to your painted plywood floor? Here are a few simple pattern ideas:
Stripes: Measure and mark out stripe widths with painter’s tape. Apply base color, let dry, then apply contrasting stripes. Peel off tape before paint dries.
Checkerboard: Divide floor into squares using tape. Paint alternating squares in two colors. For crisp lines, use a straight edge to press down on tape before painting.
Faux plank: Paint wide stripes to mimic hardwood planks. Use different shades for added realism. To disguise joints, stagger seams like real wood flooring and paint over with a darker shade.
For all patterns, use a level or laser level to ensure straight lines. Maintain crisp edges by pressing down on tape firmly and using low-tack tape to avoid pulling up paint when removing.
Tools, Materials Checklist and Cost Considerations
Assemble a comprehensive toolkit and material list that covers sanding, patching, priming, coating, and protective gear. Organize items so you can move efficiently between prep and finishing without backtracking for missing supplies. A practical kit helps maintain workflow and quality.
Break down costs and estimate DIY material ranges while noting labor options if you hire a pro, with guidance on regional price variability. Use local suppliers and compare unit costs, delivery fees, and potential discounts to keep the project within budget and avoid surprises.
Essential tools and PPE
Before you start your concrete project, use this checklist to ensure you have all the necessary tools and safety equipment. This will help you work efficiently and safely.
- Respirator/Ventilation: Check that it’s in good condition and fits properly. Confirm it meets OSHA standards for silica dust protection (typically N95 or P100).
- Safety Glasses: Ensure they provide adequate eye protection, meeting ANSI Z87.1 standards.
- Work Gloves: Inspect for any tears or wear. They should provide a good grip and protect your hands from cuts and abrasions.
- Ear Protection: Check that they fit well and reduce noise levels to safe limits (typically below 85 dBA).
- Hard Hat: Inspect for cracks or damage. It should meet ANSI Z89.1 standards.
- Steel-Toed Boots: Ensure they provide adequate protection and have good traction to prevent slips and falls.
- Tape Measure: Check that it’s accurate (measure a known distance) and in good working condition.
- Level: Verify it’s level by checking against a straight edge or plumb bob. A 2′ or 4′ level is typically sufficient for most DIY projects.
- Shovel & Wheelbarrow: Ensure they’re in good condition and suitable for the job. For large jobs, consider renting or purchasing additional equipment.
Quick rule: Always prioritize safety over speed. Skipping PPE can lead to serious injuries, while skipping tool checks can result in inaccurate work and costly rework.
Material quantities and estimating coverage
Before you start your painting project, use this checklist to ensure you have the right amount of primer and paint. This will help you avoid running out mid-job or ending up with excess materials.
- Calculate room square footage: Measure the length and width of each wall in the room, then multiply them together to find the area. Don’t forget to account for doors and windows by subtracting their areas from the total.
- Check primer/paint coverage rate: Look at the product label or manufacturer’s instructions to find out how much coverage you can expect per gallon (usually around 300-400 sq ft).
- Estimate primer/paint needed: Divide the total room square footage by the coverage rate. This will give you an estimate of how many gallons you need.
- Add safety margin for waste: To account for spills, drips, and touch-ups, add 10-15% to your estimated quantity.
- Consider paint type and application method: Latex paints typically have better coverage than oil-based ones. Also, rolling or brushing will use less paint than spraying.
- Check for color changes: If you’re changing the wall color significantly, you may need more coats (and thus more paint) to achieve full coverage.
- Avoid skimping on primer: Skipping or skimping on primer can lead to poor paint adhesion and increased paint usage. Always use a high-quality primer suitable for your surface type.
- Be aware of “touch-up” gotchas: Don’t forget to account for touch-ups, especially in high-traffic areas like hallways or near light switches.
Quick rule: Always round up when estimating paint quantities. It’s better to have a little extra than to run out mid-project.
Common Problems and How to Fix Them
Identify the usual issues such as peeling, bubbling, visible seams, and scuffs, and understand their typical causes without overreacting. A clear troubleshooting path helps you diagnose quickly and move toward durable fixes. Focus on restoring a solid basis for the finish to perform well.
Follow a practical sequence for each issue: assess, clean, repair, prime, and repaint, with a distinction between quick fixes and longer-term repairs. Emphasize preventive steps like moisture checks, proper drying times, and robust topcoats to reduce recurrence.
Causes and fixes for peeling and delamination
Peeling paint on plywood floors is usually due to moisture, poor surface preparation, or incompatible coatings. Here’s how to fix it:
Moisture: If the subfloor is damp, let it dry completely before painting. Use a moisture meter to be sure.
Poor prep: Sand any raised grain and clean the surface thoroughly with a degreaser. Lightly sand again to degloss.
Incompatible coatings: Ensure your primer and paint are compatible with existing finishes. If unsure, strip the old paint and start fresh.
Repairing scratches, chips, and high-wear spots
Scratches and chips can be easily repaired with a bit of touch-up work:
For scratches: Lightly sand the area, apply touch-up paint, and seal. For deeper scratches, use a wood filler first.
For chips: Remove any loose chips, fill with wood filler, let dry, sand smooth, prime, and repaint.
For high-wear spots: Use a durable, high-gloss paint or apply a clear sealer to protect the area. Regularly inspect and touch up as needed.
Addressing odor, mold, and moisture-related failures
Odor and visible mold indicate a moisture problem. Here’s how to address it:
Mold: If mold is present, wear gloves, goggles, and a mask. Clean with a solution of water and detergent, then apply an antifungal treatment.
Odor: If there’s no visible mold but a musty smell persists, test for moisture. If positive, address the source (e.g., leaky pipe) and let the area dry.
Replacement: If plywood is soft or crumbles, it’s rotten and needs replacing. Safety first: if you suspect structural damage, consult a professional before proceeding.
Finishing Touches, Trim, and Transitions
Install baseboards and quarter rounds to create clean, professional edges along walls, selecting material and nail or seal methods that minimize chipping. Ensure a cohesive look that protects edges and supports long-term wear. Align trim with the painted surface for a seamless transition.
Choose transition strips and edge treatments that preserve movement gaps and moisture control while matching the painted aesthetic. Address edge cleanups and ensure transitions stay visually consistent as the space experiences seasonal changes and foot traffic.
Cutting and installing trim over painted plywood
When cutting trim, use a sharp blade to avoid damaging the paint. A fine-tooth saw or a miter box works best.
To install without marring the finish, use a nail gun with 15-16 gauge brad nails. Drive them in at an angle for better holding power.
Tip: Before nailing, lightly score the back of the trim where you’ll drive the nails. This helps prevent splitting.
Choose trim profiles that complement your painted floor. Simple, clean lines work well with painted plywood. Consider using quarter round for a subtle touch or wider baseboards for a more formal look.
Transition solutions to carpet, vinyl, or hardwood
For transitions to carpet, use a T-molding. It fits over the edge of your plywood and tucks into the carpet. Make sure it’s tight against both surfaces.
To vinyl or hardwood, use an end cap. This piece sits on top of your plywood and butts up to the other floor type. Ensure they’re level with each other for a seamless look.
For doorways, consider using a threshold strip. It covers the gap between rooms and provides a smooth transition. Choose one that matches your painted floor’s color and finish.
Tip: Always leave an expansion gap at transitions to allow for seasonal movement of the floors.

Conclusion
With the right plan, the floor will look good and last. Focus on safety, a solid base, and patient application to avoid costly mistakes.
Confirm the subfloor is sound and dry, patch gaps, sand smooth, and clean thoroughly. Choose primer that suits plywood, test a small area, then apply primer evenly and let it dry. Roll on the paint in thin, even coats, usually two, and finish with the appropriate sealer or topcoat. Check seams and transitions as you go, allow full cure time, and protect the floor during curing. Finally, plan for maintenance and use, and keep a simple tools-and-materials checklist handy so you don’t wander off course.
Avoid common missteps: skipping the small-area test before full application, painting over a damp or dusty surface, using the wrong primer or paint for plywood, or rushing coats and sanding between steps. Always wear proper safety gear, work in a well-ventilated area, and follow manufacturer directions. If the floor shows woke-up issues like severe water damage, movement, or persistent peeling after a couple of attempts, call a professional—the extra cost is cheaper than ripping out a failed finish. Stay practical, stay patient, and the floor will perform well and look right for years to come.
FAQ
Do painted plywood floors scratch easily?
Yes, they can. Use felt pads on furniture and avoid dragging heavy objects. Scan for high-traffic spots and touch up as needed with the original paint.
Can I repaint if the finish starts chipping?
You can, but prep matters. Sand the area lightly, clean it, and apply a compatible topcoat. Don’t skip adhesion between layers or you’ll see peeling again fast.
What’s the best way to clean painted plywood floors?
Use a damp mop with a mild detergent. Avoid soaking the floor and don’t use harsh chemicals. Dry the surface after cleaning to prevent water damage.
Is it worth sealing painted plywood floors?
Yes, a clear sealer helps protect the paint and wood. Pick a sealer compatible with the paint you used. Reapply as needed when wear shows or the gloss dulls.