

Introduction
Excess moisture in a plywood subfloor must be removed to prevent warping and mold. In this guide you’ll learn practical steps for drying the subfloor, identifying moisture hotspots, and choosing safe methods for ventilation, heating, or desiccants. You’ll also gain tips on determining when the plywood is dry enough to proceed with repair or flooring installation.
Key takeaways
- Identify moisture signs: musty smell, staining, soft edges, or cupped plywood.
- Drying requires air flow, dehumidification, and controlled humidity to prevent mold.
- Safety first: shut off utilities, wear goggles, gloves, and use respirator.
- Assess structural damage before drying; replace damaged plywood sections as needed.
- Install vapor barrier properly, and improve ventilation to curb future moisture.
- Expect delays with finished floors; plan underlayment and levelling during repair.
Table of Contents
- Introduction
- Key takeaways
- Quick diagnosis: Is your plywood subfloor wet or damaged?
- Common causes of moisture in plywood subfloors
- Safety and prep before removing moisture or repairing
- Step-by-step method to remove moisture and dry a plywood subfloor
- Repairing and replacing damaged plywood subfloor sections
- Prevention: vapor barriers, ventilation, and long-term moisture control
- Impact on finished floors and when to delay installation
- Costs, timelines, and common mistakes to avoid
- Conclusion
- FAQ
Quick diagnosis: Is your plywood subfloor wet or damaged?
Start with a visual scan for obvious damage like warping, cracks, or staining near walls and plumbing penetrations. Look for signs of water intrusion around HVAC penetrations or door thresholds. If you see mold or delamination, note the area for further checks.
Then probe for hidden moisture: soft spots, hollow sounds when tapped, musty odors, or squeaks that indicate underlying issues. Use a moisture meter to check MC where feasible, and record the temperature and humidity of the room. If readings trigger concern or you can’t determine the cause, call a pro for a more thorough assessment.
Visual signs of moisture and mold
Start by giving your subfloor a thorough visual inspection. Look for any obvious signs of water damage:
Warping: Check for cupping, crowning, or sagging. Recent wetting will cause plywood to warp temporarily, while long-term exposure can lead to permanent deformation.
Staining and mold growth: Dark spots, stains, or discoloration could indicate water intrusion. Mold typically appears as black, green, or white patches, often accompanied by a musty odor.
Soft spots and delamination: Press down on the subfloor with your hands or use a screwdriver to gently prod it. Soft spots or areas that feel hollow may indicate hidden damage or rot. Delamination occurs when layers of plywood separate due to excessive moisture.
Using tools to detect hidden moisture
Moisture meters and infrared cameras can help you locate hidden water issues. Here’s how to use them:
- Moisture Meter (Pin-type): Insert the pins into the subfloor at various locations, especially around walls and penetrations. Target moisture content (MC) for interior plywood is typically 6–12%. Readings above 15% may indicate a problem.
- Moisture Meter (Pinless): Pass the meter over the subfloor to get quick, non-destructive readings. Keep in mind that pinless meters are less accurate than pin-type meters.
- Infrared Camera: Scan the subfloor for temperature differentials, which can indicate moisture. Warm spots may suggest hidden water intrusion. Rental prices vary but expect to pay around $50–$100 per day.
- Probe (Optional): If you suspect deep-seated moisture, use a probe to poke holes in the subfloor and check for dampness. This method is destructive but can provide valuable insights.
- Temperature and Humidity: Record ambient temperature and relative humidity during testing. Cold or damp conditions can skew moisture meter readings.
Assessing structural integrity
Before attempting to dry out your subfloor, ensure it’s still structurally sound. Perform these simple tests:
Sound testing: Tap the subfloor with a hammer or tap rod. A dull, hollow sound may indicate rot or delamination. A solid, clear sound suggests the plywood is intact.
Probing and joist inspection: Use a screwdriver to probe soft spots and check for rot. Inspect joists and other structural components for signs of damage. If you find extensive rot, warping, or delamination, the subfloor may need to be replaced rather than dried.
Squeaks and bounces: Check for excessive squeaking or bouncing when walking on the upper floor. These can indicate damaged joists or subfloor, which may require professional attention.

Common causes of moisture in plywood subfloors
Plumbing leaks are a frequent culprit. Signs include water stains, softened plywood, or damp crawlspaces under the floor. If you suspect a leak, verify with pipe tests or access panels before proceeding.
Roof and wall intrusion, high indoor humidity, and vapor drive from crawlspaces are other sources. Inspect for interior staining, musty odors, and warped panels. Check for proper ventilation and seal any gaps around exterior penetrations as part of the fix.
Exterior and Plumbing Sources
Moisture from outside and plumbing leaks are common culprits in subfloor dampness. Here’s how to spot and trace them:
Roof and wall water intrusion: Check for stains, musty odors, or warped panels. Inspect roof flashings, gutters, and splash zones for overflow. Use a ladder and flashlight for a thorough check.
Plumbing leaks: Look for water stains, soft plywood, or damp crawlspaces. Verify leaks with pipe pressure tests, access panels, or infrared scanning. Contact a plumber if needed.
Indoor Humidity and Vapor Migration
High indoor humidity can cause condensation and moisture buildup in your subfloor over time. Keep an eye on these:
Condensation: Use a hygrometer to monitor relative humidity (RH) levels. Aim for 30-50% RH in living zones, less in storage areas. Ventilate and dehumidify as needed.
Vapor barriers: Ensure your crawlspace or basement has proper vapor barriers and insulation. Check transitions between the crawlspace and subfloor for gaps that could let moisture in.
Field tests: Tape clear plastic sheets to walls and floors, then check for condensation after a few days. If present, improve ventilation and consider using a dehumidifier.
Installation and Material Issues
The right materials and installation techniques are crucial to prevent moisture problems. Here’s what to look out for:
- Using OSB instead of plywood in high-moisture areas: OSB can swell, crack, or delaminate when exposed to moisture. Stick with plywood in damp zones.
- Improper flashing: Ensure all seams and edges are properly flashed to prevent water intrusion. Check for gaps or missing pieces during installation.
- Gaps between sheets: Leave no gaps between subfloor sheets. Fill any voids with appropriate fillers before installing the next layer.
- Incorrect fastener patterns: Follow manufacturer’s guidelines for proper spacing and depth of fasteners to avoid weak bonds and warping.
- Failure to acclimate wood: Allow plywood sheets to sit in the job site for at least 48 hours before installation. This helps them adjust to local humidity levels and reduces the risk of movement later on.
Safety and prep before removing moisture or repairing
Wear proper PPE: respirators or N95s, gloves, eye protection, and coveralls. Establish a plan to contain dust and moisture so neighboring finishes aren’t exposed to work during remediation.
Shut off utilities as needed and coordinate with a licensed pro if plumbing or electrical work is involved. Set up plastic barriers and a dedicated work zone to protect occupants and prevent cross-contamination.
Personal protective equipment and mold safety
Before you start, gear up to protect yourself from mold spores and moisture. Here’s what you need:
- Respirator/N95 mask with P100 filter: Protects against mold spores and dust. Make sure it fits properly.
- Disposable coveralls: Keeps your clothes clean and prevents cross-contamination. $5-$10 per set.
- Gloves: Protects hands from moisture and mold. Choose nitrile or latex, around $2-$5 per pair.
- Eye protection/goggles: Shields eyes from dust and debris. Around $10-$20.
- Shoe covers: Prevents tracking mold spores and moisture. Around $5-$10 for a pack of 10.
Preparing the space and utilities
Secure your work area to ensure safety and minimize damage:
Power: Shut off electricity at the main panel. Disconnect nearby outlets to prevent accidental shock.
Water: If there are leaking pipes or fixtures, coordinate with a licensed plumber to fix them before proceeding. Consider turning off the main water supply as a precaution.
Furniture and flooring: Remove or cover furniture, flooring, and finishes adjacent to the work area using drop cloths and taped plastic barriers to protect them from moisture and dust.
Ventilation: Seal doors with plastic sheeting. Set up a dedicated dust containment zone with negative air pressure or HEPA filtration to protect surrounding finishes during drying.
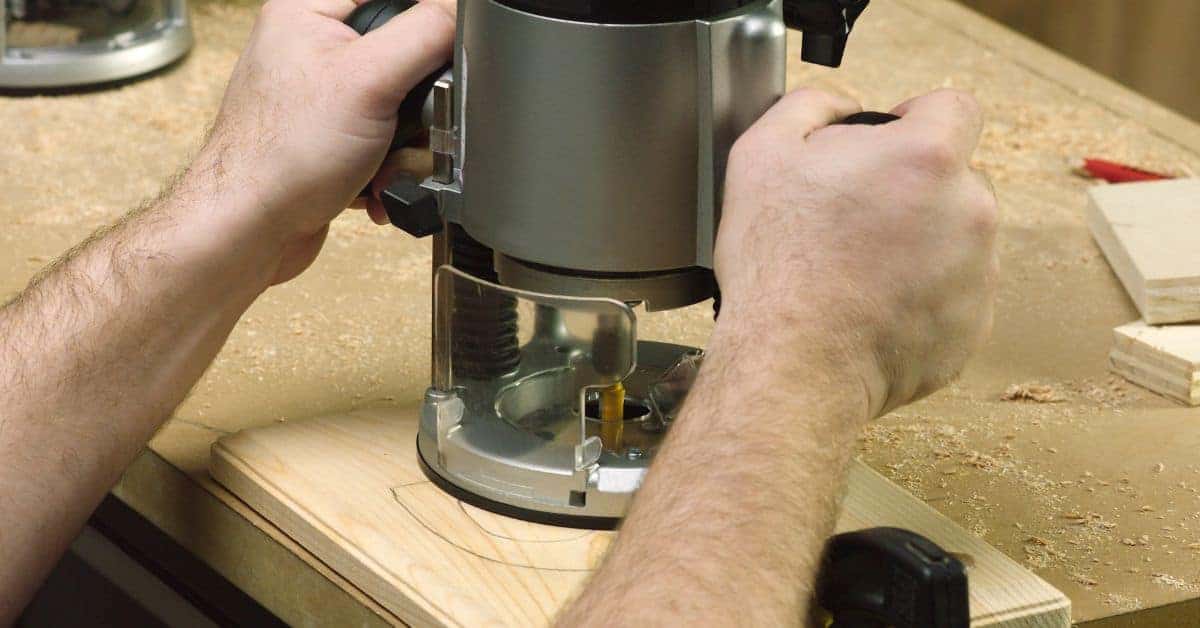
Step-by-step method to remove moisture and dry a plywood subfloor
Document the moisture source first and contain it to stop ongoing intrusion while you plan remediation. Remove coverings and affected furnishings so you can access the subfloor easily.
Drying tools like dehumidifiers and fans should be placed strategically with a plan for milestones. Start drying from the top surface and work down into joist cavities, maintaining controlled airflow and monitoring progress closely.
Step-by-Step Cleaning Process
The following steps guide you through the process of removing moisture and drying your plywood subfloor, ensuring a thorough job with minimal effort.
- Put on safety gear: gloves, goggles, and a respirator to protect against mold spores.
- Document the affected area by taking photos or notes. This helps track progress and identify any recurring issues.
- Remove or lift any coverings like carpet, underlayment, or rug pads from the affected area. Be careful not to cause further damage.
- Inspect the subfloor for signs of mold, rot, or delamination. Mark surfaces that will need priming, sealing, or replacement after drying.
- Set up your drying tools – dehumidifiers, fans, and HEPA filters – according to the affected area’s size. Run them continuously for 24-48 hours initially, then reassess.
- After initial drying, check moisture levels using a moisture meter. Target plywood moisture content below 15%.
- If mold is present, use an antimicrobial treatment or encapsulant, following the manufacturer’s instructions. If the area is large or severely affected, consider hiring a professional.
- Recheck moisture levels after another 24-48 hours of active drying. If progress is slow or levels remain high, consult with a pro to ensure no underlying issues are present.
Stop the source and remove wet coverings
First, identify and fix any leaks or humidity sources driving the moisture issue. This could be a leaky pipe, window, or door seal.
Next, carefully remove or lift any wet coverings like carpet, underlayment, or rug pads from the affected area. Wear gloves to protect your hands and avoid slipping.
If plywood sections are obviously unsalvageable due to rot or delamination, mark them for replacement. Cut out these sections if necessary, but be careful not to damage surrounding areas.
Drying techniques: passive and active
To effectively dry your plywood subfloor, consider both passive and active drying methods:
Passive drying involves natural ventilation. Open windows and doors to encourage airflow, but be mindful of outdoor humidity levels that could hinder the process.
Active drying uses tools like air movers (fans), dehumidifiers, and heaters. Place fans along walls or in corners to promote cross-ventilation. Position dehumidifiers near the subfloor’s center for optimal moisture removal. Monitor these tools every 24 hours, emptying water trays and cleaning filters as needed.
Treating mold, mildew, and odor
If mold or mildew is present, use a suitable cleaning agent like white vinegar, hydrogen peroxide, or a commercial mold remover. Always test on a small area first to ensure it doesn’t discolor the subfloor.
After cleaning, apply an antimicrobial treatment or encapsulant according to the manufacturer’s instructions. These products prevent mold regrowth and seal the surface.
For severe cases or large affected areas, consider hiring a professional remediation service. They have specialized equipment and training to handle extensive mold issues safely and effectively.

Repairing and replacing damaged plywood subfloor sections
Decide patching versus full replacement by assessing the extent of moisture damage, delamination, and warp. When in doubt, prioritize stability and height consistency with replacements where needed.
Measure moisture content and check for mold or rot before installation. Acclimate new panels, verify proper thickness, and plan for tight seams and flush surfaces with the rest of the subfloor.
Criteria for patch versus full replacement
Assessing the extent of moisture damage is crucial when deciding between patching and full replacement. Here are practical rules to guide your decision:
Patching: If the damaged area is small (less than 12″ x 12″), with minimal delamination, warp, or rot, and the moisture content of the plywood is below 15%, you can consider patching. Ensure the edges are cleanly cut and free from rot.
Full replacement: If the damage covers a larger area, shows extensive delamination, warping, or rot, or if the moisture content is consistently above 15%, it’s best to remove and replace whole panels. This maintains floor stability and height consistency.
Stepwise replacement of plywood panels
Here’s a step-by-step process for replacing damaged plywood sheets:
1. Cut out damaged sheets: Using a circular saw, carefully cut along the joists to remove the damaged panel. Ensure you don’t damage the joists.
2. Measure and fit new panels: Measure the removed panel’s dimensions. Cut a new exterior-grade or marine plywood sheet to match. Allow it to acclimate in your environment before installation.
3. Fastener spacing and sealing seams: Align the grain direction of the new panel with the existing subfloor. Fasten it using corrosion-resistant screws or ring-shank nails, spaced no more than 6″ apart along joists and edges. Apply structural plywood adhesive to seal seams if recommended.
Leveling, screwing, and preparing for finish flooring
To ensure a smooth transition with your finish flooring, follow these steps:
1. Gap allowances: Leave a 1/8″ gap between the new panel and existing subfloor to account for expansion. Fill this gap with a suitable sealant or foam backer rod.
2. Adhesive practices: If using structural plywood adhesive, apply it evenly along the tongue-and-groove edges of both the old and new panels before joining them.
3. Screw patterns and moisture-proofing: Fasten the new panel with a screw pattern similar to the existing subfloor. Ensure screws are flush or slightly countersunk. Before installing hardwood or other finishes, apply a moisture barrier if necessary, following the manufacturer’s instructions.
Prevention: vapor barriers, ventilation, and long-term moisture control
Choose a vapor barrier appropriate for the subfloor and moisture conditions; ensure seamless coverage and proper overlaps. Seal edges to minimize ground moisture ingress.
Crawlspace encapsulation and proper ventilation help stabilize humidity. Use HVAC and dehumidification strategies that suit the space and maintain consistent conditions to reduce condensation risks.
Choosing and installing vapor barriers correctly
Vapor barriers are your first line of defense against moisture. Place them under the plywood subfloor, between it and the concrete slab.
Material: Use 6–10 mil or higher polyethylene sheeting. Thicker isn’t always better; it can trap moisture if not properly installed.
Installation: Ensure seamless coverage with tight seam overlaps, no gaps. Seal edges with tape to prevent ground moisture ingress. Avoid common mistakes like installing barriers over insulation (it traps moisture) or using permeable materials (they let moisture through).
Crawlspace and subfloor ventilation best practices
Ventilation is crucial, but it’s not one-size-fits-all. For humid climates or when the crawlspace is vented into living space, consider encapsulation instead of ventilation.
Encapsulation: Install a continuous moisture barrier on walls and floor, seal vents, add drainage/sump considerations, and maintain proper insulation to reduce humidity fluctuations.
Ventilation: If you choose to ventilate, size vents based on crawlspace area (1 sq ft of vent per 500 cu ft of space). Install mechanical ventilation if natural airflow is insufficient. Ensure unobstructed airflow paths and balance exhaust/intake for proper air circulation.
Routine monitoring and maintenance
Maintaining your home’s moisture control system isn’t a set-it-and-forget-it task. Regular checks ensure everything stays in tip-top shape.
Moisture Checks: Install moisture sensors or meters in key areas (like corners, near plumbing). Check them seasonally after rain or thaw cycles to catch any issues early.
Plumbing Inspections: Regularly inspect your plumbing for leaks. Even small leaks can cause big problems over time.
Seasonal Adjustments: Adjust ventilation and HVAC/dehumidification settings seasonally to account for changing humidity levels. Document corrective actions to prevent recurrence.
Impact on finished floors and when to delay installation
Moisture-damaged subfloors affect hardwood, tile, and laminate differently, often causing gaps, cupping, or adhesive failure. Expect variability in how each finish responds to residual moisture.
Establish target moisture content and humidity ranges before installing new floors. Plan acclimation and post-drying checks to confirm stability and prevent future problems.
Effects on hardwood, engineered wood, and tile
Moisture-damaged plywood subfloors can wreak havoc on your finished floors. Here’s what to expect:
Hardwood & Engineered Wood: Moisture causes these woods to expand and contract. You’ll see:
- Gapping: Floors shrink when it’s dry, leaving gaps between planks.
- Cupping: Boards warp into a cup shape due to uneven moisture absorption.
Tile: Moisture weakens adhesive bonds. Expect:
- Adhesive failure: Tiles lift or crack due to poor adhesion.
- Bond issues: Water undermines the bond between tile and subfloor, leading to instability.
Moisture thresholds and testing before installation
Before installing your finish floor, test your subfloor’s moisture levels. Here are typical targets:
- Plywood moisture content: 12% or less for hardwood, 8-10% for laminate.
- Relative humidity (RH): 35-65% for hardwood, 40-60% for tile.
Use a moisture meter to check. Test in multiple spots and average the results. If readings are high:
- Wait until levels drop within acceptable ranges.
- Consider temporary coverings or dehumidification to speed up drying.
Costs, timelines, and common mistakes to avoid
Identify what is affected—subfloor, underlayment, and potential framing—to plan remediation steps. Understanding the moisture source helps keep scope in check and timing realistic.
Be wary of skipping moisture testing or ignoring leaks. Rushing to install finishes can lock in problems; weigh when to hire a professional for complex or persistent moisture issues.
Typical Timelines and Cost Drivers
The time and expense of removing moisture from a plywood subfloor vary greatly depending on the extent of damage, drying time, materials needed, and whether you hire professionals. Expect projects to take anywhere from a few days to several weeks.
Costs: DIY materials like sealants ($20-$50), dehumidifiers ($100-$300), fans ($10-$50 each), and moisture meters ($20-$100) can add up. Professional services, such as inspection ($100-$300), drying ($20-$60 per sq ft), and mold remediation ($15-$30 per sq ft), significantly increase costs.
Timelines: Plan for a phased timeline: Inspection (1-2 days), moisture testing (1 day), temporary mitigation (1-2 days), drying/heating (3-7+ days depending on moisture levels and season), re-testing (1 day), and final restoration (1-2 days). Contingencies may be needed for extended moisture or structural repairs.
Common DIY Errors and How to Avoid Them
To prevent further damage and costly mistakes, steer clear of these common pitfalls when tackling moisture issues in your plywood subfloor.
- Skipping initial moisture testing: Always test for accurate readings before starting any work. Use a reliable moisture meter to avoid under- or over-drying.
- Ignoring hidden leaks: Thoroughly inspect the area, including adjacent framing and underlayment, to identify all sources of moisture.
- Failing to address the moisture source: Fix leaks promptly and improve ventilation to prevent recurrence.
- Under- or over-drying: Monitor moisture levels closely. Aim for a target moisture content of 12%-15% before installing finish flooring.
- Using improper fasteners or sealants: Choose appropriate materials designed for subfloor applications to ensure proper adhesion and longevity.
- Neglecting mold risk or ventilation: Keep the area well-ventilated during drying, and address any signs of mold growth immediately to prevent health risks and further damage.
Regularly review these common mistakes and adjust your approach as needed to ensure a successful outcome.
Conclusion
Taking control of moisture in a plywood subfloor protects the structure, keeps finished floors from cupping or staining, and saves you costly repairs later. Stay focused on safety, test small areas first, and follow practical steps to dry, repair, and prevent repeat moisture.
Check the area in this order: verify moisture with a meter or quick test, reduce humidity and improve ventilation, remove any standing water, dry the surface and framing as needed, inspect for warped or damaged panels, replace only damaged sections if possible, and seal with a proper vapor barrier before any finish work. If you encounter hidden rot, delamination, or mold growth, pause and reassess before continuing; never push forward with compromised material.
Common mistakes to avoid include skipped safety gear, using heat or fans without monitoring for rapid, uneven drying, and trying to dry or repair without addressing the source of moisture. Always test a small area first, keep power tools dry, and document what you find so you can plan repairs and future prevention. If the subfloor is severely soaked, warped, or repeatedly damp, call a professional rather than pushing ahead, and remember that a solid seal and proper ventilation make finished floors last longer.
FAQ
How can I tell if the subfloor is really wet?
Look for damp spots, a musty smell, and discoloration. Use a moisture meter if you have one, check near pipes and corners. If the wood feels soft or sounds hollow when tapped, stop and reassess.
What is the fastest safe way to dry plywood subfloor?
Boost airflow with fans and dehumidifiers. Remove standing water and fix the leak first. Don’t rush to cover or lay new plywood until the wood is dry to a stable moisture level.
Should I use a dehumidifier in the room?
Yes. Run it in the room with the subfloor exposed. Keep humidity low but avoid over-drying walls or cabinets.
Can I just seal the surface to stop leaks?
No. Sealing a wet subfloor hides the problem. Fix the moisture source, dry the wood, then inspect for rot before replacing panels.