
Introduction
Installing plywood flooring over concrete requires proper moisture control and surface preparation to prevent failures.
You’ll learn practical steps for assessing moisture, choosing the right plywood and fasteners, and applying an appropriate underlayment, plus tips to avoid common mistakes.
The guide walks through real-world considerations and gives rules of thumb to help you plan, prep, and execute a durable install.
Key takeaways
- Test slab moisture with calibrated meters and patch test areas before installation.
- Ensure vapor barrier and underlayment meet manufacturer moisture and compression requirements.
- Acclimate plywood in ambient conditions for 48-72 hours prior to installation.
- Level and clean concrete surface, fill low spots, and remove adhesive residues.
- Follow grain orientation per sheet, staggering joints for stability and appearance.
- Seal edges and transitions, maintain expansion gaps, and tape perimeter efficiently.
Table of Contents
- Introduction
- Key takeaways
- Overview and Project Planning
- Moisture and Concrete: Tests, Limits, and Vapor Control
- Subfloor Preparation — Cleaning, Leveling, and Repair
- Plywood Selection, Acclimation, and Grain Orientation
- Fastening, Adhesives, and Edge Sealing
- Expansion Gaps, Perimeter Clearance, and Transition Details
- Common Failure Modes and How to Prevent Them
- Seasonal, Environmental, and Long-term Maintenance Considerations
- Conclusion
- FAQ
Overview and Project Planning
Define the scope of your plywood flooring project and set clear success criteria. Identify the rooms involved, the desired layout, and how the final height will relate to adjacent surfaces. Note constraints like radiant heat, slab grade, and existing moisture concerns.
Assess subfloor conditions and moisture risk before you start. Plan for concrete slab tests, crack presence, sealants, cleanliness, and levelness. Outline acceptable moisture thresholds for the method you choose and decide whether to DIY or hire a pro based on complexity and safety concerns.
Assessing Site Conditions and Goals
Before you start, understand your room’s needs. What’s the traffic like? Heavy furniture? Kids running around?
Moisture risk is crucial. Basements are damp; slab on grade can be too. Test for moisture with a calcium chloride test or a humidity meter.
Choose plywood based on use and finish. For heavy traffic, go thicker (3/4″ or 1/2″). For light traffic, 1/4″ might do. Consider tongue-and-groove edges for better stability.
Permits, Timeline, and Budget Considerations
Timeline: Plan for prep work (cleaning, sealing), acclimation (7-10 days), installation, and curing. Don’t rush.
Budget: Include materials (plywood, underlayment, adhesives, fasteners), moisture mitigation (sealants, membranes), tools (saw, nailer, trowel), and labor contingency if hiring help.
Permits: Check local codes. You might need permits for structural changes or if your project affects egress. Inspections may be required too.

Moisture and Concrete: Tests, Limits, and Vapor Control
Explain why moisture in concrete is a leading failure driver for plywood over concrete. Describe how moisture can affect adhesives, underlayment, and long term floor stability. Link these risks to your installation method choices.
List essential moisture checks to run or verify if unsure, including surface moisture tests, in-slab RH testing, and calcium chloride methods where appropriate. Clarify what each test reveals and its limitations so you can interpret results correctly for adhesive or underlayment choices.
Recommended moisture tests and interpretation
Before you start your plywood flooring installation, it’s crucial to test for moisture. Here are the key tests:
Surface Moisture Test: This checks surface moisture using a pinless moisture meter. Safe range is 4-6%.
In-slab RH Testing (ASTM F2170): This measures relative humidity within the slab. Acceptable range is 50-75%.
Calcium Chloride Test (ASTM F1869): This measures moisture vapor emission rate. Safe result is below 3 lbs per 1000 sq ft per 24 hours.
Vapor barriers, damp-proofing, and adhesive choices
Based on your moisture test results, choose the right materials:
Vapor Barriers: Place these between slab and underlayment to prevent moisture from rising. Use if RH is over 75%.
Adhesives: Choose adhesives rated for your measured moisture levels. For high moisture, use moisture-curing adhesives.
Underlayments: Consider 3-in-1 underlayments that combine vapor barrier, underlayment, and adhesive in one product. They’re convenient but can limit access to slab for future repairs.
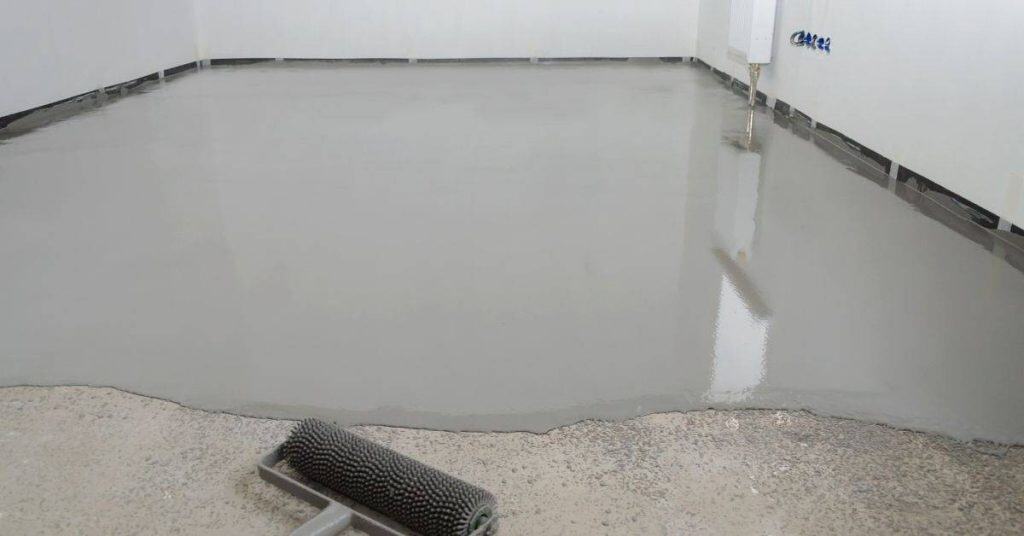
Subfloor Preparation — Cleaning, Leveling, and Repair
Outline a thorough cleaning protocol to remove dust, grease, oil, old adhesives, and sealers. Specify compatible degreasers and how they interact with plywood adhesives. Establish a clean, porous surface as the foundation for bonding.
Discuss leveling and repair steps, including addressing high spots with grinding and low spots with patching or self-levelers. Cover cracks, spalls, and joints per product specs and give practical tolerances to follow during prep.
Cleaning and contaminant removal
Start by removing all visible dust, dirt, and debris from the concrete surface using a broom, vacuum, or shop vac.
Next, tackle any grease, oil, paint, or old adhesives. Use a degreaser suitable for concrete and plywood adhesives. Follow manufacturer’s instructions to avoid damaging the concrete or compromising adhesion.
For tough contaminants like laitance (a cement-rich layer), you might need to use a more aggressive approach such as grinding with a diamond cup wheel or using a chemical remover specifically designed for laitance.
Leveling, flatness tolerances, and repair methods
Before leveling, check your concrete’s flatness. Aim for a tolerance of no more than 1/4 inch over 10 feet. This ensures a stable surface for your plywood.
For low spots, use a patching compound or self-leveler to fill dips. Follow manufacturer instructions for mixing and application. For high spots, grinding with a diamond cup wheel can help level the surface.
If you encounter structural issues like cracks, spalls, or damaged joints, address them before proceeding. Use an appropriate repair method as per product specifications. If in doubt, consult a professional.
Plywood Selection, Acclimation, and Grain Orientation
Cover plywood types and grades suitable for concrete installations, considering moisture resistance and underlayment compatibility. Note common options and provide practical pros and cons without making brand claims. Address VOCs and cost considerations relevant to concrete subfloors.
Present a plan for moisture testing and acclimation, including target ranges for plywood panels and monitoring during a standard acclimation period. Explain how to plan panel thickness, surface prep, and compatibility with moisture barriers and bonding methods.
Choosing the right plywood and specs to check
When picking your plywood, don’t just grab the cheapest. You’ll regret it later. Here’s what you need to check:
Thickness: Make sure it matches your project needs. Common thicknesses are 1/2″, 5/8″, and 3/4″. Check your plans or local codes if unsure.
Veneer Grade: This affects the plywood’s strength and appearance. For most DIY projects, C-D grade is fine. If you’re building something that’ll show, consider A-B. Check the label or ask at the store.
Moisture Content: Too much can warp your project. Look for plywood with a moisture content of around 12-15%. If it’s higher, let it acclimate to your job site before using (see earlier section on acclimation). Check the label or ask about testing.
Bond Type: This affects how the plywood layers stick together. For most projects, Exterior Glue is best. If you’re unsure, check your plans or local codes. Ask at the store if you need help.
Proper acclimation procedure and common mistakes
Before you start working with your plywood, it’s crucial to get it acclimated properly. Here are some common mistakes to avoid.
- Cross-stacking sheets – This can trap moisture and lead to warping or delamination. Always store sheets flat on the ground, not standing up against each other.
- Exposing plywood to extreme temperatures or humidity – Plywood needs time to adjust to your home’s environment. Keep it in a room with consistent temperature and humidity levels (ideally between 60-80°F and 30-50% RH) for at least 72 hours before installation.
- Ignoring signs of improper acclimation – If your plywood starts to warp, cup, or delaminate during the acclimation period, it’s a sign that something went wrong. Check your storage conditions and consider returning the sheets if they’re severely affected.
Take these points seriously, and double-check them before you start working with your plywood. A few days of proper acclimation can save you a lot of headaches down the line.
Grain direction and panel layout best practices
When laying plywood, the grain should usually run perpendicular to your subfloor joints. This is because wood’s strength runs along its grain, so this orientation provides maximum stiffness.
If you lay panels with their grain parallel to the joints, they can sag and move over time, leading to squeaks and even structural issues. So, always check your layout to ensure grains are perpendicular.
Here’s a simple layout pattern to follow: Start at one corner of the room, lay your first panel with its grain running left-to-right or front-to-back. Then, offset each subsequent row by half a panel width to stagger the joints and distribute support evenly.

Fastening, Adhesives, and Edge Sealing
Detail fastener types and patterns by install method, including glue-down versus floating options. Recommend appropriate fasteners and spacing to secure edges and field areas without compromising the substrate. Emphasize edge treatment near joints and transitions.
Discuss adhesive selection, trowel guidance, and open time tailored to plywood thickness and grade. Include edge and underside sealing strategies to minimize moisture ingress while preserving adhesion and performance.
Fastener selection and placement rules
When installing plywood flooring over concrete, the right fasteners are crucial. For glue-down installs, use ring-shank nails or cleats. Floating installs call for screws.
Spacing: Aim for 6-8 inches apart along joists and 12 inches on center for crosswise support. Keep 1 inch from edges to prevent splitting.
Penetration: Drive fasteners about 3/4″ into the plywood, no more, no less. Too deep can hit the concrete; too shallow won’t hold.
Adhesive compatibility and application tips
Match your adhesive to slab moisture levels. For low-moisture (<6 lbs), use acrylic or modified urethane. High-moisture (>10 lbs) needs epoxy.
Trowel size: Use a 3/8″ V-notch trowel for thin-set applications, and a 1/4″ U-notch for thick-set. Spread at a consistent rate.
Working time: Follow the manufacturer’s guidelines. Don’t rush; you’ve got about 20-30 minutes before it sets.
Sealing cut edges and underside protection
Seal all cut edges, end joints, and perimeter gaps to prevent moisture ingress. Use a paintable, low-VOC silicone or polyurethane sealant.
Undersides: Apply a water-resistant coating like wax or primer to the undersides of panels at seams and cutouts before installation.
Don’t seal the entire underside; it can trap moisture and cause issues. Just target high-risk areas.
Expansion Gaps, Perimeter Clearance, and Transition Details
Explain the fundamental purpose of expansion gaps on concrete-subfloor installs. Describe how these gaps accommodate moisture-driven movement and temperature changes to prevent buckling or cracking. Tie the concept to practical installation decisions.
Provide guidance on how wide gaps should be, how to handle perimeter clearance, and how to finish transitions with trim. Discuss different edging options and how to pair them with room layout and climate considerations.
Calculating and providing appropriate expansion space
Expansion gaps are crucial to prevent your plywood floor from buckling or cracking. Here’s how to calculate the right gap size:
The typical range is 1/4″–1/2″. But it depends on several factors:
Room size: Larger rooms need wider gaps. Humidity swings: High humidity areas require bigger gaps to accommodate more movement.
For example, in humid climates or large rooms (over 20′ x 20′), consider gaps up to 3/4″. Always leave at least 1/8″ between the plywood and any walls or obstacles.
Transition strips, thresholds, and perimeter finishing
Properly finishing your expansion gaps ensures a safe, attractive floor. Here’s how:
Use transition strips or T-molding at changes in flooring type to allow for movement. They snap into place and cover the gap.
At walls, use quarter round or 1/4″ beading. Attach them with finish nails or adhesive. Leave a small gap between the trim and the wall to avoid restricting expansion.
For door thresholds, use reducer strips. They create a smooth transition from one floor height to another while allowing for movement. Always leave some space at transitions to prevent telegraphing through the finish.
Common Failure Modes and How to Prevent Them
Identify five common failure modes when refinishing plywood over concrete and explain the non-technical root causes. Focus on moisture, movement, improper adhesion, and substrate cracks as the culprits behind buckling, cupping, squeaks, delamination, and bond failure.
Link each failure mode to practical preventative measures tailored for concrete substrates. Include moisture mitigation, acclimation, surface prep, appropriate adhesives or fasteners, and expansion gaps as core strategies.
Moisture-related failures (cupping, buckling, mold)
Moisture is a concrete floor’s worst enemy. It can cause your plywood to cup, buckle, and even grow mold. Here’s how to spot it early and fix it:
First, check for signs of moisture: warped or lifted panels, musty smell. Use a moisture meter on the concrete before installing plywood. Aim for readings below 3 lbs/1000 sq ft.
To prevent moisture issues, use a moisture barrier and piers to raise your plywood off the slab. Ensure proper curing of the concrete before installing. If mold appears, clean it with a solution of bleach and water (1 cup per gallon), then apply a mold-resistant primer.
Mechanical and structural issues (squeaks, panel lift, sag)
Squeaky floors and lifted panels aren’t just annoying; they’re signs of serious problems. Here’s how to diagnose and fix them:
Squeaks often come from voids under the plywood. To find them, tap the floor with a hammer. If it sounds hollow, you’ve found a void. Fill it with construction adhesive before installing the plywood.
Panel lift and sag usually mean your concrete slab isn’t level or has cracks. Before installing, use a level to check for low spots. If you find any, fill them with self-leveling compound. For cracks, use an epoxy crack filler.
Adhesion and finish problems
Failed adhesion and damaged finishes can ruin your floor’s appearance and longevity. Here’s how to prevent and fix these issues:
Wrong adhesive or contaminated substrate can cause bond failure. Always use the right adhesive for your plywood type, and ensure the concrete is clean and dry before applying. If you find delamination, remove the loose plywood, clean the area, and reapply adhesive.
For finish damage like scratches or dents, light sanding and refinishing can usually fix it. But if the damage is severe, you might need to replace the affected panels. Always use a sealer on cut edges to prevent moisture wicking.
Seasonal, Environmental, and Long-term Maintenance Considerations
Describe how seasonal humidity and temperature swings affect plywood on concrete, including movement and edge visibility. Explain why conditions matter for long-term stability and plan accordingly. Note how climate can influence fastener behavior and edge integrity.
Offer a maintenance-focused approach with a routine that addresses moisture management, HVAC strategy, and periodic inspections. Encourage documenting seasonal checks and any remodeling that could alter moisture dynamics to guide future actions.
Managing humidity and temperature year-round
The ideal indoor humidity range for plywood flooring is between 35% to 50%. Here’s how to maintain this:
Summer: Use dehumidifiers if humidity exceeds 50%. Keep them away from walls to prevent condensation. Run your AC consistently.
Winter: If humidity drops below 35%, use a humidifier. Ensure your heating system doesn’t dry out the air too much. Avoid rapid temperature changes during HVAC cycling.
Inspection schedule and small repairs to catch early
Regular inspections help prevent minor issues from becoming major problems. Use this checklist every three months:
- Gaps: Check for any gaps between planks, especially near walls.
- Soft spots: Press down on the floor to feel for soft or spongy areas.
- Odors: Smell for musty odors that could indicate moisture problems.
- Buckling: Look for any planks lifting off the subfloor.
- Squeaks: Walk on the floor to listen for squeaks, indicating loose fasteners or underlayment.
- Edges: Check where walls meet the floor for any gaps or separations.
- Fasteners: Tighten any loose screws or nails.
- Leveling: Spot-level any areas that feel uneven.
Quick rule: Address any issues immediately to prevent them from worsening over time.

Conclusion
The core idea is to finish a floor that stays flat, looks good, and holds up without costly rework. Handle moisture, subfloor prep, proper plywood choice, and confident fastening with safety and attention to detail—that’s what keeps the project durable and looking right for years.
Start by confirming moisture test results and vapor control, then verify the subfloor is clean, level, and repaired where needed. Choose the right plywood, let it acclimate, and confirm grain orientation. Plan your fastening method and any adhesive, seal the edges, set the expansion gaps and perimeter clearance, decide on transitions, and do a dry run before you fasten anything. Go step by step and don’t skip a check.
Avoid these common mistakes: skipping or misreading moisture tests, neglecting acclimation, ignoring cracks or high spots in the concrete, leaving expansion gaps or edge seals incomplete, and overcomplicating the process with the wrong adhesive or fastener choices. Safety matters—wear eye and hearing protection, keep the work area clean and well lit, and never rush through edge sealing or transitions. If you’re unsure about moisture levels, structural cracks, or large areas, don’t push ahead without a pro.
If the moisture readings are out of spec, the slab needs a proper vapor barrier or additional surface prep, or you’re dealing with unusual concrete conditions, it’s wise to call a professional. Otherwise, keep the plan in front of you, follow the checks in order, and stay disciplined. You can complete a solid, durable floor and enjoy the finished space with confidence.
FAQ
Do I need to seal or moisture barrier before laying plywood over concrete?
Yes. Test the concrete for moisture. Install a suitable moisture barrier and follow the plywood manufacturer’s guidance. Skipping this invites buckling and long term failure.
How should I prepare the concrete surface before installing the plywood flooring?
Clean it thoroughly and fix any cracks or high spots. Use a leveling compound or grinder as needed to make it flat. A dry, smooth surface is non negotiable.
Should I use glue, nails, or staples for plywood over concrete?
Follow the product instructions for the method. If you use glue, apply the recommended adhesive and weight while it cures. Nails or staples must be compatible with concrete or used with proper fasteners.
What common mistakes should I avoid?
Avoid skipping moisture tests. Don’t skip surface prep or seal seams. Don’t install over damp concrete or without proper expansion gaps.