
Introduction
A vapor barrier in a crawl space is a sheet or cap that blocks ground moisture from entering the space. Install it on the dirt floor and along any access routes, and always check the product label or local rules if you’re unsure.
Seams should be overlapped and sealed so moisture can’t seep through, using a seam product recommended for crawl spaces. When working around piers, keep the barrier intact and flat, avoiding punctures, and recheck edges after any backfill or adjustments.
Key takeaways
- Inspect crawl space for moisture sources, mold, and rodent access before barrier install.
- Choose a vapor barrier with proper thickness and seams overlap per manufacturer.
- Clean and level the crawl floor, fill gaps, and remove protruding sharp edges.
- Seal all utility penetrations and piers to prevent tracked moisture pathways.
- Plan drainage and moisture control early to avoid costly retrofits later.
- Wear gloves, eye protection, and follow ventilation guidelines when handling materials.
Table of Contents
- Introduction
- Key takeaways
- Why a Vapor Barrier Matters in Crawl Spaces
- Assessing Your Crawl Space Before DIY
- Tools and Materials Checklist
- Preparing the Crawl Space: Cleanup and Repairs
- Installing the Vapor Barrier: Layout and Seams
- Dealing with Piers, Posts, and Penetrations
- Moisture Control Systems and Drainage
- Insulation and Finishing Touches
- Conclusion
- FAQ
Why a Vapor Barrier Matters in Crawl Spaces
A crawl-space vapor barrier helps limit ground moisture from rising into the space. It supports protecting framing and reducing conditions that can lead to mold growth. You’ll also gain potential energy performance benefits by moderating moisture movement.
Use this section to understand the primary goals and what to expect from a proper installation. Remember to verify product instructions and local guidelines before choosing materials. Keep expectations realistic about performance and long-term maintenance.
Health and structural risks from moisture
A crawl space without a vapor barrier is like an open invitation to moisture problems. Excess moisture leads to mold, mildew, and rot – all of which can cause serious health issues.
Mold spores can trigger allergies, asthma attacks, and other respiratory problems. They can also stain walls, ceilings, and floors, making your home look unsightly. Worse still, moisture can weaken structural components like wooden framing, joists, and subfloors, compromising the integrity of your entire house.
Moisture also attracts pests like termites and rodents, further damaging your home’s structure and creating additional health hazards.
How vapor barriers reduce moisture transfer
A vapor barrier is a layer of material that prevents water vapor from passing through. In a crawl space, it’s typically installed on the ground and up the walls to stop ground vapor from entering your home.
Here’s how it works: warm air holds more moisture than cool air. When warm air meets a cool surface (like a concrete slab or earth), the moisture in the air condenses into water droplets. A vapor barrier prevents this condensation from happening on surfaces where you don’t want it, like your home’s framing and subfloor.
It’s important to understand that a vapor barrier controls moisture diffusion, not bulk water. It won’t stop floodwaters or large amounts of liquid water. But for everyday ground moisture, it’s highly effective.
Assessing Your Crawl Space Before DIY
Start with a careful walkthrough to spot obvious water sources, mold, and pest signs. Look for uneven soils, standing water, or areas where the barrier would be difficult to lay flat. Note any structural concerns that could affect a DIY installation.
Document problem areas with photos and simple notes. Decide if conditions exceed what a typical DIY project can safely address. When in doubt, check product labels, manufacturer instructions, and local rules before proceeding.
Inspecting for water, mold, and pests
Before you start installing your vapor barrier, it’s crucial to inspect your crawl space thoroughly. Here are some key checkpoints:
Water: Look for moisture stains on the floor or walls, and check for any active leaks around pipes or vents.
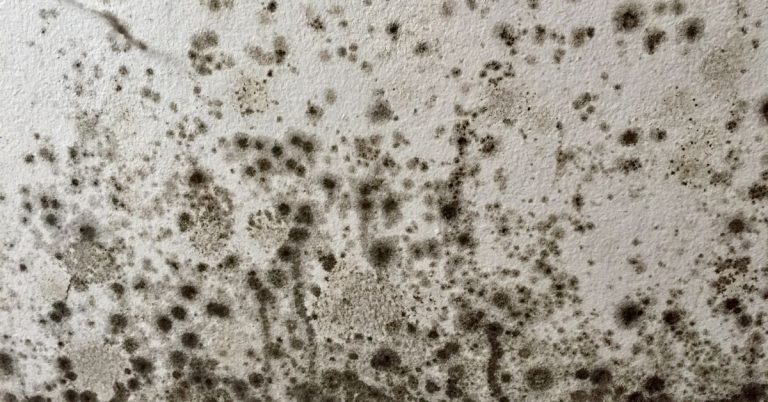
Mold: Check for visible mold growth, especially in corners and behind objects. Remember, if you smell a musty odor, it’s likely there’s mold present even if you can’t see it.
Pests: Inspect for signs of pests like rodent droppings, damaged insulation, or nesting materials. Also, check for termite damage by tapping wooden beams and listening for hollow sounds.
When to call a professional
While many crawl space issues can be tackled DIY-style, there are some red flags that indicate you should call in the pros:
Standing water: If you find persistent standing water in your crawl space, it’s a sign of a serious problem that likely requires professional waterproofing.
Significant structural damage: If you notice significant sagging or warping of floor joists, or large cracks in the foundation, these are signs of major structural issues that need immediate attention from a structural engineer or contractor.
Extensive mold: While small amounts of mold can be cleaned up DIY-style, if you find extensive mold growth (more than 10 square feet), it’s best to call in a professional mold remediation service.
Tools and Materials Checklist
Gather the basics: a sharp utility knife, straightedge, general utility tape, and compatible adhesives. Have protective gear on hand and a flashlight or headlamp for dim spaces. Keep a tape measure handy for rough layout checks.
Include extra barrier rolls and a selection of seam tape suitable for below-grade use. Review the material’s instructions for compatibility with moisture and soil conditions. If you’re unsure, verify with the manufacturer or your local building code guidance.
Essential tools for installation
Before you start, make sure you have the right tools to get the job done safely and efficiently.
- Tape measure: To ensure accurate cuts and measurements in your crawl space.
- Utility knife: For cutting vapor barrier material to size. Keep it sharp for clean cuts.
- Claw hammer or pry bar: To help you move around and work in confined spaces safely.
- Work gloves: Protect your hands from debris and sharp edges.
- Safety glasses: Essential for eye protection when cutting materials.
- Dust mask or respirator: To protect against dust and mold spores in the crawl space.
- Headlamp or flashlight: For working in dark areas. A hands-free option is best.
- Knee pads: For comfort when crawling around on hard surfaces.
Quick rule: Always prioritize safety gear before starting any work in your crawl space.
Choosing the right vapor barrier material
Selecting the correct material is crucial for effective moisture control. Here’s what to look for:
- Material type: Choose between polyethylene, polyolefin, or foam board based on your needs and local codes.
- UV resistance: Ensure the material has UV protection if it will be exposed to sunlight during installation.
- Puncture resistance: Look for a high puncture resistance rating to prevent tears from sharp objects in the crawl space.
- Warranty: Check the warranty period as an indicator of product quality and durability.
- Thickness: Thicker materials offer better insulation but can be harder to work with. Aim for 6-10 mil thickness.
- Perm rating: Verify the perm rating (moisture vapor transmission rate) meets local code requirements.
- Manufacturer specs: Always check manufacturer specifications to ensure the product suits your needs.
- Local codes: Consult local building codes to ensure compliance with any specific requirements for crawl space vapor barriers.
Quick rule: Don’t guess; always verify material specs and local codes before purchasing.
Optional sealing and fastening materials
These additional materials can improve the long-term performance of your vapor barrier installation:
- Specialized seam tape: Use it to seal seams between sheets, preventing moisture from passing through.
- Construction adhesive: Apply along edges and seams for added strength and durability. Choose one suitable for below-grade installations.
- Mechanical fasteners: Consider using them in areas with high stress or where tape may not adhere well, like on concrete piers.
- Edge trim: Use it to protect the edges of your vapor barrier from damage and prevent moisture wicking.
- Sealant for pier blocks: Apply a sealant around pier blocks to prevent moisture from entering through gaps.
Quick rule: Use these materials strategically, focusing on areas prone to stress or moisture intrusion.
Preparing the Crawl Space: Cleanup and Repairs
Clear debris and loose soil so the barrier can lay flat. If the ground is uneven, gentle leveling or tamping may help the sheet stay in place. Remove any loose or protruding materials that could abrade the barrier.
Address minor repairs that affect barrier performance, like cracked surfaces or gaps around edges. Prioritize safety and contamination precautions, including proper PPE. Always confirm repair steps align with the barrier instructions and local requirements.
Clearing, grading, and surface prep
Start by removing any organic debris – leaves, twigs, animal nests. These can trap moisture and encourage mold growth.
Next, level the soil. Use a rake or shovel to create a relatively even surface. This helps water drain away from your vapor barrier.
Identify low spots that could trap water. Fill these with clean gravel or crushed stone to promote drainage. Do not use soil as it can compact and cause more problems.
Repairing piers, beams, and damaged framing
Check your crawl space’s structure. Look for rotted wood, loose piers, or sagging beams.
For minor issues like small holes or cracks, use a wood filler and apply exterior paint to protect it. For larger problems, consider sistering – adding a new beam alongside the damaged one.
If you find significant damage, stop. These repairs may require licensed tradespeople. Structural issues are not DIY projects.
Installing the Vapor Barrier: Layout and Seams
Plan the layout from the farthest accessible area toward the entry to minimize walking on finished material. Allow extra material at edges and seams for secure overlaps. Align sheets to reduce the number of seams where practical.
Secure rows with appropriate tape or adhesive per the product guidance. Double-check that seams are fully sealed and free of voids. When unsure, consult the manufacturer’s instructions or labeling for seam requirements.
Measuring and cutting for minimal seams
Start by measuring your crawl space’s length and width. Add a few inches to each dimension to account for overlap.
Cut sheets at home before carrying them into the crawl space. This saves time and reduces waste. Use a utility knife or circular saw with a fine-tooth blade.
Pre-position sheets in the crawl space, starting from the farthest point. This minimizes walking over finished material and reduces the risk of damage.
Best seam techniques: overlap, tape, and adhesives
Overlap sheets by at least 6 inches. This creates a continuous barrier that prevents moisture from passing through.
Use vapor barrier seam tape specifically designed for your material. Apply it over the overlapping area, following the manufacturer’s instructions.
For added protection, consider using an adhesive or mechanical fasteners in addition to tape. This is especially important if your crawl space has high humidity or significant temperature changes.
Dealing with Piers, Posts, and Penetrations
Seal the barrier around piers and posts carefully to prevent gaps. Use compatible sealants or patches designed for below-grade use. Protect the barrier from abrasion where contact points occur.
Develop a method to maintain continuous coverage at penetrations, including sill plates and utility openings. Document any potential trouble spots and follow the supplier guidance for termination methods. If you’re uncertain, review manufacturer directions and local codes for clearance and sealing practices.
Sealing around piers and support posts
Start by measuring the circumference of your pier or post. Cut your vapor barrier material to size, adding a few inches overlap on each side.
For a durable seal, use a flexible collar designed for pier wraps. Alternatively, you can create a DIY collar using rigid foam board cut to fit around the pier.
Apply construction adhesive along the edges of your vapor barrier and the pier. Press firmly to ensure a good bond. Wrap the material around the pier, overlapping the edges by at least 4 inches. Secure with duct tape or staples.
Pro tip: Use a utility knife with a sharp blade to avoid tearing the material while cutting.
Handling pipes, vents, and HVAC penetrations
Before sealing, ensure all penetrations are clean and dry. For pipes, use a foam pipe collar cut to size. Apply construction adhesive around the pipe before placing the collar.
For ducts and vents, use a flexible duct wrap or rigid foam board cut to fit. Seal any gaps with expanding foam or caulk. Ensure you maintain access for future service by not sealing shut completely.
Use foil-faced vapor barrier tape to seal seams around penetrations. Press firmly to ensure a good bond. Apply a bead of caulk along the seam for added protection.
Pro tip: Always test fit your materials before applying adhesive or sealant to avoid mistakes.
Moisture Control Systems and Drainage
Compare common moisture-control options and how they fit your space, including vapor barriers, perimeter drainage, and dehumidification. Consider how each component integrates with a DIY approach and existing conditions. Avoid overloading any one system without proper design.
Check local codes and manufacturer recommendations for sizing and installation details. Use the guidance to plan placement and connections before committing to a setup. If needed, confirm requirements with a qualified professional or code resource.
Sub-surface drainage and sump options
A vapor barrier alone won’t handle groundwater. For high moisture areas, consider sub-surface drainage and a sump pump.
Perimeter drains collect water from around your crawl space’s perimeter. They should slope towards the sump pit for proper drainage.
Sump pumps are essential in low-lying areas or where groundwater is high. Professionally design this system to ensure it works effectively and safely.
Dehumidification and ventilation strategies
A dehumidifier can help control moisture in your crawl space, but it’s not a replacement for a vapor barrier. It works best when combined with a sealed barrier.
Place the dehumidifier on a stable surface near the center of the crawl space. Regularly empty or drain the collected water.
Controlled ventilation can help, but be careful not to introduce outdoor humidity into your sealed crawl space. Use exhaust fans sparingly and only when necessary.
Insulation and Finishing Touches
Discuss insulation strategies that complement the vapor barrier, whether under-floor or perimeter options. Consider how insulation interacts with moisture control to maintain performance. Plan for proper ventilation and access while keeping materials dry.
Include tips to protect insulation from moisture and pests, such as drainage considerations and sealing practices. Verify that chosen insulation types meet local code and product specifications. When in doubt, consult the insulation manufacturer instructions and your local building rules.
Under-floor Insulation vs. Perimeter Insulation
When it comes to insulating your crawl space, you’ve got two main options: under-floor or perimeter insulation.
Under-floor insulation goes between the floor joists, creating a continuous layer of protection across the entire crawl space. It’s easier to install and provides better energy efficiency as it reduces heat loss through the floor above.
However, it doesn’t do much for controlling moisture at the perimeter where most of the water vapor enters. So, you’ll still need a good vapor barrier to prevent condensation on the cold floor joists.
Perimeter insulation, on the other hand, goes around the outer walls of the crawl space. It’s more labor-intensive as it requires careful measurement and cutting around obstacles. But it provides excellent moisture control by preventing heat loss at the perimeter, which reduces condensation on the foundation walls and footings.
For most homes, a combination of both is ideal. Start with under-floor insulation for energy efficiency, then add perimeter insulation to control moisture. Always ensure your vapor barrier is intact before installing any insulation.
Attaching the Barrier to Walls and Finishing Edges
Once you’ve laid out your vapor barrier, it’s time to secure it to the foundation walls and finish the edges neatly.
Use termination beads or trim to create a clean, sealed edge around the perimeter. These are usually made of plastic or metal and can be attached with staples, screws, or adhesive. They prevent the barrier from tearing when it’s secured to the wall.
To attach the barrier to the walls, you can use staples, but make sure they’re long enough to go through the barrier and into the foundation. Alternatively, you can use adhesive specifically designed for vapor barriers. Always follow the manufacturer’s instructions.
For a neat finish, ensure your barrier is taut but not stretched when you secure it. Trim any excess material with a sharp utility knife after it’s attached. Regularly inspect and maintain these edges to prevent tears or gaps that could compromise your moisture control efforts.
Conclusion
Your crawl space work is about durability, safety, and a clean finish that keeps moisture out without harming the structure. With solid seams, proper penetration handling, and a reliable drain plan, you protect the home and your investment.
Set up your checklist in plain terms: verify the space is clean and dry, lay out the barrier with the long edges toward the wall, seal all seams and penetrations carefully, adjust for any piers or posts so they sit on clean, solid footing, connect or plan a drainage or moisture-control step if needed, insulate and finish where it makes sense, and test a small patch before committing to the full area. Do the work in the order described here and pause to recheck each step before moving on.
Two common mistakes to avoid are skipping a full dry run and forcing the barrier to fit around posts or irregularities, which leads to gaps. Don’t rush the seams or use clamps, tape, or fasteners beyond what the material requires, and always confirm you’re not pinching or tearing the barrier. Follow the safety rules: wear eye and skin protection, keep a clear path for any drainage flow, and test a small section first to confirm the barrier stays in place under temperature and moisture changes.
If you encounter deep water, uncertain structural conditions, or you’re unsure about drainage or insulation integration, call a professional. When you can verify dry conditions, complete the setup, and remain within your comfort zone, you can finish with confidence. Stay focused, stay steady, and the crawl space will be durable for years to come.
FAQ
How should I seam and overlap the vapor barrier to avoid gaps?
Overlap seams by a generous amount and seal them with the approved tape or seam adhesive per the product label. If you’re unsure about the correct method, check the manufacturer instructions before committing to the seam.
How do I fit the barrier around piers, posts, and penetrations?
Cut the barrier to wrap around posts and then seal tightly so no underlapping edges show. Leave no loose folds that can trap moisture, and verify that any penetrations maintain a continuous barrier around them.
What’s the best way to protect the edges along the crawl space perimeter?
Run the barrier up the stem walls or along the subfloor edge as required, ensuring the barrier rests flat and isn’t pinched. Avoid puncturing or tearing it; if damage occurs, replace the section or seal with the proper repair product per the label.
When should I replace or repair the vapor barrier?
Inspect for tears, loose seams, or moisture staining during routine checks. If you see damage or recurrent moisture issues, replace the affected section and confirm the repair meets the product instructions and local guidelines.