
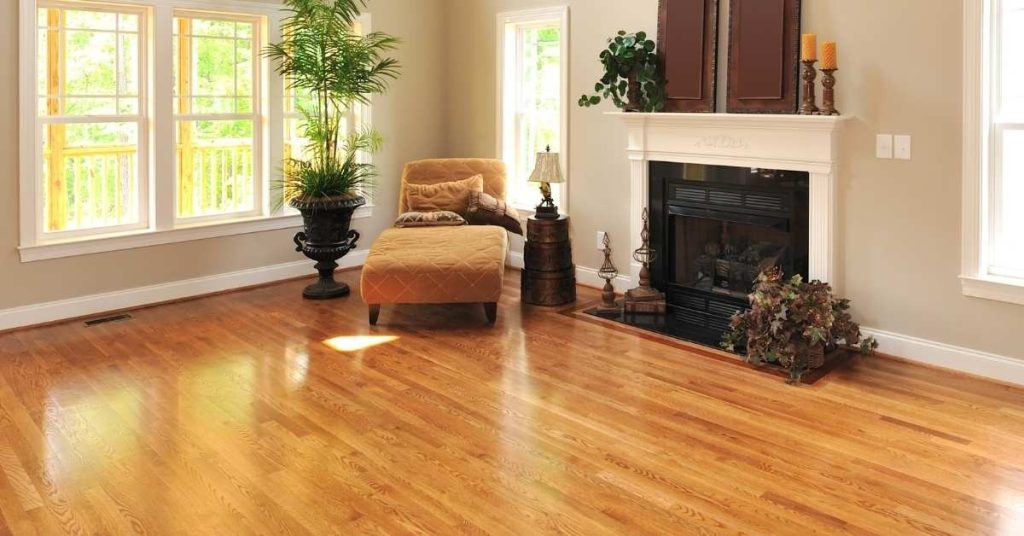
Introduction
Transitions at doorways are the finished edge where hardwood, LVP, or carpet meet, creating a smooth, safe path. They hide uneven cuts and tiny gaps while guiding foot traffic. This article shows plain‑spoken, hands‑on ways to handle the join without ugly reducers.
Start by inspecting the subfloor and the edge of each floor covering to see how they align. Plan for a clean seam, avoiding trips, and check manufacturer instructions or local rules if you’re unsure. Use straight cuts, proper transitions, and a flexible adhesive or fastener method as directed, and measure twice before cutting.
Key takeaways
- Measure doorway heights and gaps carefully to choose appropriate transition style.
- Test dry-fit before finishing; slight misalignment hides with tapered nosing.
- Wear PPE; cut and shape edges with guards to reduce injury.
- Use low-profile trims that compress and blend with hardwood, LVP, or carpet.
- Check moisture control measures and avoid visible gaps that collect dirt.
- Plan fastening patterns and edge treatments before install to prevent movement.
Table of Contents
- Introduction
- Key takeaways
- Why Transition Choice Matters for Doorways
- Assessing Height Difference and Movement Gaps
- Low-Profile Trim and Edge Treatments That Disappear Visually
- Tapering and Surfacing Carpet to Meet Hard Floors Cleanly
- Using Tapered Hardwood or Lvp Nosing for Subtle Ramps
- Invisible Fix Options: Float/Insert and Flush-Inset Techniques
- Fastening, Moisture Control, and Long-Term Durability
- Tools, Materials Checklist, and Templates for Clean Installs
- Conclusion
- FAQ
Why Transition Choice Matters for Doorways
Doorways are natural focal points where the eye catches the edge of each floor. A thoughtful transition preserves sight lines and flow as you move through the space. Choosing the right edge keeps trips and stubbed toes to a minimum without sacrificing style.
Functional factors like clearance and sound transfer begin at the threshold, so the right transition helps doors swing freely and rooms feel connected. Aesthetic choices at these points can either blend in or highlight the architectural moment. Always consider how the edge reads from different angles and lighting conditions.
Common problems with typical reducers
Bulky reducer strips can create a tripping hazard at doorway transitions. They stick out, catching feet and causing accidents.
Mismatched edges show up like a sore thumb, especially in high-traffic areas. It’s an eyesore that ruins the continuity of your flooring.
Dirt and debris get trapped in the gaps between reducer strips and the floor. This makes cleaning tough and can lead to quicker wear on your floors.
Design goals for a clean doorway transition
The ideal doorway transition should be barely noticeable, blending seamlessly with both types of flooring. Minimal visible hardware is key.
Sightlines should flow smoothly from one room to the next, without any abrupt changes in height or level.
Transition strips should ramp up gently, providing a safe and comfortable transition for feet.
Maintenance should be easy. No gaps means no dirt traps, making cleaning quick and simple.

Assessing Height Difference and Movement Gaps
Start by checking vertical differences between surfaces at the doorway, including any unevenness in subfloor or underlayment. For lateral gaps, note where one floor sits higher or lower than the next. These measurements guide what kind of transition will perform best.
Look for expansion gaps behind baseboards and along walls, and verify the site’s moisture conditions. Confirm what the manufacturer or product label requires for tolerances and tolerances when the floors expand and contract. If in doubt, consult the data sheet or installation instructions before proceeding.
Measuring techniques and quick checks
First, grab a straightedge. Place it across the doorway, spanning both surfaces. Look for any gaps or height differences.
Use feeler gauges to measure these gaps precisely. Aim for no more than 1/4″ vertical difference and 1/8″ lateral gap between materials.
Check seams too. They should be tight but not bowed. After measuring, let your materials acclimate to the climate for a few days and recheck.
When to call a pro vs DIY
If you’ve got more than 1/2″ height difference, it’s time to call a pro. They can level the subfloor or install underlayment to compensate.
Structural issues like joist damage need professional attention too. Don’t DIY if you suspect structural problems.
Transitions across thresholds with widening gaps (more than 1/4″) are tricky. A pro can help here, using special transition pieces or leveling techniques.
Low-Profile Trim and Edge Treatments That Disappear Visually
Low-profile trim options like quarter round or flush metal edges stay slim while finishing the seam. They reduce the visual mass of the transition so the floor edges read as continuous planes. Consider how each option sits with doorway clearances and carpet nap directions.
Tapered hardwood nosing and rebated hardwood reveals can blend with both wood and LVP while managing height differences. Match the profile to the floor type and verify installation notes on fasteners, finish, and substrate compatibility. Always test the look in natural light to ensure it stays discreet.
Recessed or rabbeted hardwood edge
A flush, nearly invisible transition between hardwood and other floors can be achieved by recessing the hardwood edge. This involves creating a ‘rabbet’ – a step cut into the hardwood’s thickness.
First, measure and mark the depth of your rabbet. It should match the thickness of the adjoining floor. Use a combination square to transfer this measurement onto the hardwood edge.
Next, set up your circular saw or router with a straight bit to cut along these lines. Go slow and steady for clean results. Test fit the floors together – they should sit flush.
Pro tip: If you’re unsure about cutting depth, start shallow and take small passes until you reach the right depth.
Flush metal or aluminum edge profiles
Slim metal or aluminum edge profiles provide a clean, minimalist look. They’re perfect for transitioning between hardwood and LVP or carpet.
These profiles are installed with adhesive or screws, depending on the manufacturer’s instructions. Apply construction adhesive to the back of the profile, then press it firmly against the hardwood edge. If using screws, drill pilot holes first to prevent splitting.
The key is setting them so only a thin line shows. Measure and mark the centerline of your hardwood edge onto the profile. Align this with the hardwood’s edge when installing.
Safety note: Always wear safety glasses when cutting or drilling metal profiles.
Tapering and Surfacing Carpet to Meet Hard Floors Cleanly
Carpet edges can be finished to meet hard flooring with minimal bulk by using tuck strategies or low-pile bindings. The goal is a seamless junction without a bulky reducer. Plan how the carpet nap will align with the adjoining floor edge for a tidy result.
Perimeter carpet gripper placement and tapered substrates can help create a gradual slope into the hard surface. Explore options like tapered plywood or alternative tackless methods to minimize visible hardware. Verify that your chosen method is compatible with carpet fiber and padding, and follow manufacturer guidance.
Carpet to Hardwood: Tuck-and-Strip Alternatives
When carpet meets hardwood, you don’t need bulky reducers. Here are some clean ways to finish your carpet edge:
Tucking into a narrow gap: Create a small recess in the hardwood using a router or saw. Tuck the carpet edge into this gap, securing it with a strip of tackless strip on the back. This method hides the carpet edge completely.
Using a hidden strip: Install a thin, flexible strip along the hardwood edge before laying your carpet. The strip holds the carpet in place and creates a smooth transition.
Binding for a slim seam: For low-pile carpets, use binding tape to create a neat, narrow edge. This method allows the carpet to lay flush with the hardwood, eliminating the need for reducers.
LVP to Carpet: Transition-Friendly Underlayment and Edge Trims
To meet LVP and carpet without reducers, focus on underlayment and edge preparation:
Transition-friendly underlayment: Use a thin, compressible underlayment for your LVP. This allows the vinyl to sit slightly lower than the carpet, creating a smooth transition.
For example, use 2mm or 3mm underlayment instead of thicker options. This helps keep the LVP level with or just below the carpet surface.
Edge trims and preparation: Prepare your LVP edge to meet the carpet seamlessly. You can router a small recess into the LVP edge, similar to the hardwood method above. Alternatively, use an LVP edge trim that allows for a flush or slightly lower installation.

Using Tapered Hardwood or Lvp Nosing for Subtle Ramps
Tapered nosing provides a natural ramp without a bulky transition. Shop-made or factory-milled options can offer a refined edge that feels part of the floor. Consider how the color and grain will flow with the surrounding boards.
Installation basics matter: secure fit, proper adhesion or fasteners, and finish matching. If you plan to stain or seal, confirm compatibility with your floor finishes and substrates. Check whether any nosing requires masking or surface prep before finishing.
DIY Shaping and Installation Tips
Safety first: Always wear protective gear when cutting and sanding. Use a jigsaw with a fine-tooth blade to create the taper. Keep the blade straight for consistent results.
Sand the nosing after cutting, using progressively finer grits (80, 120, 150) to smooth out any rough spots. Wipe off dust between each sanding.
For attachment, use countersunk screws and a pilot hole bit to prevent splitting. Predrill, then drive the screw in until it’s flush with the surface. Fill with wood filler if needed, let dry, and sand smooth.
Matching Stain, Finish, and Texture
Before staining, test your stain on a scrap piece to ensure it matches the adjacent flooring. Let it dry completely before proceeding.
Use a stain applicator pad or brush for even coverage. Work in small sections, applying the stain in the direction of the grain. Wipe off excess with a clean cloth after 5-10 minutes.
For a seamless appearance, match the sheen and texture of your existing flooring. If you’re unsure, consult a professional or visit a hardware store for advice on matching products.
Invisible Fix Options: Float/Insert and Flush-Inset Techniques
Floating a floor over a recessed track can hide the transition edge and reduce visible hardware. This method relies on accurate spacing and a clean, level substrate. Evaluate whether your floor species and underlayment support a float setup.
Flush-inset techniques hide the seam by inserting a thin strip of material flush with both floors. This approach demands precise routing or milling and careful edge preparation. Always confirm track depth, material thickness, and finish requirements with the product data or installation guide.
Floating Floor Insert Method
The floating floor insert method is a clean way to transition between hardwood, LVP, and carpet. It involves creating a low-profile, nearly invisible seam.
First, you’ll need to prepare a recessed channel in the subfloor at your doorway. This should be about 1/4″ deep and wide enough to accommodate your insert.
Next, choose a narrow strip of material (like aluminum or wood) that’s slightly wider than your movement gap but thin enough to remain low-profile. Insert this into the channel, allowing for some give to account for floor expansion and contraction.
Flush-Inset Thin Strip
The flush-inset method is another great way to create a near-invisible transition. It involves setting a thin strip into routed or scribed recesses in both floors.
Start by routing or scribing a recess into the bottom of your hardwood or LVP and the top of your carpet. This should be about 1/4″ deep and wide enough to accommodate your insert.
Then, choose a thin strip of material (like metal, wood, or composite) that matches the width of your recess. Insert this into both floors, ensuring it sits level and flush with the surface for a seamless look.
Fastening, Moisture Control, and Long-Term Durability
Secure fastening methods that leave no visible screws help maintain a clean edge. Use fasteners and adhesives as recommended for the floor types involved. Protect the edges from moisture exposure at the transition to prevent lifting or cupping.
Accommodating expansion is critical for hardwood and LVP longevity. Check the site conditions, installation instructions, and any local rules on moisture control and substrate preparation. Plan for a durable, serviceable seam that won’t telegraph movement over time.
Adhesives, hidden fasteners, and mechanical anchors
For a clean look at transitions, avoid visible screws. Here’s how:
Adhesives: Use construction adhesive for hardwood and LVP. Apply along the edge before installation. It bonds well and stays hidden.
Hidden fasteners: For floating floors like LVP, use click-lock systems or hidden clips. They secure the floor without screws showing.
Mechanical anchors: When needed, use small, discreet mechanical anchors for hardwood. Drill pilot holes and countersink to keep screws flush with surface.
Moisture barriers and sealing at transitions
Protect your floors from moisture. Here’s how:
Caulk: Use paintable caulk where walls meet the floor. Apply a thin bead, let it dry, then paint over.
Seam sealers: For LVP and hardwood, use seam sealer at transitions. It prevents moisture from getting between planks.
Moisture barriers: Use vapor barriers under floors in damp areas. They prevent moisture from wicking up into your floor.
Tools, Materials Checklist, and Templates for Clean Installs
Prepare a practical set of tools and materials to support accurate cuts and consistent edge profiles. Templates or jigs help reproduce the same taper across multiple transitions. Keep a small selection of guides to avoid off-square gaps.
Simple templates can make routing recessed channels or trimming planks easier. Verify that templates fit your floor thickness and edge profile, and consult manufacturer instructions if you are unsure about any step. Use a test piece to confirm fit before final work.
Recommended tools and safe alternatives
Before you start, make sure you have the right tools for the job. Here’s a checklist to help you.
- Router: For cutting tapers and recesses. If unavailable, consider a handheld router bit set or jigsaw with fine-tooth blade.
- Jigsaw: For shaping edge profiles. A manual jigsaw can work if power tools aren’t available.
- Sanding block: To smooth edges and surfaces. Use with fine-grit sandpaper (120-220 grit).
- Straightedge: For measuring and marking. A long level can double as a straightedge.
- Tape measure: To ensure accurate cuts and measurements.
- Pencil: For marking cut lines and layout.
- Safety glasses: Essential for protecting your eyes from debris.
- Ear protection: Required when using power tools.
- Dust mask: To protect against dust inhalation.
Quick rule: Always prioritize safety over speed. Use the right tool for the job, and wear appropriate PPE.
Material specs and what to buy for each floor pairing
Choosing the right materials is crucial for a clean install. Here’s a checklist to guide you.
- Hardwood to LVP: 1/4″-thick transition strip with tapered edge. Use construction adhesive and nails or hidden fasteners.
- Hardwood to carpet: 1/2″-thick reducer or stainable underlayment for a flush inset. Use tack strip and adhesive.
- LVP to carpet: 1/4″-thick transition strip with beveled edge. Use construction adhesive and nails or hidden fasteners.
- Adhesives: Choose one suitable for your floor type. Always follow manufacturer’s instructions.
- Underlayment: Use a moisture barrier underlayment to protect against moisture damage.
- Transition strips: Ensure they match the width of your flooring and are compatible with your chosen installation method.
Quick rule: Always check manufacturer guidelines for specific product recommendations and installation instructions.

Conclusion
Solid, clean transitions come down to planning, careful measuring, and safe, repeatable steps that protect the floor and the room. When you lock in the right method for your doorways, you keep moisture out, avoid damage, and make the space look finished.
First, check that you have a practical plan and follow it as you move from room to room: measure all height differences, test movement gaps with a small scrap, select a low-profile trim or edge that disappears visually, decide on tapering or nosing where needed, mock up the install on scrap, mark fastener locations, verify moisture control and substrate compatibility, and use the templates to confirm cuts and placements before you cut. Make it a habit to test in a hidden spot and double-check clearance with the final flooring you plan to use, then proceed in a calm, orderly sequence room by room.
Common mistakes to avoid are rushing the cut and fit, skipping moisture controls, and ignoring the actual movement gaps between floors. Never skip a small scale test or rely on hope instead of measurement. Always wear eye and ear protection, unplug tools when changing bits, and keep sparks and dust out of your work area. Use the correct fasteners for your chosen surface, and do not force a joint that stands high or low—let it breathe with the proper shim or edge treatment.
If the subfloor is uneven, moisture is present, or the doorway situation is unusually complex, call a professional instead of forcing it. For everything else, stay deliberate, use the templates, and keep the work area clean. With the right checks and safe habits, you can finish with a clean, durable result you can be proud of.
FAQ
What’s the best way to hide a small height difference at a doorway without using a bulky reducer?
Choose a low-profile edge treatment or a tapered nosing that blends with both floors. Make sure the edge is installed flush with both surfaces and secured properly so nothing catches. Always check the product instructions for the correct installation method.
Can I use carpet or vinyl to meet hardwood without gaps showing?
Yes, you can blend the edge with a careful transition strip or precise rounding where the carpet meets the hard floor. Align seams and ensure the surface is evenly finished to prevent trips. If unsure, confirm compatibility with your flooring brands and installation guidelines.
How do I avoid creating a trip hazard when transitioning between very different floor heights?
Use a transition option designed to ramp slightly and sit level with both floors. Do not force a stiff fit that creates a lip. Always follow manufacturer recommendations and local rules for underlayment and fasteners.
What should I check before fastening any transition piece actually into place?
Inspect the substrate for solid support and clean the area of dust and debris. Verify that fasteners won’t interfere with subfloor moisture barriers or underlying wiring. If in doubt, review the product label and adjust based on the site conditions.