
Introduction
Learn how to paint textured walls with the right tools, timing, and cleanup to achieve a durable, attractive finish.
The guide walks through selecting the proper tools, choosing suitable primers and paints, timing coats for best adhesion, and clean-up methods that minimize mess. You’ll gain practical steps, tips, and rules of thumb to apply texture successfully in real rooms.
Key takeaways
- Choose finish compatible with texture to avoid uneven coverage and staining
- Test paint on small area to gauge penetration and reveal texture
- Clean and repair surfaces before priming to ensure adhesion and durability
- Use swirling or stippling motions for heavy textures, smooth for flat areas
- Allow proper drying times between coats to prevent peeling and sags
- Protect floors and furniture, ventilate, and wear safety gear during painting
Table of Contents
- Introduction
- Key takeaways
- Why and When to Paint Textured Walls
- Tools and Materials Checklist
- Preparation: Cleaning, Repairs, and Priming
- Painting Techniques for Different Textures
- Timing and Project Planning
- Clean-Up, Maintenance, and Safety
- Cost, Common Mistakes, and Troubleshooting
- Visual Checkpoints and Final Inspection
- Conclusion
- FAQ
Why and When to Paint Textured Walls
Painting textured walls can refresh color, hide minor flaws, and help dirt and wear show less over time. Repaint when the texture is intact and you don’t have major damage or widespread seams; skim-coating or replacing drywall is usually needed if the texture is damaged or there are large, obvious flaws. Watch for signs that the texture should come off, such as peeling or bubbling paint and obvious damage that won’t smooth out with new paint.
These cues matter because they help you choose the right path and prep. For DIY projects, know that different textures like orange peel, knockdown, or stucco change how you prime, seal, and finish, and may require different sheen choices or stain-blocking steps. If moisture or structural issues are suspected, or you’re unsure how to proceed, it’s wise to check manufacturer guidance and local rules or consult a pro before starting.
When to keep texture vs. remove it
Keeping the existing texture on your walls is often the most cost-effective and time-saving approach, especially if you’re dealing with minor imperfections like small dents or scratches. The natural variation in textured surfaces can help hide these flaws without needing a full skim coat.
If you notice that your wall’s texture has some wear but isn’t damaged to the point of peeling paint or visible seams, sticking with a fresh coat of paint is usually sufficient. This approach not only saves money and time but also extends the life of your drywall by covering up dirt and grime.
However, if you spot major issues like warped drywall or extensive water damage, it might be worth considering skim coating or even replacing sections of wallboard to ensure a smooth surface before painting. This extra step can prevent further deterioration and provide a cleaner look for your finished paint job.
The decision comes down to assessing the condition of your walls and weighing the benefits against the costs involved in fixing versus repainting alone. For most homeowners, keeping texture intact is the way to go unless there are serious underlying issues that need addressing first.
Assessing wall condition and problem spots
Before you start painting textured walls, it’s crucial to inspect them for any signs of wear or damage. Look out for loose texture that can come off easily when touched; this indicates a need for repair before applying paint.
Mold growth is another red flag—especially if there are damp patches on the wall. Addressing moisture issues and mold removal should take priority over painting to prevent further problems down the line.
Check for wallpaper residue, which can affect how well your primer and paint adhere to the surface. Removing old adhesive might require extra prep work but is essential for a smooth finish.
Finally, inspect the substrate itself for any signs of damage or instability. If you find warped drywall or significant cracks, these issues should be fixed before painting to ensure longevity and prevent future problems. Taking the time upfront to assess your walls properly will save headaches later on in the project.

Tools and Materials Checklist
This checklist covers the tools and materials you need to paint textured walls, with budget-friendly alternatives and pro upgrades clearly called out. You’ll see core tools, essential materials, texture-specific gear, and items often missed by competitors so you don’t overlook anything.
Using the right combo and following good prep keeps texture looking even and durable, while avoiding common stumbling blocks. Prioritize safety, ventilation, cleanup, and disposal so the job stays clean, safe, and easy to finish without rework.
Essential tools and PPE
Before you start painting, make sure your toolbox is stocked with the right items.
- Roller setup: Choose a roller with short nap or specialty textured-roller. Confirm it fits the texture without damaging it. Skipping this can lead to poor paint adhesion and uneven coverage.
- Extension pole: Ensure you have an adjustable extension pole for reaching high spots. Verify its length matches your ceiling height. Not having one means lots of ladder climbing.
- Sanding block: Use a sanding block to prep glossy areas. Confirm it’s the right grit for smoothing out rough patches. Missing this step can result in poor paint adhesion.
- Utility knife: Have a sharp utility knife for cutting painter’s tape and plastic sheeting. Check its blade is sharp enough to cut through materials easily. Dull blades waste time and effort.
- Painter’s tape: Use high-quality painter’s tape around edges and fixtures. Confirm it sticks well but peels off cleanly afterward. Cheap tape can leave residue or peel too soon.
- Vacuum with brush attachment: Clean dust from textured surfaces before painting. Ensure the vacuum has a strong suction for thorough cleaning. Not using one leaves dirt under your paint.
- Respirator or mask: Wear an N95 respirator to filter out fine particles. Confirm it fits snugly and doesn’t fog up glasses. Skipping this can lead to breathing issues from dust and chemicals.
- Gloves: Use durable gloves for handling solvents and paints. Check they’re thick enough to protect your hands. Thin gloves tear easily, causing skin irritation.
Quick rule: Always have the right tools on hand before starting any painting project.
Materials and consumables
Before you start your textured wall painting, ensure you have all necessary materials ready to go.
- Bonding primer: Choose a high-quality bonding primer for textured surfaces. Confirm it’s stain-blocking if needed. Skipping this can lead to paint peeling off over time.
- Patching compound: Have joint compound or spackling on hand for minor repairs. Verify it matches the texture of your walls. Missing this step leaves visible imperfections.
- Caulk: Use high-quality caulk to seal gaps and cracks. Confirm it’s flexible enough for movement. Cheap caulk can crack over time, leaving unsightly marks.
- Drywall tape or mesh: Have drywall tape or mesh ready if needed for repairs. Ensure it covers seams properly. Missing this step leaves visible lines in your paint job.
- Paint: Choose a high-quality paint with the right sheen (flat, eggshell, semi-gloss). Confirm it matches the color and finish you want. Cheap paint can chip easily or fade quickly.
- Masking materials: Have painter’s tape and plastic sheeting for protecting edges and floors. Verify they cover all areas properly. Missing this step leads to messy cleanup and possible damage.
- Sandpaper: Use sandpaper to smooth out rough spots before painting. Confirm it’s the right grit for your surface. Not using sandpaper leaves visible imperfections in your paint job.
Quick rule: Always have quality materials and proper quantities on hand before starting any painting project.
Preparation: Cleaning, Repairs, and Priming
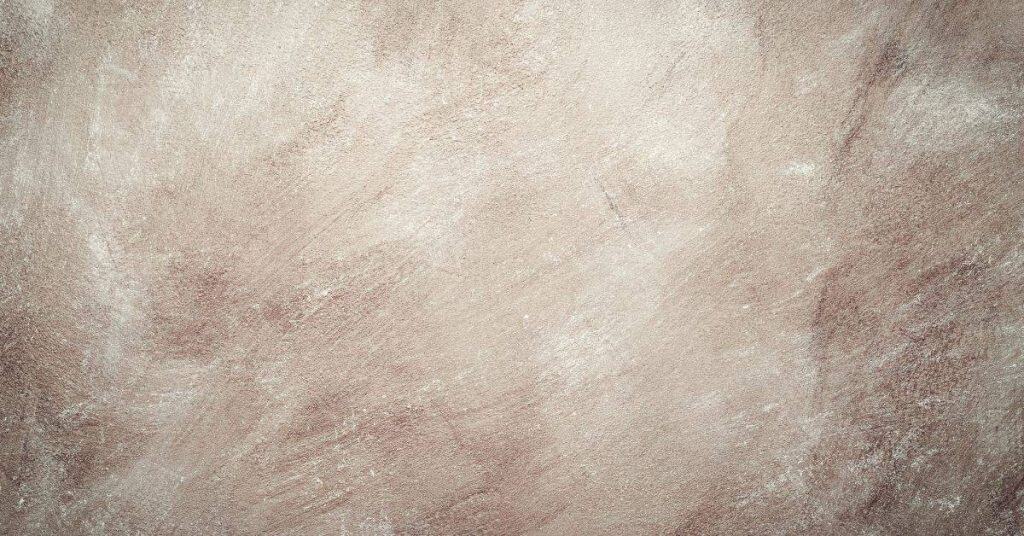
textured concrete walls need careful cleaning and targeted repairs without smoothing the surface; focus on embedded dust, loose texture, oil, and any wallpaper remnants, then seal with a primer designed for textured substrates.
this prep work matters because proper cleaning, patching, and priming set the stage for a durable finish; using the right methods preserves the texture and avoids loose patches, while a suitable primer helps the new coating adhere and evenly cover repaired areas, vents and drying times allowing for safe re-cleaning between steps.
Cleaning and removing contaminants
To prep textured walls, start by dusting the surface with a dry brush or vacuum to remove loose particles. Avoid using high-pressure water as it can flatten the texture; instead, mist lightly if needed.
For oil or grease stains, use a mild detergent solution followed by a thorough rinse and drying. If you encounter wallpaper remnants, carefully scrape off excess paper without damaging the textured surface. Use solvent-free neutralizers to break down stubborn adhesives before cleaning again thoroughly.
Always test any cleaner on an inconspicuous area first to ensure it doesn’t harm the texture or underlying material. This step-by-step approach keeps your walls ready for painting while preserving their unique look.
Patching, sanding, and feathering repairs
Identify any cracks or holes in the textured wall. Use a patch compound specifically designed for textured surfaces to fill these areas. Apply the compound carefully, matching the existing texture as closely as possible.
Once patched, gently sand the repair area with fine-grit sandpaper to feather out the edges and blend it into the surrounding surface. This helps minimize any contrast between old and new textures after priming and painting.
If necessary, skim-coat only small sections to maintain overall texture integrity. Over-skimming can lead to an unnatural look that stands out once painted. Take your time with these steps for a seamless finish.
Choosing and applying primer
Select a high-quality primer designed for textured concrete walls, such as one that blocks stains and provides excellent adhesion. This ensures the paint will adhere well and cover evenly.
Apply the primer using a roller or brush, depending on the texture’s depth and your preference. For deep textures, consider back-rolling to ensure full coverage without flattening the surface.
Allow ample drying time between coats as specified by the manufacturer. This is crucial for achieving optimal adhesion and durability. Once primed, clean up any residue or overspray before proceeding with paint application.
Painting Techniques for Different Textures
Textures demand the right tool. For orange peel, popcorn, and knockdown, pair the texture with the tool: rollers with the correct nap, a tight brush for corners, and a spray setup for larger flat areas. Use back-rolling or cross-hatching as needed to keep the surface even.
That approach helps you get even coverage and avoids drips on raised textures. It also keeps edges clean and reduces lap marks by working in sections and keeping a consistent pattern. Always check the product label for recommended settings, and follow thinning, cleanup, and cure guidance from the manufacturer.
Rollers and nap selection
The choice of roller nap is critical when painting textured walls. For orange peel texture, a medium 1/4-inch or 3/8-inch nap works well, providing enough coverage without getting stuck in the peaks.
For popcorn ceilings and walls, opt for a longer nap of about 7/8 inches to ensure even paint distribution across the raised bumps. A shorter nap will leave streaks and uneven spots.
A knockdown texture requires a medium-length roller, typically around 3/8-inch or 1/2-inch nap, to get into the grooves without overloading with too much paint.
The right nap ensures that you don’t lose control of your paint and helps achieve an even finish. Always test on a small area first before committing to the entire wall.
Sprayer vs. brush: when to choose each
Airless sprayers are ideal for heavy textures like popcorn ceilings, where a roller would struggle to cover the peaks and valleys evenly. Spraying allows you to get paint into every nook without overloading.
Brushes come in handy for tight corners or areas that require fine detail work. However, they can be messy with textured walls due to splatter and uneven application if not careful.
To minimize overspray when using a sprayer, adjust the fan pattern to cover less area at once and move slowly across the wall. This helps avoid drips and ensures even coverage without overloading the texture.
Layering, back-brushing, and touch-up tactics
Apply paint in thin layers to textured walls. This prevents sagging and ensures even coverage without overloading the texture. Let each layer dry before applying another.
Back-rolling or back-brushing is essential for getting paint into recesses of knockdown textures. Use a clean roller or brush to work the wet paint into these areas, ensuring full coverage.
For touch-ups on textured walls, use a small brush and apply thin layers, blending with the existing texture as you go. This helps hide repairs without creating noticeable patches or uneven spots.
Timing and Project Planning
Timing and planning means naming realistic prep, priming, painting, and drying durations for each space, then laying out a practical schedule for a single room or whole house. For every phase, outline whether it’s a short prep, a priming step, a first coat, a second coat if needed, and the drying intervals between coats. Weather and ventilation can change those times, so have built-in buffers.
Use room-by-room sequencing to start with the hardest textures, then move to adjacent areas, and allocate days accordingly. Check product labels for compatibility, matching tack coats and tools, and make sure you have enough product to avoid mid-project runs; if you’re unsure, use a qualitative rule-of-thumb and check the label or datasheet. Build in contingencies for redecorating or fixes and use a simple estimate vs actual times to improve future planning.
Drying times and recoat windows
The drying time for primer and paint can vary widely depending on the conditions. In general, primer needs around 2 to 4 hours to dry before you can apply a topcoat. Paint typically takes longer, usually between 6 to 12 hours, but this can extend up to a full day in cooler or humid environments.
The key factors affecting drying times are temperature and humidity levels. Higher temperatures and lower humidity speed up the process, while cooler temps and higher moisture slow it down significantly. Ensure you have enough time between coats for proper curing, which helps prevent peeling and other issues later on.
Safe recoat intervals should be observed strictly to avoid damaging your work. For primer, wait at least 4 hours before applying paint. If the weather is less than ideal, give it an extra day just to be safe. This buffer time will help ensure a strong bond between layers and minimize the risk of defects.
Project staging and working in sections
To manage large painting projects efficiently, break them into smaller, manageable sections. Start with ceilings first to avoid drips on freshly painted walls below. Then move onto trim work before tackling the main wall surfaces.
Avoid overworking wet paint by setting daily goals that fit within drying times. For instance, if you’re working in a single room, aim to complete primer and one coat of paint each day. This approach allows for proper curing without rushing or stressing about timing.
When planning your schedule, consider the texture of walls as well. Walls with heavier textures might require more time for drying between coats due to their porous nature. Plan accordingly by allocating extra days if needed, especially in areas where humidity is high or ventilation is poor.
Clean-Up, Maintenance, and Safety
Clean as you go: tidy tools and workspace, and plan safe disposal of paint and solvents. Follow a simple cleanup flow for rollers, brushes, and trowels, choosing water-based cleanup for latex paints or solvent-based cleanup if needed. Dry tools thoroughly and store them where they won’t get damaged.
This matters because it prevents residue from affecting future coats, reduces safety risks, and helps the textured finish last. Plan disposal with local rules in mind and wipe the workspace area clean to avoid spills or dust migration. Regular maintenance after painting, plus proper storage and routine cleaning, keeps textures looking sharp longer.
Tool and surface cleanup
Clean your tools immediately after painting to ensure they’re ready for the next job. Here’s how:
- Brushes: Rinse with water or solvent, depending on paint type. Use a brush comb to straighten bristles. Dry and store flat.
- Rollers: Remove excess paint by rolling over cardboard. Clean with soap and water for latex paints; use mineral spirits for oil-based paints. Hang to dry.
- Sprayers: Flush out the lines with cleaner or solvent, then rinse thoroughly with water. Store in a clean, dry place.
- Floor protection: Remove drop cloths and tarps carefully to avoid damaging floors. Clean up any spills immediately using absorbent materials.
- Trim: Wipe down edges with a damp cloth to remove paint splatters. Use a fine-grit sandpaper if necessary for tough spots.
Safety and disposal
Ensure proper ventilation when cleaning up, especially in enclosed spaces like basements or attics. Wear gloves, goggles, and a respirator to protect against harmful chemicals.
Check local regulations for disposing of leftover paint and solvents. Many areas have specific rules for hazardous waste, including recycling options for unused paint cans.
When handling volatile organic compounds (VOCs), keep the area well-ventilated and avoid skin contact. Dispose of rags and used solvent containers according to your local environmental guidelines.
Cost, Common Mistakes, and Troubleshooting
This section covers budgeting, common mistakes, and quick fixes for textured wall painting so you can plan without surprises. You’ll see practical DIY vs. professional cost cues, noting that local prices vary and you should check quotes to rough out materials, prep, coatings, and any specialty tools. We’ll outline frequent mistakes like skipping wall prep, picking the wrong primer for texture, and over- or under-coating, plus fast fixes for peeling, lap marks, or uneven sheen.
Why it matters: a solid plan saves time and money and keeps the finish durable. Understanding quotes helps you audit scope and avoid costly add-ons, and it helps you decide whether to DIY or hire pro based on prep level, priming needs, and cure times. These quick fixes—targeted sanding, re-priming, feathered touch-ups, and re-coating—are meant to keep you moving without turning a weekend project into a disaster.
Typical Costs and Budgeting Tips
When painting textured walls, it’s important to budget for both materials and labor. For a DIY project, expect to spend around $100-$250 on paint and primer per 1,000 square feet, depending on the quality of products you choose. Add another $50-$100 for specialty items like sandpaper, patching compound, and brushes.
When hiring a professional, costs can range from $3 to $6 per square foot, including materials and labor. This price includes thorough surface preparation, priming, painting, and cleanup. To get an accurate quote, ask contractors about their prep level, primer type, coating suitability for textured walls, and cure times.
To save without sacrificing quality, consider buying paint in bulk or opting for a mid-range brand that offers good coverage at a reasonable price. Also, check local hardware stores for sales on tools like sanders and rollers that you might need only once.
Troubleshooting Painting Problems
If your paint is flaking or peeling, it’s often a sign of poor adhesion. This can be caused by inadequate surface preparation or using the wrong primer for textured walls. To fix this issue, sand down the affected area until you reach bare substrate and re-prime before applying new paint.
Another common problem is texture shadows where light hits the wall at certain angles, making the texture more noticeable. This can be minimized by feathering out repairs during prep work or using a slightly darker shade of primer to blend in with existing textures.
If you notice an orange peel effect in new paint, it’s likely due to improper application techniques. Ensure your roller has the right nap for the texture and apply even coats without overworking the wet paint. For uneven sheen issues, use a high-quality paint that maintains consistent finish across different surfaces.
Visual Checkpoints and Final Inspection
Use a room-by-room visual checklist to sample key textures, paint absorption, and uniformity on walls, ceilings, and adjacents like doors and windows. Look for texture consistency, ridges, stipple, or knockdown, and run close-up texture tests plus a macro scan for repeatability. Prioritize touch-up actions by high-visibility areas and sharp edges, and plan final prep steps before declaring the job done.
This approach helps you catch issues early, save rework, and walk away confident the finish will hold up under real use. Light-angle inspections reveal surface imperfections that hide in flat lighting, so re-check after moving light positions or at different times of day. The final phase focuses on cleanliness, edge crispness, masking removal, paint pooling avoidance, and a clear sign-off that everything looks even and solid when inspected from typical viewing angles.
How to inspect for even coverage
Use this checklist right after the paint dries but before it fully cures, typically 24 hours later.
- Raking light angles: Use a raking light from different directions to spot thin spots and drips. If skipped, you might miss uneven areas.
- Inspection distances: Stand back at least 6 feet for overall coverage uniformity. Closer checks are needed for fine details.
- Drywall seams: Check if the tape is well covered and no gaps or thin spots remain. If missed, these areas will show over time.
- Corners and edges: Look closely at corners and edges to ensure crisp lines without paint pooling. If skipped, you’ll have messy edges.
- Door frames: Inspect door frames for even coverage and no drips or sags. If missed, it can look sloppy and unprofessional.
- Windowsills: Check windowsills for smooth coverage without excess paint buildup. If skipped, you might have to clean up later.
- Ceiling junctions: Look at where walls meet the ceiling for consistent texture and color match. If missed, it can look disjointed.
- Light switches and outlets: Ensure these areas are well covered with no paint buildup or thin spots. If skipped, you might have to touch up later.
Quick rule: Always use raking light angles and different inspection distances for a thorough check.
Final touch-ups and warranty-friendly tips
Use this checklist before declaring the job complete to ensure everything is in order.
- Document finish: Take photos of all areas for future reference. If skipped, you won’t have a record of the initial condition.
- Store leftover paint: Keep extra paint sealed and labeled for touch-ups. If missed, you might need to buy more paint later.
- Clean tools: Clean all brushes, rollers, and sprayers thoroughly before storing them. If skipped, they’ll be unusable next time.
- Masking removal: Carefully remove masking tape to avoid peeling off fresh paint. If missed, you might damage the finish.
- Clean edges: Wipe down edges and corners with a damp cloth for crisp lines. If skipped, it can look messy and unfinished.
- Drywall touch-ups: Address any drywall imperfections or nail holes before painting over them. If missed, they’ll be visible later on.
- Ceiling repairs: Fix any ceiling imperfections with spackle or joint compound. If skipped, it can look unfinished and unprofessional.
- Paint pooling: Remove excess paint from edges and corners to avoid drips. If missed, you’ll have a messy finish.
Quick rule: Always document the finish and store leftover materials properly for future touch-ups.
Conclusion
You now have a solid, practical plan to finish textured walls without wasting time or money. The goal is a durable, even look that stands up to daily use and cleaning, done safely and with the right prep.
First, confirm your approach by moving from prep to paint in a logical order: clean and repair as needed, prime where required, choose the right roller or brush for your texture, apply a proper first coat, let it dry fully, and then seal with a second coat if the texture calls for it. Check your work at each stage in good lighting, test a small area before committing, and follow the drying times you noted in your plan to avoid ridges or peeling.
Common mistakes to avoid are rushing through cleaners or repairs, skipping priming on bare or stained surfaces, and overworking a single spot that causes texture smearing or lap marks. Safety rules to follow are wear eye protection and a mask in dusty rooms, ventilate well, store brushes and rollers safely when not in use, and never paint over damaged or soggy walls. If you see cracks that keep widening, or you’re unsure about moisture or mold behind the texture, pause and reassess before continuing.
If the wall issues extend beyond a simple repaint, or the texture is unusual and tricky, it makes sense to call in a pro rather than push ahead solo. Stay disciplined, take it step by step, and you’ll get a durable, good-looking finish that will last. You’ve got this—start with the small test area and use that momentum to complete the project safely and cleanly.
FAQ
Do I need to sand or prime textured walls before painting?
You should dust and wipe the surface first. If the texture is very rough, a light coat of primer helps the paint stick and covers shadows.
What kind of brush or roller works best for texture?
A thick-nap roller or a stipple roller works well on textured walls. A brush is handy for edges, but don’t fight the texture; use the roller to cover large areas.
How long should I wait between coats?
Follow the paint can for dry time. In a typical room, plan for at least 4 hours between coats and more if it’s humid.
Any tips for clean-up and avoiding mess?
Remove drop cloths carefully and wash brushes with soap and water if you used latex paint. Rinse rollers and store them properly to keep them from drying out.