
Introduction
Choose the right exterior trim paint and prep correctly for durable, attractive results.
You’ll learn how to select paint types and finishes, prepare surfaces, and apply practical steps that work with different siding materials and climates.
Key takeaways
- Exterior trim paint enhances curb appeal and protects from elements.
- Inspect trim for damage, rot, or loose nails before starting.
- Gather tools: brushes, rollers, tape, drop cloths, sandpaper (120-grit).
- Clean, scrape, and sand trim; caulk gaps; prime to seal and improve paint adhesion.
- Use acrylic latex primer for best results on exterior trim.
- Choose 100% acrylic, high-quality exterior trim paint for durability.
- Apply paint in thin coats, allowing drying time between; use back-rolling technique for smooth finish.
Table of Contents
- Introduction
- Key takeaways
- Why Exterior Trim Paint Matters
- Assessing Your Trim: Condition & Materials
- Tools and Materials Checklist
- Prep Steps Before Painting (Detailed)
- Priming: When, Where, and Which Primer
- Choosing the Right Exterior Trim Paint
- Color Selection: Timeless & Trendy Choices
- Application Techniques for a Professional Finish
- Weather, Timing, and Seasonal Considerations
- Safety: Ladders, Heights, and Ppe
- Costs: DIY vs. Hiring a Pro
- Common Mistakes and How to Avoid Them
- Maintenance Tips to Extend Paint Life
- Environmental Impact & Eco-friendly Options
- Visual Checkpoints: Before & After Quality Checklist
- Practical Next Steps and Trusted Sources
- Share This Post
- Conclusion
- FAQ
Why Exterior Trim Paint Matters
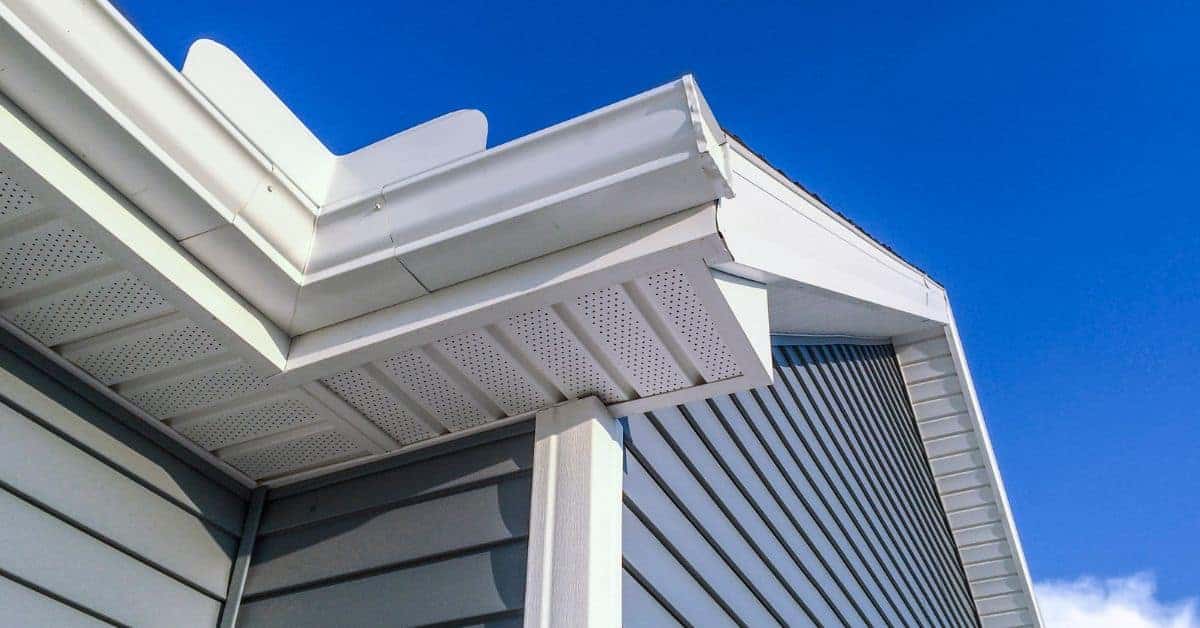
Exterior trim paint matters because it frames the house, protects the wood, and signals whether you care enough to maintain your investment. Good paint highlights architectural details, creates contrast with siding, and can boost curb appeal and perceived value when you pick the right gloss and color. Durable primers and sealants on trim pieces like soffits and fascia stop sun, moisture, and temperature swings from chewing away at the wood, which keeps maintenance cycles longer and repairs cheaper.
Choosing finishes and colors with durability in mind avoids frequent touchups and can improve resale value, so weigh the cost of premium paints against longer repaint intervals. Consider gloss level, color strategy, and how prep, caulk, primer, and topcoat work together, plus decide if DIY prep is realistic or if you need a contractor for proper edge sealing and weatherproofing. Quick checks: plan proper cleaning, use painter’s tape, prioritize sealing gaps, and stock the essential items to get long-lasting results.
Aesthetic vs. Protective Roles
The right exterior trim paint can make your home stand out by highlighting architectural details and defining contrasts with siding. Choose colors that complement your roof and siding to enhance curb appeal.
When it comes to protection, a good coat of primer and sealant is crucial before applying the topcoat. This barrier shields wood, metal, and vinyl from moisture and UV damage, extending the life of your trim pieces.
The finish you choose also plays a role in both aesthetics and durability. A glossier finish can hide flaws better but may require more maintenance over time compared to a matte or satin finish which are easier to touch up.
How Long a Good Job Should Last
A well-done paint job on exterior trim can last anywhere from 5 to 10 years, depending on the quality of materials used and how well it’s maintained. High-performance coatings tend to offer longer durability.
The lifespan also depends on local weather conditions. In areas with harsh winters or high humidity, you might need to repaint more frequently to keep your trim in good shape.
Regular inspections can help catch small issues before they become big problems, extending the life of your paint job and saving money on major repairs down the line.
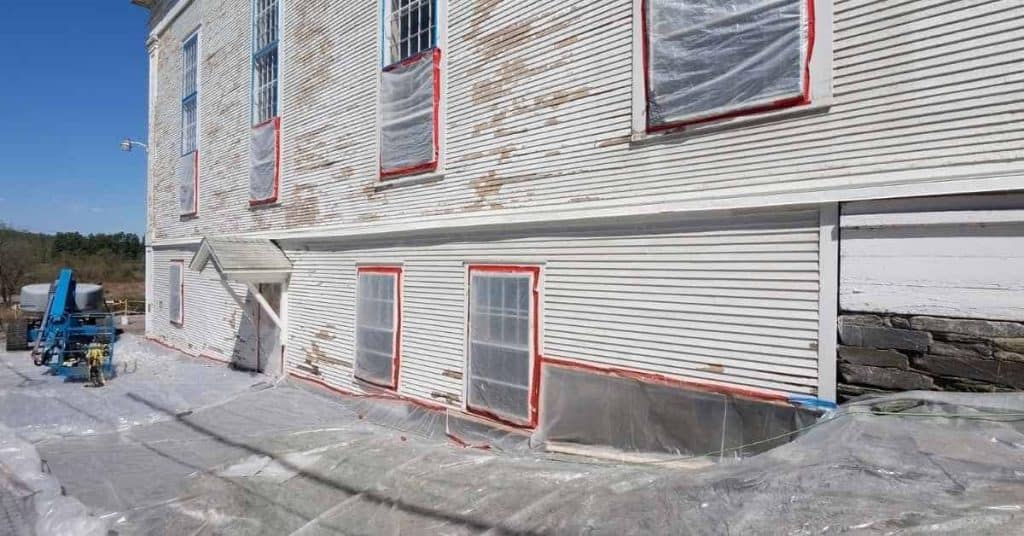
Assessing Your Trim: Condition & Materials
Start with a thorough look at trim condition and material. Look for cracks, peeling paint, rot, warping, water stains and hardware corrosion, and note where moisture could affect adhesion and substrate life. Identify trim types (wood, MDF, PVC, aluminum, composite) and distinguish painted finishes from bare substrates, including any vinyl or aluminum coatings, joints, and fastener conditions that will drive primer choices.
Check moisture and structural soundness and look for soft spots and past repairs. Plan repairs, sealing, or replacement before coating to prevent future failure. Match prep to the material and choose the right primer and dust-control steps, then pick a compatible topcoat and any moisture barrier or stain-blocking primer.
Visual Checkpoints for Damage
Before you start painting, take a good look at your trim to spot any issues that need fixing first.
- Check for cracks and splits: Look closely where the wood meets corners or joints.
- Note peeling paint: This can be an early sign of underlying problems like moisture intrusion.
- Inspect for warping or twisting: Trim that’s bent out of shape won’t paint well and needs repair.
- Look for mildew stains: Dark spots often mean there’s moisture trapped under the surface.
- Check if fasteners are loose: Screws or nails popping out can cause gaps where water seeps in.
- Identify rotted areas: Soft, spongy wood needs replacement to prevent further damage.
- Note any water stains: These indicate past leaks that could lead to future issues.
- Inspect for blisters or bubbles: Paint lifting off the surface can hide underlying problems.
- Check joints and corners: Look for gaps where water might be getting in.
- Note any discoloration: Dark patches may indicate moisture damage or mildew.
If you find movement, like warping or shifting, stop and address it before painting to avoid future problems.
Identifying Trim Materials Quickly
Different materials require different approaches for prep and paint. Here’s how to tell them apart:
- Wood: Found in older homes, it has a natural grain pattern and can be rough or smooth.
- MDF (Medium Density Fiberboard): Often used in newer construction, it looks uniform with no grain and feels smoother than wood.
- PVC (Polyvinyl Chloride): Usually white or off-white, it’s lightweight and has a plastic feel. It won’t absorb moisture like wood does.
- Aluminum: Shiny and metallic, it’s used for window frames and door casings where durability is key.
- Composite: A mix of materials that looks like wood but is more durable and weather-resistant. It often has a textured surface to mimic wood grain.
Avoid using warped or weak stock, as it won’t hold paint well and can lead to future issues.
Tools and Materials Checklist
This section gives you a practical, DIY-friendly tools and materials checklist for exterior trim work, organized into preparation, application, and finishing categories so you can plan in one pass. Expect cleaning supplies, masking materials, and surface patching gear for prep; brushes, rollers, sprayers, and extension poles for application; and caulk guns, putty knives, sanding blocks, and polishers for finishing. You’ll also see emphasis on PPE, ladders or stabilizers, drop cloths, painter’s tape, and clear notes on choosing primers and paints that bond to concrete or masonry trims.
This matters because correct tool selection speeds the job, reduces errors, and protects edges from damp, staining, or peeling when you’re dealing with weathered exterior trim. Following the checklist keeps you focused on surface prep, material compatibility, and safe handling, so you avoid rework, rust, or paint failure that eats into your budget. Keep tools clean, store them dry, and inspect wear before the next project so a small gap doesn’t become a big repair.
Essential Tools for a Professional Finish
To achieve a professional finish, you need the right tools that will help you prep your exterior trim properly and apply paint smoothly.
- Bristle brushes in various sizes (2-inch to 4-inch)
- Paint rollers with short nap for smooth surfaces
- Sandpaper grits ranging from fine to coarse
- Caulk gun and cartridges of exterior-grade caulk
- Putty knife set for applying filler and patching compound
- Masking tape, drop cloths, and painter’s tape
- Ladders with stabilizers or extension poles
- Sanding block and orbital sander
- Cleaning supplies like degreaser and water sprayer
- Filler and patch compounds for repairing cracks and holes
Ensure all tools are in good working condition before starting your project.
Paint, Primer, and Caulk — What to Buy
Selecting the right primer and paint is crucial for a long-lasting finish. Ensure you choose products that are compatible with your exterior trim material.
- Alkyd or latex-based primers depending on surface type (concrete, wood)
- Elastomeric paints for high-performance weather resistance
- Caulk suitable for exterior use and paintable if needed
- Sandpaper to smooth out rough areas before painting
- Filler or patch compound for repairing cracks and holes
- Masking tape, painter’s tape, and drop cloths
- Ladders with stabilizers or extension poles
- Cleaning supplies like degreaser and water sprayer
Always check the coverage area on paint cans to estimate how much you need.
Prep Steps Before Painting (Detailed)
Before any paint touches a surface, you fix the underlying issues and clean it thoroughly. Start with a thorough surface assessment and a moisture check to spot water intrusion, rot, rust, or other problems that will ruin the finish, then plan and complete the repairs before painting; a sound prep stops peeling, extends coat life, and saves you time and money that pay off over years. Next, scrub the surface clean, degrease where needed, rinse thoroughly, and dry completely so nothing traps moisture or oils that can peel later.
Then you scrape loose paint, feather the edges, sand rough spots, and repair cracks or gaps with the right patching materials for wood, masonry, or metal, because missed spots bite back later. Prime and seal with the right primer for the substrate and coatings you’re using, and don’t skip stain blockers or bonding primers where they’re needed; let each coat cure fully and test adhesion before topcoating. Finally, mask, cover, and plan around weather—keep temps and humidity in line, use drop cloths and tape, and wear proper protection and ventilation to keep the job durable and safe, protecting the area from dust and drips.
Cleaning and Mildew Removal
Start by assessing the condition of your trim for dirt, mold, and mildew. Use a solution of water and mild detergent or a commercial cleaner designed for exterior surfaces to wash away grime. For stubborn stains, consider using a power washer but keep it at least 10 feet away from the surface to avoid damaging the wood.
For areas with mildew, apply a mixture of bleach and water (typically one part bleach to three parts water) and let it sit for about 15 minutes before rinsing thoroughly. This helps kill mold spores without harming your trim. After cleaning, ensure all surfaces are completely dry before proceeding to the next step.
Scraping, Sanding and Feathering Edges
Begin by removing any loose or peeling paint with a scraper. Work carefully around corners and edges to avoid damaging the underlying surface. Once you’ve scraped off all loose material, use sandpaper to smooth out rough spots and feather sharp edges into the surrounding sound paint.
Avoid using overly coarse grit as it can damage the wood; start with medium-grit paper (about 100-120) for initial smoothing and then switch to finer grits like 150 or higher for a smoother finish. Feathering is crucial for blending old paint into new, ensuring a seamless transition when you apply your primer and topcoat.
Repairing Damage and Replacing Boards
Inspect your trim closely to identify any cracks, gaps, or damaged sections that need repair. For small holes from nails or screws, use a wood filler that matches the type of wood you’re working with. Apply it evenly and let it dry before sanding smooth.
If entire boards are rotten or severely damaged, replace them entirely rather than trying to patch them up. When replacing trim, ensure all fasteners are securely driven but not over-tightened to avoid splitting the wood. Use flashing where necessary to prevent water intrusion around joints and corners.
Priming: When, Where, and Which Primer
Primer is not optional on every surface, so know when you need it: bare or stained wood, metal, and chalky or failing surfaces usually require a coat, while lightly prepared or previously painted areas with good adhesion may skip it. For knotty or resinous wood, use stain-blocking primers; for metal, choose bonding or adhesion-promoting primers; for chalky surfaces, apply a stabilizing or calcium carbonate/chalk-primer to seal and improve grip. Plan for surface prep first—clean, lightly sand, repair, and, if needed, address moisture—then pick the primer chemistry that targets the substrate and the topcoat you intend to use. For best results, follow label instructions on coverage, drying times, recoat windows, and whether the primer is rated for exterior use and for the specific topcoat you plan to apply (oil- vs. water-based).
This matters because proper priming saves time, reduces failures, and extends finish life on exterior trim and interior surfaces alike. You’ll get better stain control, less bleed-through, and a stronger bond when you follow coat thickness, number of coats, and drying times, plus correct environmental conditions and recoat windows. A quick decision flow and practical tips on brushing, rolling, and troubleshooting bleed-through, staining, or peeling keep you from guesswork and rework, while internal links to related prep tips and topcoat recommendations help you stay on track. For common substrates, see the cross-check below:
Bonding Primers for Metals and Vinyl
When dealing with metals like aluminum or previously unpainted metal, a clear bonding primer is essential to ensure the paint sticks properly. This type of primer helps create a strong bond between the surface and the topcoat. Use primers labeled for exterior metal applications, and verify they are compatible with your chosen topcoat (e.g., a water-based topcoat on a shellac or epoxy-containing primer may require a specific formulation). For slick vinyl surfaces, such as PVC trim, use a specialty bonding primer designed for these materials. These primers are formulated to adhere well to smooth, non-porous surfaces like vinyl and ensure your paint job lasts longer without peeling or flaking off. Look for primers labeled “exterior,” “bonding/adhesion-promoting,” and compatible with both acrylic and alkyd topcoats. Before applying the primer, make sure the surface is clean and free of dirt, grease, and any loose particles. Light sanding (320–400 grit) can help improve adhesion, but avoid over-sanding as it may damage the substrate. After priming, allow the primer to reach the recommended tack-free time before applying the topcoat.
Stain-blocking and High-tannin Wood Primers
If your wood trim has knots or resinous areas that could cause bleed-through, use an oil-based primer or shellac-based primer to block these stains. These primers are effective at sealing in tannins and preventing them from staining the topcoat. For severe cases of bleeding or dark-staining woods, multiple coats of a stain-blocking primer may be necessary before applying your final paint color. This ensures that no discoloration will show through once you apply the finish coat. When painting high-tannin wood (cedar, redwood, oak with visible tannins), test the primer on an inconspicuous area first, and consider applying a 2-coat strategy (a first shellac/oil-based coat, followed by a water-based topcoat) if you see any bleed-through. Also ensure proper ventilation and use eye/respirator protection when applying oil-based primers.
Choosing the Right Exterior Trim Paint
Choosing the right exterior trim paint starts with understanding the paint families and how they behave on trim: 100% acrylic latex resists UV and chalking, alkyd or oil-modified coatings offer great adhesion and film strength, and specialty coatings target problem substrates or climates. Consider how trim substrates—wood, PVC, metal—take primer, bonding agents, and caulks, and plan for the prep steps like sanding, moisture checks, stain blocking, and careful caulk sealing to create a durable base. Finish selection matters too; semi-gloss hides dirt and resists mildew but shows flaws, while satin is easier on non-load-bearing surfaces; expect repaint cycles and budget accordingly, especially in humid or temperature-fluctuating areas.
In practice, the right choice saves you from cracking, peeling, and frequent touchups, while rough prep or skipping primer invites quick failure; choose open- or closed-cut edges, brush or spray, and watch weather windows to avoid wasted coats. If you know your climate, your substrates, and your budget, you can build a simple decision framework and still call a pro for tricky trim work or warranty coverage.
Substrate-specific prep and primers at a glance (dos and don’ts you can apply before selecting your topcoat):
- Wood (painted or bare):
- Do clean thoroughly and sand glossy areas to a dull finish; repair cracks with a high-quality wood filler, then caulk joints with a paint-ready sealant.
- Do block tannins and knot bleed before topcoating. Use a stain-blocking primer (shellac- or oil-based) on tannin-rich wood or knotty areas. Examples include a shellac-based primer like Zinsser B-I-N or Kilz Original. Follow with a compatible 100% acrylic topcoat.
- Don’t skip moisture checks on wood; if moisture content is high, address source leaks or sealants before priming to prevent blistering.
- Vinyl PVC trim:
- Do clean with a mild detergent, rinse, and allow thorough drying; lightly scuff with 180-grit to improve adhesion.
- Do use a bonding primer labeled for vinyl or PVC (water-based acrylic primers marketed for vinyl), then finish with a high-quality exterior acrylic topcoat.
- Don’t prime or topcoat over non-porous surfaces without a vinyl-appropriate bonding primer—without it, adhesion failures are common.
- Metal trim (aluminum, steel):
- Do remove loose finish, rust, and flaky coatings; lightly etch or abrade the surface to create a key, then apply a rust-inhibitive or bonding primer designed for metal (oil- or water-based depending on the system).
- Do on steel or iron: use a corrosion-inhibiting primer (often an epoxy or rust-blocking alkyd) before topcoating; ensure gaps and joints are sealed after priming.
- Don’t skip moisture checks on metal substrates; verify that any trapped moisture is addressed and that sealants used with metal primers accommodate expansion and contraction.
- General window for all substrates:
- Do check product labels for substrate compatibility, recoat times, and ventilation requirements; use a breathable primer if moisture or tannin bleed is a risk.
- Don’t apply over damp surfaces or in wet conditions, and avoid applying oil-based primers in enclosed spaces without ventilation.
In practice, the right choice saves you from cracking, peeling, and frequent touchups, while rough prep or skipping primer invites quick failure; choose open- or closed-cut edges, brush or spray, and watch weather windows to avoid wasted coats. If you know your climate, your substrates, and your budget, you can build a simple decision framework and still call a pro for tricky trim work or warranty coverage.
Best Sheen for Trim (Flat vs. Satin vs. Semi-gloss)
When it comes to exterior trim, durability and how well the paint holds up against dirt are key factors. Flat sheens look great but show every mark and spot easily. For most jobs, satin or semi-gloss finishes work better because they’re tougher and hide minor imperfections.
Semi-gloss is a bit shinier than satin and easier to clean, which makes it ideal for high-traffic areas like doors and windows. Satin provides a nice balance between durability and appearance, making it a go-to choice for most trim work.
Choose the right sheen based on how much wear your trim will get and how often you’re willing to wash it. If in doubt, start with satin—it’s usually the safest bet for most homes.
High-performance Coatings & Sealants
When you’re dealing with extreme climates, regular paint might not cut it. Elastomeric coatings are a game changer for areas that see lots of temperature swings and moisture. They stretch without cracking and can last years longer than standard paints.
Ceramic-infused sealants offer another layer of protection by reflecting heat and UV rays better than typical paints. This means less fading, chalking, and wear over time. While they come with a higher price tag, the durability makes them worth it for high-traffic or harsh environments.
Color Selection: Timeless & Trendy Choices
Trim color should relate to body color, roof, and surrounding homes so the house reads as a cohesive unit or makes a deliberate statement. Use high-contrast trims to highlight architectural features, or subtle accents for a softer look. Define a simple rule: test how trims look in daylight, from across the street, and against the roof color before you buy paint.
Neighborhood style and house type drive palette choices, so consider whether you live in a cottage, a modern box, or a row of townhomes. Practical testing matters: use sample boards, observe color in natural light at different times, and follow a simple decision checklist. Avoid clashing with the roof, don’t overdo dark trims on small facades, and think about long-term maintenance.
Harmonizing Trim with Siding and Brick
To find the right trim color for siding, start by testing a few shades that complement your home’s body color. Use swatches or small test panels to see how they look in natural light throughout the day.
For brick homes, consider a trim color that either contrasts sharply or complements the brick tone subtly. A typical starting point is choosing white or off-white for a clean look against dark bricks, or a soft gray for a more sophisticated appearance on lighter bricks.
To visualize combinations effectively, place swatches next to your siding and brick samples in different lighting conditions. This helps you pick colors that blend well without overwhelming the overall aesthetic of your home.
Current Trim Color Trends and Classic Picks
For a timeless look, white or cream trim is always safe. These neutral tones work with almost any siding color and roof type, providing a classic appeal.
If you’re looking for something more modern, consider black or charcoal accents paired with lighter body colors like gray or beige. This high-contrast approach can make your home stand out while maintaining a sleek appearance.
For historic homes, try using softer shades of blue or green as accent colors around doors and windows to add character without overpowering the facade. These hues complement traditional architecture beautifully.
Application Techniques for a Professional Finish
Brushing, rolling, and spraying are the three reliable ways to finish exterior trim. Use brushing for sharp edges and tight corners, rolling for broad faces, and spraying for fast coverage on flat surfaces—switch between methods within a project without leaving streaks or heavy overlaps. Prepare the surface well first—clean, sand, prime when needed, mask surrounding siding, and feather edges to prevent bleed-through and lap marks. Pay attention to tool choice and technique: select the right brush (synthetic for most paints, natural only for certain finishes), pick a compatible roller nap, and set the sprayer correctly to avoid runs. Edge and cut-in work should be deliberate, with even application and minimal coats to achieve uniform coverage with clean lines.
Knowing when and how to apply each method saves time and money on a DIY site. Proper setup—correct tip size and distance for spraying, appropriate masking, and back-rolling or back-brushing as needed—reduces drips, overspray, and sagging. Temperature, humidity, and drying times matter, so schedule work for the right conditions and scrub tools clean after use. This approach also keeps your finish durable by matching topcoats to trim material and by inspecting the job after each coat to touch up and recoat only where necessary.
Brush and Roll Techniques for Clean Edges
To achieve clean edges when painting trim, start by cutting in around corners and along the edges of your siding or brick with a brush. Use a 2- to 3-inch angled brush for sharp lines and tight spaces.
After cutting in, switch to a roller for larger areas. A short nap roller works best on smooth surfaces like painted wood or metal. Roll over the cut-in area gently to blend the edges without disturbing them. This technique ensures a seamless transition between brushed and rolled sections.
Maintain an even pressure while rolling and keep your brush close by to touch up any missed spots right away. This helps prevent lap marks and keeps the finish looking professional.
When to Use a Paint Sprayer (Pros & Cons)
A paint sprayer can speed up your project, but it requires careful setup and masking. It’s ideal for large areas with few corners or intricate details.
Pros
- Saves time on big projects.
- Covers hard-to-reach spots easily.
- Smooth finish without brush marks.
Cons
- Requires thorough masking to prevent overspray.
- Higher initial cost for equipment and materials.
- Less control over fine details compared to brushing.
If your trim has lots of corners or small sections, stick with a brush. For large, open areas, a sprayer can be the way to go.
Weather, Timing, and Seasonal Considerations
Keep exterior trim painting within a narrow window by using concrete, actionable thresholds. Ideal substrate temperature is 60–75°F (16–24°C); you can work safely from 50–85°F (10–29°C) but aim for the upper end of comfort to optimize film formation. Target relative humidity under 60–65% for best results; in very humid conditions (over 70%), expect longer dry and cure times. Monitor dew point and ensure it is at least 5°F (3°C) below the surface temperature to minimize condensation risk. Plan around weather windows that avoid sun glare, high wind, and overnight temperature drops, and don’t paint if rain is likely within 24 hours or during freeze/thaw cycles. Drying times stretch or shrink based on humidity and temperature, so time applications to the conditions and choose products that match those ranges.
Humidity and dew point matter because high moisture slows moisture loss and dew on the surface ruins film formation if you proceed too soon. Seasonal readiness means check trim temperature relative to air, substrate moisture content, and avoid surfaces still absorbing moisture; use shade or partial shade to manage heat and protect coatings. Practical steps: follow product guidelines, pick formulas suited to current temps, plan a seasonal schedule with fixed start/stop times, and use protective coverings and safe curing practices to ensure a durable finish. Add these concrete steps to your plan: verify current and forecasted temps for the scheduled day, check humidity and dew point, test moisture content with a meter, mask nearby surfaces, and keep a dedicated workspace with a covered area to protect fresh coats from rain and contamination.
Scheduling Around Rain, Heat, and Cold
Painting exterior trim works best when temperatures hover between 60–75°F with low humidity; acceptable ranges extend to 50–85°F if humidity remains under 65%. Avoid painting on days where rain is forecasted for the next 24 hours. In hot weather, aim for early morning or late afternoon when sun exposure is less intense. This helps prevent the paint from drying too quickly before it can properly adhere to the surface. Cold temperatures slow down curing times, so avoid painting if overnight temperatures drop below freezing.
How Weather Affects Dry Times & Recoat Intervals
Dry and recoat times vary based on temperature and humidity. High humidity can slow down drying, so allow extra time for the paint to cure properly. As a rough guideline (check your product data sheet for exact numbers): in ideal conditions (70°F, 50–60% RH), plan about 4 hours between coats for latex paints and 6–8 hours for oil-based paints; recoat after the surface is dry to the touch and free of tackiness. In cooler or more humid conditions, extend to 6–24 hours between coats and allow full cure before heavy use. Always follow manufacturer guidelines for the specific product you’re using and adjust for local climate.
At-a-glance checklist for scheduling, weather, and application
- Temperature: aim 60–75°F (16–24°C) for ideal work; acceptable 50–85°F with caution.
- Humidity/dew point: keep relative humidity under 65% if possible; ensure dew point is at least 5°F below surface temp to avoid condensation.
- Forecast: only paint when a clear window of at least 24 hours of dry weather is predicted; avoid freeze/thaw periods.
- Moisture readiness: test trim moisture content and ensure surfaces are not still absorbing moisture; use shade to manage heat if needed.
- Coverage and product selection: verify coating is suited to current temps; check label for recoat intervals and dry times.
- Dry times and recoat: plan 4–6 hours between latex coats (longer in cooler/humid conditions); 6–8 hours for oil-based; full cure per can instructions.
- Protection: mask adjacent surfaces, protect plants and furnishings, and monitor the finish as conditions change.

Safety: Ladders, Heights, and Ppe
Ladder safety is non negotiable on any DIY job; choose the right type for the task, set it at the proper angle on solid ground, secure the base, and always maintain three points of contact while climbing. For fall prevention, use stabilizers or a fall-arrest system where appropriate, avoid working from rooftops, wet or uneven surfaces, and keep the work zone clear of bystanders and obstacles. Dress for the task with the right PPE around solvents and dust, including respirators or painters’ respirators with organic vapor cartridges when solvent fumes are present, eye and face protection, gloves, and non-slip footwear.
Keep power tools safe and effective: unplug or latch safety switches when not in use, manage cords to prevent trips, use dust collection and guards, and inspect drills, grinders, and sanders regularly. Plan for environment and process cautions such as wind, rain, or extreme heat, ventilate work areas for paint fumes, contain and dispose of solvents properly, and avoid shortcuts that create hazards, and stay aware of nearby children or pets. With clear rules and consistent habits, you reduce serious injuries, protect your crew, and keep a DIY project moving forward with fewer delays and surprises.
Ladder Setup and Working at Height Best Practices
Select the right ladder for your job, ensuring it’s sturdy enough to handle your weight and any tools you’ll carry. Place the ladder on a stable surface, free from slippery or uneven ground.
Set up the ladder at an angle where the base is one foot away from the wall for every four feet of height. Secure the bottom with sandbags or tie it off if necessary. Always maintain three points of contact—two hands and a foot, or two feet and a hand—for stability while climbing.
Consider using scaffolding or aerial lifts when working at extreme heights to reduce risk. If unsure about your ladder setup or height work, hire a professional to ensure safety.
Chemical Safety and Ventilation
Wear a painters’ respirator with organic vapor cartridges when working with solvents or paints that emit strong fumes. A simple dust mask won’t provide enough protection against these chemicals.
Handle paint cans carefully to avoid spills, and store leftover materials in a secure area away from children and pets. Dispose of empty containers according to local regulations for hazardous waste.
Ventilate the work area well by opening windows or using fans to reduce exposure to paint fumes. Keep the environment dry and cool if possible to prevent condensation that could affect your paint job.
Costs: DIY vs. Hiring a Pro
Costs break down into materials, time, and labor, and you must compare the DIY route against hiring a pro. Start with typical materials—primer, paint, caulk, masking, brushes and rollers, sandpaper—and factor finish type, since flat coatings cost less upfront than high‑gloss or specialty finishes. Then add realistic time estimates for prep, primer, two coats, and drying, with contingencies for weather and substrate condition, because delays can swamp a tight schedule.
Compare labor costs by looking at typical per‑linear-foot or per‑project pricing and what’s included—prep work, multiple coats, clean‑up, and any trim or detail work. The right choice hinges on project scope, time you can spare, and skill; bigger jobs with intricate trim or many windows push the pro route, while small, straightforward jobs with good weather windows can be budgeted for DIY and still meet quality goals.
Estimating Materials and Labor
To estimate materials for your exterior trim painting project, start by measuring the linear feet of all trims, including windowsills, door frames, and fascia. Multiply this length by the width in inches to get square footage. For paint, a rough rule is one gallon covers about 400 square feet with two coats.
Primer needs depend on the condition of your trim. If it’s old or has peeling paint, you might need an extra coat before applying finish paint. Brushes and rollers should match the type of paint you choose; use high-quality tools to avoid streaks and drips.
Labor costs vary widely based on experience and project complexity. A DIY homeowner can expect to spend about 10 hours per 1,000 square feet for prep work, priming, painting, and cleanup. Professionals charge by the linear foot or overall project size, typically ranging from $2 to $5 per linear foot.
When It Makes Sense to Hire a Pro
Hiring a professional painter is advisable for extensive rot repair or multi-story work where safety becomes a concern. Professionals have the right equipment and experience to handle tricky angles and high elevations safely.
If your home has intricate details, such as ornate moldings or historic restorations, a pro can ensure precision and maintain authenticity. Time constraints also play a role; if you need the job done quickly without compromising quality, professional help is worth considering.
Lastly, when dealing with extensive prep work like sanding old paint off large areas, professionals are better equipped to manage dust control and waste disposal efficiently. This ensures your project stays on track while maintaining safety standards.
Common Mistakes and How to Avoid Them
Common DIY painting mistakes include skipping primer, painting in the wrong weather, using the wrong caulk, and applying with sloppy technique that leaves lap marks, uneven edges, and a finish that peels long before it should. Skip primer and surface prep and you’re fighting peeling, poor adhesion, and grain or metal showing through, so follow a quick pre-paint checklist: wash, degrease, rinse, dry, sand rough spots, then prime bare wood or metal. Plan around weather and material compatibility as well, selecting the right caulk and painter’s tape for the substrate and choosing the correct brush or roller technique to avoid over-brushing and poor edge control.
This matters because small mistakes compound and cost you time, labor, and money, so you’ll want to lock in ideal conditions, monitor forecasts for exterior trim, and respect curing temperatures and humidity to prevent slow or improper cure. Understanding product compatibility—wood, PVC, metal, masonry—keeps you from cracking or peeling when you pick caulk, sealant, and tape that work with your paint and substrate. If you follow a sound application routine, use the right sheen, protect joints, and plan post-paint maintenance, you’ll extend life, reduce touch-ups, and get a durable, professional-looking result.
Fixes for Peeling, Blistering, and Lap Marks
To prevent peeling paint, ensure the surface is clean and dry before painting. Use a primer on bare wood or metal to seal it properly.
If you notice blisters forming, they are often caused by moisture trapped beneath the paint layer. Sand down the affected area gently, then scrape off any loose paint and reapply a fresh coat after priming.
Lap marks occur when wet paint dries unevenly due to overlapping strokes or improper brush loading. To avoid this, work in small sections and maintain consistent brushing speed and pressure throughout each section.
Maintenance Tips to Extend Paint Life
Maintenance to extend paint life comes down to a practical, repeatable routine: set a cadence for inspections every season or quarter, look for chalking, peeling, cracking, loose trim, and caulk deterioration, and decide who should perform the checks and how to document findings so nothing slips through the cracks. Clean and prep surfaces with the gentlest effective cleaners, frequency aligned to weather and dirt buildup, and address mold, mildew, or efflorescence quickly because cleaning directly affects how long the next coat will hold. Tackle routine maintenance tasks like caulk replacement, hardware tightening, rust treatment on metal trims, and checking for insect damage so small problems don’t escalate into repaint triggers or moisture intrusion.
The value shows up in fewer full repaints, lower material costs, and less weather damage over time when you budget for minor touch-ups as part of a proactive plan rather than reactive repairs after failure. Use sealant refreshes and primer when you see sealant cracks or moisture under the surface to protect the substrate and ensure adhesion for the next coat. Document wear, plan weather-aware timing, and decide between minor fixes and a full repaint so you stay ahead of issues and keep trim looking sharp without unnecessary downtime or risk.
Seasonal Checklists and Quick Touch-up Tips
Regular checks help catch issues early, saving you time and money in the long run. Here’s what to look for each season:
- Spring: Inspect for winter damage like cracks or peeling paint.
- Summer: Check caulk around windows and doors for signs of wear.
- Fall: Look for any loose trim that may have come out of place due to settling.
- Winter: Keep an eye on ice dams near the roofline that can cause water damage.
- Inspect all exterior wood, metal, and plastic trims for chalking or peeling paint.
- Check screws and nails; tighten any loose ones before they pull out completely.
- Clean mold and mildew from surfaces to prevent further growth.
- Replace deteriorated caulk around windows and doors with fresh sealant.
- Apply rust treatment on metal trims if you notice signs of corrosion.
- Look for insect damage, especially in wood trim; repair any holes or splits.
- Use a soft-bristled brush to remove dirt from painted surfaces before repainting small areas.
- Touch up chipped paint with matching enamel paint and let it dry thoroughly.
If you notice movement in the trim, such as cracks widening or gaps appearing, address these issues immediately to prevent further damage.
Environmental Impact & Eco-friendly Options
Eco-friendly exterior trim paint uses low-VOC, waterborne formulas with minimal odor to suit DIY projects and indoor-outdoor spaces. Choose products that balance durability and environmental impact, like low-VOC acrylic/latex or waterborne alkyds, and practice good surface prep. Focus on using greener primers and proper tools to extend coat life and reduce waste.
Proper surface prep, water-based primers, and low-emission tools help you get longer paint life and fewer touch-ups. Store and dispose of leftover paint correctly, recycle cans, and reuse mixed colors where feasible to cut waste. Estimate needs carefully and favor sustainable packaging or refill options to keep your project green without blowing the budget.
Choosing Low-VOC and Low-Odor Products
When selecting exterior trim paint, opt for low-VOC (volatile organic compounds) options to reduce environmental impact. These paints minimize harmful emissions while still providing good coverage and durability.
Low-VOC paints often come in both waterborne acrylic and alkyd forms. Acrylics are generally easier to apply and dry faster, making them ideal for DIY projects. Alkyds offer better adhesion and resistance but may have a stronger odor and longer drying times.
To find the best low-VOC lines, look for products certified by reputable organizations like Green Seal or Greenguard. These certifications ensure that the paint meets strict environmental standards without compromising performance.
Visual Checkpoints: Before & After Quality Checklist
Visual Checkpoints set a clear standard for exterior trim work, defining a professional-looking finish as an even surface with crisp edges, a consistent color, and minimal brush or roller marks across mouldings, corners, fascia, and soffits. It pairs a pre-paint inspection, in-process cues for uniform coverage and edge sharpness, and post-paint verification, plus a photos-to-take guide and a printable quick-criteria checklist with pass/fail benchmarks you can use at a glance. Follow this to judge success by simple metrics: even pigment, no lap marks, proper caulk at joints, correct dry times, and documentation of before, during, after, and close-ups so you can spot problems before they bite.
This matters because DIY jobs fail when you guess at finish quality; the visual QC gives you objective signals, helps you catch moisture or substrate issues early, and saves rework by guiding touch-ups and timing. Use the photos, notes, and the one-page checklist as your on-site boss, so you stay steady, finish faster, and end with trim that looks like a pro did it rather than a rushed weekend hack.
10 Inspection Points for a Successful Job
Before you call it quits, make sure your exterior trim looks sharp and professional. Here’s what to check:
- Clean caulked seams with no gaps or cracks.
- No visible brush marks or roller lines on the paint surface.
- Consistent sheen across all painted areas.
- Sharp, clean edges where trim meets siding or brick.
- No drips or sags in corners and recesses.
- Uniform coverage without bare spots or thin layers.
- No signs of future peeling or blistering on the surface.
- Cleanliness around windows and doors with no paint overspray.
- Consistent color matching across all elevations.
- Proper touch-ups made to blend in seamlessly.
If you spot any issues, address them immediately before the paint dries completely. This ensures a flawless finish that will last for years.
Practical Next Steps and Trusted Sources
This section lays out concrete, actionable steps you can take now: confirm the project scope, plan surface prep, choose primer and paint, and set a realistic timeline around weather windows. It also flags prep and safety checks and points you toward trusted resources for checklists, a paint calculator, and product pages without promising downloads. Share this guidance with neighbors or on your project page to help others plan.
Doing it right saves time, money, and headaches; skipping prep leads to peeling paint and wasted effort. Use the trusted sources to verify product compatibility and to compare alkyd versus latex, primers, and color strategies for concrete-adjacent trims. The resources are chosen for DIY friendliness and clear, practical guidance that keeps you out of the risk zone.
Printable Prep & Materials Checklist
Before you start, grab a one-page checklist to keep track of everything you need for your paint project. This handy tool will help ensure you don’t miss any crucial steps or materials.
- Confirm the scope and timeline of your painting project.
- Inspect all surfaces for cracks, chips, and loose paint.
- Clean the area thoroughly with a degreaser and water rinse.
- Repair any damaged areas using appropriate fillers and sealants.
- Sand rough spots to create an even surface for painting.
- Maske off windows, doors, and other surfaces you don’t want painted.
- Select the right primer based on your trim material (wood, metal).
- Choose a high-quality exterior paint that suits your climate.
- Gather necessary tools: brushes, rollers, drop cloths, ladders.
- Check weather forecasts to avoid painting in wet or windy conditions.
- Wear protective gear including gloves, goggles, and respirator mask.
- Ensure proper ventilation during paint application and drying stages.
Once your prep work is complete and all materials are ready, you’re set to start painting. If any surfaces show signs of movement or shifting, address them before proceeding with the actual painting process.
Share This Post
Share this post with ready-to-use social captions and platform variations for Pinterest, Facebook, Instagram, and LinkedIn, plus a bold CTA that highlights practical tips or a free download. The section includes visually engaging assets—a 1200×630 feature image, before/after GIFs, and a concise one-page infographic outlining the 7-step exterior trim paint process and key prep tips. Readers will find a quick copy-paste snippet and a pinned quote to spark interest, along with clear share CTAs, a copyable link, and a note about bookmarking for future projects. Accessibility and analytics are baked in with alt text, keyboard-friendly buttons, and UTMs to track shares and referrers.
This matters on a DIY jobsite because easy sharing builds momentum and saves time when you’re in the thick of prep and painting. The share block is designed to be scanned quickly, with intrinsic triggers like time and money savings, DIY empowerment, and safety and maintenance benefits. Expect practical, scannable bulleted lists readers can copy to caption their posts, grab the essential tips they need, and reuse across platforms without reinventing the wheel. The approach keeps readers engaged, boosts reach, and helps you capture referrals while you finish the next project.
Prepare share-ready assets: images, pull quotes, and meta data
Create a 1200×630 feature image for your blog post that highlights key points from the article. Use high-quality photos of exterior trim painting projects to grab attention.
Include alt text for all images describing their content clearly. This helps with SEO and accessibility. Write compelling pull quotes that summarize important tips or stats, like ‘A well-prepared surface can extend paint life by up to 5 years.’
Create a meta description of about 160 characters summarizing the article’s main points. Include keywords relevant to exterior trim painting but keep it natural and engaging.
Craft concise, action-oriented share copy and visuals
Create platform-specific social media posts with clear calls-to-action. For example, ‘Learn the secrets to perfect exterior trim paint in our latest blog post! #DIYPaintingTips’
Use consistent branding across all platforms but tailor your message to fit each audience. Include hashtags relevant to DIY and home improvement like #HomeImprovement #DIYPainting.
Create visually engaging graphics such as before-and-after GIFs or infographics summarizing the 7-step exterior trim paint process. These visuals can be shared on Pinterest, Instagram, and Facebook to attract more followers.
Schedule, track, and optimize shares across platforms
Use UTM parameters in your links to track the performance of each share. This helps you understand which platforms drive the most traffic and engagement.
Create a posting schedule that includes peak times for social media activity on different platforms. For example, post early mornings on LinkedIn and evenings on Instagram.
Regularly review analytics to see what works best. Look at metrics like click-through rates, engagement levels, and referral sources. Adjust your strategy based on these insights to improve future shares.
Avoid common mistakes such as broken links or inconsistent branding across platforms. Consistency builds trust with your audience and keeps them engaged over time.

Conclusion
Exterior trim paint protects your home, looks sharp, and lasts longer when you finish it right. The core idea is simple: prep well, choose the right product, and work safely so you don’t waste time or money redoing the work later.
Do this: inspect the trim and materials, gather the exact tools and primers, wash, scrape, and sand where needed, prime bare wood, apply the proper exterior trim paint in calm, dry conditions, and check your work with a visual before-and-after mark. Start with a small test area, then move to larger sections in a steady, methodical pass, keeping ladders secure and PPE on every time you work at height.
Common mistakes to avoid include skipping the test patch, skipping or skipping the right primer, and painting in heat, direct sun, or damp conditions. Always keep safety first: set up stable ladders, use fall protection if needed, and wear eye protection and gloves. If the job requires intricate detailing, very tall heights, or you’re unsure about the trim material, call a pro before you risk costly mistakes. With the steps above, you’ll finish with a durable, professional-looking result and the confidence to tackle future maintenance—your home will thank you.
FAQ
What’s the best exterior trim paint for real weather?
Choose a 100% acrylic exterior enamel or acrylic satin for trim. It sticks well, resists peeling, and cleans up easy with water. Oil-based paints are old school; they yellow and take longer to cure.
Should I prime before painting trim?
Yes. Primer seals the wood and helps paint stick. Use a good wood primer, especially on bare wood or stained areas.
How should I prep the trim before painting?
Wash off dirt, scrape loose paint, sand rough spots, and repair with wood filler. Let it dry, then caulk gaps to keep moisture out. A clean, dry surface saves you from redoing work.
Do I need multiple coats?
Yes. Two coats give real durability and even color. Skipping the second coat on hard-to-reach spots can ruin the look.