

Introduction
Feather-edge concrete repairs are a method to rebuild a thin, tapered edge on damaged concrete so it blends with the surrounding slab. This approach is hands-on and relies on proper surface prep, bonding, and gradual build-up rather than full removal. If the edge is chipped but the rest of the slab is sound, a feather-edge repair can save time and avoid a bigger patch.
First decide whether you can repair or you need to replace the edge by assessing depth, load, and how the edge carries weight. Prepare the surface by cleaning, roughening, and drying as recommended, then choose a bonding method and follow the product label for wetting the surface if instructed. Always check local rules and manufacturer instructions for bonding agents and curing, since the right choice varies with product and conditions.
Key takeaways
- Assess if repair or replacement is required before planning any feather-edge fix.
- Prepare the substrate properly: clean, dry, mechanically roughen surfaces for bonding.
- Wetting the surface as needed improves adhesion when applying repair materials.
- Choose bonding method based on substrate, movement, and expected load conditions.
- Prefer build-up methods over feathering for longer durability and crack resistance.
- Follow safety: PPE, ventilation, edge protection, and proper curing practices.
Table of Contents
- Introduction
- Key takeaways
- Why Feather-Edge Repairs Fail — Common Signs and Root Causes
- Assessing Whether to Repair or Replace
- Preparing the Substrate for a Durable Bond
- Bonding Methods — Mechanical Vs Chemical and When to Use Them
- Better Build-up Methods Instead of Feathering
- Tools, Materials, and Specs to Choose — a Practical Checklist
- Application Techniques — Wetting, Mixing, Placement, and Curing
- Quality Checks, Maintenance, and Preventing Recurrence
- Conclusion
- FAQ
Why Feather-Edge Repairs Fail — Common Signs and Root Causes
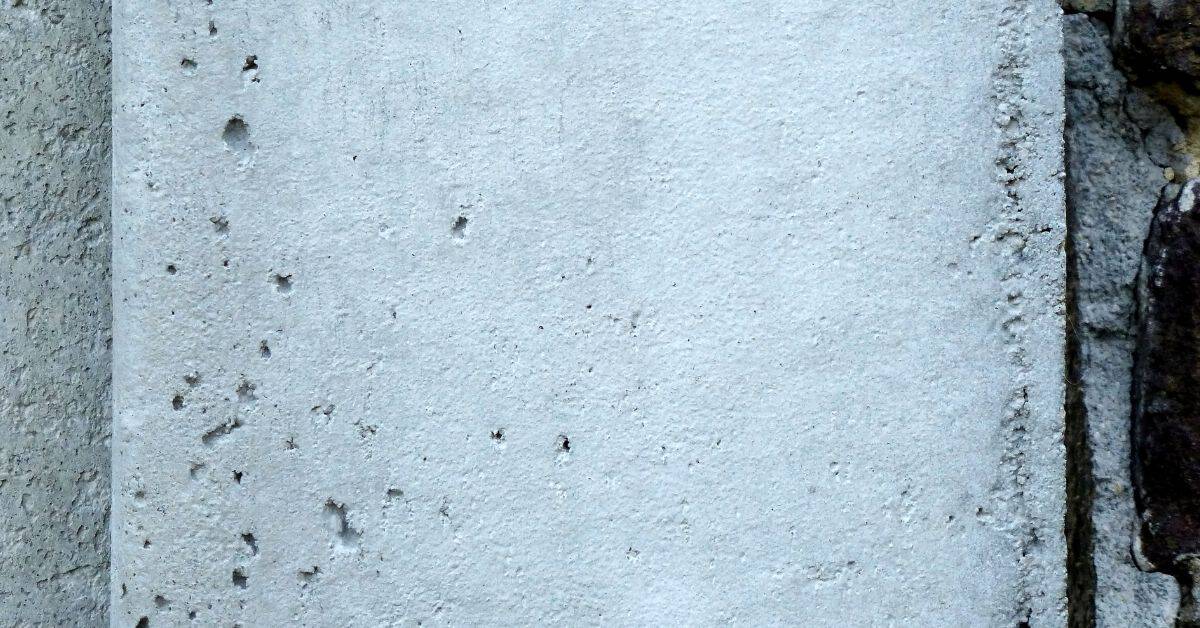
Feather-edge repairs refer to ultra-thin patches that sit at the surface rather than building up a thicker, integral repair. This method is inherently fragile on most substrates, especially where movement or moisture is present. The approach relies on bond strength at a narrow interface, which is easily overwhelmed by everyday conditions on a slab or wall.
Observable failure signs include cracking, delamination, lifting at edges, spalling, discoloration, or edge chipping. Root causes span inadequate thickness, substrate movement, poor surface prep, contaminants, or incompatible patch materials and improper curing. Each factor weakens the bond and accelerates degradation under load or environmental cycles, making long-term performance uncertain. Practical checks include testing edge cohesion, looking for moisture presence, assessing roughness, and observing patch behavior under load or freeze–thaw exposure. Planning tips emphasize proper substrate prep, minimum feather-edge guidelines, compatible patch products, and knowing when to shift to a build-up method for durability.
Visual and structural failure indicators
Feather-edge repairs failing often show signs before they crumble. Keep an eye out:
Cracking: Hairline cracks can grow into major problems. If you see them, dig deeper.
Delamination: Peeling or lifting of the patch from the substrate indicates poor adhesion. Tap it; if it sounds hollow, it’s delaminating.
Check edges for lifting. If they’re popping up, the repair is compromised. Also, watch for spalling: flaking or chipping of the patch surface. Discoloration can signal moisture issues.
Underlying causes (movement, bonding, moisture)
Premature failure often stems from these root causes:
Movement: Substrate shifting or settling can crack even the best repairs. Ensure your base is stable.
Bonding: Inadequate surface prep or incompatible materials lead to poor adhesion. Clean, rough surfaces and compatible products are key.
Moisture management matters too. Efflorescence, for instance, can weaken bonds. Keep the substrate dry before repair.
Common installation mistakes
Avoid these common pitfalls:
- Poor prep: Skimping on surface cleaning and roughening leads to weak adhesion.
- Wrong product: Using incompatible patch materials guarantees failure. Match the substrate’s properties.
- Excessive feathering: Over-thinning the patch makes it fragile. Stick to recommended guidelines.
- Insufficient curing: Skipping proper curing lets moisture in, weakening the bond.
Each mistake undermines your repair’s strength and longevity. Don’t cut corners; do it right first time.
Assessing Whether to Repair or Replace
A practical patch viability hinges on clear criteria such as crack width, depth, delamination, and spalling relative to the overall area. If any condition signals weakness beyond a simple surface flaw, replacement considerations rise. Consider how the patch fits with the surrounding structure and whether the repair will transfer loads as intended.
Structural assessment should ask whether the repair affects load paths, reinforcing steel, or post-tension elements, and when a structural engineer should be consulted. Material choice and surface prep limits come into play, including patch compatibility with feather-edge edges, moisture conditions, and cure requirements. Environmental factors like ongoing moisture, freeze exposure, and potential corrosion of embedded metal must be weighed as well. Use a simple yes/no flow to guide your decision, and document field tests or bond checks to support the final choice between repair and replacement.
Structural integrity checklist
Before you start any repair or replacement work, use this checklist to assess your concrete slab’s structural integrity. It’ll help you understand the extent of damage and plan your work accordingly.
- Check for settlement: Look for areas where the slab is lower than surrounding ground level. This could indicate soil settlement or inadequate compaction during installation. What goes wrong if you skip this: You might end up with a sloped floor that’s difficult to fix and can cause further damage.
- Measure joint width: Check the width of control joints (the narrow grooves cut into the slab) using a ruler or tape measure. They should be about 1/8″ to 3/16″. Wider joints may indicate movement or settlement. What goes wrong if you skip this: Wide joints can let in water and debris, leading to further cracking and damage.
- Check for cracks: Inspect the entire slab for cracks. Hairline cracks (less than 1/8″) are normal, but wider cracks could indicate structural issues. What goes wrong if you skip this: Ignoring cracks can lead to progressive damage and costly repairs.
- Test crack stability: Gently try to move the cracked edges with a pry bar or screwdriver. If they move, it could indicate serious structural issues. What goes wrong if you skip this: You might proceed with repairs that won’t fix the underlying problem.
- Check for diagonal cracks: These can indicate settlement or movement in two directions. They’re often more serious than straight cracks. What goes wrong if you skip this: Diagonal cracks may require extensive repair work and could be a sign of serious structural issues.
- Inspect corners: Check for signs of movement or cracking at corners, where slabs often show stress first. What goes wrong if you skip this: Corner damage can lead to further cracking throughout the slab.
- Check for spalling: Look for flaking or peeling concrete, which could indicate rebar corrosion or other serious issues. What goes wrong if you skip this: Spalling can expose reinforcing steel and weaken the structure.
- Test slab stability: Try to rock the slab gently with your hands. If it moves more than 1/8″, there could be a serious problem. What goes wrong if you skip this: A unstable slab may require extensive repair or replacement work.
Quick rule: If you find any signs of serious structural issues, like wide cracks, diagonal cracks, or significant movement, consult a professional engineer or concrete specialist before proceeding with repairs. They can provide expert advice tailored to your specific situation.
Replace vs repair criteria
Before you grab your tools, step back and assess the situation. Replacing or repairing concrete isn’t always clear-cut.
Replace: If you see ongoing movement – like cracks getting bigger over time – or deep, pervasive deterioration, it’s time for a full replacement. Check for signs of structural damage too, as mentioned earlier.
Repair: For minor issues like hairline cracks or small chips, repairs might be enough. But remember, even small problems can hide bigger ones. Always check the base compaction and ensure there’s no underlying cause for concern.
Cost, lifespan, and performance trade-offs
When deciding between repair and replace, you’re balancing initial cost, how long it’ll last, and how well it’ll perform. Here’s what to consider:
Initial Cost: Repairing is usually cheaper than replacing. But remember, a cheap fix now might mean more expensive problems later.
Expected Service Life: Check the manufacturer’s estimated lifespan for both repair and replacement options. A quick fix today might only last a year or two, while a full replacement could last decades.
Performance Risks: Consider how well each option will perform. Sometimes, a repair just won’t bring things back to their original condition. And remember, cutting corners can lead to bigger issues down the line.
Preparing the Substrate for a Durable Bond
The goal is a clean, dry, mechanically receptive substrate that yields a durable feather-edge bond. This starts with a plan to remove contaminants and create a rough surface that can accept the repair material. A solid foundation reduces the risk of premature failure.
Cleaning should remove dust, grease, oil, curing compounds, and efflorescence using approved tools and products, while environmental conditions stay within recommended ranges. Laitance removal and profile creation involve testing for weak surface layers and using suitable methods to achieve a clearly rough, anchor-ready finish. Inspections should cover cracks, moisture, salts, and movement, with guidance to treat or replace deficient concrete and to test moisture and pH before patching. Safety, PPE, containment, and contaminant-testing steps are essential, and when in doubt, consult professional guidance.
Cleaning and contaminant removal
Start by removing dust with a broom. Then, use a vacuum to suck up any remaining particles.
For grease or oil stains, use a degreaser. Apply it, let it sit for 15-20 minutes, then scrub and rinse off. For biological stains like mold or mildew, use a detergent designed for the job.
If there’s paint on the surface, you might need to scrape it off mechanically. Always wear gloves and eye protection when handling chemicals.
Achieving the right surface profile
The goal is a rough, anchor-ready surface. Start with mechanical abrasion using a wire brush or shot blaster for large areas.
For smaller spots or where more control is needed, use a chipping hammer to remove weak layers. Be careful not to damage the underlying concrete.
The result should be a clearly roughened surface, with no smooth or shiny patches. This provides the best grip for your repair material.
Testing and safety precautions
Before you start, test for moisture using a simple calcium chloride test kit. If it turns blue, there’s moisture present. Wait until the concrete is dry.
Check pH too. It should be around 7-9.5. Too high or low can affect your repair’s longevity. Use litmus paper for this.
Wear safety glasses and gloves when working with tools and chemicals. If you’re using power tools, wear hearing protection too. Always follow the manufacturer’s guidelines for safe use.
Bonding Methods — Mechanical Vs Chemical and When to Use Them
Mechanical bonding relies on surface roughening, keying, or anchors to grip the repair, while chemical bonding uses adhesives or polymer-modified mortars to create a chemical bond. Each method has a place for feather-edge repairs, depending on substrate condition and service needs. A practical plan often combines both approaches for best results.
Substrate readiness must consider porosity, moisture, and contamination, with priming steps selected for concrete or existing patch materials. Common mechanical methods include scoring, chipping, wire brushing, aggregate exposure, and anchors when applicable, each with their own pros and cons. Chemical methods cover bonding agents, epoxy resins, and polymer-modified mortars, noting cure times and temperature or moisture constraints. A sequence that roughens first, then applies bonding agents and primers, often yields the most reliable adhesion, supported by a simple decision tree and test patches for verification.
Mechanical bonding and keys
Mechanical bonding involves roughening the surface to create a physical interlock. This is crucial for feather-edge repairs where you’re patching small areas.
Scoring, chipping, or wire brushing expose fresh concrete and increase surface area. For larger patches, use mechanical anchors or embed rebar to create a solid bond.
Forming a key involves creating undercuts – small recesses that hold the new patch material in place. This is especially useful when repairing corners or edges.
A scratch coat – a thin layer of cementitious material applied and scratched while wet – also creates mechanical interlock. It’s ideal for preparing surfaces before applying a bonding agent.
Chemical bonding agents and primers
Chemical bonding uses adhesives, bonding agents, or polymer-modified mortars to promote strong adhesion. These products create a chemical bond with the substrate.
Cementitious bonding agents are easy to use but have shorter pot lives. Epoxy resins provide superior strength but require careful handling and longer cure times. Polymer-modified mortars combine the benefits of both.
Before application, check product instructions for temperature, moisture, and surface preparation guidelines. Some products may require a primed surface or specific substrate conditions.
Primer application is crucial. It improves adhesion, seals the surface, and enhances the performance of the bonding agent. Use a primer suitable for concrete or existing patch materials as directed by the manufacturer.
Combining methods and surface-slurry techniques
The best results often come from combining mechanical and chemical bonding. Roughen the surface, then apply a bonding agent to create both physical and chemical interlock.
A bonding slurry or scratch coat can be used instead of simply wetting the surface. These techniques involve applying a thin layer of cementitious material mixed with water, allowing it to set slightly, then scratching it before applying the patch. This creates additional mechanical keys and improves adhesion.
However, avoid trapping moisture or creating bonding failures. Ensure the substrate is dry (but not bone-dry) and free from contaminants before application. Test patches in hidden areas first to ensure compatibility and performance.
Always follow a logical sequence: clean, prepare, prime, bond, patch. And remember, safety first – use appropriate PPE and follow manufacturer guidelines for each product used.
Better Build-up Methods Instead of Feathering
Recognize feather-edge failures by signs such as cracking, popping, spalling, or bond loss, and use a decision framework to determine when a build-up method offers superior long-term performance. Consider service conditions like foot traffic, moisture, and anticipated loads to guide the choice. The aim is to select a method that reduces rework and extends life under real conditions.
Layered build-up can involve a base coat and a top coat with proper sequencing and curing, emphasizing mechanical bonding over chemical bonding where feasible. Polymer-modified mortars and fiber-reinforced mixes improve crack resistance and water resistance, while reinforced repairs use mesh or fibers to transfer loads and resist future damage. A practical flowchart helps compare methods by patch size, depth, substrate state, climate, and accessibility, with common pitfalls and test procedures to validate performance before full application.
Layered scratch-coat build-up
The layered approach, also known as the scratch-coat method, is a reliable alternative to feather-edge patches. It involves building up the repair in layers to reduce shrinkage and delamination risk.
Start by applying a base coat of suitable concrete mix. Let it set until it’s stiff but not completely dry – this is your ‘scratch’ stage. Then, use a trowel or broom to scratch the surface lightly, creating mechanical keys for better bonding with the next layer.
Apply the second layer, following the same process as the first. Continue adding layers until you reach the desired thickness, allowing each layer to set properly before moving on to the next. This method ensures a strong, durable bond between layers and reduces the risk of cracking or popping.
Note: Be sure to follow the manufacturer’s guidelines for cure times and moisture management to ensure optimal results.
Polymer-modified mortars and specialty mixes
Polymer-modified mortars are a great alternative when you need improved bond strength, flexibility, or resistance to chemicals. They’re made by adding polymers like acrylic, vinyl, or latex to the concrete mix.
These specialty repair mortars are ideal for areas with heavy foot traffic, moisture exposure, or chemical attack. They can be used as a base coat in layered repairs or on their own for smaller patches. Always check the manufacturer’s recommendations for suitable substrates and climate conditions.
Cure times vary depending on the polymer type and environmental factors. Follow the manufacturer’s guidelines to ensure proper curing and optimal performance.
Tip: Polymer-modified mortars can be more expensive than standard concrete mixes, but their improved performance often makes up for the extra cost in reduced rework and increased lifespan.
Reinforcement and fibers for added strength
For larger repairs or areas subject to heavy loads, consider using reinforcement or fiber additives. These help control cracking and improve load transfer.
For deep repairs, embed steel mesh or rebar into the concrete mix. Ensure the substrate is properly prepared – clean, dry, and roughened – for optimal bonding. Design your reinforcement layout to suit the anticipated loads and forces acting on the repair.
Fiber additives can be used in place of or alongside traditional reinforcement. They’re easy to apply and help distribute stresses evenly throughout the concrete mix. Use fibers suitable for your specific application, following manufacturer guidelines for dosage rates and mixing procedures.
Remember: Reinforcement and fibers won’t prevent cracking entirely, but they’ll significantly improve the repair’s long-term durability and reduce the risk of rework.
Tools, Materials, and Specs to Choose — a Practical Checklist
Gather essential hand tools, grinders, brushes, trowels, and PPE, and note when a hammer drill or chisel attachment is needed for feather-edge removal. A clear work setup reduces delays and helps control dust and noise on the job. The list should stay practical and focused on the tasks at hand.
Materials and products must be checked for compatibility with the concrete substrate and feather-edge compatibility. Read labels and data sheets for minimum and maximum repair thickness, cure times, working time, and temperature ranges. Verify moisture tolerance, substrate prep requirements, and any priming needs. Environmental conditions such as surface moisture and humidity affect performance, so plan accordingly. A simple preparation and sequencing plan should outline cleaning, dampening, feather-edge removal, bonding agents, lift applications, troweling, finishing, and curing, with safety and disposal considerations factored in.
Tools and PPE checklist
Before you start any repair, make sure you have the right tools and safety gear. Here’s a quick checklist to keep you safe and effective.
- Hammer: For chipping away damaged concrete.
- Pry bar & chisel: To remove loose pieces carefully.
- Grinder or oscillating tool: For smoothing surfaces and removing feathered edges.
- Stiff-bristle brush: To clean the surface thoroughly.
- Trowels & hawk: For applying and spreading repair materials.
- Hammer drill (with chisel attachment): Needed for tough feather-edge removal.
- Gloves, safety glasses, & ear protection: Essential PPE to protect your hands, eyes, and ears.
- Dust mask or respirator: To safeguard against concrete dust.
Quick rule: Always wear appropriate PPE when working with concrete. Safety first!
Material selection guide and label checks
Choosing the right materials is crucial for a successful repair. Here’s what to look out for when selecting products.
- Patch or repair mortars: Check minimum/maximum repair thickness on labels/TDS.
- Bonding agents: Ensure compatibility with concrete substrate and check working time.
- Epoxy or polyurea polymer: Confirm cure times and temperature range.
- Crack fillers & sealants: Check substrate compatibility and recommended substrate prep.
- Mesh or fibers: Ensure they’re suitable for crack control in your specific application.
- Release agents: Confirm they won’t interfere with adhesion of repair materials.
- Curing compounds: Check cure temperature range and any special conditions for application.
Quick rule: Always follow manufacturer guidelines to ensure the best results.
When a product’s minimum thickness rules the method
Some repair materials have minimum thickness requirements. Here’s how to work with these limitations.
- Minimum repair thickness: Check this on labels/TDS before starting any repair.
- Tiered build-up: If required, use multiple thin layers (lifts) of repair material instead of one thick layer.
- Different materials: Consider using a different product if the minimum thickness is too high for your needs.
- Substrate prep: Ensure the surface is clean and dry to allow proper adhesion of repair materials.
- Working time: Keep an eye on this, as it can affect how many lifts you can apply in one go.
Quick rule: Always respect manufacturer minimum thickness guidelines. Going too thin can lead to weak repairs that don’t last.
Application Techniques — Wetting, Mixing, Placement, and Curing
Start with a sound, clean surface and a controlled dampening strategy that avoids ponding but improves adhesion. Washing, etching, or abrading may be necessary to maximize bond, depending on surface condition. Set expectations for how the surface will interact with the repair material during placement.
Mixing requires a consistent water-to-cement ratio, appropriate aggregates, and any bonding admixtures. Target a workable time that prevents segregation, and maintain slump within acceptable limits. Placement should be controlled, with attention to feather-edge transitions, multi-pass methods, and avoiding cold joints. Finishing should aim for a uniform texture and proper edge protection, while curing must follow recommended regimes and consider climate factors. Avoid over-wetting, retempering, contamination, premature finishing, or moisture loss that could undermine the bond.
Surface wetting and moisture control
The key to a strong bond is proper surface moisture. Too dry, and the mix won’t stick; too wet, and it’ll just wash off.
Dampen, don’t soak. Use a spray bottle or damp cloth. The surface should feel like a wrung-out sponge – slightly moist but not dripping.
Moisture gradients matter too. If the top’s wet and the bottom’s dry, you’ll get poor bonding. Keep it even.
Mixing and working time best practices
Right mix consistency is crucial. Too much water weakens the bond; too little makes it hard to work with.
Start with the correct water-to-cement ratio. Then add aggregates, checking for a smooth, plastic consistency – like cookie dough. Not too runny, not too stiff.
Set-accelerating admixtures can speed up work but reduce working time. Be ready to place the mix quickly after mixing.
Curing, protection, and early-age care
Proper curing lets concrete gain strength slowly, preventing cracks. It’s like giving a baby time to grow strong.
For small repairs, use a damp cloth or plastic sheeting to keep the surface moist. For larger areas, consider a curing compound spray.
Keep traffic off until it’s cured – usually 7 days for small repairs. In cold weather, protect from freezing. In hot, windy conditions, seal early to prevent moisture loss.
Quality Checks, Maintenance, and Preventing Recurrence
Post-install, develop a clear inspection plan that guides bond verification, crack monitoring, and substrate readiness checks. Schedule initial review within a short window after repair and set seasonal checks to track changes over time. Keep records of readings and visual observations to guide future actions.
Bond and integrity tests should be simple and field-friendly, using scratch tests, wedge pulls, hammer taps, or grout checks as appropriate. Define pass/fail criteria and safe testing methods, interpreting results to decide if reseal or rework is needed. Routine maintenance should include joint cleaning, edge resealing, and monitoring weathered edges after freeze-thaw cycles, with a frequency that fits exposure. Preventive measures tie back to proper preparation, material matching, and moisture control, while documenting repair details helps with lifecycle planning and timely rework decisions.
Immediate and short-term bond tests
The first step after any feather-edge repair is ensuring a strong, lasting bond. Here’s how to test it:
Hammer Tap Test (24-72 hours post-repair): Gently tap the repaired area with a hammer. A good bond will sound solid and uniform. If it sounds hollow or dead, rework may be needed.
Visual Adhesion Check: Inspect for any signs of delamination, such as cracks at the edges or lifting. If present, reseal or rework immediately.
Long-term monitoring and maintenance
Regular checks and low-cost upkeep can extend your repair’s life significantly:
Crack Progression (Quarterly): Inspect for new cracks, especially at the edges. Small hairline cracks are normal, but wider ones need attention.
Edge Lifting (Biannually): Check for any lifting or separation at the edges. If found, reseal immediately to prevent further damage.
Record your findings and track changes over time to anticipate future needs.
Common pitfalls and how to avoid them
Learn from these frequent mistakes to prevent repeat failures:
- Inadequate Surface Preparation: Ensure the substrate is clean, dry, and free of contaminants. A poorly prepared surface leads to weak adhesion.
- Incorrect Material Matching: Use a patch material that matches your existing concrete in strength and composition. Mismatched materials can cause stress cracks.
- Neglecting Reinforcement: When needed, use fibers or rebar for added strength to prevent edge lifting and cracking.
- Insufficient Curing: Protect your repair from harsh weather conditions during curing. Inadequate curing can lead to weak, brittle concrete.
- Poor Joint Control: Incorporate control joints to manage natural cracks and prevent random cracking.
- Moisture Management: Keep moisture levels in check. Excessive moisture can cause delamination and spalling.
By avoiding these pitfalls, you’ll extend the life of your feather-edge repairs significantly.
Conclusion
You now have a clear, practical path to durable repairs. Safety and a solid bond come first, then build-up methods that actually last without wrecking the surface or your time and money.
Do this in order: verify the substrate integrity, choose the appropriate bonding method, prepare the surface, mix and place correctly, then cure and test for a solid bond. Start with a small test patch to confirm adhesion and drying times, then scale up to the full area using the same steps. If any step shows poor bonding or unexpected movement, stop and reassess before continuing.
Avoid these common mistakes: rushing the surface prep or using the wrong bond method for the substrate, which leads to delamination or cracking. Never skip wetting or proper curing, and avoid feathering when the base is too weak for a build-up. Always work with safety in mind: wear eye protection, dust mask, and gloves; guard nearby edges and moisture; and unplug or secure tools when not in use.
If the substrate shows significant instability, or you’re dealing with large areas, structural cracks, or repeating failures, it makes sense to bring in a pro rather than push ahead. A measured, well-planned repair will save time and prevent costly damage down the road. Stay disciplined, follow the steps, and you’ll get a solid, lasting result.
FAQ
When should I repair a feather-edge crack versus replacing the section entirely?
If the structural path is still solid and the crack is shallow with no hollow spots, a repair may be possible. If you see deep voids, wide spreading cracks, or obvious movement, plan for replacement. When in doubt, check with a local pro or the product instructions before proceeding.
What surface prep steps help a feather-edge repair stick long-term?
Clean the area thoroughly to remove dust, oil, and loose material. Roughen the surface slightly so the patch grips better, and remove any loose feathered edge. Dry the area as needed before applying bonding materials.
How do I choose the right bonding method for a feather-edge repair?
Match the method to the condition of the substrate and the repair patch. If the concrete is sound but dusty, use a bonding agent or primer recommended by the product maker. If you have deep or irregular edges, a mechanical method or hybrid approach may be needed—follow manufacturer instructions and local guidance.
Should I wet the surface before applying repair material?
Wetting is sometimes required to reduce suction and improve adhesion, but never leave standing water. Follow the product label for pre-wetting guidance and ensure the surface is damp but not pooling before applying the patch.