
Introduction
Grinding, topping, and re-pouring are practical steps to repair and level a birdbath set in concrete. This DIY guide walks you through evaluating the damage, choosing a plan, and doing the work safely. You’ll learn what to check on materials and how to approach the job without fancy tools.
Start by inspecting the existing setup for cracks or hollow spots and decide whether grinding or a new pour is needed. Follow safety and manufacturer directions for grinding dust and patching mix, then apply the topping or new concrete and cure properly. Always check labels, local rules, and instructions for the products you use to ensure compatibility with your surface, and consider testing a small area first if you’re unsure.
Key takeaways
- Inspect cracks and movement in birdbath base before grinding or patching
- Use compatible grinding discs and patch materials per manufacturer instructions
- Clean and dry surface; remove old coatings to ensure bonding
- Grind to feather edges, then dry-fit topping before final cure
- Topping and patching: apply thin layers, cure slowly, seal against moisture and freeze
- Re-pour only when crack or movement dictates; assess base stability first
- Sealing, surface finishes, and wildlife safety: avoid slick coatings, inspect after rain
Table of Contents
- Introduction
- Key takeaways
- Quick Diagnosis: Identifying the Problem
- Tools and Materials Checklist
- Preparing the Birdbath for Repair
- Grinding Techniques: When and How to Grind
- Topping and Patching Methods
- When to Re-Pour the Birdbath Bowl or Base
- Re-Pour Process Overview: Planning to Finishing
- Sealing, Surface Finishes, and Wildlife Safety
- Conclusion
- FAQ
Quick Diagnosis: Identifying the Problem
Start by inspecting the surface for shallow cracks, flaking, or hollow spots. Look for obvious patches that don’t bond well to the surrounding concrete. Use simple taps or a light tapping test to listen for hollow sounds that indicate deeper issues.
Differentiate cosmetic wear from structural concerns by checking for movement, wide-scale cracking, or settling around the bowl or pedestal. If you see repeated cracking or shifting, plan for a more extensive repair or re-pour and consult local guidelines if needed.
Assessing surface vs structural damage
First, look at the birdbath’s concrete. Surface issues are usually cosmetic and easier to fix.
Scaling: Small flakes or powdery material on the surface. It’s typically superficial but can worsen if not addressed.
Spalling: Larger pieces of concrete breaking off, exposing aggregate. This is more serious and may indicate deeper problems.
Cracks: Hairline cracks are thin and usually cosmetic. Through-cracks penetrate the entire slab thickness, signaling structural issues.
Visual checkpoints and simple tests
Before diving into repairs, use this checklist to understand your birdbath’s condition. It’s best to do these checks on a dry day.
- Sound: Tap the concrete with a hammer. Hollow or dull sounds may indicate delamination (layers separating).
- Probe: Gently probe cracks with a screwdriver. If it goes deep, there’s structural damage.
- Water test: Pour water onto the concrete. If it soaks in quickly, moisture may be present, weakening the structure.
- Crack width: Measure crack widths. Hairline cracks are less than 0.015 inches; wider ones need attention.
- Crack pattern: Diagonal or stepped cracks often indicate structural issues.
- Concrete color: Discoloration can signal moisture or other problems.
- Concrete texture: Rough, pitted surfaces may hide deeper issues.
- Birdbath movement: Gently push or pull the birdbath. Movement signals settlement or instability in the base.
Quick rule: If you find any signs of structural damage, consider re-pouring the concrete to ensure stability.
Inspecting the base and support
The pedestal and footing are crucial. Issues here can cause the entire birdbath to fail.
Movement: Gently push or pull the pedestal. Any movement signals settlement, which can lead to cracks and instability.
Settlement: Check for signs of settling around the footing. This could be due to soil erosion or inadequate compaction.
Reinforcement corrosion: If your birdbath has steel reinforcement, check for rust stains or cracks near the base. Corrosion can weaken the structure significantly.
Tools and Materials Checklist
Gather basic grinding tools, patching compounds, and topping materials suitable for concrete birdbaths. Include a mixer, trowel, and safety gear to protect eyes and lungs. Decide whether renting or buying best fits your project duration and budget.
Verify that each tool and material is compatible with your chosen patch or topping product. Check labels or manufacturer instructions for surface prep, cure times, and material compatibility before proceeding.
Essential tools for grinding and patching
Before you start fixing your birdbath, make sure you have these essential tools ready. This checklist helps ensure a smooth and safe repair process.
- Grinder: A heavy-duty angle grinder is ideal for concrete grinding. It’s versatile and can handle various tasks.
- Abrasives: Use diamond or silicon carbide abrasive discs designed for concrete to avoid damaging the surface.
- Safety gear: Protect yourself with safety glasses, ear protection, gloves, and a dust mask. Concrete dust is harmful if inhaled.
- Mixing tools: You’ll need a mixing paddle and a drill to mix your repair mortar thoroughly.
- Application trowel: A rubber-edged trowel helps apply the patch material evenly and smoothly.
- Dust control: Use a wet vacuum or water spray to minimize dust during grinding. It’s crucial for your safety and cleanliness.
- Personal protective equipment (PPE): Wear long sleeves, pants, and sturdy boots to protect yourself from debris and chemicals.
- Tape measure: Measure the damaged area to ensure you have enough repair material.
Quick rule: Always prioritize safety when using power tools. Wear appropriate PPE, and follow manufacturer guidelines.
Material options: patch mortars, toppings, and bonding agents
Choosing the right materials is key to a successful repair. Consider these options based on your birdbath’s finish and water exposure.
- Patch mortars: Opt for fast-setting or standard patch mortars depending on the severity of damage. Fast-setting is ideal for quick repairs.
- Polymer-modified toppings: These are great for resurfacing and enhancing durability. They’re suitable for both interior and exterior applications.
- Bonding primers: Use a bonding primer to ensure proper adhesion between the new patch material and the existing concrete surface.
- Finishes: Choose a finish that matches your birdbath’s original look. You can opt for a smooth, textured, or stamped finish.
- Water exposure: If your birdbath is exposed to frequent water, use materials designed for wet areas to prevent deterioration.
Quick rule: Always follow manufacturer guidelines when selecting and applying repair materials. They provide crucial information on compatibility and usage.
Optional tools and rental alternatives
While not always necessary, these optional tools can make your repair job easier. Consider renting larger equipment for one-off repairs instead of purchasing.
- Concrete edger: This tool helps create clean, sharp edges around your patch, giving a professional finish.
- Concrete saw: Rent a concrete saw to make precise cuts when removing damaged concrete. It’s safer and more efficient than using a grinder.
- Power trowel: For larger repairs, rent a power trowel to achieve a smooth, level surface quickly.
- Concrete vibrator: Use this tool to remove air bubbles from your patch material, ensuring a strong, durable repair.
- Respirator: For extended grinding or mixing tasks, use a respirator for added protection against concrete dust.
Quick rule: Renting larger equipment is often more cost-effective than purchasing for one-off repairs. Always ensure you’re comfortable using the tools before starting your project.
Preparing the Birdbath for Repair
Clear the area around the birdbath and remove any loose material from the surface. Protect nearby plants and surrounding concrete to prevent damage or staining. Ensure a dry, contaminant-free surface before grinding or patching begins.
Take time to rinse away dust and debris and allow any moisture to dry fully. If the bowl is porous, consider a brief surface wipe with an appropriate cleaner as recommended by the product instructions. Double-check that all prep steps align with manufacturer guidelines.
Cleaning and removing contaminants
Start by removing any dirt, debris, or loose material from the birdbath’s surface. Use a stiff brush, broom, or even a pressure washer to clean it thoroughly.
Algae and efflorescence (white salt deposits) can also affect adhesion. For algae, use a solution of bleach and water (1 part bleach to 3 parts water), apply it, let it sit for 15-20 minutes, then scrub and rinse off. To remove efflorescence, use muriatic acid diluted with water (1 part acid to 4 parts water). Apply, let it sit briefly, then scrub and rinse.
If there’s delaminated concrete, remove it. Use a chisel or grinding tool to chip away loose pieces. Ensure the surface is clean, dry, and free of contaminants for optimal repair adhesion.
Protecting surroundings and controlling dust
Before you start grinding or patching, protect nearby plants, structures, and waterways. Cover them with plastic sheets or tarps to prevent damage from debris or dust.
Contain the work area using barriers or screens to keep dust from spreading. If you’re working near open windows, consider sealing them temporarily.
To control dust during grinding, use a wet/dry vacuum or mist the surface with water before and during grinding. This will help suppress dust and make your job cleaner and safer.
Bonding and surface prep (etching/priming)
Mechanical preparation involves roughening the surface to increase bonding area. Use a grinder with a diamond cup wheel or a wire brush attachment to lightly abrade the concrete.
Chemical preparation, or etching, helps remove any remaining contaminants and improves adhesion. Use a concrete etcher (phosphoric acid) following the manufacturer’s instructions. Apply it, let it sit for the recommended time, then rinse off thoroughly.
Before applying patch mortar or topping, use a bonding agent. Follow the manufacturer’s instructions for compatibility with your chosen repair material and open time. This ensures a strong bond between the old concrete and your repair.
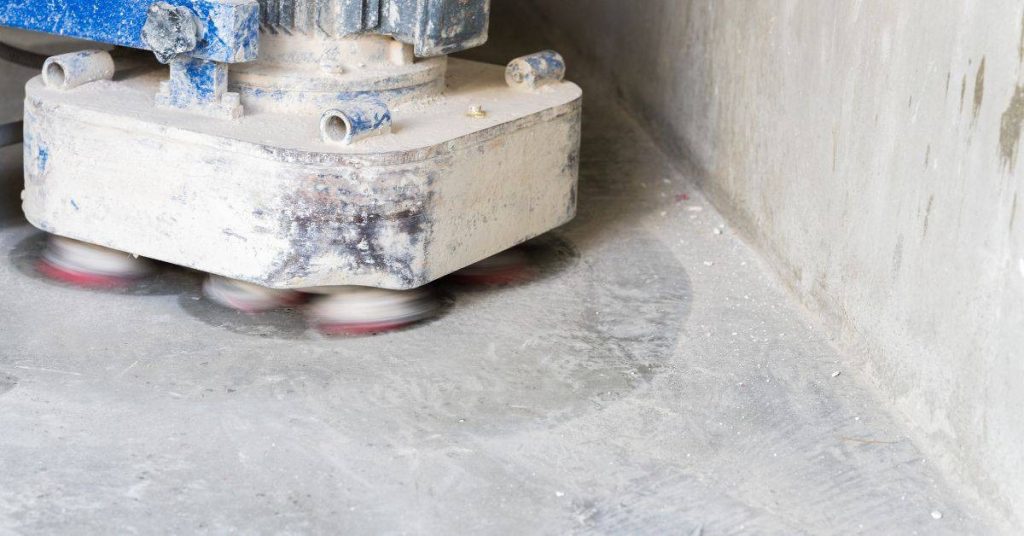
Grinding Techniques: When and How to Grind
Use grinding to even out high spots or remove failed surface layers that won’t harden properly. Target only the damaged area and blend the edge into surrounding material for a smooth transition. Keep the grinder moving to avoid creating new divots.
Prioritize operator safety with proper respirators and eye protection, and manage dust with a dampened work area or dust collection if available. Always follow the tool manufacturer’s safety instructions and local dust-control rules.
When grinding is the right fix
Grinding is your go-to when you’ve got minor surface unevenness or a failed topping layer. It’s not for structural cracks or crumbling bases.
Uneven surfaces: Grinding evens out high spots and removes minor dips. It won’t fix major low points though, those need topping.
Failed toppings: If your birdbath’s top layer is cracked or flaking off, grinding can remove it and prepare for a fresh topping. But if the base concrete is damaged, you’ll need to re-pour.
Step-by-step grinding procedure
Follow this sequence to grind safely and evenly, avoiding over-grinding and heat buildup.
- Start with a coarse grit (e.g., 30 or 40) to remove major defects. Work in straight lines, overlapping each pass by about half the blade width.
- Inspect your progress. If you’ve got high spots left, go over them again.
- Switch to a medium grit (e.g., 60 or 80) for a smoother finish. Repeat work pattern.
- Check again. If needed, use a fine grit (e.g., 120 or higher) for the final pass.
- Inspect one last time. If you’ve got heat lines or over-grinding, let it cool and touch up lightly with a finer grit.
Post-grind checkpoints
Before bonding or topping, ensure your surface is ready. Here’s how:
- Loose particles: Tap the surface gently. If it sounds hollow or feels gritty, grind more.
- Heat lines: Check for discoloration from heat buildup. If present, let it cool and touch up with a finer grit.
- Smoothness: Run your hand over the surface. It should feel smooth, no rough spots.
- Moisture: Ensure the surface is dry. Moisture can weaken bonds.
Quick rule: If you’re unsure about any point, don’t proceed until it’s right. Better safe than sorry.
Topping and Patching Methods
Choose patch materials for small repairs or topping mixes for larger areas based on the damage. For tiny patches, a compatible concrete repair mortar can work well; for bigger jobs, a topping compound may provide a seamless finish. Read the product labels to confirm you’re mixing to the correct consistency.
Apply in thin, even layers and finish according to the product’s directions. Cure-time guidance and sealing options should come from the manufacturer or local guidelines to ensure lasting results.
Choosing between patching and overlay topping
When it comes to fixing your birdbath, you’ve got two main repair approaches: small patching or full-area overlay topping. The choice depends on the damage’s size, depth, and your aesthetic goals.
Patching is best for small cracks or chips – less than 1/4 inch deep. It’s quick, easy, and keeps the original look intact. Just remember, it won’t hide old patterns or colors.
Overlay topping, on the other hand, is ideal for larger areas with deeper damage – up to 2 inches deep. It gives you a fresh canvas to work with, hiding old patterns and even changing the color if you wish. But it’s more time-consuming and may alter the original look.
Consider the area affected, depth of damage, and what you want your birdbath to look like afterwards. That’ll help you decide which repair approach is right for you.
Small patch technique and finishing
For those small cracks or chips, follow this simple patching sequence:
Prep the area: Clean and dry. Use a bonding agent if needed (see earlier section).
Mix your patch mortar: Follow the mix ratio on the bag. Not too wet, not too dry.
Place and feather edges: Apply with a trowel or putty knife. Smooth out, pushing into cracks. Feather edges to blend with existing surface.
Initial curing: Keep damp for 3-7 days. Follow product instructions. Don’t let it dry too fast.
Applying a cementitious topping or overlay
For larger repairs, follow these steps for applying a cementitious topping:
Surface prep: Clean, dry, and etch/prime (see earlier section). Let it dry.
Mix your topping: Follow the mix ratio. Aim for peanut butter consistency – not too runny, not too thick.
Placement technique: Apply with a trowel or squeegee. Spread evenly. Use a straight edge to level if needed.
Finish options and curing: Float finish for smooth, troweled for textured. Let it set slightly, then seal edges. Follow product cure instructions – usually 3-7 days damp.
When to Re-Pour the Birdbath Bowl or Base
Decide to re-pour when cracks are extensive, the substrate is severely degraded, or structural movement is evident. A full pour is often safer when patching cannot restore levelness or support. Consider dimensions, weight, and surrounding framing as part of the decision.
Mind safety and handling concerns with concrete weights and forms. If in doubt, check local codes or consult a pro for recommendations on re-pour feasibility and proper setup.
Decision criteria: extent and cause of damage
The first step in deciding whether to re-pour your birdbath is understanding the extent and cause of the damage. Here are some factors to consider:
Through-cracking: If cracks run through the entire thickness of the concrete, it’s a sign that the structure has lost its integrity. Grinding won’t fix this.
Delamination area: Large areas where the concrete has peeled or flaked off indicate serious damage. A small patch might not be enough to hold these pieces in place.
Exposed reinforcement and foundation movement also favor a re-pour. If you’re unsure, consult with a professional before proceeding.
Structural signs demanding re-pour or replacement
Some damage is too severe for simple repairs. If you see any of these signs, it’s time to re-pour your birdbath:
Large separations: Gaps wider than 1/4 inch (6 mm) between the concrete and its base or sides indicate serious structural issues.
Shifting parts: If the birdbath wobbles or moves when you touch it, the foundation may be compromised. This is a safety hazard that needs immediate attention.
Compromised reinforcement: Exposed or rusted rebar means the concrete isn’t doing its job. A re-pour is necessary to protect the steel and restore strength.
DIY feasibility vs hiring a pro
Re-pouring a birdbath can be a complex task. Before you start, consider if it’s something you can do yourself or if you need to hire a professional:
Complexity and equipment: Re-pouring involves mixing concrete, creating forms, and ensuring proper drainage. You’ll need the right tools and knowledge to do this safely and effectively.
Formwork precision: A successful re-pour depends on accurate formwork. If you’re not confident in your ability to create precise forms, it might be best to hire a pro.
If you notice any serious structural issues or are unsure about any aspect of the process, always consult with a professional. They can assess the damage and provide guidance tailored to your specific situation.
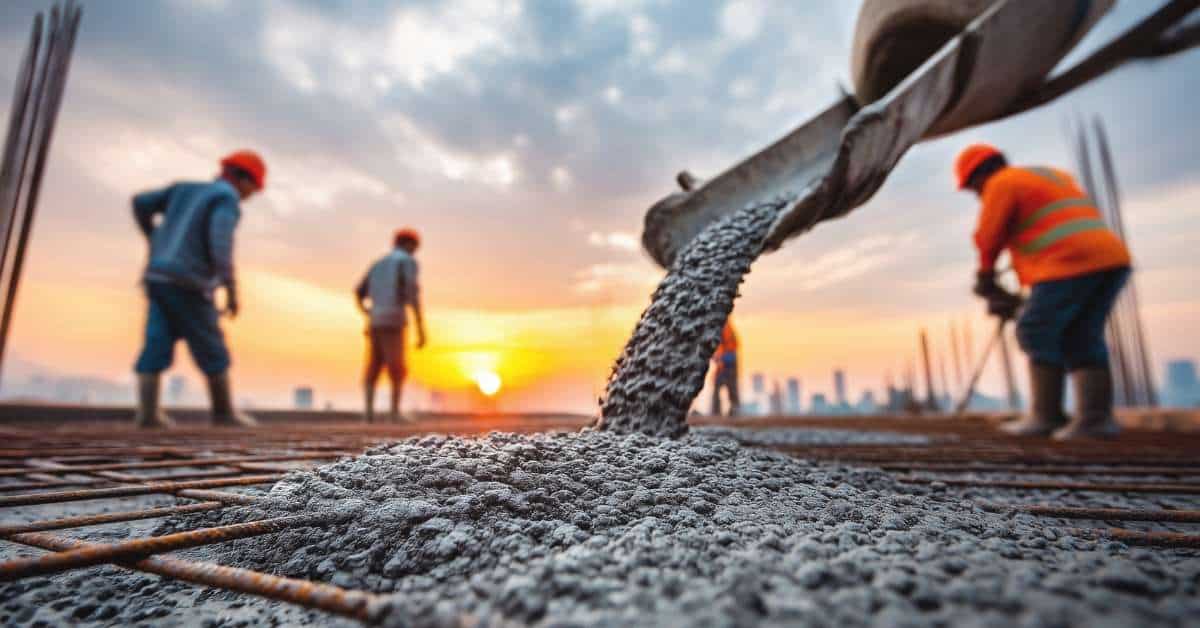
Re-Pour Process Overview: Planning to Finishing
Plan the pour from measuring and forming to choosing a concrete product suitable for exterior exposure. Build forms that hold the desired shape and capture the final height of the bowl or base. Refer to the product’s instructions for preparation and mix ratios.
Place the concrete, consolidate to remove air pockets, and finish the surface according to the manufacturer’s guidance. Allow proper curing time and follow any sealing or protective steps once the work is complete.
Designing and building formwork
The first step in re-pouring is creating a stable mold for your new concrete. You’ll need:
Form materials: Plywood or plastic sheets, stakes, and nails/screws.
Bracing: Ensure the form is sturdy by bracing it with 2x4s at regular intervals. Allow for drainage holes to prevent water buildup.
Releasing agent: Apply a releasing agent like vegetable oil or form release spray to help remove the form without damaging the new concrete.
Placing, consolidating, and finishing concrete
When pouring, safety first: Wear appropriate gear, including gloves, safety glasses, and a hard hat.
Pour the concrete into the form from one side, allowing it to flow evenly. Use a shovel or rake to spread and level the concrete.
Consolidation: Use a vibrator or poker to remove air pockets. Work quickly but carefully to avoid damaging the formwork.
Finishing: Strike off the excess concrete with a straight edge, then smooth the surface using a trowel. For a birdbath, you may want a slightly textured finish for better grip.
Curing and protection after re-pour
Curing is crucial to allow the concrete to gain strength. Keep the area moist and covered, using plastic sheeting or a curing compound.
Moisture: Spray the concrete with water regularly for the first 7 days. Then, reduce watering but keep the surface damp for another 21 days.
Temperature control: Protect the concrete from extreme temperatures. If it’s hot, provide shade; if it’s cold, consider heating the area.
Cure time: Follow your concrete product’s specifications. Generally, allow at least 28 days before using or adding weight to the birdbath.
Sealing, Surface Finishes, and Wildlife Safety
Select a sealer that matches whether you want breathability or a film-forming coating. Consider decorative finishes and color options that won’t degrade with weather or wildlife exposure. Review the product data sheet for suitability on bird-friendly surfaces.
Balance maintenance needs with safety for birds by avoiding slippery finishes and steep, unfinished edges. Follow manufacturer directions for application and curing to keep the birdbath durable and easy to clean.
Choosing sealers and waterproofing
When it comes to sealing your birdbath, you’ve got two main types of sealers: breathable and film-forming.
Breathable sealers let moisture escape while keeping water out. They’re great for toppings but might not be enough on their own in wet areas. Film-forming sealers create a barrier, perfect for preventing water exposure damage, but they can trap moisture if not used with proper ventilation.
Always check the sealer’s compatibility with your chosen topping or overlay. And remember, it’s crucial to pick one rated for continuous water exposure to keep your birdbath in tip-top shape.
Decorative options and finishing touches
Once you’ve sealed your birdbath, it’s time to add some pizzazz. Staining is an easy way to change up the color without affecting performance.
Exposed aggregate gives a natural, textured look. Just make sure to rinse off any loose particles before sealing. Faux-stone treatments can add elegance, but they might need extra care when applying sealers.
Remember, these decorative touches should complement your repair work, not hide it. So, choose wisely and keep the overall aesthetic in mind.
Wildlife-safe coatings and slip resistance
Safety for our feathered friends is paramount. Opt for non-toxic products to ensure their well-being. Always rinse new coatings thoroughly before letting birds use the bath.
To prevent slips, add a subtle texture to your birdbath’s surface. This could be through an aggregate mix in your topping or a specialized slip-resistant sealer. The goal is to give birds secure footing without compromising their comfort.
Keep in mind, less is more when it comes to texture. You don’t want to create a rough surface that could harm birds’ feet over time.
Conclusion
Fixing a birdbath on concrete is about durability, safety, and looking right. When you finish, you want a surface that won’t crack again and a basin that wildlife can use without leaks or sharp edges.
Check your plan as you go: assess the problem, gather the right tools and materials, prepare the surface, grind only where needed, patch or top as required, decide if a re-pour is needed, follow through from planning to finish, seal properly, and test for smoothness and wildlife safety. Move in small, measured steps and test at each stage before you proceed.
Avoid these mistakes: grinding too aggressively and causing deeper damage, skipping cleaning or proper bonding, and rushing a reseal or re-pour without proper curing time. Safety rules to follow: wear eye and skin protection, keep the work area ventilated, work on a stable, flat surface, and test a small area first before a full repair. If anything looks unsure or structural, call a pro instead of forcing a fix that could fail later.
When to call a professional: if the base shows cracks through to core material, the concrete is spalling beyond simple grinding, or a re-pour is required but you lack the proper forms or curing access. Otherwise, stay deliberate, document steps, and stay flexible. With careful work, your birdbath will perform reliably and look good for years to come.
FAQ
How do I know when to grind versus re-pour for a damaged birdbath?
Grind when the surface is uneven or ridged but the base is solid. Re-pour if the bowl or base is cracked through or the repair would be cheaper and more durable than grinding.
What should I look for when choosing patch or topping material?
Read the product label for compatibility with concrete and outdoor use. Check manufacturer instructions for cure times and surface prep steps. If in doubt, ask the supplier or check the local rules for outdoor water features.
How long should I wait before sealing after a patch or re-pour?
Follow the product’s cure guidance on the label. If you can’t find it, wait until the patch has hardened to a solid feel and is no longer tacky to the touch.
Avoid grinding too deep in one pass or overheating the surface. Don’t mix patch products with incompatible fillers. Always clean the surface before applying new material and verify it’s dry and dust-free.