
Introduction
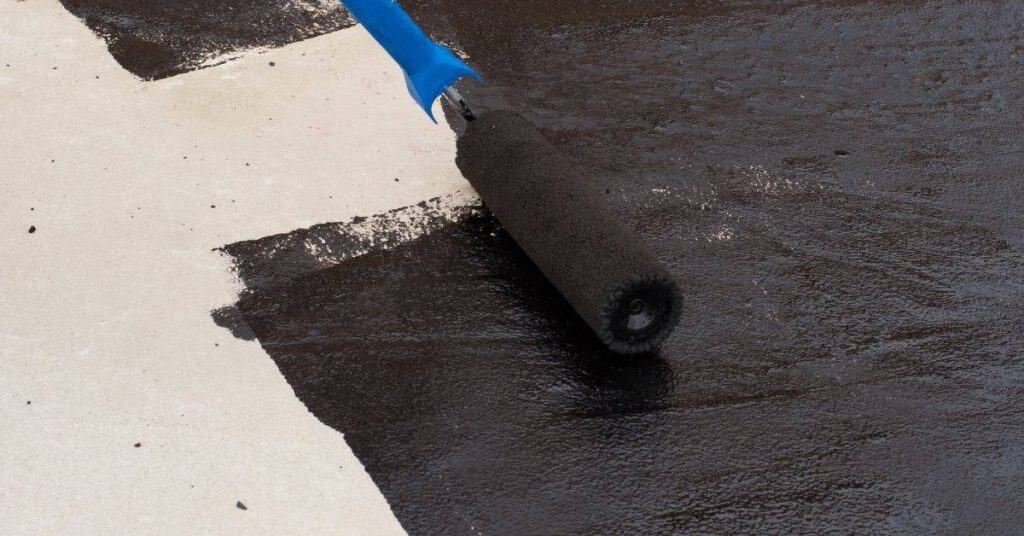
Concrete sealer lap marks are shiny stripes that appear when sealer dries unevenly along the edges of a previous pass. They often come from pooling, overlapping strokes, or applying too many coats too quickly. In practice, you can spot them as brighter lines where the finish looks different from the surrounding surface.
To prevent them, work in small sections with an even, continuous pass and avoid excess puddling. Use the right tools for your sealer, follow the product’s instructions, and keep a consistent pace so the wet edge stays fresh. If you see lap lines after sealing, lightly rework the area or apply a fresh coat according to manufacturer guidance, and beware of dust, temperature, and curing time.
Key takeaways
- Understand lap marks occur from uneven sealer penetration and roller pressure inconsistencies.
- Choose a sealer type with low sheen variability and compatible surface prep.
- Fill pores and dry thoroughly before sealing to reduce shiny stripes.
- Apply in thin, even coats with consistent rolling direction and overlap.
- Protect edges, wear PPE, and allow proper cure; fan can cause rapid drying.
- If lap lines appear, lightly rework with compatible sealer following label guidance.
Table of Contents
- Introduction
- Key takeaways
- What Are Lap Marks (Shiny Stripes)?
- How Sealer Type Affects Susceptibility to Lap Marks
- Pre-Application Planning and Surface Preparation
- Correct Application Techniques to Prevent Roller Lap Lines
- Tools, Materials, and Safety Checklist
- Troubleshooting Lap Marks During and After Application
- Common DIY Mistakes and How to Avoid Them
- Maintenance, Longevity, and Cost Implications
- Conclusion
- FAQ
What Are Lap Marks (Shiny Stripes)?
Laps marks describe shiny stripes or lines that run along a sealer film where roller edges overlapped during application. They differ from blisters, haziness, orange-peel, or pinholes by forming straight, directional lines tied to the roller pattern. You’ll often notice them more clearly on exterior edges and transitions, and less so in fully absorbed areas.
Causes include over-application, thick coats, insufficient back-rolling, uneven absorption, improper surface prep, solvent evaporation rates, and environmental factors like temperature and humidity during application. To diagnose, perform a small test patch and compare with a non-lapped area, check the sealer type and dilution, and measure or estimate thickness with a mil gauge if available. Plan for cure time and moisture before recoating to prevent further laps.
How lap marks form — primary causes
Lap marks, also known as shiny stripes, happen when you apply concrete sealer with a roller. They’re not blisters, haziness, or other defects. Here’s how they form:
Overlapping working edges: When you overlap strokes too much, the excess sealer can’t absorb evenly, leading to lap marks.
Uneven film thickness: Applying sealer in thick coats or uneven layers can cause stripes as it dries and levels out.
Poor wet edge management: Not maintaining a ‘wet edge’ while rolling can lead to visible lines where the sealer starts to dry.
Some sealers may also behave differently based on their type, causing lap marks more easily. Always follow the manufacturer’s guidelines for your specific product.
When and where lap marks typically appear
Lap marks usually show up during or after the sealer has started to dry, but before it’s fully cured. Here are typical surfaces and conditions:
Stamped concrete: Lap marks often appear on stamped patterns, especially at the edges of stamps where sealer can pool.
Broom-finish or smooth floors: On flat surfaces, lap marks tend to form along roller edges and transitions between pours or sections.
Pool decks: In outdoor areas like pool decks, temperature and humidity changes can cause lap marks as the sealer dries at different rates in various spots.
Lap marks often become visible within a few hours after application but may take up to 24 hours to fully show. Keep an eye on your surface during this time.
How Sealer Type Affects Susceptibility to Lap Marks
Different sealer categories behave differently in gloss and lap risk. Water-based acrylics often dry fast with lower odor but can show more uniformity challenges on porous surfaces. Solvent-based acrylics tend to level better but require good ventilation and careful thinning as directed by the label.
Penetrating sealers, epoxies, and polyurethanes/polyaspartics each have distinct gloss levels and lap tendencies. Consider how film thickness, application technique, and environmental conditions influence the final look for DIY projects. Use specific manufacturer instructions and compatibility notes to decide which option fits your substrate and desired gloss, then tailor roller type, back-rolling, and recoat windows accordingly.
Which sealers are more forgiving
Some sealers are less prone to lap marks due to their chemistry. These typically fall into two categories: finish-building and penetrating.
Finish-building sealers, like water-based acrylics, create a film on the surface. They’re more forgiving because they can self-level minor inconsistencies. However, they may still show lap marks if not applied correctly.
Penetrating sealers, such as silane or siloxane, absorb into the concrete. They don’t leave a film, so there’s no risk of lap marks from overlapping coats. But they might not be as durable and may require more coats for full protection.
Matching sealer choice to surface and conditions
Choosing the right sealer depends on your concrete’s condition, exposure, and intended use. Don’t just pick one based on gloss alone.
For porous surfaces, consider penetrating sealers or high-solids epoxies. They’ll absorb into the concrete, providing better protection against moisture and chemicals.
If your surface is exposed to UV light or heavy traffic, opt for solvent-based acrylics, polyurethanes, or polyaspartics. These offer better UV resistance and durability.
Always follow manufacturer’s application notes. They provide specific guidelines based on their product’s chemistry and intended use. Don’t rely solely on aesthetics; consider the sealer’s performance in your specific conditions.
Pre-Application Planning and Surface Preparation
Before sealing, verify cleanliness, absence of dust, oils, grease, curing compounds, and any existing coatings that could hinder adhesion. Check for efflorescence and surface contaminants that cause patchy finishes. This preparation sets the stage for a uniform result.
Clean thoroughly with a protocol suited to your surface type, addressing degreasing and potential pressure washing. Inspect for cracks or defects and repair them so patches don’t become moisture pathways or color mismatches. Assess porosity with simple tests and confirm ambient conditions align with the sealer’s guidance.
Cleaning, Repairs, and Surface Profiling
The first step to preventing lap marks is a clean, well-prepared surface. Here’s how:
- Remove dirt and dust: Sweep or vacuum the area thoroughly.
- Degrease if needed: Use a degreaser on areas with oil or grease stains to ensure your sealer adheres properly.
- Pressure-wash if appropriate: For heavily soiled surfaces, use a pressure washer. Be careful not to damage the surface.
Next, remove any release agents or curing compounds. These can cause glossy patches or hinder adhesion.
Repair substrate defects: Fill cracks, open joints, and pitted areas with a compatible patching compound. Ensure these repairs are dry before sealing to avoid introducing moisture pathways.
A consistent surface profile is crucial for even sealer absorption. Use a tang or scribe test to confirm the profile. If it’s too smooth, consider lightly abrading the surface with sandpaper or using a profiling tool.
Environmental Checks and Timing
Checking environmental conditions is vital for successful sealing. Here’s what to consider:
- Temperature: Check both ambient air and slab temperatures. Most sealers require a minimum temperature, usually around 50°F (10°C).
- Humidity: Ensure humidity levels are within the sealer’s specified range, typically between 40-70%.
- Wind and sun exposure: Minimize these to maintain a consistent ‘wet edge’ as you apply the sealer.
Timing passes matters. Apply sealers in manageable sections, keeping a ‘wet edge’ to avoid lap marks. Follow the manufacturer’s guidelines for application rates and drying times between coats.
If conditions aren’t ideal, wait for them to improve. Rushing can lead to poor adhesion, uneven absorption, and yes, lap marks.
Correct Application Techniques to Prevent Roller Lap Lines
Start with proper surface prep and ensure the substrate is dry and uniform. Identify low spots or porous areas that could exaggerate lap lines and address them before you begin. A solid base reduces future visibility of roller marks.
Maintain a continuous wet edge, use consistent patterns, and choose a roller setup that provides even loading. Plan your sequence to minimize directionality, and monitor film thickness as you go to catch buildup or thin spots in real time.
Wet-edge technique and work sequence
Start by sectioning off your slab into manageable areas. Each area should be no larger than you can comfortably cover in one continuous, wet pass.
Begin at the farthest corner from your starting point. Roll out a thin, even coat, working back and forth in a ‘W’ or ‘M’ pattern. This helps maintain a consistent directional flow and prevents streaks.
As you roll, overlap each new pass into the wet edge of the previous one by about 50%. This ensures a smooth, seamless finish with no visible lap lines. Keep moving while the sealer is still workable to avoid leaving marks.
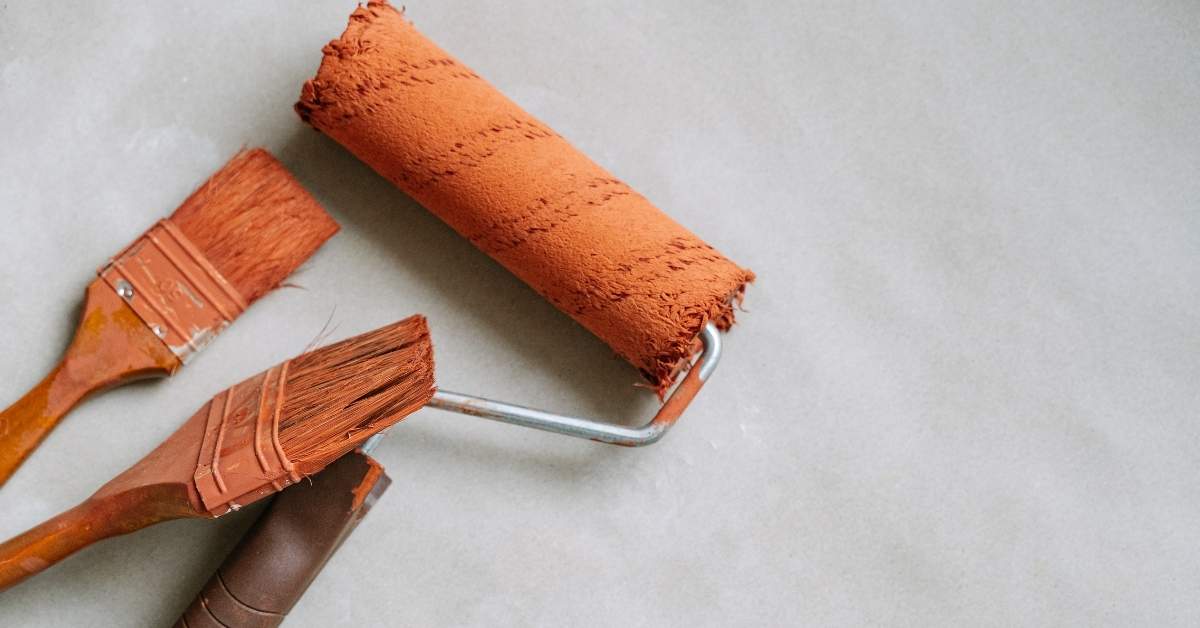
Rollers, pads, and brushes — choosing the right tool
Selecting the right applicator is crucial for a smooth, lap-free finish. Here are your best options:
- 9-inch roller with 3/8-inch nap cover: Ideal for most sealers on concrete. It provides even coverage and minimizes trapped air.
- 12-18 inch roller with 3/4-inch nap cover: Use for thicker, more viscous sealers or when applying multiple coats. It helps distribute the product evenly.
- 9×18 inch roller with 3/8-inch nap cover and extension pole: For high ceilings or hard-to-reach areas, this tool allows you to maintain a consistent working height.
- Paint pad (9-12 inches) with 3/8-inch nap: Great for edges and detailed work. It provides better control and reduces drips.
- Natural bristle brush (2-3 inches): Use for touch-ups, corners, and edges where a roller can’t reach. It’s also useful for applying sealers to porous surfaces.
Spraying, back-rolling, and multi-coat methods
For large areas or when time is a factor, consider spraying the sealer. It provides faster coverage but requires proper equipment and technique to avoid overspray and lap marks.
After spraying, use a roller (back-rolling) to even out the film and remove any missed spots or streaks. This step is crucial for achieving a smooth, uniform finish.
For multi-coat methods, follow your sealer’s guidelines for recoating times. Typically, you’ll apply a second coat at right angles to the first, allowing it to dry slightly before back-rolling. This helps reduce lap visibility and ensures even coverage.
Tools, Materials, and Safety Checklist
Gather core tools for a clean application: rollers, brushes, a squeegee, a tray, a mixing paddle, and edge-trim tools to reduce lap lines. Have a roller cover suitable for sealers and a spare nap in case of wear. Don’t forget a clean tack cloth for final wipe-downs.
Stock mixing aids and consumables like a drill mixer, proper containers, measuring cups, stir sticks, strainers, and pre-filters help keep blends consistent. Plan for PPE and ventilation: safety glasses, gloves, a respirator or ventilation plan, and appropriate clothing. Create a simple workflow checklist to maintain uniform thickness from start to finish.
Tools and consumables to have on hand
Before you start, make sure you’ve gathered all the necessary tools and materials. This will ensure a smooth application process with minimal lap marks.
- Rollers: 9-inch nap roller for sealers, extension poles for hard-to-reach areas.
- Sprayers: For large surfaces or spraying applications. Choose one with adjustable nozzle sizes.
- Mixing buckets: Large enough to hold your sealer and mixing paddle.
- Lint-free cloths: To wipe off excess sealer from tools and edges.
- Tape/edge tools: Painter’s tape for controlling borders, edge-trim tool or brush for minimizing lap lines along walls and edges.
- Mixing paddle: Compatible with your mixing drill to ensure thorough mixing.
- Measuring cups: To accurately measure sealer quantities.
- Stir sticks: For checking mixed consistency and strainers for removing impurities.
- Pre-filter (if needed): To remove any remaining particles before application.
Quick rule: Having the right tools on hand ensures a clean, controlled application, reducing the risk of lap marks.
Safety and PPE best practices
Protect yourself and your workspace with the right personal protective equipment (PPE) and safety measures.
- Respirator: Use a respirator rated for organic vapors when working with solvent-based sealers. Follow manufacturer’s instructions for fit testing and maintenance.
- Gloves: Wear chemical-resistant gloves to protect your hands from solvents and other chemicals.
- Safety glasses: Protect your eyes from splashes and debris during mixing, pouring, and application.
- Long sleeves/pants: Wear long-sleeved clothing to minimize skin exposure to sealers.
- Safe handling/disposal of solvents: Follow label instructions for safe storage, disposal, and cleanup. Check local regulations for hazardous waste disposal.
- Ventilation: Ensure adequate ventilation in your workspace. Open windows or use fans to maintain a well-ventilated area.
- Post-application hygiene: Clean up spills immediately and wash hands thoroughly after handling sealers.
Quick rule: Always prioritize safety first. Proper PPE and ventilation prevent potential health hazards and ensure a safe working environment.
Troubleshooting Lap Marks During and After Application
When the sealer is wet, re-roll with light pressure to blend lines and maintain a wet edge to minimize seams. Work in small sections and avoid dragging over dried areas. Temperature and humidity control can prevent rapid drying that sharpens lap lines.
During inspection, verify nap condition, seam alignment, and even coating thickness. If sheen is inconsistent, apply a thinner coat or use a fresh applicator tip. After cure, assess for gloss differences or haziness and plan re-coating or spot repairs with compatible products.
On-the-spot fixes while product is wet
If you notice lap marks while the sealer is still wet, don’t panic. You can often fix them right then and there.
Re-roll with light pressure. Gently go over the lap lines again using even, light pressure to blend the sealer. Be careful not to overwork the area or create new marks.
Use a back-rolling technique to smooth out any remaining lines. Work in small sections and maintain a wet edge to minimize visible seams. This helps distribute the sealer evenly and prevents roller marks.
If the sealer is drying too quickly, causing roller marks or making it hard to blend, lightly mist the area with water (if using a water-based sealer) or the appropriate solvent (for oil-based). This will reflow the film, allowing you to feather edges and remove marks without creating halos.
Corrective actions after sealer cures
Sometimes, lap marks or other sheen issues don’t show up until the sealer has cured. Here’s how to address them.
First, assess the damage. Look for gloss differences, blotches, hazy spots, or orange-peel. Check if the issue is due to film buildup, contamination, or improper adhesion.
If the sealer has proper adhesion but shows lap marks, you can often correct this by applying a compatible top coat. This will even out the sheen and hide minor defects. Always perform a patch test first to ensure compatibility.
For more severe issues or when appearance or adhesion is compromised, you may need to spot-sand and recoat. Lightly sand the affected area using fine-grit sandpaper, following the grain of the concrete. Wipe off any dust, let it dry, then apply a new coat of sealer.
In rare cases, you might need to strip and reseal the entire surface. This should be done as a last resort, following manufacturer guidelines for stripping and reapplying the sealer.
Common DIY Mistakes and How to Avoid Them
Top missteps include roller overload, skipping test patches, re-coating too soon or too late, and ignoring manufacturer directions. Use a diagnostic patch to spot issues before treating the entire surface. This helps catch problems early and saves time later.
Control risk by ensuring thin, even coats, proper back-rolling, a consistent wet edge, and the right roller nap for the surface. Follow labeled recoat windows and match sealer type to surface and traffic expectations. When in doubt, perform a small test and verify compatibility before proceeding.
Mistakes in mixing & product compatibility
To ensure your concrete sealer goes on smoothly and evenly, avoid these common mistakes when mixing and choosing products.
- Over-diluting: Thinning the sealer too much reduces its protective qualities. Avoid over-thinning; follow manufacturer guidelines.
- Combining incompatible products: Mixing different sealers or combining with other substances can cause adhesion issues and lap marks. Always test first.
- Ignoring surface type: Different surfaces require specific sealer types. Use the wrong one, and you’ll see lap lines and poor coverage.
- Not checking for blisters: Blisters under the sealer mean it’s not adhering properly. Check with a test area before full application.
Always do test patches to confirm appearance and adhesion before starting your project.
Planning and execution errors
Proper planning and careful execution are key to avoiding lap marks. Here’s what to watch out for:
- Rushing application: Hurrying through the job leads to uneven coats and lap lines. Take your time.
- Poor lighting: Inadequate light makes it hard to see where you’ve applied sealer, leading to overlap marks. Ensure good lighting.
- Not accounting for weather: Wind or direct sunlight can cause the sealer to dry too fast, resulting in lap lines. Work in shaded areas and on calm days.
- Inadequate cleanup: Leftover debris or residue can show up as lap marks. Clean the surface thoroughly before sealing.
Adequate planning and careful execution will help you avoid these common pitfalls.
Maintenance, Longevity, and Cost Implications
Set a practical maintenance cycle that includes regular cleaning, gloss monitoring, and reseal timing based on traffic and exposure. Track performance and signs of wear so you can plan ahead. This helps prevent costly surprises later.
Look for early signs of failure like hazing or blotchiness and understand how they affect lifecycle costs. Weigh DIY maintenance against professional help with a simple budgeting approach, and follow a season-by-season plan for resealing, spot repairs, or full strip-and-reseal. Practical tips include preventing lap lines and avoiding common defects to prolong service life.
Cleaning, recoat intervals, and inspection checkpoints
Regular maintenance keeps your concrete sealer looking uniform and prevents lap lines from becoming more visible due to wear patterns.
- Monthly: Inspect for dirt or stains. Clean if necessary using a mild detergent and soft-bristle brush.
- Every 3 months: Check gloss uniformity. Loss of uniform gloss can accentuate lap lines.
- Twice a year (spring, fall): Inspect for signs of damage like cracks or chips. Repair if needed to prevent moisture intrusion.
- Annually: Evaluate recoat timing based on traffic, weather exposure, and chemical exposure. High-traffic areas may need resealing every 2-3 years.
Quick rule: Regular cleaning and inspection help maintain uniform gloss, preventing lap lines from becoming more prominent.
Cost of fixes versus prevention and when to hire a pro
The cost of stripping and resealing can be high due to labor and material expenses. Prevention is often cheaper.
Preventive maintenance: Regular cleaning, timely recoating, and addressing minor issues promptly can extend the life of your sealer and prevent costly repairs or full strip-and-reseal jobs.
However, there are times when hiring a professional is more cost-effective. If you notice multiple lap lines, extensive roller marks, or severe discoloration, it might be best to hire experienced applicators. They have the tools and expertise to assess the damage, strip old sealer if necessary, and apply new sealer for a uniform finish.
Break-even reasoning: Consider the cost of materials and labor for DIY maintenance versus professional services. If the DIY option takes more time and effort than you can afford, or if the damage is extensive, hiring professionals might be your best bet.
Conclusion
Safety first and durable results come from planning, proper prep, and steady hands. By fixing lap marks now, you protect the finish and your investment for years to come.
Inspect the surface, test a small area, and then follow a simple flow: choose the right sealer for the job, mix and apply per instructions, plan a weather window, scrub and dry the surface, keep edges wet and the roller even, back-roll to blend lines, clean up spills, and ventilate and wear protection. Do it in that order and keep the work steady from start to finish until you’re done with good, even coverage.
Common missteps to avoid are skipping prep or not letting the surface dry, applying too thick or in the wrong temperature range, and rushing through the back-rolling or edge work. Work in small, workable sections, test again if conditions change, and never force a sealant into pores or overlaps. Always re-check for drips or lap lines before the sealant skins over, and never inhale fumes or cut corners on ventilation.
If the project feels beyond your comfort level—especially with larger slabs, high humidity, or tricky substrates—don’t push through. A pro can save you time and costly mistakes. Stay patient, follow these steps, and you’ll finish with a sealant that looks clean, lasts longer, and keeps its shine without the stripes. You’ve got this.
FAQ
What causes concrete sealer lap marks (shiny stripes) to appear?
Most lap marks come from overlapping coats and uneven drying. When the sealer bleeds into the previous stroke or dries at a different rate, you get shiny bands. Poor surface prep or hot, windy days can make this worse.
What techniques prevent concrete sealer lap marks during application?
Keep a wet edge and roll gradually to avoid stopping in one spot. Back-roll after applying to even out sheen and remove excess at the same time. Use the right roller nap and thin coats that your product recommends, and work in consistent conditions.
How do I repair lap lines on a sealed surface?
First, clean the area and make sure the surface is dry and compatible with the sealer you used. Lightly recoat the affected area with the same product, keeping a smooth, even pass to blend the line. If this isn’t blending, consult the product instructions or manufacturer for proper feathering or possible reapplication in a new coat.
What safety precautions and maintenance tips should I follow after sealing?
Wear PPE and ensure adequate ventilation during application. Keep the area free of traffic until the sealer dries per label instructions. After curing, clean with manufacturer-approved products and reapply as needed when wear or loss of sheen shows up.