
Introduction
Stopping water stain bleed means fixing the moisture source and sealing the ceiling so stains don’t reappear. It’s a hands-on job that starts with finding where the water is coming from and drying the area thoroughly. Then you seal the surface to block any future bleed-through.
You’ll see practical tips for locating the leak, prepping the surface, and applying a seal and finish. Always read the product label and follow local building rules. If in doubt, pause and verify with the manufacturer instructions before proceeding.
Key takeaways
- Identify whether stains are still bleeding and confirm active leaks before repair.
- Contain the area to prevent mold spread and protect occupants during work.
- Repair the root cause: fix leaks, dry surfaces, then monitor for new stains.
- Prep damaged ceiling by removing loose material and priming before sealing.
- Choose stain-blocking products with ventilation and follow manufacturer safety guidance.
- Wear eye protection and respirator when sanding or cutting damaged ceiling.
Table of Contents
- Introduction
- Key takeaways
- Understanding How Water Stain “Bleed” Forms
- Diagnosing Active Leaks Versus Old Stains
- Immediate Containment and Safety Steps
- Fixing the Root Cause: Plumbing, Roof, and HVAC Solutions
- Preparing the Damaged Ceiling for Repair
- Tools and Materials Checklist
- Stain-Blocking and Sealing Products Explained
- Refinish Options and Painting Best Practices
- Conclusion
- FAQ
Understanding How Water Stain “Bleed” Forms
Stain bleed happens when moisture carries pigments and minerals into the finished ceiling. The migrating water can pull tannins, rust, and mineral salts along with it. This is why fresh paint can still show through after a patch or coat, even if the surface looks dry.
Knowing this helps you plan the repair. You’ll need to address not just the stain, but where the water came from and how far the damage has spread. Always check the label or manufacturer instructions on any product you use to block bleeding before application.
Common sources of ceiling stains
Ceiling stains don’t just appear out of nowhere. They’re usually caused by water carrying pigments, tannins, rust, and mineral salts from various sources.
Roof leaks are a common culprit. Water seeps in through damaged shingles or flashing, then travels along roof trusses before staining the ceiling below.
Plumbing failures can also cause stains. A leaky pipe or fitting above the ceiling can drip water directly onto it, leaving unsightly marks.
HVAC condensation and overflow events from bathtubs or sinks can also lead to stains. These sources deposit contaminants differently, but all result in the same problem: ugly ceiling stains.
What makes a stain active vs. residual
Not all ceiling stains are created equal. Some are actively being fed by moisture, while others are just old, dried-out marks.
Active stains are caused by ongoing moisture transport. Water is still moving through the structure, carrying contaminants with it. These stains will keep reappearing until you fix the source of the moisture.
Residual stains, on the other hand, are old, fully dried stains that still contain soluble pigments. They’re not being actively fed by water, but they can still bleed into new paint or primer if not properly treated.
The key is to identify whether your stain is active or residual before you start painting. If it’s active, you’ll need to fix the source of the moisture first. If it’s residual, you’ll just need to treat and seal the stain before painting.
Diagnosing Active Leaks Versus Old Stains
Start by locating the water source and tracking whether moisture persists. Use a moisture check in several spots around the stain to see if readings stay elevated. Look for drips or damp patches that appear after rain or fixture use.
Next, compare current conditions to past events. If the stain expands or darkens with humidity, the leak may be active. If the area appears dry and stable, you’re likely dealing with an old stain that needs blocking and sealing.
Moisture testing methods and limits
First, let’s talk about non-invasive tests. These are your eyes, hands, and sometimes an infrared scanner.
Start by looking for any obvious signs – water marks, peeling paint, or mold. Then touch the area. If it feels cold, damp, or spongy, that’s a red flag.
Infrared scans can help too, but they’re not always reliable alone. Moisture meters are your best bet for accurate readings. But remember, every meter’s different, so check the manufacturer’s guidance before assuming any numeric thresholds.
Visual checkpoints and stain patterns
Before you start poking around, use your eyes. Visual clues can point you right to the leak’s source.
- Satellite spots: These are small stains around a larger one. They mean water’s spreading from a single point.
- Discoloration halos: If stains are darker or lighter than surrounding areas, that’s water changing the surface’s appearance.
- Surface blistering: Peeling paint or wallpaper? That’s trapped moisture pushing outwards.
- Stain edges: Sharp lines mean a contained leak. Blurry edges suggest ongoing spread.
- Stain color: Brown stains are often old. Yellow or green can indicate mold growth.
- Stain size: Larger stains usually mean longer leaks or heavier flows.
- Stain location: Check above and below the stain. Water follows the path of least resistance.
- Stain history: If you know when a stain appeared, that’s a clue to its cause.
Quick rule: The more patterns you see, the more severe the leak likely is.
Immediate Containment and Safety Steps
Shut off the water source if you can do so safely and quickly. Move nearby furnishings away from the affected area to prevent further staining. Place drop cloths and plastic to protect floors and belongings.
Ventilate the room to reduce humidity and avoid mold risk. Do a quick visual check for sagging or loose ceiling material and note any bad spots you’ll address during repair. Always wear eye and skin protection when handling solvents or sealers.
Short-term leak control and tarp/patch options
First, stop the water at its source if possible. Place a bucket under the drip to catch any falling water.
For small holes, patch the ceiling with a quick-setting joint compound or spackle. Press it firmly into the hole using a putty knife, then let it dry according to package instructions.
If the leak is coming from the roof, throw a tarp over the affected area to keep rain out until you can make permanent repairs.
Mold risk, PPE, and when to isolate the area
Water stains can hide mold growth. If you see or smell mold, wear gloves and a respirator before touching anything.
If there’s visible mold covering an area larger than 10 square feet, call a professional. They have specialized equipment to handle large-scale mold remediation.
While waiting for repairs, keep the area dry and well-ventilated. Open windows or use fans to circulate air. If possible, isolate the affected room to prevent spores from spreading.
Fixing the Root Cause: Plumbing, Roof, and HVAC Solutions
Target the most common entry points: visible leaks, compromised seals, or faulty connections. Shutting off and repairing the source is essential for lasting results. If you’re unsure where the leak originates, inspect accessible plumbing joints and roof penetrations near the stain.
Document what you find and compare with local rules or guidelines before proceeding. Permanent stain prevention relies on a proper fix at the source, not just surface sealing. Check product labels and manufacturer instructions for any follow-up steps after a repair.
Plumbing Repairs Checklist
Use this checklist when you suspect a leak is coming from your plumbing. It’s crucial to address these issues promptly to prevent further damage.
- Check visible pipes: Look for water stains, drips, or corrosion. If found, trace the pipe back to its source.
- Inspect joints: Joints are common leak points. Check all accessible joints for leaks or signs of wear.
- Examine fixtures: Faucets, showers, and toilets can cause leaks. Check seals and connections.
- Listen for leaks: Turn off water-using appliances and listen for dripping or running water.
- Check water pressure: Low water pressure could indicate a leak. Test it at faucets throughout the house.
- Inspect the main shutoff valve: If it’s leaking, you may have a slab leak.
- Look for mold or mildew: These can indicate hidden leaks. Check areas where pipes run through walls and ceilings.
- Check your water meter: Turn off all water-using appliances. If the meter is still running, you likely have a leak.
Quick rule: If you find a leak or can’t pinpoint its source, shut off the main water supply and call a plumber immediately.
Roof, Flashing, and Exterior Envelope Fixes
The roof is often the culprit behind ceiling stains. Inspect your roof for these common issues.
Check shingles for cracks, curls, or missing pieces. These can let water seep through to the underlayment and into your home.
Inspect flashing around chimneys, vents, and skylights. Damaged or improperly installed flashing can cause leaks. Step flashing should be securely nailed and overlap shingles properly.
Don’t forget: Proper exterior drainage is key. Gutters and downspouts should direct water away from your home’s foundation to prevent leaks.
HVAC and Condensation Control
Condensation from your HVAC system can cause ceiling stains. Here’s what to look for:
Check ductwork for leaks. Leaky ducts can allow moist air to escape into your home, causing condensation on ceilings.
Ensure insulation is properly installed and maintained. Gaps in insulation can let cold air from the attic meet warm, moist air from living spaces, creating condensation.
Improve ventilation: Proper ventilation can prevent condensation. Ensure your HVAC system has adequate airflow, and consider installing exhaust fans in kitchens and bathrooms to remove excess moisture.

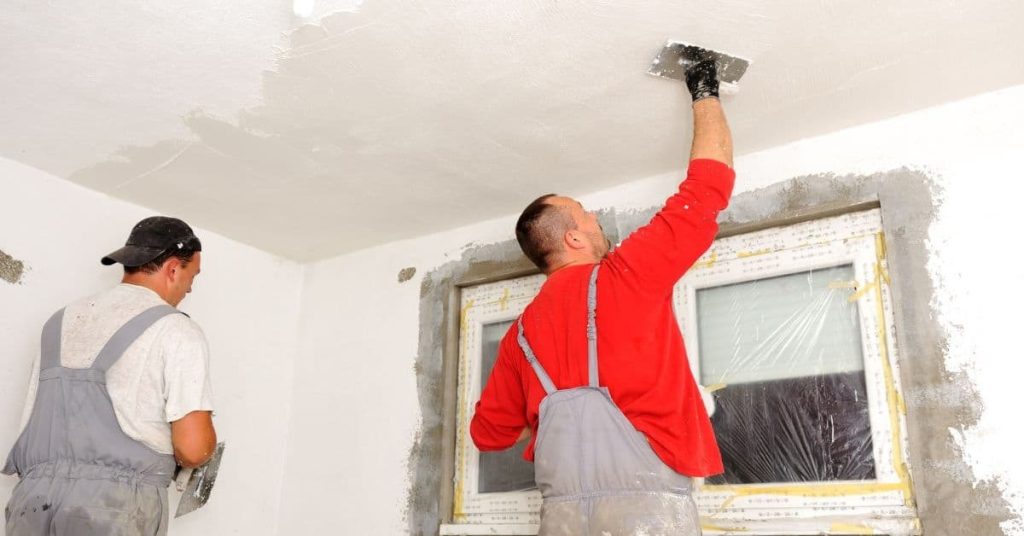
Preparing the Damaged Ceiling for Repair
Drying is the first step. Use fans and dehumidifiers as needed and monitor progress until the area feels dry to touch. Inspect for structural damage and signs of rot or mold before removing material.
Carefully remove compromised drywall or plaster, then clean all surfaces to remove loose particles and staining. Keep the work area clean and ready for sealing or refinishing according to the product directions you plan to use.
Properly drying the area and confirming it’s cured
First, open windows and use fans to ventilate the area. This helps remove moisture from the air.
Rent or purchase a dehumidifier to suck out excess water. Empty its collection tank daily.
Check for dryness every 24 hours. Use a moisture meter, but remember: it’s just one reading. Look for signs of drying like reduced musty smell and no visible dampness.
Keep drying until the area is consistently below 15% relative humidity and stays that way.
Removing damaged drywall, plaster, and insulation
Wear gloves and safety glasses. Cut out the wet or damaged sections with a utility knife or reciprocating saw.
Inspect exposed framing for rot or corrosion. If found, replace affected members before proceeding.
Remove all saturated insulation. It can’t be dried effectively and will only cause more problems later.
Cut out damaged drywall or plaster down to the nearest sound substrate. Be careful not to damage surrounding areas.
Cleaning stains and neutralizing contaminants
Start by washing the area with a mild detergent solution. Rinse thoroughly with clean water.
For tough stains, use a stain-specific cleaner or prep product. Follow manufacturer’s instructions carefully.
Avoid products that spread pigments. They can make future repairs more difficult.
Always test cleaners on a small, hidden area first to ensure they don’t cause discoloration or damage.
Tools and Materials Checklist
Gather basic diagnostic tools like a moisture meter, flashlight, utility knife, and putty knife. Have containment items such as drop cloths, plastic sheeting, and painter’s tape on hand. Include fasteners, joint compound, sandpaper, and a compatible sealer or primer for the project.
Choose materials with safety and suitability in mind, and confirm that products are appropriate for ceilings and existing finishes. Always check label instructions and local requirements for ventilation, disposal, and curing times.
Diagnostic and safety tools
Before you start any concrete work, use this checklist to ensure you have the right tools and safety measures in place. This will help you avoid costly mistakes and keep your project on track.
- Moisture Meter: Check for excess moisture before pouring or applying finishes. Too much moisture can cause delamination and other issues. Use a non-invasive, pinless meter for accurate readings (0-2% is ideal).
- Flashlight: Have a reliable flashlight on hand to inspect dark areas like crawlspaces or under slabs. A headlamp can be useful for hands-free use.
- Infrared Camera (Optional): For experienced users, an infrared camera can help detect heat loss, moisture intrusion, and other issues not visible to the naked eye.
- Ladder: Ensure you have a sturdy ladder for safe access to elevated areas. Check its stability before use and follow manufacturer guidelines for weight limits.
- Personal Protective Equipment (PPE): Always wear appropriate PPE, including safety glasses, gloves, steel-toed boots, and hearing protection when working with concrete. Check your local regulations for specific requirements.
- Respirator: Concrete dust is harmful to your lungs. Wear a respirator rated for silica dust (e.g., N95 or P100) during cutting, grinding, or other tasks that generate dust.
- Concrete Test Kit: Use a test kit to check the pH of existing concrete before applying any coatings or sealers. High pH levels can cause discoloration or damage to some products.
- Tape Measure: Accurate measurements are crucial for planning and executing your project. Check your tape measure’s accuracy before use and recalibrate if necessary.
Quick rule: Always prioritize safety first. Ensure you have the right PPE, tools, and knowledge to complete each task safely and effectively.
Repair and finishing materials
Use this checklist before starting any drywall repair or painting project to ensure you have the right materials for a professional finish.
- Drywall Joint Compound: Check label for setting type (quick, regular, or slow). Ensure it’s suitable for your climate and job size. Wrong compound can lead to improper drying and cracking.
- Mesh Tape: Verify tape width matches joint width. For wider joints, use multi-purpose tape. Incorrect tape can cause cracks or uneven surfaces.
- Stain-Blocking Primer: Ensure it’s suitable for your specific stain issue (e.g., water stains, smoke damage). Check label for indoor use. Using the wrong primer may not seal stains properly, leading to reappearance.
- Caulks: Choose paintable, acrylic-latex caulk for interior drywall seams and gaps. Ensure it’s suitable for your specific application (e.g., corners, trim). Using the wrong caulk can result in cracking or peeling.
- Paint Types: Select paint based on room use (kitchens/bathrooms need mildew-resistant paint). Check label for indoor use and desired sheen. Wrong paint type can lead to poor durability, fading, or mildew growth.
- Paint Colors: Ensure you have enough paint for the entire project. Check color match at store before purchasing. Running out of paint mid-project may result in slight color variations.
- Sandpaper Grit: For drywall, use 120-grit sandpaper for final smoothing. Ensure it’s suitable for your sander type (e.g., orbital, pole). Wrong grit can cause uneven surfaces or damage drywall.
- Cleaning Supplies: Have damp cloths, sponges, and a vacuum to clean up dust before painting. Dust on walls can cause paint imperfections.
Quick rule: Always check product labels for indoor use and compatibility with your specific project needs.
Stain-Blocking and Sealing Products Explained
Oil-based and shellac sealers are traditional choices for blocking stains. They tend to form solid barriers against bleed-through but require ventilation and longer odor drying. Read the product data sheet to confirm compatibility with your ceiling finish.
Water-based stain blockers can be easier to work with and cleanup, but you’ll want to verify drying times and surface compatibility. In some cases, a shellac alternative may be recommended; always compare the label guidance to your project needs.
How to choose a primer-sealer
The first step in stopping water stain bleed is choosing the right primer-sealer. It’s not one-size-fits-all, so consider these factors:
Stain type: Different stains need different treatments. Tannins from wood require shellac or a shellac-based primer. Rust needs a rust-specific primer. Watermarks can be tackled with water-based stain blockers.
Substrate and odor tolerance: Consider the surface you’re working on and your tolerance for odors. Oil-based primers are great for most surfaces but have strong fumes. Water-based alternatives are low-odor but may not be suitable for all surfaces. Always follow manufacturer instructions for application.
Application methods and common pitfalls
Applying primer-sealer correctly is crucial to prevent stains from bleeding through again. Here are some mistakes to avoid:
- Priming over damp surfaces: Make sure the surface is completely dry before applying any primer-sealer. Moisture can cause the stain to bleed back into the new material.
- Not following drying times: Always respect the recommended drying time between coats and before painting or wallpapering. Rushing this process can lead to recurring stains.
- Using too much product: Over-applying primer-sealer can cause drips and runs, which may trap moisture and lead to further staining.
- Not testing first: Always test your chosen primer-sealer on a small, hidden area first. This helps you check for compatibility with your surface and ensures it works against the specific stain in your home.
By avoiding these common pitfalls, you’ll ensure a successful application that stops water stain bleed effectively.
Refinish Options and Painting Best Practices
Texture repair often comes first if the ceiling was damaged. Skim-coating or patching can create a smooth base before sealing. Plan for a consistent finish that hides repaired areas under your final paint.
Prime before final color, and match the primer to the ceiling type you have. Follow any listed drying times and apply paints in appropriate coats to achieve a seamless match with nearby areas.
Repairing texture and matching finishes
Fixing the texture of your ceiling can be a tricky task, but with the right methods, you can blend it seamlessly into the surrounding area. Here are three common techniques:
Spray Texture: This method is quick and easy. Rent or buy a spray texture machine from your local hardware store. Match the existing texture by adjusting the nozzle size and pressure.
Hand Trowel: For smaller areas, use a hand trowel to apply joint compound. Apply thin layers, letting each one dry before sanding lightly. This method allows for more control over the texture.
Skim Coating: If your ceiling has deep imperfections or you want a smooth finish, consider skim coating. Apply multiple thin layers of joint compound with a wide trowel, feathering the edges to blend into the existing texture.
Paint selection, sheen, and long-term durability
Choosing the right paint is crucial for a successful ceiling repair. Here are some tips:
Paint Type: Opt for a high-quality, water-based latex paint. It’s easy to clean up, dries quickly, and has good adhesion.
Sheen: For ceilings, a flat or matte sheen is best as it hides imperfections and doesn’t reflect light. Semi-gloss can be used in kitchens and bathrooms for easier cleaning but may show imperfections more.
Durability: Look for paints with mildew-resistant additives, especially if your ceiling has been affected by moisture. Always test a small area first to ensure the color and texture match before full application.
Conclusion
The core idea is simple: fix the water source, dry out the area, then seal and restore the ceiling so stains don’t bleed again. When you keep safety and durability in mind, you protect your home and your budget from repeat damage.
First, check for active leaks and shut off any water source if needed, then inspect the roof, plumbing, and HVAC paths for the leak. Contain and dry the area, prepare the damaged surface, and choose a stain-blocking or sealing product that fits the ceiling material. Apply in the recommended order, then refinish and repaint with care, testing small patches first and allowing proper dry times. Safety first, test patches before you coat, and don’t rush the dry time or the sealant cure.
Common mistakes to avoid include chasing a stain without locating the real leak, skipping the test patch, and using a sealer or paint on a still-wet surface. Don’t skip ventilation or forget to protect nearby surfaces; always follow product instructions and use proper PPE. If you’re unsure about the leak source, or the ceiling is structurally compromised, don’t push past your limits—address the leak first, then call in a pro if needed. When you stay deliberate and patient, you’ll finish with a sturdy, clean result you can stand behind.
FAQ
Why does water stain bleed happen after the ceiling dries, and how can I tell if it’s still active?
Bleed happens when moisture moves through gypsum and carries pigment from the stain. If you see new dark spots after a few days, there’s likely ongoing moisture. Look for fresh damp spots or dripping from above to confirm active leaks before repair.
Can I seal a stain without fixing the ceiling leak first?
No. Sealing on an active leak will trap moisture and cause more damage. Fix the source first, then let the area dry per the product instructions before staining or painting.
What should I check on stain-blocking products to choose the right one?
Read the label for stain-blocking capability and whether it’s compatible with your ceiling material. Check for meets-to-surface guidelines, dry times, and any odor or ventilation notes. If unsure, follow the manufacturer instructions and local rules.
How do I prepare a repaired ceiling for finishing after applying a sealant?
Let the sealant cure fully, then lightly sand smooth with fine grit. Wipe away dust, prime as recommended, and then apply the finish coat. Do test patches to ensure paint adheres and color matches.