
Introduction
This article explains how to repair stucco after removing a satellite dish, focusing on filling holes, embedding mesh, and matching color. You’ll work from the outside in, prep the area, and choose the right patching compound for your surface. Plan for a gradual build up and smooth finish, then check local rules or manufacturer guidelines for compatibility.
You’ll learn practical steps to apply patch, reinforce with mesh, and feather the edges to blend with the surrounding wall. Check the product label and local requirements for curing times and painting recommendations, and adjust for your climate. If in doubt, consult the manufacturer instructions or a local pro to confirm suitable materials.
Key takeaways
- Inspect and clean damaged area before patching and ensure stable surrounding stucco.
- Remove loose material, fit a backing board, and secure with appropriate mesh.
- Wear eye protection and gloves when mixing patch materials to prevent injuries.
- Dampen surrounding stucco slightly to minimize rapid moisture loss during patching.
- Apply base, scratch, and finish coats per manufacturer guidelines and curing times.
- Test color match with a small blended area and adjust with care.
- Allow proper environmental drying and review any local rules before final finish.
Table of Contents
- Introduction
- Key takeaways
- Quick Overview and Scope: When This Guide Applies
- Tools and Materials Checklist
- Preparing the Hole and Surrounding Stucco
- Installing Mesh, Lath, and Backing
- Applying Patch Coats: Base, Scratch, and Finish
- Color Matching and Blending Strategies
- Drying, Curing, and Environmental Considerations
- Troubleshooting, Visual Checkpoints, and When to Hire a Pro
- Conclusion
- FAQ
Quick Overview and Scope: When This Guide Applies
This guide covers common stucco finishes used on residential exteriors and typical satellite-dish damage like holes or gouges from mounting brackets. It is focused on small to moderate repairs where the surrounding stucco is structurally sound. DIY repair is appropriate when you can access the area safely and the damage does not involve major cracking or water intrusion.
Look for damage patterns such as edge crumbling, rusting fasteners, or loose patches, which may indicate more extensive issues. If the patch area is large or the substrate shows moisture damage, consult the manufacturer instructions and local codes, or hire a professional. Use this guide to set expectations for repair steps and when to seek pro help to avoid warranty or structural problems.
Types of Stucco and Satellite Mount Systems
First, let’s understand the two main types of stucco you might be dealing with:
Traditional Cement Stucco: This is a mix of cement, sand, and water. It’s strong but can crack over time.
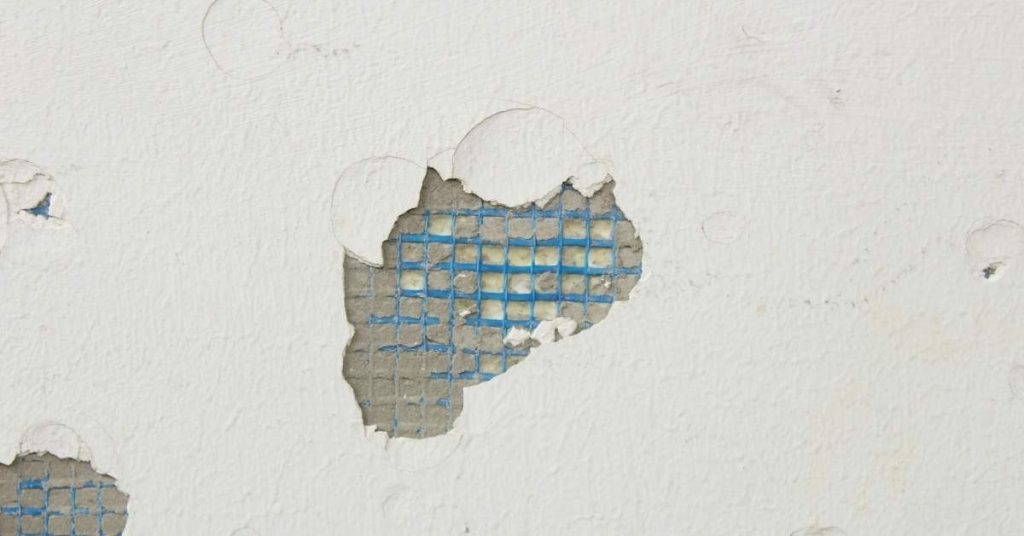
Synthetic/EIFS (Exterior Insulation and Finish System): This is a synthetic exterior wall cladding system that provides insulation and drainage. It’s less prone to cracking but can be damaged by moisture.
Now, satellite mounts. They typically use one of these systems:
Bracket Mounts: These attach directly to the stucco using screws or bolts. They’re common on traditional cement stucco.
Saddle Mounts: These sit on top of the dish and are secured with straps. They’re often used on EIFS systems as they don’t penetrate the surface.
Assessing Damage Size and Substrate Condition
Before you start repairs, you need to assess the damage:
First, measure the hole size. Use a tape measure or a piece of paper to get an accurate reading.
Next, check for any underlying issues. Remove any remaining brackets and look for:
Rust: This could indicate water intrusion or old, rusted hardware.
Rot: In EIFS systems, moisture can cause the foam insulation to rot.
Based on your findings, categorize the repair:
Small Patch: Holes up to 6 inches in diameter with no underlying issues.
Medium Repair: Holes larger than 6 inches or minor substrate damage like rusted hardware.
Structural: Extensive rot, cracks, or other signs of significant structural damage. This requires professional help.
Tools and Materials Checklist
Start with a sturdy cleanup kit: a hammer and chisel, wire brush, utility knife, and protective gear like gloves and eye protection. Have mixing tools, a cement mixer or bucket, and trowels for applying patch materials lined up for the job size. Choose patch material and mesh or lath that match the existing stucco system.
For small repairs, you may use premixed patch compounds and lightweight mesh; for larger patches, you may need lath, bonding agents, and base coats. Always verify product labels and manufacturer instructions for compatibility with your stucco type and substrate. When in doubt, check local building rules or HOA guidelines before starting the repair.
Recommended tools
Before you start, gather these essential tools to ensure a smooth repair process.
- Utility knife: For cutting old stucco and preparing surfaces. Skip this and you’ll struggle with clean cuts.
- Trowel (1/2″ & 3/4″): For applying and spreading stucco mixes. You need both sizes for different stages of the job.
- Hawk: To hold and carry stucco mix to your trowel. Don’t forget this; it’s a game-changer.
- Scrub brush: For cleaning surfaces before repairs. Neglect this step, and your repair won’t stick.
- Power drill (with mixing paddle): To mix stucco mixes quickly and efficiently. Without one, you’ll be mixing by hand for ages.
- Safety glasses: Protect your eyes from debris during cutting and sanding. Don’t take chances with your vision.
- Dust mask/respirator: To protect against stucco dust. Inhaling this can cause serious health issues.
- Tape measure: For accurate measurements when cutting mesh and determining repair size.
- Level (4′ or longer): To ensure your repairs are even and flush with the existing surface. A wonky level leads to a lumpy finish.
Quick rule: Always prioritize safety gear, then gather tools based on repair size and complexity.
Materials and product options (mesh, bonding agents, stucco mixes, finishes)
Choose the right materials to match your existing stucco system for a seamless repair.
- Mesh: Metal lath vs. fiberglass mesh. Metal lath is stronger but can rust; fiberglass won’t rust but isn’t as strong. Choose based on repair size and substrate condition.
- Bonding agent: Use a compatible bonding agent to ensure your new stucco adheres properly to the old. Skip this, and your repair could peel off.
- Scratch/base coat: Match the existing stucco type (sand/cement or acrylic) for a consistent finish. Mixing types can cause compatibility issues.
- Finish stucco: Choose a finish that matches your existing texture and color. Mismatches are obvious and hard to fix later.
- Paint/coating: Ensure your chosen paint or coating is compatible with your stucco system. Incompatibility can lead to peeling or discoloration.
Quick rule: Always select products that are compatible with your existing stucco system for a seamless, long-lasting repair.
Safety gear and prep supplies
Protect yourself and keep your work area clean with these essential safety gear and prep supplies.
- Hard hat: Protect against falling debris during cutting and sanding. Don’t risk a head injury.
- Work gloves: To protect hands from cuts, scrapes, and burns. Gloveless hands are vulnerable hands.
- Ear protection: To muffle loud power tool noises. Prolonged exposure can cause hearing damage.
- Drop cloths: To protect surrounding areas from stucco dust and debris. Cleanup is easier with drop cloths.
- Masking tape: For protecting edges and creating clean lines during repairs. Without it, you’ll struggle with a neat finish.
- Temporary weather protection: To shield your repair from rain or direct sunlight while curing. Exposure can cause cracking or discoloration.
Quick rule: Always prioritize safety gear and prep supplies to protect yourself and ensure a clean, professional-looking repair.
Preparing the Hole and Surrounding Stucco
Carefully remove loose or damaged material around the hole with a chisel and brush away dust. Do not tear back more than necessary; use a margin to ensure a solid edge for bonding. Clean edges help the patch adhere and resist future cracking.
Inspect for concealed moisture or mold behind the damaged area. If you find dampness, dry out the area and address the source before patching. Follow product instructions for surface prep primers or bonding agents as needed.
Cleaning, removing rust, and cutting back damaged stucco
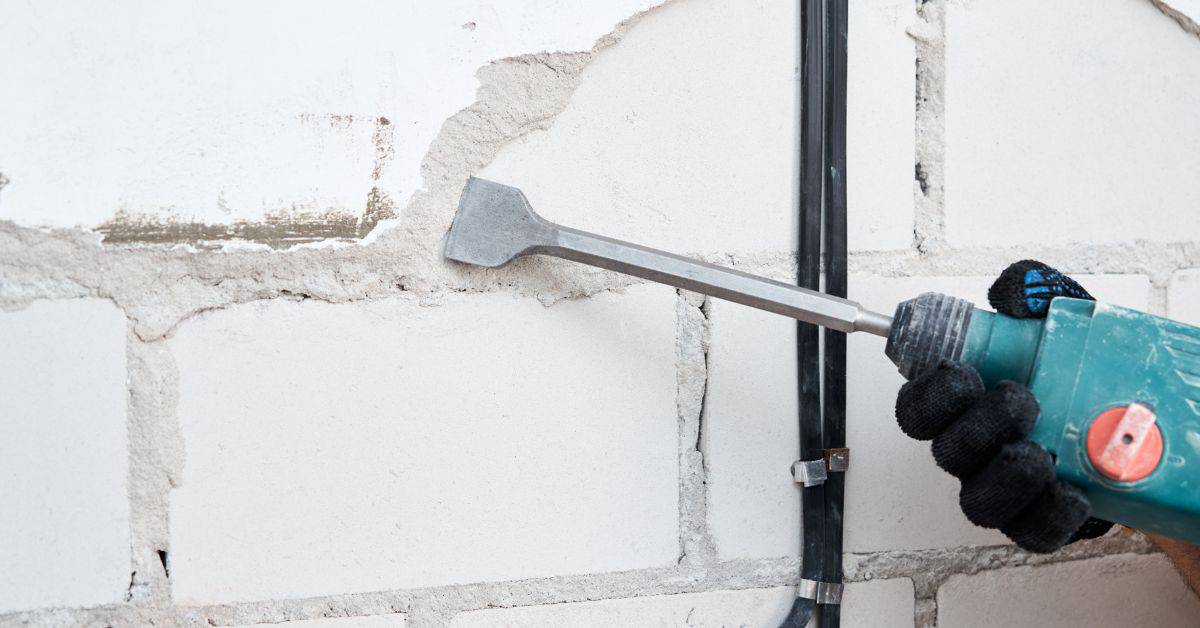
Start by scraping off any loose or crumbling stucco around the hole using a stiff-bristle brush. Be careful not to damage surrounding intact material.
If there are rusted fasteners, use a wire brush to remove as much rust as possible. A little elbow grease goes a long way here.
Now, cut back the damaged stucco with a utility knife or oscillating tool. You want to create a clean edge that’s about 2-3 inches beyond the hole. Be sure not to overcut into good material.
Dealing with lath, sheathing, and water-damaged backing
Before you start patching, inspect the area behind the stucco. You’re looking for any damaged lath or sheathing that needs replacing.
If you find any rot or damage, replace it now. Use a reciprocating saw to cut out the bad section and install new pieces using galvanized nails or screws.
Important: If there’s water damage, check for mold. If present, treat it before proceeding. Water-damaged backing won’t support your patch properly.
Installing Mesh, Lath, and Backing
Place the mesh or lath so it extends beyond the patch area with proper overlap onto sound stucco. Secure it with appropriate fasteners or adhesive compatible with the substrate. Ensure the backing is continuous to prevent future delamination.
Attach methods vary by substrate, such as masonry, wood sheathing, or cement board. Use the recommended fastener type and spacing from the product instructions. Check that the mesh is taut and free of wrinkles before applying patch coats.
Choosing the Right Mesh or Lath
First, you need to decide between fiberglass mesh and metal lath. Fiberglass is lightweight, flexible, and resistant to corrosion. It’s great for small repairs and synthetic stucco systems.
Metal lath, on the other hand, is stronger and more rigid. It’s ideal for larger repairs or when using cement-based stucco. Always choose a mesh or lath that’s compatible with your existing stucco system.
Overlap, Embedment, and Anchoring
Start by overlapping the new mesh or lath onto the existing one. A 6-inch overlap is usually sufficient to ensure a strong bond.
Next, embed the mesh into the base coat. This ensures it’s well-bonded and won’t peel off later. Use a notched trowel to press the mesh firmly into the wet base coat.
For anchoring, use corrosion-resistant fasteners like stainless steel or galvanized screws. Drive them through the mesh into the substrate at 6-inch centers. This prevents movement and ensures a solid attachment.
Applying Patch Coats: Base, Scratch, and Finish
Mix and apply the base coat to rebuild the substrate thickness, following the product’s guidelines for mixing and pot life. Use a straightedge to feather the edges so the patch blends with the surrounding surface. Allow the base coat to cure per the manufacturer’s timing before the next layer.
Apply the scratch coat and a finish coat in thin, even layers, keeping a consistent buildup with the existing stucco. Treat each layer as a separate cure period and avoid overworking when the material begins to set. Reference the product instructions for bonding and curing requirements.
Mixing and applying the base/scratch coat
The base coat is your first layer of repair. It’s crucial to get it right for a strong, durable finish.
Mix your stucco according to the manufacturer’s instructions. You want a consistency like thick peanut butter – not too runny, not too stiff.
Apply the base coat using a trowel or hawk and knife. Spread it evenly over the patched area, pushing it into any mesh or lath. Aim for a thickness of about 1/4 to 3/8 inch. Use vertical and horizontal strokes to key the patch into the surrounding stucco, creating grooves for better adhesion.
Let it cure according to the manufacturer’s guidelines. This is usually around 24-72 hours, depending on weather conditions.
Building texture and applying the finish coat
The finish coat is what gives your stucco its final look. It’s all about recreating the original texture while blending with the surrounding area.
Start by wetting down the base coat lightly. This helps with adhesion and prevents suction that could cause cracking. Then, apply your finish coat mix using a trowel or hawk and knife. Aim for a thickness of around 1/8 inch.
To recreate the original texture, you can use various methods: dashing with a dash brush, sanding with a float, or troweling with a straight edge trowel. Feather the edges of your patch to blend it into the surrounding stucco.
Let it cure again according to the manufacturer’s guidelines. Once fully cured, you can apply any final sealants or treatments as needed.
Color Matching and Blending Strategies
Use tintable base coats or color-matched finish products that are designed for your stucco system. Test a small patch first to evaluate tone, texture, and aging behavior. Plan the blend so the repaired area gradually fades into the surrounding finish.
For faded or weathered surfaces, blending may require feathering the edges or repainting adjacent sections. Do not oversaturate the surface with color; follow the product label for recommended application and cure conditions. When repainting is necessary, verify compatibility with the underlying patch and original finish.
Techniques for matching color and texture
Matching the existing stucco’s color and texture is crucial for a seamless repair. Here are some techniques to help you achieve that:
Create sample mixes: Make small batches of your patch mix, adjusting pigment or aggregate until you match the original color and sheen.
Apply test patches: Once you’ve got a close match, apply small test patches on an inconspicuous area. Let them cure under the same conditions as the repair site to ensure they don’t change color over time.
Adjust and refine: Based on your test patches, make any necessary adjustments to your mix until you’ve got a perfect match. Then apply your patch with confidence.
When to feather, spot-repair, or repaint larger areas
Knowing when to blend a repair in and when to repaint is key. Here’s how to decide:
Feathering and spot-repair: If the damage area is small (less than 1 sq ft) and the surrounding stucco is in good condition, you can likely feather the edges of your patch and blend it in seamlessly.
For slightly larger areas (up to 2 sq ft), you might need to spot-repair. This involves blending multiple patches together to cover the damaged area.
Repainting or reskinning: If the damage is extensive, or if the surrounding stucco is faded, weathered, or has a different texture, it’s best to repaint or reskin the entire affected wall. This ensures an even appearance and prevents your repair from standing out.
Drying, Curing, and Environmental Considerations
Temperature and humidity affect set times, so monitor the forecast and avoid working in extreme heat or cold. Protect fresh work from rain, wind, and rapid drying that can cause cracking. Follow the product’s guidance on curing windows and handling after application.
Check manufacturer instructions for any required curing aids or backsplash protection. If you are unsure about the cure period, verify the recommended times before exposing the patch to weather. Plan repairs so you can maintain control over drying conditions.
Temperature and humidity impacts on cure and adhesion
Cold temperatures slow down the curing process of stucco. In freezing conditions, it’s best to wait until spring or use special cold-weather mixes.
Heat, on the other hand, speeds up curing but can cause excessive shrinkage and cracking if not properly managed.
High humidity also affects cure time. It can lead to slower drying and potential mold growth if not addressed. Keep your repaired area dry during the curing process.
Moisture testing and sealing after repair
Before applying finish coats, test for moisture using a moisture meter. Stucco needs to be dry (less than 16% moisture) before painting or sealing.
Consider using breathable sealers or paints that allow moisture to escape. These products are compatible with stucco systems and help prevent trapped moisture issues.
Always follow manufacturer instructions for specific product recommendations and application guidelines.
Troubleshooting, Visual Checkpoints, and When to Hire a Pro
Common issues include cracking, delamination, and visible seams. If you see gaps around edges, rework the surrounding patch and reseal with compatible materials. Use a bright light at close range to inspect transitions for uniform texture and color.
Set criteria for bringing in a pro, such as persistent water intrusion, significant base movement, or mismatch that affects curb appeal and warranty. Maintain the area after repair with a protective finish or sealant if recommended by product instructions. Keep notes on materials used and dates of work for future reference.
Common problems and how to fix them
Before you start patching, check for these common issues.
- Shrink cracks: Check for hairline cracks around windows or corners. Cause: Inadequate moisture control during curing. Fix: Seal and repatch.
- Poor adhesion: Look for flaking or peeling stucco. Cause: Insufficient bonding agent or incompatible surfaces. Fix: Remove loose material, apply bonding agent, and repatch.
- Texture mismatches: Inspect edges of old repairs. Cause: Different textures in new vs. existing stucco. Fix: Feather edges and blend textures.
Quick rule: Address these issues before they worsen.
Visual checkpoints to confirm a successful repair
After patching, use this checklist to ensure your repair is sound and blended.
- Color match: Check for color consistency. Cause: Inaccurate mixing or application. Confirm: Compare with adjacent areas in natural light.
- Texture match: Inspect the feel of the patched area. Cause: Incorrect texture application. Confirm: Run your hand over the surface.
- Cracking: Look for new cracks around the patch. Cause: Inadequate curing or movement in the substrate. Confirm: Inspect after drying and curing.
Quick rule: Regular visual checks help catch issues early.
Signs you should hire a stucco professional or structural repair
Certain problems require expert assessment and repair. Use this checklist to identify them.
- Large water damage: Check for widespread discoloration or soft spots. Cause: Extensive water intrusion. Confirm: Inspect behind the stucco.
- Persistent leaks: Look for recurring water issues. Cause: Undetected leaks behind the stucco. Confirm: Check for moisture during and after rain.
- Structural rot: Inspect for soft or crumbling wood. Cause: Hidden water damage or insect activity. Confirm: Probing reveals structural integrity.
Quick rule: If in doubt, consult a professional to avoid further damage.
Conclusion
The key takeaway is to finish the repair with the same care you’d give a new stucco surface: it must be safe, durable, and visually integrated with the rest of the wall. Proceed step by step, test as you go, and respect the materials’ drying and curing windows to avoid costly backtracking.
Now, confirm you have a clean, properly sized hole, assemble the mesh, lath, and backing in the correct order, mix and apply the patch coats (base, scratch, finish) with smooth, feathered transitions, then blend color to match and let everything dry and cure in proper conditions before the final review and any sealing or painting.
Common mistakes to avoid are oversizing the hole or skipping the mesh and backing, applying patch coats too thick or unevenly, and rushing drying or curing or skipping a color test. Safety rules: wear eye protection, dust mask, and gloves; work in good light and in dry, moderate weather; test patching compounds on a small area first to prevent irreversible damage.
If the hole is large, the surrounding stucco is cracked, or you’re unsure about the backing and lath setup, call a pro rather than push on. When you know the steps are correct and you’ve validated the work on a small area, you can finish with confidence and move on to a clean, weather-tight result ready for paint.
FAQ
How do I determine which patch method to use for a satellite dish hole?
Size and depth matter. Small chips can often be filled with a simple patch coat, while larger holes may need mesh, lath backing, and multiple coats. Follow the patch material and backing instructions for your specific stucco system.
What should I look for in patch material and mesh when repairing stucco?
Choose materials labeled for stucco repair that match your system. Check that the mesh and backing are compatible with the patch coats you’ll apply and follow the manufacturer’s instructions. If unsure, read the product label or datasheet and verify local requirements.
How can I blend the repaired area with the surrounding color?
Test color on a hidden area or scrap, then apply in thin, feathered coats. Tint the patch if allowed by the product and match the texture as you go. Allow each coat to set per the product instructions before the next step.
What signs mean I should hire a pro?
If you see ongoing cracking, sagging, or water intrusion after patches have cured, call a pro. Hidden structural damage or improper backing can cause future failure. When in doubt, verify with the patch product guidelines and local advice.