
Introduction
Installing a concrete keyway involves careful planning and precise execution. Understanding the timeline is crucial to ensure your project stays on schedule.
This guide walks you through each step of the process, with estimated durations, so you can plan your keyway installation efficiently.
The Concrete Keyway Installation Timeline
From planning to post-installation checks, here’s a detailed timeline to help you complete your concrete keyway project on time:
- Planning and Pre-job Considerations (1-3 days): Measure, design, and gather materials. This step can take longer if you’re ordering custom tools or materials.
- Surface Assessment and Preparation (1 day): Clean, dry, and prime the substrate. This step may take longer if the surface requires extensive cleaning or repairs.
- Forming and Bonding (2-4 hours): Set up forms, apply bonding agent, and pre-wet the surface. The duration can vary depending on the size of the keyway and chosen bonding method.
- Concrete Placement (1-3 hours): Mix, place, and finish the concrete. Larger keyways or complex designs may take longer to complete.
- Curing and Post-installation Checks (28 days +): Monitor cure conditions, protect the work, and perform final inspections. The curing process takes at least 28 days, but full strength is typically reached after 56 days.
Key takeaways
The planning stage significantly impacts your overall timeline, so it’s crucial to allocate enough time for accurate measurements and material gathering.
- Plan keyway location with precise measurements to ensure alignment and leveling.
- Clean and dry substrate before installation to maximize bonding strength.
- Choose mechanical or chemical bonding suited to substrate porosity and load.
- Pre-wet surface appropriately to control suction and improve adhesion durability.
- Mix and place concrete promptly to prevent slump and cold joints.
- Inspect cured keyway for uniform depth, clean edges, and fill voids.
Table of Contents
- Introduction
- Key takeaways
- What is a concrete keyway and when to use one
- Tools and materials checklist
- Planning and pre-job considerations
- Surface assessment and preparation
- Bonding methods explained: mechanical vs chemical
- Moisture management and pre-wetting best practices
- Step-by-step keyway installation (DIY workflow)
- Post-installation checks, maintenance, and troubleshooting
- Conclusion
- FAQ
What is a concrete keyway and when to use one
A concrete keyway is a recessed groove or channel cut into the surface to create a physical embedment for concrete to grip, not just a line or a crack control joint. It’s distinct from joints because it provides a mechanical bond and a path for load transfer, which helps the new concrete lock with the old and resist movement.
In practice, a keyway matters for stronger slabs, repairs, and new pours where bonding and shear transfer are critical. It shines in slab-to-slab connections, repair patches, formwork to new pours, around embedded items, and high-traffic edges where differential movement could creep in; it also helps when you want a predictable grip for grout or filler rather than relying on surface trowel only. Use it when you want improved load transfer and crack control, but avoid it near weak substrates, very close to edges, or in joints where a key might trap moisture or restrict movement; if in doubt, check the product label or datasheet and consider simpler keys or alternative interlocks.
Keyway types and profiles
A concrete keyway comes in different shapes to suit various load requirements and locations. The most common are V-shaped, U-shaped, and dovetail profiles.
The V-shaped keyway is great for smaller projects where you need a simple groove that still provides good bonding without taking up too much space. It’s ideal for areas with moderate loads and limited concrete depth.
A U-shaped keyway, on the other hand, offers more surface area for better load transfer and shear resistance. This profile is best suited for larger repair patches or new pours where you expect significant stress from traffic or machinery.
The dovetail keyway provides excellent mechanical interlock due to its shape, making it a go-to choice in areas prone to differential movement or high load transfer needs. It’s more complex but offers superior performance over simpler profiles when dealing with critical connections.
When to repair vs replace
Deciding whether to repair a concrete keyway or replace the entire slab depends on several factors. If the damage is minor and localized, a repair might be sufficient.
If you notice widespread cracking, spalling, or significant structural issues across large areas of your slab, it’s likely time for replacement rather than repair. A quick check involves looking at the condition around existing joints and edges; if they’re in poor shape, chances are high that full replacement is needed.
Another key indicator is whether the substrate beneath the concrete is stable enough to support a new patch or keyway. If there’s any doubt about soil stability or underlying structure integrity, it’s safer to replace the slab entirely rather than risking future failures.
In summary, repair when damage is isolated and minor; opt for replacement if issues are widespread or structural concerns exist.

Tools and materials checklist
This section covers a practical, prioritized checklist: core hand tools like a trowel, hawk, margin trowel, and shovel, plus the primary power tools such as a mixer or drill with a paddle and a wheelbarrow. It also flags safety gear you must have on site—eye and face protection, gloves, a respirator if dust or chemicals are involved, a hard hat, and hearing protection—along with dust control and safe handling and storage practices. Expect notes on cement types and strengths, bonding agents, sealers, and common admixtures, with quick guidance on when to use penetrating versus film-forming sealers and polymer-modified or epoxy bonds.
Maintenance and setup matter just as much as the tools: surface prep, cleaning, calibration, and storage tips, plus advice on rental versus purchase based on project scope. The process-oriented checklist runs from surface prep to finishing, highlighting key decisions like keyway alignment and moisture management, with practical substitution tips for common scenarios. This matters for DIY success because choosing the right gear and materials up front saves time, reduces failures, and keeps budgets in check while you stay flexible for local availability and substitutes—just check product labels or datasheets for specifics and never substitute critical bonding or curing agents without solid guidance.
Recommended mixes and bonding products
This checklist helps you choose the right materials for your concrete keyway project.
- Type I cement: For general use, check moisture content; avoid if high humidity.
- Type II cement: Use in moderate weather conditions; confirm by checking temperature range.
- Polymers: Add for improved bond strength; verify with pull tests; skip at risk of failure.
- Epoxy adhesives: For critical joints, ensure proper mixing ratio; avoid improper curing times.
- Water reducers: Use to improve workability without adding water; confirm by checking slump test results.
- Air entraining agents: Add for freeze-thaw resistance; verify with air content meter; skip at risk of frost damage.
- Accelerators: For faster set times, check ambient temperature; avoid in cold weather.
- Film-forming sealers: Apply after curing to protect surface; confirm by checking for even coverage; skip risking concrete degradation.
Quick rule: Always test materials before full application to ensure compatibility and performance.
Visual checkpoints and measuring aids
This checklist ensures your keyway dimensions are precise and aligned correctly.
- Tape measure: Check overall length; confirm by marking reference points; skip risking misalignment.
- Depth gauge: Measure keyway depth accurately; verify with a straight edge; avoid shallow cuts.
- Profile template: Ensure uniform profile shape; check against manufacturer specs; skip risking inconsistent fit.
- Alignment jig: Keep edges straight and parallel; confirm by using plumb bob; avoid crooked joints.
- Level: Check horizontal alignment; verify with water level; skip risking uneven surfaces.
- Protractor: Measure angles accurately; check for consistency across sections; avoid misaligned cuts.
- Ruler: Mark precise width measurements; confirm by double-checking dimensions; skip risking incorrect fit.
- String line: Guide straight lines and alignments; verify with plumb bob; avoid wavy edges.
Quick rule: Always use measuring aids to ensure accuracy and consistency in your keyway project.
Planning and pre-job considerations
Plan this job in clear steps: confirm the keyway dimensions, trench depth, and alignment with existing slabs, and lock in the required forms and join spacing. Check for permits, HOA or property access rules, and any drainage or utility clearance needs before you pour. Map out a weather and timing plan with suitable curing conditions, forecast windows, and a contingency for rain or heat so you don’t end up with cracks or an improper set.
Assess the base slab condition, moisture, and slope, and decide on any substrate remediation, crack repair, or surface cleaning you’ll need before keyway installation. On the labor side, plan on how materials, equipment, and waste move on site, and roughly estimate crew size, roles, shifts, and sequence to minimize downtime. List every form, keyway insert, concrete mix considerations, sealants, and safety gear you’ll need, and build a rough cost and time estimate with buffers for surprises. When in doubt, check the product label or datasheet for any specific instructions or limits.
Cost breakdown and time estimates
You need to budget for the concrete mix, forms, keyway inserts, sealants, and safety gear. For a small job, expect around $150-$200 in materials alone, plus another $50-$75 if you rent tools or equipment. A medium-sized project might double these costs. Large jobs can easily hit the thousands.
Time-wise, prep work like substrate assessment and form setup takes about half a day for small projects. Pouring and finishing the keyway itself usually takes another full day to ensure proper curing. Larger projects will naturally stretch out over several days or even weeks depending on the scale.
Don’t forget buffer time in your schedule for unexpected delays, like bad weather or material shortages. A good rule of thumb is to add at least 20% extra time to your initial estimate to stay ahead of surprises.
Environmental and disposal considerations
Concrete waste can be a hassle, but there are ways to manage it. Use reusable forms whenever possible and recycle leftover concrete if local facilities accept it. For smaller amounts, consider mixing it with soil for garden paths or retaining walls.
Minimize runoff by setting up barriers around your work area. This prevents contaminated water from entering storm drains and harming local ecosystems. Also, choose low-VOC sealants to reduce air pollution during application.
Proper disposal is key too. Check with your city for guidelines on concrete waste. Some places have specific drop-off locations or recycling centers that accept construction debris. Follow these rules to avoid fines and do your part for the environment.
Surface assessment and preparation
Before you lay anything, assess the slab for soundness and moisture, identify cracks, and plan a keyable surface for the new concrete. Look for oils, sealers, curing compounds, dust, and laitance, and choose cleaners that will actually remove them. Decide how rough the surface should be—mechanical profiling, wire brushing, or light shot blasting—and set a thorough rinse and dry plan along with a recommended bond booster if the surface is smooth.
This prep matters because a poor substrate is a failing bond waiting to happen. A clean, properly profiled, and dry surface lets primers and bonding agents do their job and keeps moisture from undermining the repair. Always check the product label or datasheet to choose the right cleaners, primers, and drying guidance for your substrate and climate.
Cleaning methods and stain remediation
To prep your surface, start by assessing the type of contaminants you’re dealing with. For oil stains, use a degreaser or solvent to break down the oils before pressure washing. If sap is an issue, scrape it off first then clean thoroughly with a strong detergent.
For stubborn stains and residues, consider using a chemical cleaner designed for concrete. Always test in a small area first to ensure no damage occurs. After cleaning, rinse well and let dry completely before proceeding.
If the surface is heavily contaminated or has old sealers, you might need to chip away loose material with a chisel or hammer. This ensures any bonding agent will adhere properly without being compromised by leftover contaminants.
Mechanical profiling and creating a good bond surface
The goal here is to create a rough, keyed surface that allows the new concrete or repair material to adhere properly. Start by using an abrasive blaster if you have access to one; this will expose fresh aggregate without damaging the substrate.
For smaller areas, use a scarifier or grinder to remove laitance and smooth out any uneven spots. This also helps create small grooves that act as mechanical keys for better bonding. If these tools aren’t available, chisel off loose material by hand until you see solid aggregate underneath.
Once the surface is profiled, inspect it closely for consistency. The keyway should be uniform across the area to ensure even adhesion and strength. Any weak spots or smooth patches need further work before applying your repair mix.

Bonding methods explained: mechanical vs chemical
Mechanical bonding relies on a physical grip—roughening, scoring, and creating a keyway so the patch mechanically locks into the substrate as the material cures, which makes it strong where geometry can resist movement and where you can control the fill to maximize interlock. Chemical bonding uses bonding agents, epoxies, and cementitious primers to create a chemical bond between patch and substrate, which can be quick and smooth on flat surfaces but hinges on clean, compatible substrates and proper cure conditions; each system has tradeoffs: mechanical needs correct keyways and tolerance to movement, while chemical depends on surface prep and cure and can be sensitive to moisture and temperature.
For DIY work, you decide based on the site: keyways and dowels favor mechanical interlock, patches on stable, clean surfaces lean chemical when you want a flush repair. Plan surface prep, check substrate health, manage moisture, and test bond with simple tack tests or pull-off checks according to the product label; if you see cracks, moisture, or movement, switch approaches or consult a professional.
How to create a mechanical bond
To achieve a strong mechanical bond, start by designing your keyway geometry. The shape and depth of the keyway should provide enough surface area for the new concrete to lock into the old substrate. Use forms or templates to ensure consistent dimensions.
Roughen the existing concrete surface with scabbling, wire brushing, or scoring techniques. This creates a textured surface that helps grip the new material. If you’re using dowels or anchors, place them in the keyway before pouring the new concrete to provide additional mechanical interlock.
When filling the keyway, make sure to trowel the new concrete into every nook and cranny of the roughened surface. This maximizes the physical grip between old and new material. Be mindful of any existing cracks or movement joints that could affect your bond strength.
Remember, mechanical bonds work best when there’s a good fit between surfaces without excessive gaps or misalignment. Proper preparation is key to success.
Choosing and applying chemical bonding agents
Selecting the right chemical bonding agent depends on your project needs. Common options include epoxy primers, polymer-modified mortars, and silane/silicate primers. Each has its own strengths in terms of adhesion, flexibility, and durability.
Before applying any bonding agent, clean the surface thoroughly to remove dust, grease, or contaminants that could interfere with adhesion. Follow manufacturer instructions for application methods—this might involve brushing, spraying, or troweling on a thin layer.
Cure times vary depending on the product and environmental conditions. Ensure proper curing before installing new concrete or mortar over the bonding agent. This often means waiting until the primer is tack-free but still wet to touch.
Be cautious about compatibility issues when mixing different products. Some primers may not work well with certain patch mortars, so it’s important to test a small area first and consult product data sheets for guidance.
Moisture management and pre-wetting best practices
Pre-wetting the substrate is essential for keyway bonding. It prevents dry-out and suction that steal mix water and lead to inconsistent strength and finish. Aim for a uniformly damp surface with no standing water or surface sheen.
Do a quick porosity check with a water-bead test or a touch-and-wipe feel to categorize the substrate as highly, moderately, or low porosity. Wet the surface just before placement with a damp sponge or light mist until uniform dampness is achieved, avoiding puddles that create hydrostatic pressure. Re-check moisture right before placement, keep ambient conditions steady, and document what you see to repeat it later.
When to Dampen vs When to Use a Scratch Coat
Knowing the right time to dampen your substrate or apply a scratch coat is crucial for achieving strong, durable concrete keyways. If you’re dealing with a highly porous surface, like old brick or concrete that has been mechanically profiled, go ahead and use a scratch coat made from a mix of cement and water. This creates a consistent base layer that’s ready to bond with your new concrete.
For less porous surfaces, such as smooth concrete or masonry that isn’t too absorbent, just dampen the surface until it feels cool but doesn’t have standing water. You can use a spray bottle or sponge for this. The goal is to ensure the substrate is moist enough to prevent drying out during placement but not so wet that you’re washing away cement particles.
Remember, if your keyway walls are unevenly dampened, it can lead to inconsistent bond strength and finish quality. Always check the surface right before pouring concrete or applying mortar to make sure everything’s in line with your plan.
Avoiding Common Moisture-Related Failures
Mistakes happen, but knowing how to spot and correct them can save you a lot of headaches. Over-wetting or uneven dampening are two major issues that can lead to poor bonding and weak spots in your concrete.
- Over-wet surface: Too much water on the substrate washes away cement particles, weakening the bond. Check for standing water before pouring and use a dry sponge if needed.
- Puddles forming: Puddles create hydrostatic pressure that can push out aggregate or weaken the concrete mix. Avoid them by pre-wetting just enough to dampen without pooling.
- Dry spots in wet areas: Inconsistent moisture levels lead to weak bond points and uneven finish quality. Re-evaluate your substrate right before placement for uniform dampness.
- Surface sheen: A shiny surface indicates too much water, which can cause the concrete to lose strength. Ensure a matte look after pre-wetting.
Maintaining consistent moisture levels and checking conditions frequently will help you avoid these common pitfalls and ensure your keyway is strong and durable.
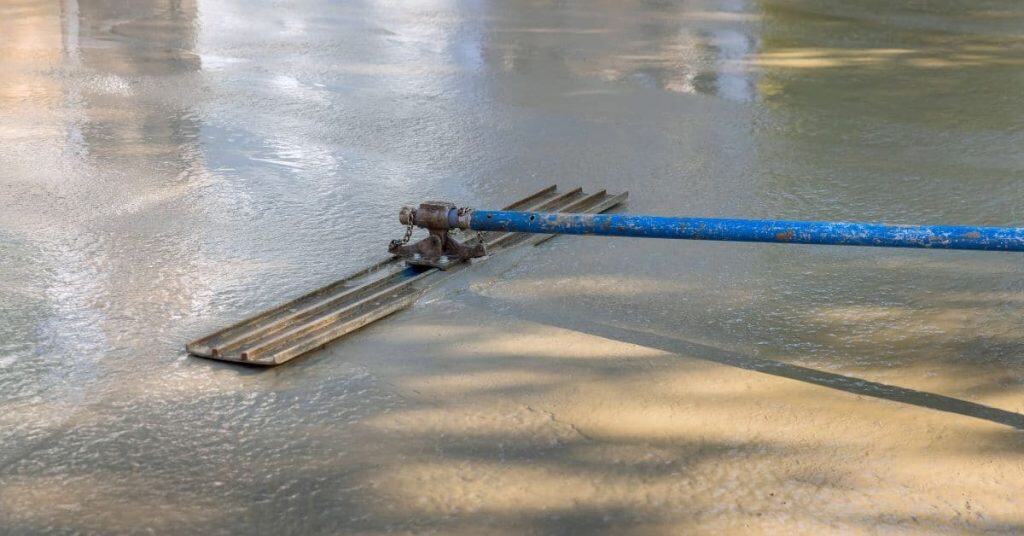
Step-by-step keyway installation (DIY workflow)
Step-by-step keyway installation means laying out the keyway, confirming location and tolerances, and then cutting or shaping the groove before you mix, place, and finish the concrete with an eye for long-term consistency. From pre-install planning to edge considerations, you’ll follow a straight sequence: verify subgrade compaction, align forms, pick a workable concrete mix and additives for workability, and set up the tools and safety gear you’ll need. Then you move through cutting the keyway with precise depth and square corners, mixing and placing, consolidating to avoid voids, finishing the surface, and kicking off curing with moisture or a curing method to minimize cracks.
Why it matters: a clean, well-supported keyway prevents leaks and reduces joint movement, so you don’t fight cold joints, delamination, or shrinkage later. Planning and discipline on pour day save time, keep forms right, and improve final appearance by controlling edge work and finish texture. Follow the sequence, use the specified tools, and be ready to pause and reassess if you see edge spalling, excessive dust, or signs that the joint won’t perform as intended.
Step-by-Step Installation Process
This sequence ensures your keyway is cut accurately and filled properly, ready for curing.
- Mark the location of the keyway on the concrete surface using chalk lines or spray paint. Verify dimensions with a tape measure to ensure accuracy.
Quick check: Double-check measurements against plans. - Cut the keyway using a saw or chisel, maintaining depth and width as specified. Clean out dust and debris thoroughly before proceeding.
Quick check: Ensure no loose material remains in the cut area. - Mix concrete according to batch size and slump requirements for small pours. Place concrete into the keyway using a chute or wheelbarrow, ensuring even distribution.
Quick check: Check for voids by tapping around edges with a hammer. - Vibrate the placed concrete gently but thoroughly to eliminate air pockets and ensure proper consolidation. Use a straightedge to level the surface if necessary.
Quick check: Surface should be smooth and free of bubbles. - Finish the surface using your preferred method (broom, trowel, stamping), then smooth out joints and edges carefully. Apply curing compound or cover with plastic film immediately after finishing.
Quick check: Ensure even coverage and no exposed concrete edges.
Mixing and Placing Techniques for Small Pours
For DIYers, mixing and placing in smaller batches is key to avoiding cold joints and voids. Aim for a slump of 1-2 inches for easy workability without excessive water.
To mix the concrete, start with dry ingredients first, then gradually add water while stirring continuously until you achieve the desired consistency. Use a wheelbarrow or bucket for small batches up to 50 lbs.
Tip: Mix thoroughly but avoid overworking which can weaken the concrete.
When placing the mix into the keyway, use a chute or shovel to ensure even distribution and minimize air entrainment. Tamp down each layer with a rod or poker before adding more material to eliminate voids.
Note: Keep batches small enough to pour continuously without waiting too long between pours.
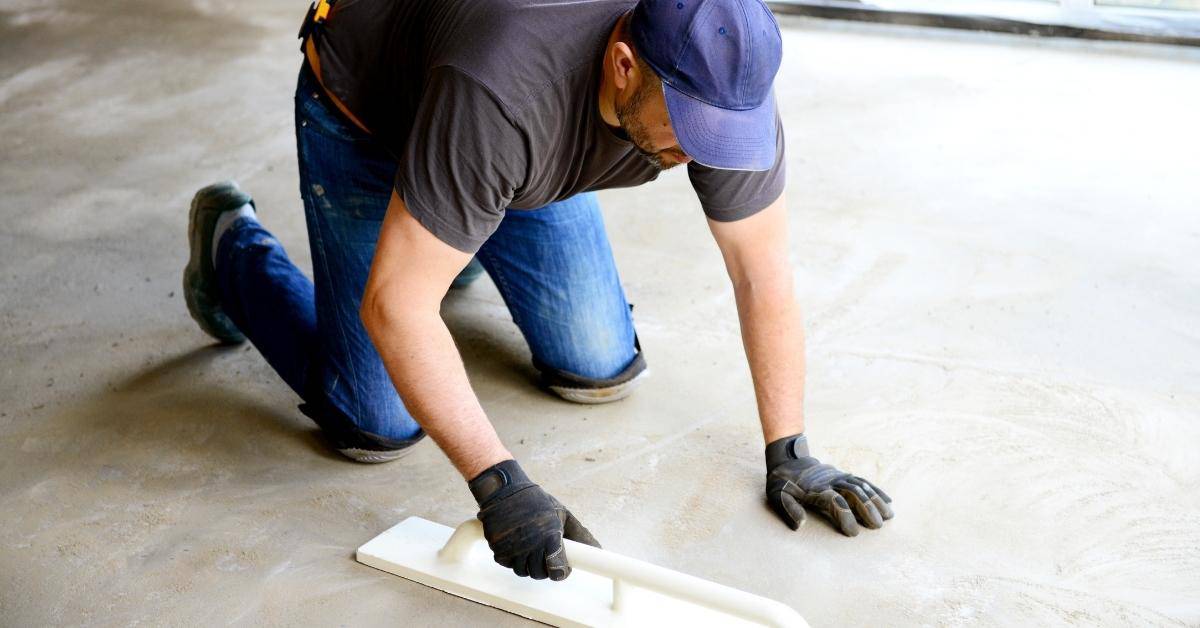
Finishing, Jointing, and Curing Tips
Proper finishing techniques are crucial for a smooth surface that resists cracking. Use a float to level the concrete and remove any imperfections.
Control joints should be placed at regular intervals based on the thickness of your pour to prevent random cracks from forming.
Note: Joints should be cut while the concrete is still plastic but not too soon after placement.
Curing is essential for developing strength and durability. Apply a curing compound or cover with plastic immediately after finishing to retain moisture.
Tips: Keep the surface moist for at least 7 days, especially in dry conditions.
Post-installation checks, maintenance, and troubleshooting
Post-installation checks start with a clear inspection protocol: define when to look again, what signs to flag (bond failure, surface delamination, cracking, scaling), and how to record findings with photos and notes. Use simple field tests to gauge bond and curing status, like quick pull tests, scratch or hammer checks, and moisture exposure observations, but skip any guesswork on precise methods—check the label/datasheet for guidance. Keep maintenance tasks modest and document them in a log so you can spot patterns over time.
This matters because catching issues early saves you from bigger repairs later. A routine cadence helps you stay ahead of grout or sealant failures, prevent moisture-related damage, and refine your mixes and prep for future projects. Use the notes to adjust substrate prep, sealing schedules, and patching methods, and to justify when a pro should step in rather than DIY chasing headaches.
Quick quality checks and long-term inspection schedule
After pouring your concrete, it’s crucial to perform quick quality checks within the first week. Follow up with regular inspections every three months for the first year.
- Hammer tap test: Check for hollow sounds indicating weak spots; skip this and you might miss early signs of delamination.
- Visual surface check: Look for cracks, scaling, or honeycombing; missing these can lead to water penetration and further damage.
- Joint condition review: Ensure joints are clean and sealed properly; neglecting this allows moisture in causing spalling.
- Bond line inspection: Verify the bond between layers is intact; failure here means structural integrity issues down the road.
- Surface delamination check: Look for signs of surface peeling off; ignoring this can lead to significant repair costs later.
- Crack width measurement: Use a ruler or gauge to measure cracks; not doing so means you won’t catch widening issues early enough.
- Moisture exposure assessment: Check for dampness around edges and corners; missing this can cause freeze-thaw damage in cold climates.
- Cleaning routine adherence: Ensure regular cleaning to remove debris and salts; skipping this leads to faster deterioration of the surface.
Quick rule: Regular inspections catch issues early, saving you time and money on repairs.
Common mistakes and how to fix them
Avoid these common pitfalls that DIYers often face when working with concrete.
- Inadequate prep: Skipping thorough substrate preparation leads to poor bonding; ensure the surface is clean, dry, and roughened for a strong bond.
- Wrong bonding agent: Using an incorrect chemical bonding agent can weaken the structure; always follow manufacturer guidelines or seek expert advice.
- Poor curing practices: Not properly sealing and protecting your pour from moisture and UV rays leads to surface scaling and cracking; use a good quality sealant after initial cure.
- Overlooking maintenance: Neglecting regular cleaning and resealing allows for water intrusion, leading to spalling and deterioration over time; establish a routine maintenance schedule.
Address these issues promptly or consult with a professional if unsure about the best course of action.
Conclusion
Getting a solid keyway is about control, not luck. When done right, it anchors the structure, keeps movement in check, and preserves the appearance. Safety first, and you’ll avoid costly fixes later.
To move forward, follow the checklist in practical terms: verify the plan and measurements, gather and organize tools and materials, prep the surface and form accurately, check moisture or bonding readiness, choose the mechanical or chemical bond method, dry-fit and then install the keyway in the proper sequence, monitor cure conditions, and protect the work until full strength is reached.
Avoid these mistakes: rushing the prep or skipping surface cleaning, using the wrong bonding method for the conditions, over-wetting or under-wetting the substrate, and leaving edges unmasked or alignment unchecked. Keep PPE on, work in a well-ventilated area, and never force a fit or rush cure times. If you’re unsure about moisture levels, substrate compatibility, or load demands, pause and consult a pro rather than pushing through.
If the job involves uncertain moisture, heavy loads, or complex joints, it makes sense to bring in a professional before you damage the work or waste material. Stay deliberate, test small areas first, and you’ll finish strong with a durable, clean result you can trust.
FAQ
How deep should a concrete keyway be?
The depth of a concrete keyway depends on the load and location. Generally, a depth of about 1/4 to 1/3 of the slab thickness is sufficient. Always check specific project requirements and adjust accordingly.
Can I install a keyway without professional help?
Yes, you can install a keyway yourself if you follow proper guidelines and safety measures. Ensure you have the right tools, understand the process, and don’t rush the job. If in doubt, consult a professional.
What tools are essential for keyway installation?
You’ll need a saw or chisel for cutting, a trowel for finishing, and a level for alignment. Safety gear like gloves and goggles are also crucial. Having the right tools ensures a clean and effective installation.
Why is moisture management important in keyway installation?
Proper moisture management prevents the substrate from absorbing too much water from the new concrete, which can weaken the bond. Pre-wet the surface to achieve a damp, not wet, condition before pouring.