

Introduction
Prevent visible picture framing by ensuring patches sit flush under the paint so the finish remains seamless.
The guide walks you through practical steps for surface prep, leveling patches, feathering edges, and selecting compatible paints, so you’ll learn how to avoid raised borders and achieve a uniform appearance.
Key takeaways
- Diagnose root cause before patching: moisture, sanding dust, or substrate issues.
- Feather edges with progressive sanding to minimize abrupt paint transitions.
- Use stain-blocking or shellac primer on dark patches to prevent bleed-through.
- Choose matte or eggshell finishes to better hide patch seams under light.
- Match sheen and film thickness to surrounding surface for invisible repair.
- For persistent ghosting, consider spot repair rather than full repaint when possible.
Table of Contents
- Introduction
- Key takeaways
- What is picture framing / ghosting and why it matters
- How to diagnose the root cause before you repair
- Surface preparation: cleaning, sanding and feathering for invisible patches
- Primers and sealers that prevent ghosting (material-specific recommendations)
- Paint selection and sheen matching: getting film and light right
- Application techniques to blend patches seamlessly
- Fixing existing framed patches: targeted repairs and when to repaint
- Troubleshooting checklist and advanced problems
- Planning, safety, cost and when to call a pro
- Conclusion
- FAQ
What is picture framing / ghosting and why it matters
Picture framing and ghosting describe visual halos or halos that appear around individual patches or repairs under paint, forming subtle lines that frame each area as if a picture was mounted on the surface. These effects are aesthetically unacceptable because they draw attention away from an even finish and can signal coating failure or adhesion problems, often hinting at improper substrate prep or incompatible materials. Recognizing these halos helps you identify deeper issues before they worsen and ensures the job looks uniform rather than patchy.
In practice, expect to see inconsistent film thickness, edge bleeding, and faint halos that persist after multiple coats, which point to underlying causes like moisture in the substrate, poor primer/finish compatibility, or improper drying and curing. On the job, perform diagnostic checks under varied lighting, test edge transitions, and notice whether halos fade with additional coats or remain stubborn—signs you can act on. By prioritizing feathered edges, uniform thickness, correct primer and finish pairing, and controlled temperature and humidity, you reduce framing and ghosting and improve durability; if present, re-sanding, re-priming, blending edges, and ensuring full cure before the final coat are practical repair steps.”
Visual examples and common scenarios
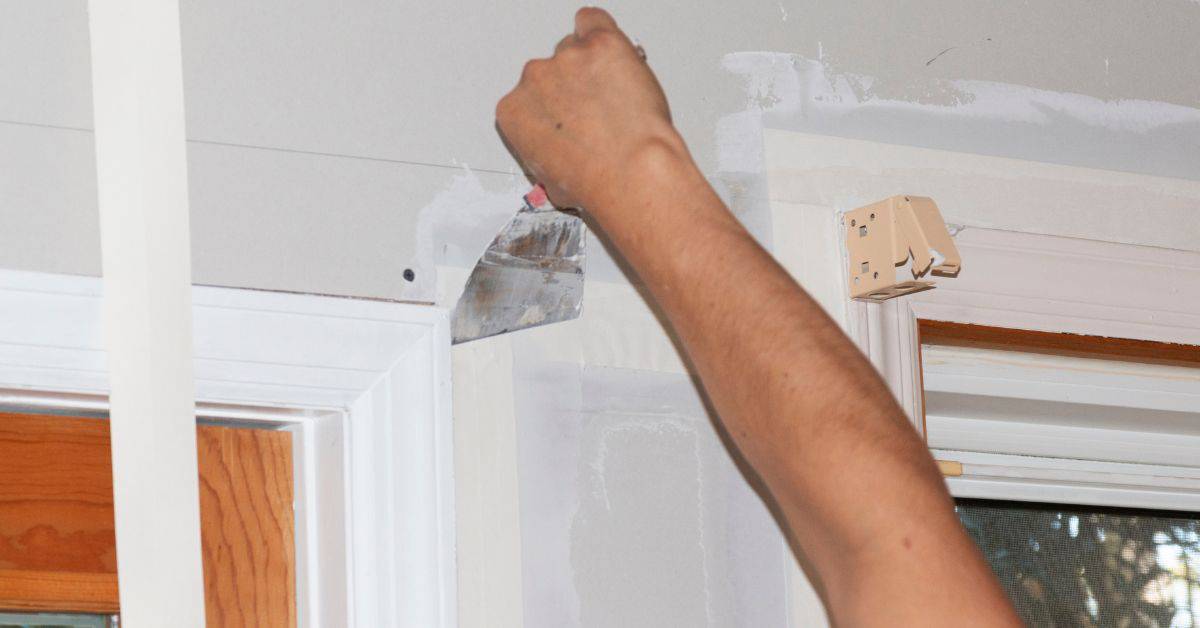
You’ll usually see framing where a patch or skim coat meets the original wall. Think small drywall repairs, new plaster patches, or limewash over an older finish. The patched area sits like a faint rectangle or halo against the surrounding paint.
Under flat paint the outline can look like a darker or lighter patch. Under higher sheens the edges show up as a shiny frame because the repaired surface reflects light differently. In repeated touch-ups the shape may be obvious from certain angles even when the colour match is good.
Look for clean straight edges around repairs, faint rectangles at eye level, or a glow near lights — those are the typical signs that you’re seeing picture framing or ghosting.
How sheen, porosity and substrate differences cause ghosting
Different sheens reflect light differently. A repair with a higher or lower sheen will catch light and stand out as a frame. Even when the paint colour matches, the finish tells the eye where the patch is.
Porosity matters. New plaster or joint compound soaks up primer and paint differently than the old wall. That changes the film thickness and how light is scattered, creating visible outlines.
Substrate depth and texture play a part too. Slight differences in sanding, skim coat thickness or absorption depth make the patch sit at a different level. The result is a ghosted edge you can see from some angles — not just a colour mismatch but a structural one.
How to diagnose the root cause before you repair
Begin with a concise diagnostic flow that guides you through sheen mismatch analysis, substrate porosity assessment, moisture checks, and adhesion/film integrity tests, then move to targeted repairs such as repainting, priming, or substrate corrections. Use a quick decision tree to decide the next step based on findings: if sheen mismatch and low adhesion, start with priming or surface preparation; if high porosity, treat the substrate before coating; if moisture indicators are present, address dampness first.
Concise diagnostic flow for quick decisions (DIY-friendly):
- Observe gloss differences and halos under natural and angled light. If you see a clear gloss mismatch with no bleed-through, suspect a surface-level issue; halos around patches suggest moisture or contamination may be involved.
- Check substrate porosity. Perform a quick damp wipe or a dampened cloth test: areas that darken or absorb more readily indicate higher porosity that may require sealing/priming.
- Conduct a moisture check. Use a moisture meter on patches and surrounding areas; elevated readings or a plastic-sheet test showing condensation under the film indicates dampness that must be addressed before coating.
- Evaluate adhesion and film integrity. Gently scrape a small, inconspicuous area; if the coating lifts easily, plan for adhesion-promoting prep or substrate repair rather than a quick topcoat.
Decision guide: if moisture or contamination is present → address dampness first; if porosity is high → treat the substrate with appropriate sealers or primers; if adhesion is poor → use bonding primers and proper surface prep; if the issue is purely a sheen mismatch → adjust priming/topcoat strategy.
This approach matters on the jobsite because it clarifies causes before you repatch, reducing rework and uneven gloss. A simple visual inspection and a few non-invasive tests reveal patterns around patches, moisture clues, and differences between patched and intact areas, guiding you to the right repair path. Recording area, substrate type, test results, and recommended fix helps ensure consistent adhesion and uniform sheen across the whole surface.
Step-by-Step Repair Process
This sequence gets you from inspection to a finished patch with checks at each stage to confirm the real cause before you commit to a full repair.
- Put on safety gear and clear the area. Protect floors and furniture so dust and chemicals don’t spread. Quick check: no lingering dust or hazards before you start.
- Do a basic surface clean and solvent wipe. Dirt and old wax hide problems and give false readings. Check: the surface looks uniformly clean and the wipe comes away mostly clean.
- Run the simple tests (sheen, flashlight, moisture meter) to narrow the culprit. Knowing if it’s moisture, porosity, or sheen mismatch directs the fix. Sign it’s right: tests point to one likely cause, not conflicting results.
- Feather and sand the affected area to expose the substrate where needed. This shows whether the old paint is firmly bonded or peeling. Quick check: sound sanding with no large loose flakes means adhesion is likely OK.
- Do a small trial repair — prime a 6″ patch and topcoat the same way you plan to fix the whole area. A trial avoids wasting materials and reveals sheen or adhesion problems. Check: the patch matches and holds after 24–48 hours.
- If the trial fails, do an adhesion pull or deeper substrate test (see next sections). If you find moisture or structural issues, stop and address that first or call a pro if it’s severe. Sign it’s right: tests pass and the trial patch stays intact.
- Apply primer and full repair using the techniques matched to the cause (binding primer for poor porosity, moisture-tolerant systems for damp areas). Primer choice solves many root-cause problems. Check: primer seals and topcoat lays out evenly.
- Finish with the topcoat and allow full cure time before normal use. Curing prevents late sheen or adhesion surprises. Final check: no lifting, streaking, or sheen mismatch after the recommended cure time.
- Clean up and document what you did for future reference. Proper cleanup preserves tools and makes repeat issues easier to diagnose later. Quick check: tools cleaned and photos logged.
Simple in-field tests (sheen inspection, flashlight, moisture meter)
Use quick, low-tech checks first to separate common causes. They’re fast and usually tell you whether the issue is surface-level or deeper.
For sheen inspection, stand at an angle with natural light and look for differences; rotate your head to see gloss shifts. A bright, angled light or flashlight highlights low and high spots — move the light and watch reflections. If the reflection changes drastically, you likely have a sheen mismatch rather than a moisture or adhesion failure.
For moisture, use a moisture meter or the plastic-sheet test: tape a 2-ft square of clear plastic to the surface for 24 hours and check for condensation underneath. Persistent moisture or high meter readings mean don’t paint until it’s fixed. For quick bonding checks, a firm solvent wipe or a small scrape will reveal loose paint without committing to removal.
When to remove paint and when to test the substrate
Strip paint only when tests show adhesion failure, hidden damage, or when a trial patch keeps failing. If the surface sands solid and a trial patch holds, you usually don’t need full removal.
Perform adhesion pulls or scrape tests when paint flakes or lifts during sanding, or when small repairs keep failing. An adhesion pull tells you if the coating bonds to the substrate or to previous layers instead. If pulls show poor adhesion across a large area, plan for full removal back to sound material.
Expose the substrate if you suspect porosity or contamination. For wood, look for tannin bleed or rot; for drywall, check paper integrity; for metal, check rust through. If you find structural or moisture damage, repair the substrate first or call a pro for complicated fixes or suspected lead paint.
Surface preparation: cleaning, sanding and feathering for invisible patches
Surface preparation follows a precise workflow: clean the surface and chemically degrease if needed, remove loose material, inspect for remaining defects that could telegraph through patches, then feather the edges to create a gradual transition before sanding, vacuuming, and a final tack. Use a controlled feather width and minimum feathering radius to avoid a hard edge, and document dwell times and rinsing steps for any cleaners to ensure compatibility with both the existing paint and the patch material. The goal is a seamless base so that subsequent patches disappear under paint and don’t telegraph through when viewed up close or in strong light.
- Concrete steps with numbers for repeatability:
- Clean surface: wash with a mild detergent solution (1–2 oz per gallon of warm water). Rinse thoroughly with clean water and allow to dry completely (minimum 2 hours in dry indoor conditions, longer in humid spaces).
- Degrease (if needed): use aqua-based degreaser or denatured alcohol, wipe with a clean lint-free cloth, and let dry 15 minutes before proceeding.
- Loosen loose material: remove flaky paint, concrete dust, and loose joint compound with a putty knife or scraper; vacuum the gap area afterward.
- Repair and inspect: fill small voids or gouges with compatible patch compound and let cure per manufacturer instructions; inspect for any remaining defects that could telegraph through patches.
- Feather edges: abrade a 1/4 inch (0.25 in) minimum beyond the repair using controlled strokes to create a gradual taper into the surrounding surface. Do not exceed a 1/2 inch feather width on patch repairs to avoid over-sand distortion.
- Sanding sequence: start with 120–150 grit to knock down high points, then progress to 180 grit, finishing with 220 grit for a smooth feather. Use long, continuous strokes; avoid creating new edge lines or digging into joint tape.
- Dust control: vacuum thoroughly after each grit, then wipe with a tack cloth to trap fine particles. Repeat tack wiping before applying any primer or patch material.
- Test for smoothness: perform a surface test by wiping with a clean cloth under a 60 W work light from 12–18 inches away. Look for any edge halos or texture differences. If visible, repeat feathering and reclean until uniform.
- Documentation: record grit sequence, feather width, dwell times for cleaners, and test results in a project log for traceability and future touch-ups.
The practical steps emphasize how to execute each task well: choose a grit progression from coarse to fine, decide between hand or machine sanding, and avoid rounding corners or creating new edge lines near patches. Vacuum thoroughly to remove dust, then run a tack cloth to trap fine particles, because even tiny dust specks ruin patch invisibility. Verification checks, including visual tests under different lighting and a non-critical test patch, confirm feather edge continuity and a uniform surface before painting, reducing the risk of visible patch lines later on.
Best sanding and feathering techniques by substrate
Drywall: start with 120–150 grit to knock down high spots, then finish with 220 grit for a smooth feather. Keep the sanding strokes long and even so you don’t dig a groove into the joint tape or compound.
Plaster and limewash: use a softer touch. Begin with 120 grit to level ridges, then switch to 180–220 to blend edges. Feather back gradually beyond the repair so the new film tapers into the old surface.
Painted wood: scuff with 150–180 grit to remove gloss and feather the paint edge; for deep builds use a sanding block to keep the surface flat. On all substrates, vacuum and tack off dust between grits to avoid contamination of the final skim coat. Work progressively—don’t try to feather from 40 grit straight to finish grit in one pass.
Contaminant removal and adhesion promotion
Wipe the area with a degreaser or trisodium phosphate solution where oils or cooking residues are present. For small repairs household degreasers work; for heavy contamination use a stronger cleaner and rinse thoroughly, then allow to dry.
If you spot mold or mildew, treat it first with a biocide or diluted bleach, scrub, rinse and let the substrate dry fully before any patching. Painting over active biological growth will cause failure.
On slick or previously coated surfaces, use an adhesion-promoting primer or bonding agent once the surface is clean and dry. Prime only after proper cleaning and feathering—primer helps the patch material bond, but it won’t fix a dirty surface.
Primers and sealers that prevent ghosting (material-specific recommendations)
Primers and sealers tailored to the exact substrate and porosity—from drywall and plaster to wood—are essential to prevent ghosting, especially when staining, previous finishes, or limewash are present, because different materials soak in and release paints at different rates. Start by identifying any staining or ghosting tendencies and then choose material-specific primer types, such as stain-blocking acrylic or shellac-based options for problematic areas, or breathable primers for limewash to avoid trapped moisture while still blocking bleed-through. In tricky cases like oil-over-water systems, prior stains, or limewash surfaces, ensure compatibility and breathability so that the primer forms a stable base without sealing in future issues.
Practical surface preparation and a simple testing protocol are key: clean, degrease, crack-fill, and lightly abrade glossy or limewashed areas, then seal over stains and apply a small patch of primer to cure and inspect under raking light for ghosting before full coverage. This approach helps you verify that the chosen primer type will perform as expected in real conditions, reducing rework and color variation down the line. Understanding application details—coverage rates, drying times, recoat windows, VOC considerations, and tinting options—answers the most common DIY questions and improves long-term results on diverse surfaces.
Best primers for drywall and new joint compound
On new drywall or fresh joint compound I reach for a high-build acrylic primer or a quality drywall sealer. These level the paper’s porosity and help hide feathered edges from repairs so the topcoat goes on smooth. If you’re patching with larger areas, consider a second skim coat or a drywall primer-sealer labeled as “new drywall ready” to minimize suction and reduce pinholes.
Look for a product labelled “high-build” or “drywall primer-sealer.” One good coat will usually even out suction and cut down on finish differences. If you have heavy repairs or visible sanding marks, a second coat of the same primer often saves you from sanding and touch-ups later. For safety and air quality, wear a dust mask during any sanding, and ensure good ventilation during primer application and curing.
Tip: Apply at the manufacturer’s recommended spread rate—too thin and it won’t fill, too thick and you risk raising nap or drying unevenly.
Options for plaster, limewash and tannin-stained areas
Historic or soft plaster benefits from breathable primers designed for masonry or lime substrates. These let moisture move and prevent trapped vapor that can cause blisters or flaking. If the surface was limewashed, use a primer or blocker specifically marked “limewash-compatible” or a breathable silicate product. For exterior limewash or interior lime-rich finishes, test compatibility with your chosen finish in a small, inconspicuous patch before full coverage to avoid color or adhesion surprises.
For tannin bleed-through—wood trim, old dark stains, or some plasters—use a shellac-based or oil-based stain blocker. Shellac-based primers are the fastest and most reliable at locking in tannins; oil-based blockers work well too if you prefer solvent systems. Be mindful of odor and ventilation with solvent-based products and choose low-VOC or waterborne options when possible to reduce fumes and cleanup costs.
Always do a small test patch first on historic finishes. That tells you whether you need a breathable primer, a stain blocker, or both before you roll on the finish coat. Plan for maintenance: if you’re covering limewash with a finish that breathes, avoid overly dense topcoats that could trap moisture over time; prefer breathable topcoats and occasional re-evaluation of moisture conditions in damp environments.
Paint selection and sheen matching: getting film and light right
Selecting the right sheen (flat, eggshell, satin, or gloss) and pigment depth is the core technique for making patched areas disappear, because different sheens reflect light differently and create edge visibility or halo effects that can be exaggerated by room lighting, texture, and the sequence of coats. By aligning tint strength with neighboring surfaces and choosing near-neutral or subtly tinted blends, you establish a smooth edge that minimizes contrast at borders, and you can preview this with controlled swatches before committing to a full repair.
A practical decision flow helps you choose sheen-tint combos for substrates such as new patches, skim coats, plaster, or concrete and for each coat type (primer, mid-coat, finish), followed by edge tests and lighting-adjusted checks at different times of day. Using a simple rubric and quick DIY checks, you can avoid common pitfalls like overly glossy patches, white balance drift, or pigment drift, and employ fixes such as adjusting sheen, glazing, staggered coats, or brief waiting times to achieve seamless blends.
When to match existing sheen vs. recoat entire wall
Small repairs—think nail holes and hairline dents under about 6–8 square inches—usually do best when you match the existing sheen. Matching keeps the light bounce consistent and makes the spot less visible. Use the same sheen and a feathered application and you’ll often be fine.
If the repair is larger than a handprint, the original sheen is high-gloss, or the room gets strong directional light, plan to recoat the whole panel or wall. High sheens show texture and edge differences easily. In active rooms (kitchen, hallway) a full repaint gives a uniform finish and saves touch-ups later.
Consider practical factors: if you have extra same-batch paint and the wall is low-traffic, spot-matching is economical. If not, or if multiple areas need work, go full-panel. When in doubt, test a small area first under the room’s normal light before committing.
Tinting and sheen adjustments to hide repairs
Always start with factory-tinted touch-up paint from the same line and formula. That keeps pigment and binder levels consistent. If you mix at the store, take a labeled sample of the original can or the color code to avoid a shade shift.
Small tweaks to sheen or pigment can help compensate for substrate differences. For example, if drywall repair soaks up paint and reads flat, use a touch-up with a slightly higher sheen or a touch more pigment to match the surrounding wall’s light response. Apply sparingly and build thin coats.
Feather the edges of your repair and let each coat cure before judging the match. If you still see the spot, adjust by changing the sheen one step (eg. eggshell to satin) or adding a tiny amount of color tint at the store. Test on a scrap piece or discreet corner before finishing the repair.

Application techniques to blend patches seamlessly
Patch prep and substrate readiness set the foundation for a seamless blend: ensure the surface is clean, dry, and uniformly abraded, verify patch material compatibility, and feather edges at the boundary to minimize contrast as you apply material. Use feather coats around patches, maintain consistent film thickness across patched and surrounding areas, and choose between spray, brush, or roller based on patch size and adjacent texture, planning a sequence that starts with mist or feather coats before full coverage while allowing tack-free intervals and avoiding overworking to prevent halo or ghosting at the edges. Focus on layer sequencing and drying to prevent visible gaps, and keep the approach practical by avoiding heavy-handed passes that can disturb underlying textures.
This approach matters for DIY jobs because it translates into a more forgiving process on real-world substrates, reducing the risk of obvious lines and mismatched sheen while giving you controllable steps to correct if needed. By combining careful prep, appropriate technique choices, and targeted touch-ups, you gain predictable results, easier QA checks under varied lighting, and a clearer path to matching texture and finish without costly rework.
Step-by-step for roller/brush touch-ups
This sequence gets a patch that visually disappears into the surrounding finish. Follow it to avoid ridges, laps, and color shifts.
- Clean and sand the patch smooth. Remove dust and feather the repair so paint bonds. Check by running your hand over the edge for any burrs.
- Prime the repair if drywall or bare wood shows. Primer seals and evens absorption so topcoats match. Look for even primer sheen before topcoating.
- Thin the first topcoat slightly and apply a light mist coat. A thin first coat prevents drag and build differences. The surface should look uniformly damp, not glossy.
- Feather the edges with light, tapering strokes. This blends the new paint into old paint and avoids a hard frame. Stop when the edge is barely visible.
- Use a 3/8″ nap for light texture and 1/2″ for slight orange-peel surfaces. The correct nap carries enough paint for texture match without stipple lines. Roll a test patch to confirm texture match.
- Back-roll or brush out any small ridges while paint is wet. This evens film thickness and removes roller lines. If ridges remain after drying, sand very lightly and recoat.
- Build two to three even coats, allowing proper flash time between. Thin middle coats only if needed to level; finish coats should be full strength. Check in good light for uniform sheen before calling it done.
When and how to use spray application
Spray gives the most uniform film and is best when you need to hide feathered edges or match a factory-smooth finish. I reach for a sprayer on larger patches, trim, or when brush/roller leaves texture differences.
Use an airless sprayer for thicker coatings and quick coverage, or an HVLP for fine atomization and less overspray. Set the pump pressure or nozzle size so the spray lays down evenly without spitting; test on cardboard until the spray pattern is a consistent fan.
Mask thoroughly. Tape and plastic beyond the repair area prevent overspray from framing the patch. Overlap each pass by about 50% and keep the gun moving at a steady distance so wet film thickness stays consistent and you avoid runs.
Fixing existing framed patches: targeted repairs and when to repaint
Diagnose the framed patch by identifying whether adhesion issues, substrate damage, or paint failure caused the patch, so you choose the right intervention. Repair options range from spot-priming and re-coating for small patches to feathered sanding with a blended recoat and, if necessary, a full-panel repaint when framing is extensive or sheen color mismatch is severe, with a clear sequence of surface prep, priming, coating, and curing. Each option includes a practical decision flow: signs that warrant spot repair, medium touch-up, or full repaint, plus edge feathering, dust removal, patch priming, test patches, and final inspection under different lighting to verify color and texture matching.
Why this matters on the jobsite is that primer and topcoat compatibility, sheen matching, and careful blending prevent new picture-framing effects and save time by prioritizing the least invasive fix that still lasts. The approach also covers prep, execution, and inspection steps, and provides maintenance tips such as humidity/temperature considerations, appropriate paint systems, and routine checks to avoid future framing. Following the flow helps DIYers choose the right repair path, execute it reliably, and keep future touch-ups minimal.
Quick fixes that sometimes work (spot-prime, scuff & recoat)
When the framed patch is small and the surrounding finish is sound, start with cleaning. Wipe away dust, grease, and loose paint so the new coat can bond.
Scuff the edges with fine sandpaper, apply a spot primer or sealer designed for the substrate, then feather a thin coat of finish paint over the repair. Keep brush strokes small and work outward to blend.
If color match and sheen look good after curing, you’re done. If the patch flashes or shows texture differences, that’s a sign you need a larger blend or full repaint.
Larger repairs and full-repaint strategies
When patches span a panel or several frames, plan to blend the repair into adjacent areas or repaint the whole wall. Sand the patch level, feather joint compound beyond the damaged area, and texture-match before priming.
Prime the patched area with a compatible sealer, then test a small recoat. If the repaired zone still reads different, extend your repaint to the nearest natural break—corners, trim lines, or the whole wall—to avoid visible seams.
Prevention: fix root causes like moisture, poor adhesion, or incompatible primers. Use the same paint line and sheen for the full repaint to ensure uniform appearance and reduce repeat touch-ups.
Troubleshooting checklist and advanced problems
A concise troubleshooting checklist guides you through ghosting persistence by confirming whether it remains after initial patching and painting, then following a triage flow—clean, re-prime, then recoat—to isolate the failure point and test for advanced causes such as residual salts, incompatible materials, or moisture-related issues. It highlights practical diagnostic checks like a tactile wipe test, salt swabs, and moisture readings, plus removal or substitution of suspect patch materials for controlled comparison to pinpoint where ghosting originates. Clear decision criteria map remediation paths for efflorescence, primer compatibility, moisture-affected substrates, and possible replacement of warped boards or lath.
This approach helps DIYers quickly separate root causes from surface symptoms, preventing wasted rework by targeting the right material, primer, or substrate treatment and setting realistic curing times to avoid re-ghosting. By outlining field-friendly steps—surface prep, product recommendations, drying timelines, and a minimal recoat protocol—it reduces guesswork and enhances durability on real jobsites. A built-in preventive angle emphasizes proper sealing, substrate acclimation, and test patches before full rework to lower recurrence and extend coating life.
Diagnosing recurring or intermittent ghosting
Ghosting that comes and goes is usually hiding in conditions, not in the paint. Watch the wall at different times—morning, midday and under artificial light—to see when the marks show. Note seasonal changes; high humidity in spring or winter heating cycles can make ghosting appear only under certain conditions.
Do simple surface tests: feel for temperature and damp spots, and run a moisture meter if you have one. Check for reflected light angles—low sun or a bright bulb can reveal texture and sheen differences. If you suspect salts, incompatible primers or a warped substrate, treat those as separate fixes rather than repainting right away.
Record your observations on a time-and-condition log. It tells you whether the problem is environmental, material-related or a prep issue that needs targeted repair instead of more paint.
Tools, pro tips and texture-matching hacks
Bring the right gear and you’ll save hours chasing mismatched texture or sanding scuffs. These are the go-to tools and how I use them on site.
- Feathering knife Use it to blend compound edges and thin buildup. Look for a flexible 6–10″ blade. Tip: keep one clean to avoid dragging dried mud into a fresh skim coat.
- Texture roller Matches stipple and orange-peel effects quickly. Buy or rent pattern rollers—expect $20–$60 new or $10–$25 daily rental. Tip: practice on scrap before working the wall.
- Moisture meter Confirms damp substrates that cause ghosting. Use a pin or pinless unit with building-material settings. Warning: readouts change with temperature—take multiple spots.
- Orbital sander Speeds micro-sanding between coats for smooth transitions. Choose 5″ with variable speed. Wear dust protection and avoid over-sanding textured areas.
- Mini sprayer Ideal for small touch-ups and blending sheen. HVLP units give control; small machines rent for $30–$80/day. Tip: mask generously to prevent overspray.
- Matching samples Create test panels with your primer and topcoat. Use 8″x8″ drywall or hardboard for comparison. Label the conditions so you can repeat the successful method.
- Spot-light A narrow-beam work light reveals texture and sheen differences. Use it low and oblique to mimic the worst-case lighting. Tip: check your repair under both daylight and artificial light.
- Joint compound Use setting-type for quick fills and feathering. Choose 20–45 minute set times for control. Mix thin and apply thin coats to avoid ridges that ghost through paint.
Planning, safety, cost and when to call a pro
A practical plan unfolds over several days: set up prep, patch and sand in stages, follow with paint touch-ups, and finish with a final inspection, leaving buffer days for drying and unexpected delays. Safety is built in with a ventilation plan, respirators with appropriate filters, eye and skin protection, careful disposal of paints and solvents, and special handling for any lead paint or hazardous waste. Expect a ballpark cost split across materials, tools, and disposal, and decide early whether the job is DIY or best left to a pro based on patch size, substrate condition, and moisture or lead concerns.
This approach matters because it translates to fewer surprises on site and a clearer budget, reducing the risk of rework and costly mistakes like ghosting or picture framing. You’ll gain a concrete framework for decision-making, from surface prep to curing times and feathering edges, plus a quick planning checklist to verify ventilation, PPE, and disposal readiness before each stage. If signs of ongoing moisture, cracking around patches, or inconsistent sheen appear, the guide helps you escalate decisions and know when professional help is warranted.
Timeline and staging for multi-day repairs
Work in stages and plan for drying and cure times. Day 1 is prep: remove loose material, clean surfaces and make any minor repairs. Let cleaned areas dry 24 hours if possible before applying any primer or sealer.
Day 2 is priming and patch work: apply primer or stabilizer and let it tack up — most water‑based primers need 2–4 hours to be touch dry and 24 hours to accept topcoats. Day 3 is finish coats: apply paint or protective coats and avoid heavy use for 48–72 hours while the finish cures.
For deep repairs or moisture issues add extra drying days. Rushing recoats or covering damp substrate is the main cause of failures; when in doubt, wait the extra day.
Cost estimates and budget-friendly alternatives
Materials for a typical room repair run roughly $50–$300 depending on the scope: cleaners and patching compounds on the low end, specialty primers or sealers toward the high end. Labor for a pro varies widely — expect $200–$800 per day of crew time for small jobs, more for commercial-grade work.
If you’re on a budget, use a quality acrylic primer instead of specialty binders and a 3/8″ nap roller plus a brush for cutting in. Tool rentals (sanders, small compressors) often cost less than buying; buy midgrade patching compound rather than the most expensive brands.
Tip: Buy primer by the gallon and use leftover paint for topcoats to save money. Prioritize materials that stop the problem (good primer/sealer) over cosmetic upgrades.
Safety and when to hire an expert
Wear basic PPE: safety glasses, nitrile gloves and a respirator rated for the task (N95 for dust, a cartridge respirator for solvents). Keep the area ventilated with fans and open windows. Bag and label waste and follow local disposal rules — do not sweep lead dust into the trash without containment.
If the home is older or you suspect lead paint or asbestos, stop and test before disturbing surfaces. Large contaminated areas, structural problems, or historic finishes that must be preserved are jobs for licensed professionals. Professionals also have containment equipment and disposal channels that a homeowner usually does not.
Call a pro when the area is extensive, when testing shows hazardous materials, or when you lack the tools or experience to make the repair safe and long-lasting.
Conclusion
Fixing ghosting around patches is about doing smart prep, choosing the right products, and sticking to clean, small-step work. When you respect safety, you protect the surface and your own hands, and you keep the patch from standing out or failing later.
First, run through a simple, practical check in order: confirm the root cause with a quick look at moisture, surface condition, and prior finishes; clean and lightly sand the area, feathering the edges; seal with the right primer or sealer for the material and patch size; choose a paint and sheen that match the finish; test a small area first, then apply thin, even coats and blend with the surrounding wall until the edge disappears; finally cure, recheck, and touch up as needed. Safety first, test in a small area, and don’t rush the drying times or coats.
Common mistakes to avoid are skipping the test patch, using the wrong primer for the substrate, applying too thick a coat, or skipping proper feathering and sealing. Don’t chase color or sheen without a proper match, and don’t work over damp surfaces or damaged framing. Keep your hands protected, ventilate, and clean up as you go to prevent mistakes that become damage.
If the patch is large, the problem is repeating, or you’re unsure about moisture, it makes sense to call a pro rather than push through and risk repainting more area. When you finish this project, you’ll have a durable, nearly invisible repair and the confidence to handle the next patch without drama. You’ve got this.
FAQ
What is picture framing and why is it bad?
Picture framing is when a patch shows a distinct edge under the paint. It sticks out like a border and makes the wall look patchy. It’s a telltale sign you did not blend the patch right.
How do you prevent it when patching?
Feather the edges of the patch so it blends with the surrounding wall. Use primer and a light touch with sanding between coats. Match the texture of the wall before the final coat.
What mistakes cause framing?
Skipping primer, over-wetting the patch, or using the wrong patch compound. Not letting each coat dry fully also creates hard edges. Bad texture matching will always show later.
How do I fix it if I already see framing?
Sand the edge smooth, reseal with primer, and repaint. Don’t rush it—rest that area and apply a couple of thin coats until it blends. If needed, retexture to match the wall.