
Introduction
A long-lasting paint job comes from thorough prep, proper materials, and careful application. Start with surface prep to remove peeling paint, clean dirt, and repair cracks, then check the surface for texture and moisture before choosing paint. Choose paint type based on the surface and environment, and read the label for recoat times and surface prep notes.
Use even-application techniques and follow manufacturer guidance to apply coats smoothly. Look for and fix problems like peeling or bubbling by addressing moisture, rust, or improperly prepared edges, and test a small area first. If unsure, check product labels, manufacturer instructions, and local rules for prep steps and safety.
Key takeaways
- Plan the project to avoid mid-job material shortages and delays.
- Clean and repair the substrate thoroughly before priming to prevent trapping issues.
- Test moisture and substrate condition; address leaks or dampness before painting.
- Choose primers and paints suitable for material and exposure conditions.
- Apply paint evenly with consistent technique; avoid heavy coats and runs.
- Wear protective gear and ventilate; follow local regulations and label warnings.
Table of Contents
- Introduction
- Key takeaways
- Plan and Estimate Before You Start
- Surface Preparation: the Foundation of Durability
- Understanding Causes of Paint Failure
- Testing for Moisture and Substrate Issues
- Choosing Primers and Paints for Longevity
- Application Best Practices to Ensure Durability
- Safety and Environmental Precautions
- Maintenance and Inspection to Extend Life
- Conclusion
- FAQ
Plan and Estimate Before You Start
Start by mapping every area you plan to paint and note the surface types you’ll encounter. Look for bare concrete, old paint, sealers, or stains that can affect adhesion. Decide if elevations or hard-to-reach spots will need ladders or scaffolding before you buy materials.
Estimate materials and labor with a realistic waste factor, considering porosity, weatherproof sealers, cleaners, patches, and tools. Forecast the hours needed for prep, priming, coating, and curing, and build in a contingency for surprises. Use manufacturer instructions and product labels to verify what you’ll actually need, and know when hiring a pro is wiser for cracks or complex layouts.
Project timeline and staging
The first step in any painting project is planning. You need to break down your job into stages and allocate time for each.
Preparation: This stage includes cleaning, repairing cracks, and patching holes. On bare concrete, this could take 1-2 days. Existing paint or sealers might require extra time for stripping or etching.
Priming: Priming helps paint adhere better and seals the surface. Allow 1 day for application and drying, depending on temperature and humidity.
Painting: Apply topcoats in 2-3 thin layers, allowing adequate drying time between coats (usually 4-6 hours). This stage can take 2-3 days, plus curing time.
Cost breakdown: materials vs. labor
Understanding where your money goes helps you make informed decisions. Here’s a simple breakdown:
- Materials (60-70% of total cost): High-quality paint and primer ensure longevity. Look for 100% acrylic or latex paints with good coverage and adhesion ratings. Avoid cheap paints that can crack, stain, or peel.
- Labor (30-40% of total cost): Labor costs vary by region and job complexity. Expect to pay more for extensive repairs, scaffolding, or complex layouts.
- Scaffolding/Equipment Rental: If you need to rent equipment, factor this into your budget. Scaffolding can add $50-100 per day.
- Repairs: Crack repairs and spall patching can significantly increase costs. Allocate 10-20% of your total budget for unexpected repairs.
- Overhead: Contingency (10-15%) covers overruns, delays, or hidden issues like moisture damage.
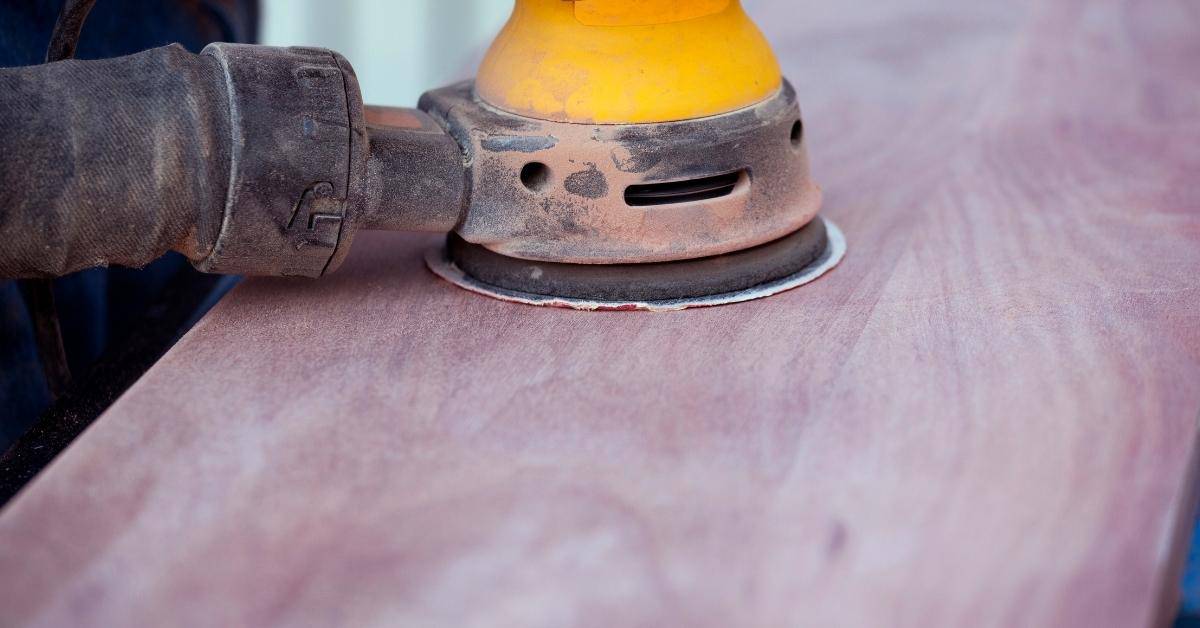
Surface Preparation: the Foundation of Durability
Explain why prep matters and which surfaces you’ll treat—wood, drywall, masonry, and any previously painted areas. Describe how poor prep leads to peeling, cracking, or blistering if you skip cleaning, sanding, or proper abrasion. Emphasize how each surface type needs its own approach.
Outline a thorough cleaning plan to remove dust, oils, wax, mold, and efflorescence, including degreasing for slick surfaces. Include moisture checks and environmental conditions that must be met before moving to priming. Give concrete, actionable steps for each material and list required PPE and safety measures.
Repairing common substrate problems
Before you start painting, inspect your surfaces for any damage. Here’s how to fix common issues:
Cracks and Holes: Fill with a suitable patching compound. Let it dry, then sand smooth.
Rot (Wood): Cut out affected areas, treat with wood preservative, and replace with new wood. Ensure it’s well-secured before painting.
Rust (Metal): Remove rust using a wire brush or chemical rust remover. Prime the area with a metal primer to prevent further rusting.
Proper cleaning and adhesion checks
A thorough clean ensures paint adheres well. Here’s how:
Degreasing: Use a degreaser to remove oils, grease, and wax from surfaces like kitchen cabinets or garage walls.
Adhesion Test: Perform a simple finish test before painting. Apply painter’s tape, let it sit for 24 hours, then pull it off quickly at a 90-degree angle. If paint comes off with the tape, re-clean and prep the surface.
Understanding Causes of Paint Failure
Match common failure modes—peeling, blistering, chalking, fading—to their root causes like moisture, poor prep, incompatible products, UV exposure, or substrate movement. Explain how these factors interact with the surface you’re painting. Provide homeowner-friendly explanations to help identify the most likely culprits.
Highlight causes often overlooked, such as hidden moisture or insufficient adhesion tests before painting. Include practical diagnostic steps and quick fixes tied to each cause, such as moisture mitigation or selecting compatible primers and paints. End with a simple decision guide on whether to repair, replace, or call a pro.
Moisture-related failures
Paint failure due to moisture is a common issue that homeowners often overlook. Moisture can come from leaks, rising damp, or vapor drive – where moisture moves through porous materials.
Signs of moisture-related failures include:
- Peeling: Paint lifts off the surface in large sheets.
- Blistering: Paint forms bubbles that eventually pop and cause further damage.
If you notice these signs, check for water stains, warping, or musty odors. Use a moisture meter to confirm if moisture is the primary issue.
Product and application-related failures
Using the wrong primer or paint, applying in unsuitable conditions, or incorrect film thickness can lead to paint failure. Here’s what to look out for:
- Incompatible products: Using a latex paint over an oil-based paint, or vice versa, can cause peeling.
- Improper application: Painting in high humidity or low temperatures can lead to poor adhesion and blistering. Always check the product labels for suitable conditions.
- Incorrect film thickness: Too thick, and paint can crack; too thin, and it won’t protect the surface. Aim for 2-3 coats of 2-4 mils each.
To diagnose, check if the problem area has a different sheen or texture than the rest. Test adhesion by trying to scrape off the paint with a coin – if it comes off easily, you’ve found your issue.
Testing for Moisture and Substrate Issues
Describe practical, DIY-friendly tests for moisture, including moisture meters, the plastic-sheet test, and spotting efflorescence or blistering patterns. Explain how to interpret readings or results and when to trust a pro’s evaluation. Include tips for cross-checking ambiguous results.
Talk through substrate assessment steps like porosity checks, surface contamination, and prior coatings that might trap moisture. Give quick checks such as a water droplet test and surface abrading tests to gauge absorption. Note when environmental conditions require postponing painting and how to plan moisture-reduction steps.
How to use a moisture meter and interpret results
A moisture meter is your best friend when checking for hidden dampness. There are two types: pin-type (probe) and electrical impedance (pinless).
Pin-type meters need direct contact with the substrate. Insert probes into drilled holes, about 1-2 inches deep. Readings above 15% indicate problem levels for most paints and stains.
Pinless meters work by sending electrical signals through the surface. They’re faster but less accurate. readings over 12% suggest moisture issues.
If readings are ambiguous, cross-check with other tests or methods. Always test in multiple spots to account for variations.
Simple visual and DIY tests
Not all moisture is obvious. Here are some low-cost checks to find hidden water intrusion or slow drying:
The plastic-sheet test is simple: Seal a plastic sheet to the wall with tape, let it sit 24-48 hours. No condensation? You’re dry. Moisture under the sheet signals rising damp.
Look for efflorescence – white powdery deposits – or blistering/popping of existing coatings. These indicate capillary rise, salt deposition, or trapped moisture. Document findings with photos and notes.
Check surface contamination and porosity variation. A water droplet test and surface abrading/scrape tests can gauge absorption and compatibility with new coatings.

Choosing Primers and Paints for Longevity
Explain how primer choice should match the surface type, condition, and substrate, such as concrete, masonry, wood, or previously painted surfaces. Consider moisture, efflorescence, mold, or glossy finishes that affect adhesion. Emphasize the role primers play in long-term performance.
Describe primer formulations and their purposes, including stain-blocking, bonding, and waterproofing. Clarify when specialty primers or adhesion aids are necessary, and how to pair primers with common paint systems for durability. Include basic compatibility checks and drying considerations for best results.
Primer selection by substrate
Choose your primer based on the surface you’re painting. Here’s what works best:
Wood and metal: Use an oil-based or acrylic primer. They bond well to these surfaces.
Bare drywall: Go for a latex primer, like PVA (polyvinyl acetate). It seals the surface and helps paint adhere.
Masonry (concrete, brick): Use a masonry primer. It penetrates the surface, providing better adhesion and preventing moisture issues.
Paint type and finish guidance
Select your paint wisely for longevity:
Acrylic (latex) vs. Alkyd: Acrylic is water-based, dries fast, and cleans up easily. Alkyd is oil-based, has better adhesion, and provides a smoother finish.
Sheen levels: Higher sheens are more durable but show imperfections. Matte or eggshell for walls, semi-gloss or gloss for trims and high-traffic areas.
Exterior paints: Choose ones with UV protection to prevent fading. Also, look for mildew-resistant formulations to keep mold at bay.
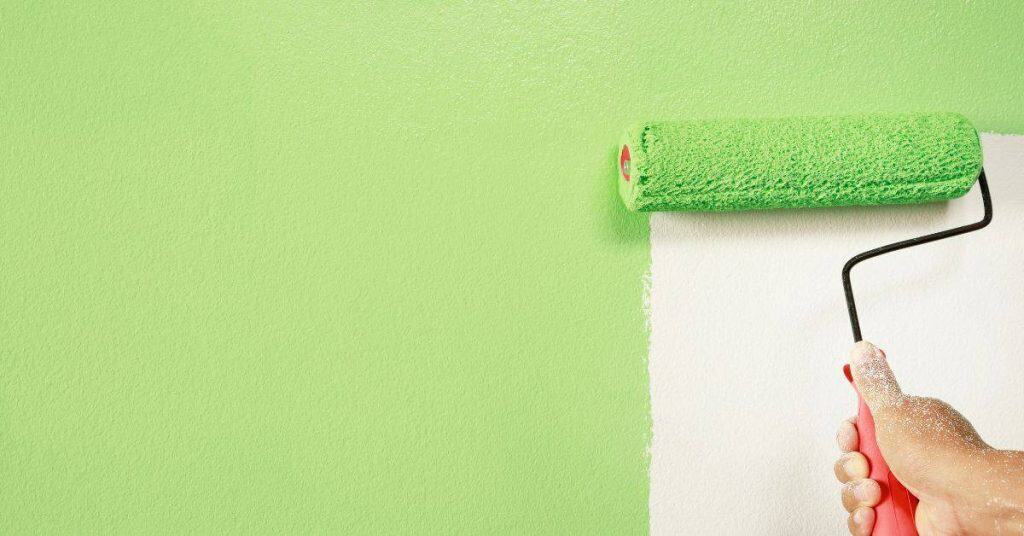
Application Best Practices to Ensure Durability
Outline the essential prep steps for concrete, including cleaning, etching, moisture checks, and patching to ensure proper adhesion. Mention when a sealer is appropriate between concrete and paint. Keep the focus on practical steps you can take on site.
Cover techniques such as cutting in, back-rolling, and choosing the right tool for the job. Explain how to monitor wet-film thickness and adjust for texture or porosity. Include environmental guidelines and a short post-application checklist to avoid common mistakes.
Tools and equipment checklist
Before you start painting, make sure you’ve got the right tools for the job. The right tools can save you time and ensure a long-lasting finish.
- Paint brushes: Choose natural bristles for oil-based paints, synthetic for latex. 1.5 to 2.5 inches wide is standard.
- Paint rollers: Microfiber or lambswool covers work best on concrete. 9-inch roller with 3/8-inch nap cover for smooth surfaces, 1/2-inch for textured.
- Sprayer type: Airless sprayers give even coverage but require proper technique to avoid overspray and lap marks.
- Scaffolding/ladders: Essential for high areas. Ensure they’re stable and secure before use.
- Personal protective equipment (PPE): Safety glasses, gloves, dust mask, and old clothes to protect from paint and debris.
- Tape measure: To ensure you’ve got enough paint and for cutting in straight lines.
- Painter’s tape: For protecting edges. Blue tape is preferred as it leaves less residue.
- Drop cloths/tarps: To protect floors and catch drips.
Quick rule: Don’t skimp on tools. Good quality tools make the job easier and last longer.
Layering, coverage, and wet-film thickness
Proper coverage is key to a durable paint job. Too thin, and you’ll end up with multiple coats or even bare spots.
Wet-film thickness (WFT): This is the thickness of the paint film while it’s still wet. It’s measured in mils – thousandths of an inch. Most paints need 2-4 mils WFT for adequate coverage and durability.
To check WFT, use a wet-film gauge or a magnetic dry-film gauge after the paint has dried. Adjust your application technique to achieve the recommended WFT. For textured surfaces, you might need more paint per coat.
Typically, 2 coats are needed for full coverage and durability. But this can vary depending on the paint color, surface texture, and porosity. Always spot check first to ensure adequate coverage.
Safety and Environmental Precautions
Summarize ventilation needs, respirator use, eye and skin protection, and ladder or scaffold safety. Note when to improve airflow and how to position exhaust to protect occupants. Mention basic disposal considerations for waste and containers.
Address lead-paint precautions for older homes, containment, and regulatory references you should check locally. Include reminders about waste labeling, spill response, and local rules for VOCs and environmental handling. Conclude with a quick regulatory reminder to verify requirements with local authorities.
Lead and hazardous material precautions
Identifying and handling lead paint safely is crucial to protect your health. Here’s how:
- Identify lead paint: Use a lead test kit on any paint in homes built before 1978.
- Containment: Seal off work area with plastic sheets, keep dust to a minimum.
- Wet scraping: Use water to minimize dust when removing old paint.
- Certified abatement: Hire professionals for large areas or high lead levels. They follow EPA guidelines (40 CFR 745).
- Cleanup: Clean up with wet mops and disposable wipes, dispose as hazardous waste.
Personal protective equipment (PPE)
Protect yourself from paint fumes, splashes, and noise. Here’s what you need:
- Respirator: Use a P100 respirator for lead or other hazardous materials. Fit test before use.
- Gloves: Wear nitrile gloves to protect hands from chemicals.
- Eye protection: Goggles or safety glasses with side shields keep eyes safe.
- Hearing protection: Use earplugs or earmuffs when using power tools like sanders.
- Ventilation: Use fans to exhaust fumes, maintain fresh air without spreading dust.
Maintenance and Inspection to Extend Life
Suggest a simple maintenance schedule with annual checks for peeling, cracking, blistering, moisture intrusion, and wear on high-exposure areas. Emphasize early action to keep small issues from growing. Focus on practical, low-cost maintenance steps.
Explain how to clean and prepare surfaces for touch-ups, when to re-prime, and how to schedule full repainting. Include a basic maintenance calendar, simple record-keeping for products and dates, and clear signs that a repaint is needed to extend the life of the job.
Seasonal inspections and touch-up strategy
Use this checklist to inspect your painted surfaces four times a year. Catching small issues early prevents them from spreading.
- Spring: Check for peeling or cracking caused by winter’s freeze-thaw cycle. Touch up any affected areas immediately.
- Summer: Inspect high-traffic surfaces for wear and tear. Address any damaged spots to prevent further deterioration.
- Fall: Look for moisture intrusion or efflorescence, which can be exacerbated by autumn rains. Clean and repair as needed.
- Winter: Check for blistering caused by temperature fluctuations. Touch up any affected areas before the next spring thaw.
Quick rule: Always address minor issues promptly to prevent them from becoming major repairs.
Cleaning and surface care
Regular cleaning maintains your paint job’s appearance and longevity. Use these methods to safely clean painted surfaces without damaging the finish.
- Dirt and dust: Gently wipe with a damp cloth or use a soft-bristled brush for tougher spots. Avoid abrasive materials that can scratch the paint.
- Mildew stains: Apply a solution of water and mild detergent, then rinse thoroughly. For stubborn stains, use a bleach-based cleaner, but test first to ensure it doesn’t discolor the paint.
- Grease or oil stains: Use a degreasing agent specifically designed for painted surfaces. Follow manufacturer’s instructions for safe and effective cleaning.
Quick rule: Always test cleaners on a small, hidden area first to ensure they don’t damage the paint.
Conclusion
A long-lasting finish starts with a solid plan, thorough surface prep, and honest testing to avoid hidden problems that turn into costly failures. If you do the upfront work right, the job will look better, hold up longer, and feel safer to live with.
Hold to this checklist: confirm your plan and estimate, run moisture and substrate checks, fix any issues you find, select primers and paints rated for longevity, set up proper ventilation and PPE, mask and protect surroundings, apply in the right conditions with clean tools, follow recoat and cure times, and inspect after completion to catch anything early.
Avoid these common missteps: skipping moisture tests or ignoring damp substrates, rushing the prep or the prime, and painting in the wrong temperature or humidity with poor ventilation. Always wear the right PPE, keep a breathable work space, and test a small area first to confirm adhesion and color before committing everywhere.
If you encounter persistent moisture problems, severe substrate damage, or you’re unsure about the right primer or paint for your conditions, don’t push on alone—call a pro. With careful planning and steady execution, you’ll finish confident, and the next repaint will be a longer wait with fewer headaches.
FAQ
How do I prep a surface to ensure the paint lasts longer?
Clean the surface to remove dirt, oil, and chalk. Scrape loose paint and sand rough edges so the new coat has a solid bite. Always rinse and let it dry fully before applying primer or paint.
What type of paint should I choose for durability on a DIY project?
Pick a paint that matches the surface and environment. Check the label for exterior vs interior use, substrate compatibility, and any surface prep notes. If in doubt, read the manufacturer instructions or ask at the store for guidance.
How can I apply paint evenly and avoid common application mistakes?
Use the right tools for the job and work in thin, even coats. Maintain a wet edge to reduce lap marks and avoid overworking the area. Follow the product’s recommended recoat times and temperature guidelines on the label.
What are the signs of peeling or bubbling, and how do I fix them?
Peeled or bubbled paint usually means moisture or poor adhesion. Scrape back to solid substrate, sand smooth, and re-prime before repainting. If you’re unsure about the moisture source, test and address it first and check local guidelines or product labels for fixes.