
Introduction
A vapor barrier under a slab is a continuous sheet of material placed on the ground to stop water vapor from rising into the concrete; it needs to be intact, sealed at overlaps and penetrations, and taped or repaired when torn. Think practical: choose the right class of material for your project and check the product label and local building rules for required thickness and overlap details. Keep edges elevated or sealed where the slab meets walls or footings to prevent moisture bypass.
For DIY patching, use compatible patch tape or a repair product the manufacturer recommends and make sure seams are flat and snug before pouring concrete. If you’re not sure about code, product compatibility, or how to handle pipes and conduits, check the manufacturer instructions and local regulations or consult a pro for that step.
Key takeaways
- Verify barrier type and specs meet Class I, II, or III definitions per code.
- Inspect for tears and punctures before pour; patch with approved seamless methods.
- Seal penetrations and sleeves to prevent moisture bypass at joints and corners.
- Follow installation sequence and overlaps; avoid gaps that create leakage paths.
- Check local building codes and manufacturer instructions for underslab moisture requirements.
- Include proper safety gear and venting during installation to prevent hazards.
Table of Contents
- Introduction
- Key takeaways
- What an Underslab Vapor Barrier Is and Why It Matters
- Choosing the Right Material for Underslab Use
- Pre-Pour Layout and Installation Best Practices
- How to Patch Tears and Minor Damage in Underslab Membranes
- Sealing Penetrations, Sleeves, and Construction Joints
- Avoiding Moisture Bypass and Common Leakage Paths
- Tools, Materials Checklist, and Standards to Reference
- Common Mistakes, Maintenance, Inspection, and When to Call a Pro
- Conclusion
- FAQ
What an Underslab Vapor Barrier Is and Why It Matters
An underslab vapor barrier is a continuous sheet membrane placed directly under a slab-on-grade to control water vapor movement from the ground into the slab; common materials include polyethylene and reinforced composite sheets. It’s meant to resist vapor diffusion rather than act as a flood-proofing layer for liquid water, so drainage and site grading remain important.
Performance goals for a slab assembly include keeping in-slab relative humidity and moisture vapor emission rates within limits needed for curing, adhesive bonding, and finished flooring compatibility; verify exact emission targets and acceptance criteria with your flooring manufacturer and local code. Proper installation—correct membrane thickness, adequate overlaps and taped seams, sealed penetrations, and protection during placing of concrete—is critical because common failure modes are punctures, poor laps, and unmanaged penetrations that create moisture bypasses; check product data sheets and field test methods (smoke tests, permeance checks) to confirm compliance.
Vapor Barrier vs. Moisture Barrier and Vapor Retarder Classes
A vapor barrier is not the same as a moisture barrier. A vapor barrier controls water vapor diffusion, while a moisture barrier prevents liquid water infiltration.
Vapor retarders are also part of this mix. They slow down water vapor movement but don’t stop it like barriers do. Industry standards classify these based on permeability:
- Class I: Vapor impermeable (like 10-20 mil poly)
- Class II: Low permeability
- Class III: Moderate permeability
- Class IV: High permeability
Check product labels for these classes to ensure you’re getting the right barrier for your slab.
Risks of a Failed or Missing Underslab Barrier
A failed or missing underslab vapor barrier can lead to big problems. Here’s why:
Without a barrier, water vapor from the soil can migrate into your slab and up into your home. This increases indoor humidity, promoting mold growth and musty odors.
Moisture in the slab can also cause flooring failures. It weakens adhesives, hinders curing of concrete, and shortens the lifespan of your flooring systems. Plus, it can lead to structural issues over time.
So, continuous coverage is critical. Don’t skimp on sealing penetrations or patching tears. A small gap can cause big problems down the road.
Choosing the Right Material for Underslab Use
Select an underslab material based on permeance, puncture resistance, chemical compatibility with concrete and admixtures, and the manufacturer’s stated approval for below-slab installation; typical options include HDPE/LLDPE sheets, reinforced flexible polyolefin, and composite membranes. Read the product data sheet to confirm permeance ratings, puncture-test results, and any primer or installation limits rather than relying on marketing names.
Account for jobsite factors such as temperature during the pour, subgrade abrasiveness, how penetrations are handled, and whether the barrier must integrate with insulation or radon systems; these drive choices between a heavier mil-thickness sheet, reinforced membrane, or multi-layer system. Before buying, use a simple decision workflow—compare material type, lab test results, and documented underslab approvals—and ask the supplier for test certificates and recommended installation details to field-verify suitability.
Material performance and what to check on datasheets
Before you buy, make sure the underslab material can handle your job’s demands. Here’s a quick checklist.
- Permeance: Look for Class I or II vapor retarder (0.1 – 1.0 perm). Too high, moisture gets in; too low, it gets trapped.
- Tensile strength: Check it’s strong enough to handle installation and construction traffic without tearing.
- Elongation: Ensure it can stretch without breaking during concrete pour and temperature changes.
- UV exposure limits: If exposed, check how long it can withstand sunlight before degrading.
- Puncture resistance: Make sure it’s tough enough to avoid punctures from debris or sharp objects.
- Chemical compatibility: Confirm it won’t react with concrete admixtures or other chemicals on site.
- Industry-standard tests: Look for ASTM, EN, or other recognized test methods to back up claims.
- Warranty and installation instructions: Check these cover underslab use and follow the manufacturer’s guidelines.
Quick rule: Don’t rely on marketing hype. Verify specs with tests and standards.
Environmental, code, and durability considerations
Your climate, ground conditions, and local codes all play a role in choosing the right underslab material. Here’s what to consider.
Climate: In cold regions, you need freeze-thaw resistance. In hot areas, UV stability is crucial. Always check temperature limits on datasheets.
Ground moisture: High moisture ground needs a lower permeance material. Check local soil conditions and adjust your choice accordingly.
Local code and engineer: Consult your local building code for vapor barrier requirements. Also, discuss with your project engineer to ensure the chosen material meets their specifications.
Pre-Pour Layout and Installation Best Practices
Start with a clean, compacted subgrade free of organics and loose debris and confirm drainage conditions and compatibility with the chosen membrane; surface prep prevents punctures and adhesion problems during the pour. Lay out rolls so seams run the shortest path and minimize the number of seams beneath high-traffic or load-bearing areas.
When unrolling, keep the sheet flat and oriented to avoid wrinkles; plan lap direction to shed water and install seams with approved overlap width and taping method per the membrane manufacturer. Pre-plan all penetrations with collars or sleeves, protect the sheet during formwork and rebar placement, and schedule a pre-pour inspection to catch layout or seam issues before concrete is placed.
Overlaps, seam sealing, and anchoring methods
The key to a successful vapor barrier under slab is proper overlaps, seam sealing, and securing the sheets. Let’s dive into each.
Overlaps: Aim for 6-12 inches of overlap between sheets. This width allows for proper sealing and prevents moisture from bypassing the barrier. Too narrow, and you risk gaps; too wide, and it’s a waste of material.
Seam sealing: Use approved seam tapes or adhesives to seal overlaps. Apply them evenly, following manufacturer instructions. Avoid gaps or punctures that can let moisture through.
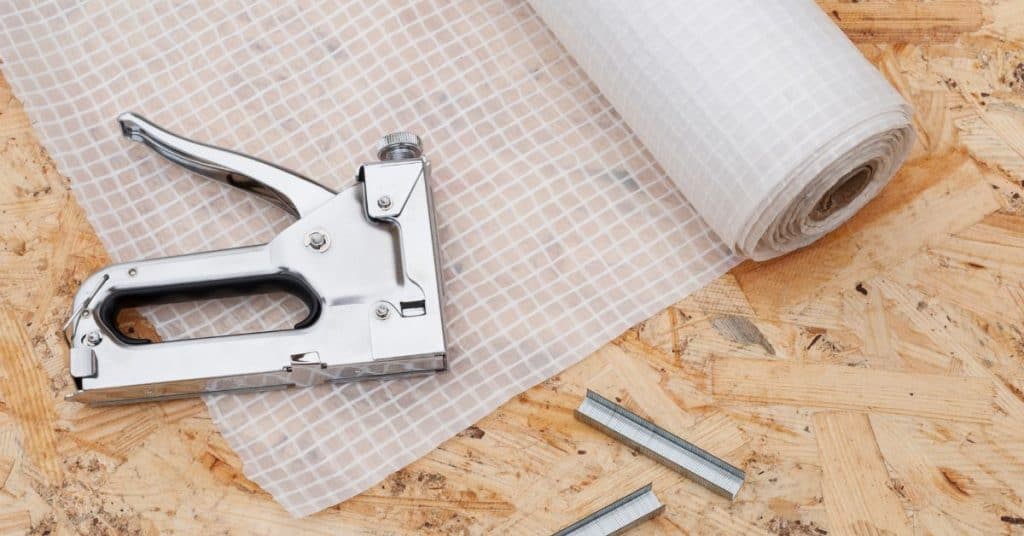
Securing sheets: Anchor the sheets with staples or nails every 12-18 inches along the edges and overlaps. This keeps them in place during concrete placement, preventing wrinkles and tears. Use a flat surface to ensure proper contact and sealing.
Visual checkpoints before pouring concrete
Before you pour that concrete, it’s crucial to do a thorough visual inspection of your vapor barrier. This checklist will help ensure everything is in order.
- Continuous coverage: Check for any gaps or exposed subgrade. The barrier should cover the entire area under the slab.
- Taped seams: Ensure all overlaps are properly taped and sealed. No gaps, no punctures.
- Sealed penetrations: Verify that all pipes, conduits, or sleeves have proper collars or seals around them. No exposed edges.
- Equipment protection: Make sure the barrier is protected from equipment like forms and rebar. No tears or punctures.
- Wrinkles: Check for any wrinkles in the barrier. They can trap moisture and cause problems later on.
- Alignment: Confirm that the barrier is aligned with your slab dimensions and formwork.
- Drainage: Verify that your subgrade drainage is still intact and functioning properly.
- Moisture check: Do a final moisture check of the subgrade to ensure it’s dry before pouring.
Quick rule: If you find any issues, address them immediately. A small problem now can become a big one later under that concrete slab.
How to Patch Tears and Minor Damage in Underslab Membranes
Minor damage includes small punctures, tears, and lifted seams that don’t compromise overall layout; decide to patch when the remaining membrane around the damage is sound and the repair will restore continuous coverage. Document damage size and position relative to control joints or penetrations before proceeding.
Prepare the area by removing dust, debris, oils, and release agents and ensure the surface meets the membrane manufacturer’s moisture and cleanliness requirements for adhesion. Use a compatible patch material—self-adhesive tape, peel-and-stick patches, or liquid-applied systems specified for that membrane—follow overlap and edge-rolling recommendations, protect the repair during curing, and perform a simple adhesion or tracer test to confirm the seal.
Step-by-Step Process
Follow these practical steps to patch tears and minor damage in underslab membranes, ensuring a proper repair before pouring concrete.
- Inspect the damage: assess size, location relative to control joints, and any moisture or contamination. Document findings for future reference.
- Clean the area: remove debris, dust, oils, and release agents using a stiff-bristle brush and appropriate cleaning solutions. Ensure the area is dry or within membrane manufacturer’s moisture limits.
- Prepare the patch material: choose a compatible patch tape or liquid system that matches your base membrane (self-adhesive, solvent-free, or epoxy-based).
- Apply the patch: follow the manufacturer’s instructions for application. Ensure proper overlap and smooth adhesion to prevent moisture bypass.
- Protect and test: temporarily protect the repair during curing as per manufacturer’s guidelines. After curing, perform a moisture/adhesion test to confirm a seal before proceeding with concrete pour.
Choosing patch materials and adhesives
Selecting the right patch materials and adhesives is crucial for a successful repair. Here’s what to consider:
- Matching base membrane material: Choose a patch that matches your existing underslab membrane in type (e.g., polyethylene, polyolefin) and thickness.
- Adhesive compatibility: Ensure the adhesive or tape is compatible with both the concrete substrate and the membrane. Check manufacturer’s guidelines for any required primers.
- Factory patch systems: For complex repairs or unique membranes, consider using a factory-provided patch system to ensure optimal performance.
- Avoid incompatible materials: Using the wrong material can lead to cracking, staining, weak bonds, and ultimately, moisture bypass.
Temporary vs. permanent repairs and documenting work
Understand when temporary measures are acceptable and how to make a permanent repair before pouring concrete:
Temporary repairs: For short-term solutions, use duct tape or other quick-fix materials to prevent immediate moisture intrusion. However, these should not be considered long-term solutions.
Permanent repairs: To ensure lasting protection, follow the step-by-step process outlined above for a permanent repair before pouring concrete.
Documenting your work is essential for warranty claims and inspections:
Keep records: Maintain detailed records of all repairs made to the underslab membrane, including dates, materials used, and any relevant notes. This information can be crucial in case of future issues or inspections.

Sealing Penetrations, Sleeves, and Construction Joints
Penetrations such as pipes, conduits, sleeves, and floor drains are routine locations where vapor barrier continuity is lost if not detailed correctly; each type needs a tailored sealing approach to maintain a continuous vapor-control plane. Choose sealing methods compatible with the penetration material and the membrane—options include mechanical sleeves with gaskets, preformed penetrations, collars, backer rod with compatible sealant, or liquid-applied membranes.
Install penetrations so the membrane is cut and tied into a sleeve or collar before the pour, and seal interfaces per manufacturer instructions to prevent gaps when concrete is placed. Account for movement joints, thermal change, and firestopping requirements, perform visual and functional checks of sealbed and cures, and confirm the system meets local code or product guidance before proceeding with the pour.
Pipe boots, flange seals, and collar systems
Pipe boots, collars, and preformed seals are essential for maintaining a continuous vapor barrier around pipes and other penetrations. They create a tight seal that prevents moisture from bypassing the barrier.
Mechanical clamps or adhesives can be used to secure these systems in place. Clamps provide quick installation but may require periodic tightening due to movement. Adhesives offer a permanent bond, ideal for long-term stability.
Choose boots and collars that match the pipe size and material. Ensure they’re compatible with your vapor barrier material and concrete mix. Always follow manufacturer guidelines for best results.
Integrating with sleeves, conduits, and control joints
Sleeves and conduits allow pipes to pass through the slab while maintaining vapor barrier continuity. Control joints manage concrete shrinkage and prevent cracking.
Before pouring, pre-cut and reposition your vapor barrier around these elements. Install sleeves or collars according to manufacturer instructions, ensuring they’re properly seated and aligned.
Seal interfaces between the vapor barrier and sleeves/conduits using compatible sealants or backer rods before pouring concrete. This ensures a tight bond that won’t allow moisture bypass.
For control joints, use joint fillers or sealants that maintain vapor resistance and accommodate movement. Always check local building codes for specific requirements.
Avoiding Moisture Bypass and Common Leakage Paths
Moisture bypass commonly follows non-obvious routes: floor-to-wall transitions, laps with insufficient overlap, damaged edge terminations, foundation drain connections, and aggregate layers that wick vapor. Treat the entire slab-perimeter system as one moisture-control plane and plan laps, edge terminations, and transitions to perimeter insulation or flashing so no gap is left for vapor to move around the membrane.
Detail interfaces with compatible patch collars, tapes, and sealants rated for sub-slab use and ensure overlaps and seams are tied into adjoining membranes and flashings to avoid pressure points at drains or footings. Conduct a layout review and field check for wrinkles, loose edges, and potential bypass paths before pouring, and sequence sealing and protection tasks to minimize rework and preserve the continuous plane during construction.
Floor-wall junctions and edge detailing
When installing your underslab vapor barrier, don’t forget about the edges. Here’s how to detail floor-to-wall junctions right:
Turn it up: Bring the membrane up the walls at least 6 inches. This creates a continuous moisture-control plane.
Tie into wall barriers: If you’ve got a wall vapor barrier, overlap and seal it with your underslab membrane. Use compatible tape or adhesive to ensure a watertight bond.
Protect the turn-up: During construction, protect that vulnerable edge with temporary blocking or by tucking it behind wall flashing. This keeps it from getting damaged before you pour.
Perimeter insulation and drainage interactions
The perimeter of your slab is a critical moisture-control zone. Here’s how to coordinate trades and manage drainage:
Insulate the perimeter: Use rigid foam or other insulation around the edge of your slab. This stops moisture from wicking in, but it won’t stop water pressure. So, you need proper drainage too.
Footing flashings: Seal around footing flashings with compatible caulk or sealant. This prevents moisture from getting behind your vapor barrier and into the slab.
Drainage coordination: Work with your site prep crew to ensure proper drainage away from the foundation. If water pools, it’ll find a way in. And coordinate with your plumber to make sure drain tiles aren’t blocked or damaged during installation.
Tools, Materials Checklist, and Standards to Reference
Assemble a repair and sealing kit that includes a utility knife, straight edge, seam roller, approved tape or adhesive, compatible patch membranes, primers if required, a moisture meter, cleaning solvent per manufacturer directions, and PPE. Also include temporary protection materials—board or geotextile—to shield the membrane during rebar setting and formwork handling.
Consult the membrane product data sheet and relevant standards for required performance metrics and test methods—look for permeance, puncture-resistance test results, and any cited ASTM/CSA/ICC references noted by the manufacturer. Keep a checklist for site verification (cleanliness, seam overlaps, penetration details, test records, and photos) and log repairs, cures, and final inspections for quality control and code documentation.
Essential tools and consumables for patching and sealing
Before you start any underslab repair work, make sure you have all the necessary tools and consumables on hand. This will save you time and ensure a smooth process.
- Cleaning tools: Brooms, scrapers, and wire brushes to clean the surface before patching or sealing.
- Compatible tapes/adhesives: Check with your chosen membrane manufacturer for approved tapes and adhesives to ensure compatibility.
- Patch sheets: Pre-cut fiber mesh or fabric sheets for reinforcing patches.
- Sealant guns: For applying urethane or cementitious sealants around penetrations and edges.
- Protective boards: To walk on the membrane without damaging it during repair work.
- Moisture meter: To test the moisture content of the concrete before patching.
- Trowels and knives/box cutters: For applying primers, mortars, and sealants.
- Patching mortars: Cementitious or urethane-based mortars for filling tears and holes.
- Primer: To prepare the surface for patching and sealing.
Quick rule: Always verify compatibility of tools, adhesives, and consumables with your chosen vapor barrier membrane to avoid adhesion issues or damage.
Standards, datasheets, and who to consult
To ensure your underslab repairs meet industry standards and local building codes, consult the following resources before starting work.
- Manufacturer’s datasheet: Review the membrane manufacturer’s installation guidelines and recommended patching materials.
- ASTM International (ASTM) standards: Refer to ASTM C1529 for vapor retarders and ASTM E1743 for moisture testing methods.
- CSA Group (CSA) standards: Consult CSA A123.3 for vapor barriers in concrete construction.
- International Code Council (ICC) codes: Check the International Residential Code (IRC) and International Building Code (IBC) for local requirements.
- Structural or envelope engineer: Consult with an engineer for complex conditions, such as high moisture areas or unique membrane types.
- Local building department: Verify that your chosen materials and methods comply with local codes and regulations.
Quick rule: Always consult the manufacturer’s datasheet first, then cross-reference with relevant industry standards and local codes to ensure compliance.
Common Mistakes, Maintenance, Inspection, and When to Call a Pro
Common errors include using the wrong patch materials, failing to seal penetrations properly, inadequate overlaps or poorly prepared surfaces, and skipping moisture or adhesion tests—these all create leakage risks. Prevent them by following manufacturer instructions, verifying product compatibility, and documenting installation and repairs with photos and notes.
Set a simple inspection routine: visual checks after major trades, periodic moisture checks with a meter or tracer tests after slab placement, and immediate repair of any new punctures. Hire a specialist when damage is extensive, repairs fail to stop moisture migration, penetrations are complex (multiple services or firestop implications), or when project specifications or code authorities require certified installers or lab-tested repairs.
Frequent installation and repair mistakes to avoid
Before you start any work, review this checklist to ensure a successful vapor barrier under slab installation or repair.
- Inadequate overlaps: Tears can form if seams aren’t overlapped properly. Ensure at least 6 inches of overlap.
- Incompatible patch materials: Using the wrong adhesive or sealant can cause delamination and tears. Stick to manufacturer recommendations.
- Uncovered seams during pour: Exposed seams can be damaged by concrete. Keep them covered until pouring begins.
- Failure to seal penetrations: Unsealed pipes, wires, or other penetrations can allow moisture bypass. Seal all before pouring.
- Under-rolling coatings: Insufficient rolling can leave voids that trap moisture. Roll out coatings thoroughly.
- Over-rolling coatings: Excessive rolling can damage the barrier. Be gentle, but thorough.
- Skipping moisture testing: Not testing for moisture before installation can lead to trapped moisture and failures. Test first.
- Improper substrate preparation: A dirty or uneven surface can cause adhesion issues. Clean and prepare the surface properly.
Quick rule: Always follow manufacturer guidelines for best results.
Routine inspection, maintenance, and documentation
Regular checks ensure your vapor barrier is working as intended. Use this checklist to stay on top of things.
- Post-pour visual survey: Inspect the slab for any signs of damage or movement immediately after pouring.
- Check for punctures, tears, voids: Any of these can compromise the barrier. Repair as needed.
- Edge lifts inspection: Check edges for lifting, which can indicate moisture issues. Seal if necessary.
- Moisture/condensation checks: Look for signs of condensation or dampness on the underside of the slab.
- Use a moisture meter/tracer tests: Regularly test the slab’s moisture content to ensure it’s within acceptable limits.
- Document findings: Keep records of all inspections, repairs, and test results. Include photos and dates.
- Reseal or patch as needed: If any damage is found, repair it promptly to maintain the barrier’s integrity.
- Re-test after significant concrete work: After major repairs or modifications, re-test the moisture barrier to ensure it’s still effective.
Quick rule: Regular checks and prompt repairs are key to maintaining a healthy vapor barrier.
Cost drivers and when to engage a professional
Knowing when to hire a pro can save you money in the long run. Consider these factors before starting any work.
- Size of tears: Large tears may require specialized equipment or expertise to repair properly.
- Complex penetrations: Intricate pipe, wire, or ductwork layouts can be challenging to seal. A pro can ensure a proper seal.
- Code disputes: If you’re unsure about local building codes, consult with an engineer or architect to avoid costly mistakes.
- Extensive damage: Widespread damage may require a complete replacement of the vapor barrier. A pro can assess the extent of the damage.
- Suspicious bulging/movement: Unusual slab movement or bulging could indicate serious structural issues. Consult an engineer immediately.
- Embedded nonconformities: Objects embedded in the concrete can compromise the vapor barrier. A pro can assess and repair as needed.
- Persistent moisture issues: If you’ve made repairs but still have moisture problems, it’s time to call a pro for further investigation.
Quick rule: When in doubt, consult with a professional. It could save you money and headaches in the long run.
Conclusion
Patching tears, sealing penetrations, and guarding against moisture bypass is about making the slab durable and cleanly finished. Do it right, and you save time, money, and headaches down the line.
Before you pour again, run this practical check: confirm you’re using the right underslab material, prep and clean the area, patch any tears with compatible material, seal all penetrations and sleeves, treat construction joints properly, and verify the patch and seals with a simple moisture test or inspection before the pour. Keep it simple, work in small steps, and document what you did so you can verify success later. Focus on safety, moisture control, and a proper seal at every critical point.
Common mistakes to avoid are skipping a small-area test, using the wrong patch material, tearing or puncturing the membrane during patching, and neglecting to seal penetrations and joints firmly. Always wear appropriate PPE, use careful tool handling, and don’t rush repairs. If any step feels uncertain, pause and reassess rather than forcing a fix.
If the project grows beyond patching minor damage, or you’re faced with complex penetrations, multiple sleeves, or signs of persistent moisture, it’s wise to call a pro. When in doubt, stop and consult an experienced contractor to prevent costly mistakes. Stay deliberate, finish clean, and you’ll have a durable underslab system you can trust.
FAQ
What are Class I, II, and III vapor barriers and which type should I use under a slab?
Class I, II, and III refer to material types and their permeability. Check the label or datasheet to see the vapor transmission rate and intended use. Choose a barrier that matches the project specs and local guidance from the manufacturer.
How can improper installation lead to moisture bypass, and what common mistakes should I avoid when laying out and sealing the membrane?
Avoid gaps, tears, and misaligned seams. Don’t rely on tape alone for long-term seals and don’t stretch or puncture the barrier during placement.
What maintenance steps help extend the life of an underslab vapor barrier?
Inspect for damage before backfilling and after backfill, especially around penetrations. Repair or patch small tears per manufacturer instructions and document any fixes for future inspections.
Do building codes or local rules govern vapor barriers, and how should I verify compliance?
Check with the project’s local rules and the material label for any requirements. If in doubt, reference the manufacturer instructions and consult with a local inspector or code official to confirm what applies.