
Introduction
Radon sealants are products designed to bond to poly vapor barriers and help block radon movement.
Choose one based on surface compatibility, curing behavior, and how it behaves on smooth plastic.
Consider the features and physical properties, like adhesion, elasticity, and moisture tolerance, to see what fits your setup.
Always read the label for surface prep, cure time, and any standards or local rules, and follow the manufacturer’s instructions.
Key takeaways
- Verify sealant adheres to polyethylene per manufacturer guidelines before application.
- Check material specs and standards to match expected vapor barrier compatibility.
- Compare at least two products for adhesion, movement tolerance, and cure behavior.
- Follow application guidelines for clean, dry substrate and proper coverage.
- Include safety, handling, and disposal steps during sealant work practices.
- Understand warranties and common troubleshooting to avoid future sealant failures.
Table of Contents
- Introduction
- Key takeaways
- Why Radon Sealants Matter for Poly Vapor Barriers
- Types of Sealants That Adhere to Polyethylene
- Material Specs and Standards Explained (How to Choose the Right Product)
- Product Features & Benefits: Evaluating Titebond and Comparable Sealants
- Application Guidelines for Radon Sealants on Poly
- DIY Planning Guide: Tools, Materials Checklist, and Workflow
- Safety, Handling, and Disposal
- Costs, Warranties, and Troubleshooting Common Mistakes
- Conclusion
- FAQ
Why Radon Sealants Matter for Poly Vapor Barriers
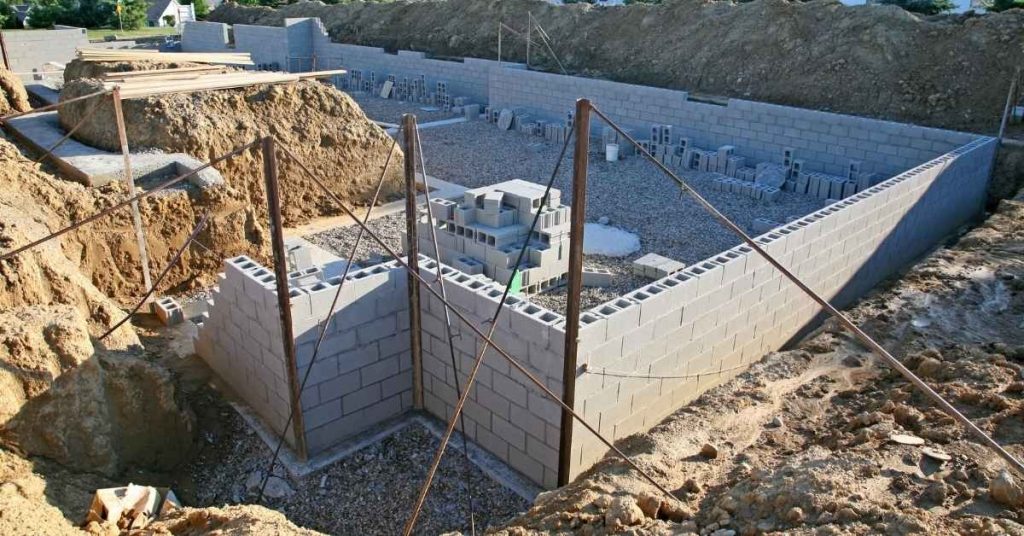
Seam and penetration sealing is a fundamental part of a radon-mitigation strategy. A continuous, airtight barrier on poly vapor barriers reduces pathways for gas migration. Proper sealing matters at joints and around penetrations for long-term performance.
Adhesion to polyethylene is critical because surface energy, plasticizer migration, and joint stress can affect seal integrity over time. Different sealants interact with plastic films in distinct ways, so choosing the right match is essential. Compare solvent-based and water-based formulations, urethane, silicone, and other compatible options for your membranes.
How Radon Moves Through Foundation Assemblies
Radon gas seeps into your home through tiny cracks and gaps in the foundation. It can enter through:
- Cracks in concrete slabs or walls.
- Gaps around pipes, vents, and electrical wires.
- Openings where the foundation meets the walls above.
Sealing these entry points is crucial to prevent radon infiltration. A continuous seal at your poly vapor barrier helps block these pathways effectively.
Difference Between Vapor Barriers and Radon-Specific Membranes
Polyethylene vapor barriers are common in construction, but they’re not designed specifically for radon mitigation. Here’s the difference:
- Vapor Barriers: Prevent moisture from moving into walls and ceilings.
- Radon Membranes: Designed to block radon gas, often with additional sealing requirements.
While a vapor barrier can help reduce radon entry, it’s not enough on its own. A dedicated radon sealant or system is needed for optimal protection.
Types of Sealants That Adhere to Polyethylene
This section covers four chemistry families and how they interact with poly films. Butyl, polyurethane/hybrid, acrylic/water-based, and specialty adhesives each behave differently in bond formation. The goal is a durable, airtight seal on poly vapor barriers.
Surface prep matters, including film compatibility checks, cleaning methods, and moisture considerations. Embossed or recycled films can affect tack and adhesion, so verify with product data before applying. Consider whether a sealant is marketed as peel-and-stick or requires primers for your job.
Butyl-based and rubberized sealants
Butyl-based and rubberized sealants are often chosen for their good adhesion to low-energy plastics like polyethylene. They form a strong bond due to their natural affinity for plastic surfaces.
Use cases: These sealants are commonly used in basement applications where the poly vapor barrier is exposed, and a durable, long-lasting seal is needed.
However, they may not adhere as well to recycled or embossed poly films due to their textured surface. Always check the product’s compatibility with your specific poly film type.
Polyurethane and hybrid (MS/SS) sealants
Polyurethane and hybrid (moisture-curing/solvent-based) sealants offer excellent durability, flexibility, and adhesion to plastic substrates. Some formulations bond well to polyethylene with the use of primers or proper surface preparation.
Durability: These sealants are known for their long-term performance and resistance to chemicals, temperature changes, and UV exposure.
However, they may have longer cure times compared to other types. Always follow the manufacturer’s instructions for application and curing under your specific flooring/basement environment.
Water-based and acrylic sealants
Water-based and acrylic sealants are easy to use, low in VOCs, and clean up with just water. However, they may not adhere well to raw polyethylene without a primer or proper surface preparation.
Suitability: These sealants are typically suitable for indoor, low-movement joints where the poly vapor barrier is not exposed to harsh conditions.
They are often used in conjunction with a compatible primer to enhance adhesion and ensure a strong bond. Always check the product’s compatibility with your specific poly film type and application environment.
Material Specs and Standards Explained (How to Choose the Right Product)
Start with substrate compatibility and any required surface prep. Ensure the sealant bonds reliably to common poly barriers and note any primer needs. Long-term performance depends on proper surface preparation.
Look for key standards and test methods, such as elastomeric performance and barrier-related testing cited in the datasheet. Evaluate adhesion, elongation, cure time, and temperature tolerance as they relate to your site conditions. Safety, emissions, and warranty terms also matter when selecting a product.
Key standards and test methods to check
The first step in choosing the right sealant is understanding what tests and standards matter. Here’s what to look for:
ASTM C920: This standard covers elastomeric joint sealants, focusing on movement accommodation, adhesion, and durability – all crucial for radon-specific applications.
Review any radon-specific or barrier-related testing mentioned in the product datasheet. Look for tests like ASTM D4587 (peel resistance), ASTM C1601 (tensile strength), and ASTM E2356 (radon entry rate through sealed joints).
Check if the sealant meets relevant building codes or mitigation guidelines, such as those from the EPA, AARST-NRPP, or local authorities.
How to read technical data sheets for compatibility
Technical datasheets provide vital info on sealant performance. Here’s what to focus on:
Adhesion claims: Look for explicit statements about adhesion to polyethylene and other common poly vapor barriers.
Recommended substrates: Ensure polyethylene is listed as a suitable substrate. If not, contact the manufacturer for clarification.
Primer requirements: Some sealants need primers for optimal adhesion. Make sure you have the right one on hand.
Service temperature range and cure conditions: Check if the sealant can be applied and perform within your job-site temperatures and humidity levels, and how long it takes to cure under those conditions.
Product Features & Benefits: Evaluating Titebond and Comparable Sealants
Create an evidence-based evaluation framework by separating marketing claims from measurable performance. Use a checklist tied to cited standards for adhesion, cure, and VOCs. This helps avoid marketing ambiguity.
When comparing products, focus on bond strength to plastic barriers, compatibility with substrates, moisture and alkaline resistance, and curing behavior. Demand documentation such as product data sheets, safety data sheets, and test references. Frame your decisions around documented performance rather than claims.
What to verify on the manufacturer’s product sheet
Before you buy, check these key points on the manufacturer’s product sheets. They’ll tell you if the sealant sticks to polyethylene and performs as claimed.
Adhesion test results: Look for tests showing good adhesion to polyethylene. Don’t rely on claims alone.
Recommended substrates: Make sure polyethylene is explicitly listed. Some sealants claim ‘universal’ compatibility but fail on poly.
Curing times: Check if the cure time fits your project schedule, especially in typical garage/basement environments.
Brand comparison checklist
Use this checklist when comparing sealants. It helps you pick the best one for your poly vapor barrier job.
- Adhesion to poly: Check test results, not just claims.
- Flexibility: Ensure it can handle foundation movement without cracking.
- UV resistance: Important if exposed to sunlight during or after application.
- Paintability: Some sealants can’t be painted over, limiting finish options.
- Warranty coverage: Longer warranties suggest better product confidence.
- Intended environment: Check if it’s designed for your specific application (e.g., interior vs. exterior).
Quick rule: Don’t skip checking adhesion to polyethylene. It’s the most critical factor for radon-specific membranes.

Application Guidelines for Radon Sealants on Poly
Surface prep should ensure a clean, dry surface compatible with the chosen sealant. Confirm the poly material type and whether primers are recommended by the manufacturer. Proper prep sets the stage for reliable adhesion.
Environmental conditions during application matter. Note the recommended temperature and humidity ranges and planned cure times. Describe bead size, tooling, and how to treat joints and penetrations for a continuous seal.
Surface preparation and when to use a primer
The key to a good bond is a clean, dry surface. Here’s how:
Cleaning: Use a mild detergent or isopropyl alcohol to remove any dirt, dust, or grease from the poly vapor barrier. Wipe with a clean cloth and let it dry.
Drying time: Ensure the surface is completely dry before applying the sealant. This could take anywhere from 24 to 72 hours depending on humidity levels.
Primer use: If the poly material feels smooth and slippery, or if the chosen sealant recommends it, use a primer. Apply it thinly and evenly, following the manufacturer’s instructions. Let it dry as specified before applying the sealant.
Application technique, tooling, and cure management
Applying radon sealants on poly vapor barriers requires careful technique and environmental control. Here’s how to do it:
- Bead placement: Apply the sealant in uniform beads along joints and penetrations. The size of the bead depends on the sealant’s recommended application rate.
- Tooling: Use a notched trowel or a caulking gun with a smooth tip to apply the sealant. After application, use a damp sponge or brush to tool the sealant into the substrate and remove any excess.
- Joint movement: Allow for some joint movement by creating a ‘backer rod’ effect with foam or rope before applying the sealant. This prevents stress on the sealant during expansion and contraction.
- Temperature control: Apply the sealant when temperatures are between 50°F to 90°F (10°C to 32°C). Avoid condensation or freezing conditions, as they can hinder curing.
- Humidity and ventilation: Maintain a relative humidity of less than 85% during application and curing. Ensure adequate ventilation in the work area to facilitate curing.
- Cure time: Allow the sealant to cure for the recommended time, usually between 24 to 72 hours, before exposing it to moisture or foot traffic.
- Recoat window: Check the manufacturer’s guidelines for when you can apply a second coat. This is typically after the initial cure period but before the sealant has fully cured (usually within 30 days).
DIY Planning Guide: Tools, Materials Checklist, and Workflow
Outline essential product criteria including poly compatibility, radon-blocking potential, cure times, and VOC standards. Provide a decision tree for choosing sealant types based on barrier material and space type.
Arm yourself with a practical tools list and a materials shopping plan. Include primers (if required), sealants, tapes, backing materials, and quantities by area. Add a clear workflow from prep to inspection so a homeowner can track progress.
Tools and materials checklist
Use this checklist before you start your concrete project to ensure you have everything you need. It’s best to gather all tools and materials at once to avoid mid-project trips to the hardware store.
- Tape measure: Confirm it’s in good working condition with no damaged tape or broken spring.
- Level: Check for bubbles in both air and water levels. For laser levels, ensure batteries are fresh.
- Shovel: Inspect for a sturdy handle and sharp edge to easily mix and move concrete.
- Wheelbarrow: Ensure it’s stable with no wobbly wheels or cracks in the tray.
- Concrete mixer (if using): Check that paddles are intact, and motor starts smoothly. Follow manufacturer instructions for proper functioning.
- Concrete mix: Verify it’s the right type (e.g., fast-setting, regular, or high-strength) and bag size for your project. Check local rules on mixing ratios.
- Sealant/primer: Confirm compatibility with your concrete mix and surface type on product labels. Skip this step at your peril; it can lead to poor adhesion and premature deterioration.
- Caulking gun: Ensure it’s in working order, with no leaks or broken seals. Check that the sealant is compatible with your caulking gun.
- Cleaners (e.g., wire brush, acid wash): Confirm they’re suitable for your surface type and condition. Pre-cleaning ensures better adhesion of sealants and primers.
- Tapes (e.g., masking, duct): Check for any tears or damage. Use appropriate tape for your application to prevent adhesive residue.
- Personal Protective Equipment (PPE): Include safety glasses, work gloves, ear protection, and a dust mask. Ensure everything is in good condition before use.
Quick rule: Always check your tools and materials before starting any project. It’s better to find out something is missing or broken before you need it, not during the job.
Step-by-step project plan and visual checkpoints
Use this checklist before, during, and after your concrete work to ensure a strong, durable result. Follow these steps to avoid common mistakes that can lead to costly rework.
- Inspect surface: Check the substrate for cleanliness, soundness, and proper profile. Remove any contaminants, loose material, or weak spots.
- Check moisture content: Ensure the substrate is dry enough to bond with the concrete. Use a moisture meter if unsure; aim for 75% relative humidity or less.
- Prepare surface: Prime or seal the surface as per manufacturer’s instructions to improve adhesion and prevent moisture migration.
- Mix concrete: Follow the mix design specified on your product label, ensuring proper water-to-cement ratio for strength and workability.
- Check temperature: Apply concrete when temperatures are between 50°F (10°C) and 90°F (32°C). Check local rules for cold or hot weather adjustments.
- Apply concrete: Spread the mix evenly, checking for continuity and proper coverage. Use a screed to level and finish the surface.
- Cure properly: Keep the concrete moist and covered for at least 7 days to allow proper hydration and strength development. Check local rules for specific curing requirements.
- Final inspection: Inspect the cured concrete for signs of delamination, cracking, or other defects. Address any issues promptly to prevent further damage.
Quick rule: Always follow manufacturer’s instructions and local building codes to ensure your concrete work is safe, durable, and up to code.
Safety, Handling, and Disposal
PPE and exposure controls are essential. Specify respirators or masks, chemical-resistant gloves, eye protection, and ventilation needs. Understand radon-related exposure during handling and application.
Cover product handling, surface prep, and application safety. Include indoor vs. outdoor use guidance, venting practices, and minimum cure times. Discuss disposal per SDS and local regulations for hazardous waste.
Personal Protective Equipment and Jobsite Controls
Safety’s your top priority. Here’s what you need:
- Respirator (P100 mask): Protects against dust and fumes. Rent or buy: $20-$50.
- Chemical-resistant gloves: Shield hands from chemicals. Buy: $10-$20 per pair.
- Eye protection: Goggles or safety glasses. Buy: $5-$15.
- Protective clothing: Long sleeves, pants, and boots. Use what you have; consider disposable coveralls for heavy applications.
- Ventilation: Use fans or hire a mechanic to set up negative pressure ventilation. Rent: $50-$100 per day.
Waste Handling, Cleanup, and Disposal
Safely handle leftover sealant. Follow these steps:
Contain excess material: Keep unused product in the original container or a sealed, clearly labeled one.
Cleanup: Wipe up spills immediately with damp rags. Rinse tools and equipment with water after use.
Disposal: Follow your product’s SDS for waste disposal instructions. Some may require hazardous waste treatment. Check local regulations. Contaminated PPE and cleanup rags should be disposed of as hazardous waste.
Costs, Warranties, and Troubleshooting Common Mistakes
Assess upfront costs, expected coverage, and overall value including long-term radon performance. Compare solvent- and water-based formulations and labor implications without relying on unverified numbers. Look at total cost per project area when weighing options.
Read warranty terms carefully to understand duration, scope, and exclusions, especially for poly vapor barriers. Check installation requirements and how to document defects for claims. Identify common mistakes and practical fixes to minimize rework.
Cost factors and lifecycle considerations
When choosing a radon sealant, consider more than just the upfront cost. Material type, primer needs, labor, and expected longevity all play a role in total cost.
Material Type: Solvent-based formulations tend to be cheaper but have longer cure times and higher VOCs. Water-based options are pricier but faster curing and eco-friendlier.
Primer Needs: Some sealants require priming, adding extra cost. Check if your poly vapor barrier needs it.
Labor Implications: Faster-curing sealants can save on labor costs by reducing application time. Consider this when comparing products.
Warranty statements: what to verify
A warranty is only as good as its terms. Here’s what to check before you buy:
Duration and Scope: Look for warranties that cover a reasonable length of time (at least 5-10 years) and include coverage for both material defects and labor.
Installation Practices: Some warranties require specific installation practices. Make sure you can meet these conditions.
Documentation: Keep records of your purchase, application date, and any issues that arise. This will help if you need to make a claim.
Common mistakes and troubleshooting tips
Avoid these common pitfalls to ensure your radon sealant performs as expected:
- Insufficient Priming: Skipping primer can lead to poor adhesion. Always use a compatible primer if recommended.
- Over-application: Too much sealant can cause drips and runs, leading to improper curing. Apply evenly and sparingly.
- Gaps at Seams: Inadequate overlap or missed spots can allow radon intrusion. Ensure thorough coverage at seams.
- Improper Curing Temperatures: Sealants need the right temperature to cure properly. Follow manufacturer guidelines.
- Incompatible Products: Using the wrong primer or sealant can cause adhesion issues. Always use compatible products.
If you spot an issue, address it promptly. Re-apply sealant as needed, following the manufacturer’s recommendations to avoid further problems.
Conclusion
Choosing the right sealant for a poly vapor barrier is about durability, safety, and a clean finish that lasts. When you seal correctly, radon protection stays effective, the seam looks intentional, and you avoid costly callbacks or damage to the building envelope.
To move from plan to done, confirm the product is rated for polyethylene and compatible with your specific barrier, study the data sheet, prep the surface by cleaning and drying it, mask where needed, apply per the directions in the right environmental window, cure fully, and then verify adhesion and a simple air-tight check after cure. Do the work in a logical sequence, keep tools clean, and dispose of waste as you go; Safety first and a test small area approach reduce surprises.
Common mistakes to avoid are using an incompatible sealant, skipping surface prep, applying in damp or cold conditions, skimping on curing time, and skipping a follow-up test. Always wear proper gloves and eye protection, ventilate as needed, and follow local disposal rules. If you’re unsure about substrate compatibility, requiring unusual primers, or dealing with complex joints, stop and call a professional instead of risking the wall, floor, or your health. Stay steady, stay methodical, and you’ll finish with a durable, reliable seal that performs as designed.
FAQ
What features and benefits should I expect from radon sealants that stick to poly vapor barriers?
Look for good adhesion to polyethylene and a flexible, crack-bridging film. Benefits include reducing radon paths and staying on the surface during movement or temperature changes. If in doubt, check the product label or datasheet for adhesion and elasticity claims.
How do sealants’ physical properties affect performance on poly sheeting?
Flexibility and shrink resistance matter, so the sealant won’t crack with temp swings. Drying time and tackiness influence how soon you can move on with the next step. Verify these specs on the manufacturer’s instructions or packaging.
What product specs or standards should I check before buying?
Look at adhesion to polyethylene, curing mode (open or closed time), and any surface prep requirements. Also note any environmental limits like temperature during application. If a spec is unclear, consult the label, datasheet, or manufacturer guidance.
How should I budget for sealants, including warranty considerations and potential extra costs?
Plan for the material cost plus a margin for waste and rework. Check if the product offers a warranty and what it covers, but know warranties vary and often have conditions. If you see big price gaps, compare label claims to the datasheet and local rules.