
Introduction
Underlayment for tile on a concrete slab is a layer that sits between the slab and the tile to improve adhesion, levelness, and protection. This DIY guide will help you diagnose common problems and choose a practical fix. Stay within manufacturer instructions and local rules when selecting materials.
In this hands-on approach, you’ll assess moisture, adhesion, and surface flatness before picking a fix. Options range from patching cracks to selecting a compatible underlayment, but always check the product instructions and local rules.
Key takeaways
- Inspect slab for flatness, cracks, and moisture before underlayment selection.
- Verify manufacturer instructions for tile and underlayment compatibility on concrete slabs.
- Remove old adhesives and clean surface to promote bonding and adhesion.
- Use a compatible crack-isolation or moisture-control layer per product label.
- Plan for proper curing or curing time before grouting to prevent failures.
- Wear safety gear, cover adjacent areas, and ventilate when applying compounds.
Table of Contents
- Introduction
- Key takeaways
- How to Identify Underlayment Needs on a Concrete Slab
- Common Types of Underlayment for Tile on Concrete
- Diagnosing Specific Tile Problems and Root Causes
- Step-by-Step Repair and Preparation Workflow
- Tools, Materials, and Specs Checklist
- Common Mistakes and How to Avoid Them
- Cost, Time, and When to Call a Professional
- Visual Checkpoints and Final Qa Before Tiling
- Conclusion
- FAQ
How to Identify Underlayment Needs on a Concrete Slab
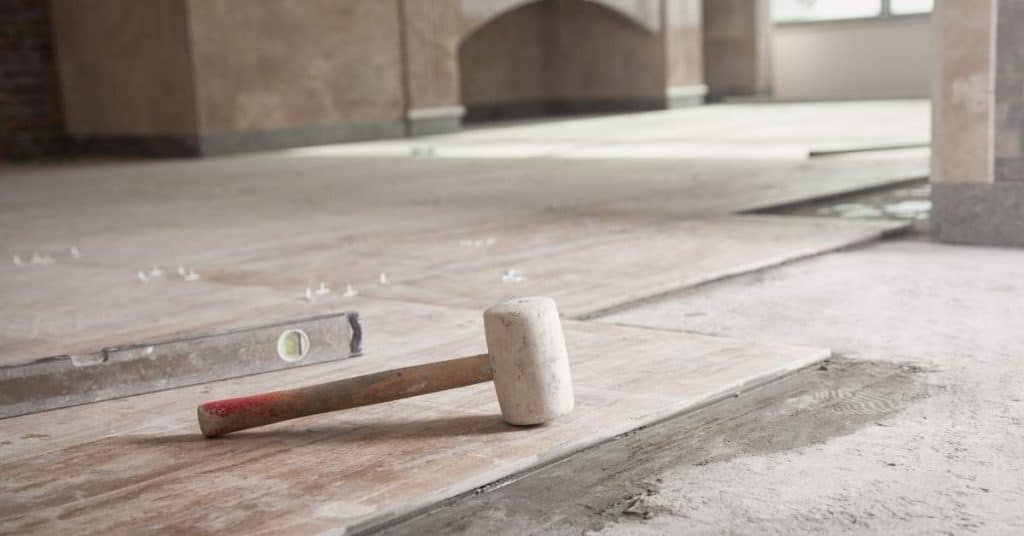
Look for cracked or spalling tile edges and chalky grout as first clues. Tap a tile gently to hear if it sounds hollow or solid. Check for a visible or damp sheen that doesn’t dry evenly. If you see high spots or obvious ridges, the slab may be out of level. If the slab feels dry and smooth, you may be able to bond tile directly in some spots.
Use simple tactile checks like running a straightedge across the surface and feeling for flatness. A flexible feel underfoot can signal unevenness. For moisture concerns, look for persistent damp patches or a musty odor near the slab. When in doubt, verify slab dryness and adhesion compatibility with product labels or manufacturer instructions before proceeding.
Step-by-Step Process
Follow these steps to identify underlayment needs on your concrete slab. It’s a straightforward process that’ll help you understand if your slab is ready for tiling or needs some prep work.
- Start by cleaning the slab. Remove any debris, dirt, or old materials using a broom and a stiff brush. Safety first – wear gloves and eye protection.
- Inspect the slab visually. Look for cracks, unevenness, or other signs of damage. If you find any, note them down.
- Perform visual and sound tests (see next section) to check tile adhesion and slab integrity.
- Check level and flatness using a straightedge or level (next section).
- If needed, perform moisture and vapor diagnostics (following section). Clean up any mess made during the process. If you’re unsure about any findings, don’t hesitate to call a pro.
Visual and Sound Tests
Tap tiles gently with the handle of a trowel or a rubber mallet. Listen for a clear, solid sound. A dull thud could indicate debonding or movement.
Inspect grout lines. If they’re cracked or missing, it might mean your tiles are moving.
Look for cracks in the tiles themselves or at their edges. Any signs of cracking warrant further investigation.
Level and Flatness Checks
Use a straightedge or level to check your slab’s flatness. Place it on the slab and look for gaps. A 10-foot level or a 6-foot straightedge can help cover larger areas.
If there are gaps of more than 1/8 inch, you’ll likely need an underlayment or leveling product to ensure a smooth tile installation.
Note: Small variations are normal in concrete slabs. But if the slab is significantly uneven, it might be best to call a professional.
Moisture and Vapor Diagnostics
The plastic sheet test is simple: place a piece of clear plastic on the slab, secure it with tape, and leave it for 24 hours. If moisture beads form underneath, you’ve got a moisture issue.
A moisture meter can give you a more precise reading. Most tile installers recommend keeping your slab’s relative humidity below 3% before tiling.
If you find high moisture levels or signs of vapor drive (like efflorescence on the slab), consider using a moisture-mitigating underlayment to protect your tiles.
Common Types of Underlayment for Tile on Concrete
You have several main options: bonding directly with thinset, adding a cement backer board, using uncoupling membranes, applying a skim coat or leveling compound, or installing a liquid waterproofing membrane. Each option changes how the tile will perform and how your surface handles movement. The choice depends on slab condition, moisture risk, and the tile type you plan to install.
In general, check the pros and cons of each method against the site conditions. For every product option, read the label and the manufacturer’s instructions to confirm suitability. If needed, consult local rules or a professional for guidance on what’s acceptable in your area.
Cement backer board and fiber-cement panels
Cement backer boards and fiber-cement panels are popular choices for underlayment on concrete slabs. They provide a rigid, stable surface for tile installation.
Pros: They’re durable, fire-resistant, and easy to install. Fiber-cement panels offer additional strength and resistance to cracking.
Cons: They can be heavy and difficult to handle. Thinner options may not provide enough stability for larger tiles or heavy traffic areas.
Thickness: Typically 1/2″ to 5/8″. Choose thicker panels for heavier tile installations.
Uncoupling membranes (e.g., Ditra-style)
Uncoupling membranes like Ditra create a flexible layer between your concrete slab and tile. This prevents cracks from the slab from transferring to your tile installation.
How they work: They allow slight movement of the slab without affecting the tile. This is especially useful in areas with minor slab movement, like basements or over-grade slabs.
Installation basics: Apply thin-set mortar to the slab, embed the membrane, and let it dry before tiling. Follow manufacturer’s guidelines for specific products.
Suitability: Ideal for slabs with minor movement or areas prone to slight settling. Not recommended for heavy traffic or large tiles without additional support.
Self-leveling and patching compounds
Self-levelers and featherpatch compounds are used to achieve a flat surface before tiling. They’re ideal for correcting minor imperfections in your concrete slab.
When to use: Use self-levelers for larger areas with significant dips or low spots. Featherpatch is great for filling small cracks, holes, or uneven surfaces.
Compatibility: Both can be used under tile installations. Ensure the product you choose is compatible with your chosen tile adhesive and follow manufacturer’s guidelines for best results.
Application: Follow package instructions for mixing and application. Allow proper drying time before tiling.
Liquid-applied waterproofing and moisture barriers
Liquid membranes provide a flexible, waterproof barrier against moisture vapor and liquid water intrusion. They’re ideal for areas prone to moisture issues or where waterproofing is required.
When to use: Use in bathrooms, laundry rooms, basements, or other areas with potential moisture problems. Also useful when tiling over green concrete (concrete that hasn’t fully cured).
Interaction with underlayments: Liquid membranes can be used alone or in combination with other underlayment types. They’re often applied over a primed concrete slab before installing cement backer board, uncoupling membrane, or tile.
Application: Follow manufacturer’s guidelines for surface preparation, mixing, and application. Ensure proper drying time before tiling.
Diagnosing Specific Tile Problems and Root Causes
Cracked tiles often point to movement or a poor substrate. Grout failure can happen when the underlayment isn’t stable or moisture issues exist. Hollow spots indicate delamination or voids beneath the tile assembly. Efflorescence suggests moisture traveling through the slab bringing salts to the surface. Mold around joints can signal moisture infiltration into the underlayment or substrate.
For each symptom, link it to a likely cause, such as a flawed underlayment, inadequate substrate prep, or slab moisture. Always verify conclusions by checking product instructions, testing results, and local building guidance before choosing a repair path.
Cracked or loose tiles
If your tiles are cracked or loose, it’s crucial to figure out why. Here’s how:
First, check if the cracks run through multiple tiles and follow a pattern. This could mean slab movement, like settlement or expansion.
Next, look at the bond between your tiles and the underlayment. If it’s weak or non-existent, you might have an inadequate bond. This can happen if thinset wasn’t used properly or the surface wasn’t clean.
Lastly, consider if you chose the right underlayment for your slab. Some materials can’t handle movement or moisture like they should. If that’s the case, you might need to re-evaluate your underlayment choice.
Hollow-sounding tiles and bond failure
When tiles sound hollow when tapped, it’s a sign of trouble. Here’s how to confirm debonding:
Tap your tiles gently with a wooden or plastic tool. If they sound hollow, that means they’re not properly bonded to the underlayment.
Now, figure out why. It could be insufficient thinset, which didn’t create a strong bond. Or maybe there was dust on the slab when you laid your tiles, reducing adhesion.
Another culprit might be an incompatible membrane. Some membranes can prevent proper bonding with thinset. If that’s the case, you may need to reconsider your membrane choice.
Rising moisture, efflorescence, and mold
Moisture problems can wreck your tile job. Here’s how to spot them:
Look for signs of moisture intrusion from below. This could be water stains, warped tiles, or even mold. Efflorescence – a white, powdery deposit – is another sign of moisture.
To tell if it’s vapor or liquid water, do a simple test. Place clear plastic sheeting on the floor and seal the edges. If you see water droplets after a few days, that means you’ve got liquid water. If not, it’s probably just moisture vapor.
Both can be trouble for your underlayment. Make sure to choose one that can handle moisture and vapor, or you’ll have ongoing problems.
Step-by-Step Repair and Preparation Workflow
Begin with demolition of damaged zones and removal of old materials as needed. Clean and roughen the substrate to promote adhesion. Address obvious moisture or repairable cracks before moving forward. Assess flatness and plan the underlayment approach based on the findings.
Apply moisture mitigation or leveling as required, then install the chosen underlayment system. Allow proper curing and dry time per product instructions. Finally, confirm readiness for tile installation with a pre-tile check of surface condition and adhesion readiness.
Step-by-Step Repair Process
This sequence will guide you through repairing a concrete surface, ensuring durability and longevity.
-
Inspect the damage: Check the extent of the damage. If it’s extensive or structural, stop and call a pro.
Why: Severe damage may indicate underlying issues that need expert attention.
Check: Visually inspect for cracks, holes, or crumbling. -
Clean the area: Remove all dirt, debris, and loose concrete using a wire brush or pressure washer.
Why: A clean surface ensures better adhesion of the repair material.
Check: The surface should feel smooth and look clean. -
Prepare the surface: If necessary, chip out damaged concrete using a cold chisel and hammer. Brush off dust.
Why: Removing damaged material allows for better bonding of the repair patch.
Check: The edges should be well-defined and stable. -
Mix the repair material: Follow manufacturer’s instructions to mix concrete or mortar. Use a shovel and wheelbarrow.
Why: Proper mixing ensures strength and consistency of the patch.
Check: The mixture should have a consistent texture and color. -
Apply the repair material: Fill the damaged area with the mixed concrete or mortar, tamping it down in layers. Smooth the surface with a trowel.
Why: Proper application ensures the patch bonds well with the existing concrete and has minimal voids.
Check: The repaired area should be level with the surrounding surface. -
Cure the repair: Keep the patched area moist for at least 72 hours to allow proper curing. Cover with plastic if necessary.
Why: Curing allows the concrete to gain strength and prevents cracking due to rapid drying.
Wait: At least 72 hours before using or applying weight to the repaired area.
Pro tip: Always wear safety glasses, gloves, and a dust mask when working with concrete. Safety first!
Safe removal of failed tile and thinset
First, suit up: safety glasses, gloves, and ear protection. Tiles can shatter, sending sharp bits flying.
Start by scoring the tiles with a utility knife to break their bond. Then, use a rubber mallet and a flathead screwdriver to pry them off. Work from one corner of the tile towards the center.
Be patient. Don’t hammer at the tiles like you’re mad at them. You’ll damage the slab that way. If they won’t budge, check if there’s a layer of thinset under them. If so, you might need to use a chisel and hammer.
Once the tiles are off, it’s time for the thinset. Use a floor scraper or a chisel and hammer to remove as much as possible. Go slow; you don’t want to damage the slab. If there’s any doubt about the slab’s condition, check with a local pro. They can assess if it needs repair before you proceed.
Surface preparation before underlayment
Before you start laying down your new underlayment or leveling compound, you’ve got to get the surface ready. Here’s how:
Clean it up: Remove all traces of old thinset, tile adhesive, and any other debris from the previous job. Use a scraper or chisel if needed.
Profile it: Now you need to roughen up that surface. This gives your new underlayment something to grab onto. You can use a diamond blade on an angle grinder, or a scarifier for larger areas. Just make sure you’re not leaving any smooth spots.
Repair cracks: Fill in any cracks with a suitable repair mortar. Check the manufacturer’s instructions to ensure it’s compatible with your underlayment. Let it cure according to their guidelines before proceeding.
Prime it: Apply a thin layer of primer to seal the surface and improve adhesion. Again, follow the manufacturer’s instructions for the best results.
Let it dry: Now you wait. Make sure your surface is completely dry before applying your underlayment or leveling compound. Check the product label for specific drying times.
Installing the chosen underlayment
Now that you’ve prepped your surface, it’s time to install the underlayment. Here are the key steps for common types:
Cement-Bonded Particle Board (CB): Apply a thin layer of thinset (check manufacturer’s recommendations) directly onto the prepared surface. Lay the CB boards perpendicular to your tile direction, pressing firmly and evenly. Use spacers for consistent grout lines. Seams should overlap by at least 1/4 inch, and you can use fiberglass tape or a special CB seam compound.
Concrete Board: Apply a layer of thinset (check manufacturer’s recommendations) onto the surface. Lay the concrete boards, pressing firmly and using spacers for grout lines. Seams should overlap by at least 1/2 inch, and you can use fiberglass tape or a special concrete board seam compound.
Cure times: Always follow manufacturer’s guidelines for curing underlayment before tiling. This usually ranges from 24 to 72 hours. Don’t rush this step; it’s crucial for a strong bond with your tile.
Tools, Materials, and Specs Checklist
Assemble a homeowner-friendly toolbox: trowels, mixing tools, straightedges, and a damp proofing or leveling kit as needed. Have the appropriate underlayment options on hand and a quality thinset suitable for your tile and substrate. Keep a few consumables like spacers, sealant, and replacement blades handy.
Review product labels for intended use, recommended substrate, and thickness guidance. Compare membrane types and leveling products to your project conditions, and verify any required cure or open times on the instructions. If any spec is unclear, check manufacturer data sheets or local rules before proceeding.
Essential tools for diagnosis and installation
Before you start, make sure you have all the necessary tools to diagnose issues and install your underlayment properly.
- Straightedge: To check if your slab is level. If it’s not, you’ll need to address this before installing tile.
- Level: To ensure your tiles are installed evenly and won’t wobble or look uneven.
- Moisture meter: To check for excess moisture in the slab, which can cause problems later on. If it’s too high, you’ll need to address this before proceeding.
- Grout saw: For cutting tiles to size and making clean cuts.
- Grinders: To grind down any high spots or remove old thinset if needed.
- Trowels: Notched trowel for applying thinset, straight edge trowel for spreading it evenly.
- Mixing tools: To mix your thinset and other compounds properly. A drill with a paddle mixer works well.
- PPE (Personal Protective Equipment): Safety glasses, gloves, dust mask, and ear protection for when using power tools.
Quick rule: Having the right tools ensures your job is done safely and correctly the first time around.
Material specs and compatibility
Choosing the right materials is crucial for a successful tile installation. Here’s how to check your products’ datasheets and match them to your slab conditions.
- Thinset: Check if it’s Portland cement-based or modified. Modified thinsets are better for heavy tiles or areas with high moisture.
- Thinset class: Make sure it matches the tile you’re using. The class number should be equal to or higher than your tile’s rating.
- Membrane type: Choose an uncoupling membrane if your slab is cracked or has movement. For most other cases, a liquid-applied waterproofing will do.
- Membrane thickness: Follow the manufacturer’s recommendations for proper coverage and protection.
- Thinset coverage: Calculate how much you’ll need based on the area of your floor and the recommended coverage rate.
- Tile size: Check if your chosen tile size is compatible with your underlayment. Some membranes are designed for specific tile sizes.
- Tile material: Ensure your thinset and membrane are compatible with the type of tile you’re using (ceramic, porcelain, natural stone, etc.).
- Adhesive setting time: Check how long it takes for the adhesive to set. This will affect when you can grout your tiles.
Quick rule: Always follow manufacturer’s guidelines and choose products that are compatible with each other and suitable for your specific job conditions.
Common Mistakes and How to Avoid Them
Skipping moisture tests or relying on visual checks alone can lead to hidden problems. Improper thinset open time or inconsistent mixing can ruin adhesion. Inadequate flatness prep leaves high spots and lippage that are hard to fix later. Wrong membrane orientation or missing overlaps can compromise a waterproofing layer.
Prevent these issues by following the manufacturer’s installation steps closely and verifying specs on labels. Double-check surface prep, thickness requirements, and curing guidance. When in doubt, pause and consult product instructions or local codes before continuing.
Errors in bonding and setting
These are common mistakes to avoid when installing tile on a concrete slab.
- Improper priming: Skipping primer can lead to poor adhesion. Use a suitable primer for your thinset.
- Non-recommended thinset: Using the wrong type of thinset can cause bond failure. Always follow manufacturer’s recommendations.
- Poor trowel technique: Incorrect trowel usage can result in insufficient coverage and weak bonding. Use the right trowel size and technique for your chosen thinset.
- Insufficient open time: Not allowing enough time for thinset to set before installing tile can lead to bond failure. Follow the manufacturer’s recommended open time.
Proper priming, using recommended products, correct trowel technique, and respecting open times are key to a successful installation.
Overlooking moisture and vapor issues
Ignoring moisture and vapor drive can lead to serious problems in your tile installation. Here’s why:
Moisture: Rising moisture can cause tiles to lift, leading to bond failure and potential mold growth.
To mitigate this, ensure your concrete slab is properly cured before tiling (at least 28 days) and consider using a moisture mitigation membrane if necessary.
Vapor drive: Vapor pressure can push moisture through the tile and grout, leading to efflorescence and potential damage.
Proper ventilation and using vapor retarder membranes can help prevent these issues. Always consider your specific environment’s needs when choosing underlayments and membranes.
Cost, Time, and When to Call a Professional
Project duration and cost depend on slab condition, chosen underlayment, and the area to cover. Unexpected subfloor issues or moisture mitigation needs can extend timelines. For simple installs on a well-prepared slab, most homeowners can manage the basics.
Consider a specialist if you encounter persistent moisture, structural concerns, or multiple failure signs. Involve a structural engineer or waterproofing contractor if the situation requires professional assessment or complex systems. Use product labels and local requirements to decide when DIY ends and professional help begins.
Estimating time and complexity
First off, don’t rush. Concrete work ain’t like painting a wall. It needs time to set right.
Patching is quickest – figure a day or two per small patch. But remember, prep’s half the job. That means cleaning, chipping out, and checking base compaction. Don’t skimp on this.
Leveling takes longer. You’re looking at a week or more for a decent-sized area. It’s not just pouring and done. You’ve got to screed, bullfloat, and power trowel. And that’s before edging and finishing.
Installing a membrane? That’s another day or two on top. And don’t forget, you’ll need time for the concrete to cure before tiling.
Tiling depends on size and complexity. Simple slabs might take a weekend. But if it’s intricate patterns or big pieces, double that.
Now, permits and inspections. That’s a whole ‘nother ball game. Check local rules. Some places you can do it all yourself, others you need a pro for the permit. Inspections? Figure a week or two between pours.
Red flags requiring professional assessment
If you’re seeing any of these signs, it’s time to call in a pro. Don’t wait, as they could indicate serious issues:
Active water leaks. If you’ve got standing water or damp spots that won’t dry out, there might be a leak. Check your plumbing and drainage, but if the problem persists, get a pro to assess.
Significant slab movement. If your concrete is cracking or moving significantly, it could be due to settlement issues or other problems that need professional attention. Don’t ignore it; get it checked out.
Structural cracks. Cracks wider than a hairline (1/8 inch) or running diagonally could indicate structural issues. If you see these, don’t wait – call a pro immediately.
Large, persistent moisture readings. If your moisture meter is showing high readings in the same spot over time, it’s not just a surface issue. Get a professional to take a look and determine the cause.
Visual Checkpoints and Final Qa Before Tiling
Do a final flatness check and ensure there are no arches or humps in the surface. Confirm moisture levels and that any membranes or leveling compounds are cured per instructions. Check seam treatments and confirm you can perform an adhesion test if required.
Also verify that the substrate is clean, dry, and free of laitance or loose debris. Ensure the underlayment is correctly installed with consistent thickness in line with product guidance. Use the manufacturer instructions and local rules to confirm you are ready for tile installation.
Flatness and Slope Validation
Before you start tiling, use this checklist to ensure your surface is flat and properly sloped for drainage. This will save you from costly rework later on.
- Check Flatness: Use a 4-6ft straight edge (like a level or a long piece of wood) to check the entire area. Look for any high or low spots that could cause tiles to crack or lift.
- Measure Tolerances: Acceptable flatness tolerances vary, but typically it’s 1/8″ in 10ft for residential work. Measure diagonally and across the surface to ensure you’re within these limits.
- Check Leveling Compound: If you’ve used a leveling compound, make sure it’s fully cured before tiling. Check the manufacturer’s instructions to confirm.
- Inspect for Cracks: Look for any cracks in the surface that could compromise your tile installation. Fill and repair as needed.
- Check Slope: Ensure there’s a slight slope (usually 1/4″ per foot) away from walls to facilitate water drainage. Use a level or a long straight edge to verify this.
- Verify Drainage Points: Make sure all drains are clear, unobstructed, and properly sloped for water to flow away from the tiles.
- Avoid Common Mistakes: Don’t ignore small undulations or slight slopes. They can cause big problems later on, like tiles popping off or cracking.
- Re-check After Leveling: Once you’ve leveled the surface, re-do these checks to ensure your work is up to par and no new issues have arisen.
Quick rule: If you can’t fit a dime under the straight edge at any point, your surface isn’t flat enough for tiling. Re-check and re-level as needed.
Adhesion and moisture final checks
Before you start tiling, use this checklist to ensure your surface is ready. Perform these checks after you’ve validated the flatness and slope.
- Spot Bond Test: Apply a small amount of adhesive on the substrate, press a tile onto it, wait for 15-30 minutes, then pull the tile off. Check if the adhesive sticks well to the surface. If not, recheck your primer or consider using an adhesion promoter.
- Moisture Content: Use a moisture meter to check the substrate’s moisture content. It should be below 4% for most tiles. If it’s higher, consider using a moisture barrier membrane or wait until the surface dries out.
- Surface Contamination: Inspect the surface for any dirt, grease, or other contaminants. Wipe clean with a damp cloth if necessary. These can prevent proper adhesion.
- Curing Time: If you’ve recently applied a primer or sealer, ensure they’re fully cured before tiling. Check the product label for specific curing times.
- Tile Back Butter: Before installing tiles, apply adhesive to the back of some tiles (back buttering). This helps distribute the adhesive evenly and ensures better adhesion.
- Adhesive Open Time: Check your adhesive’s open time. This is the time during which you can still work with the adhesive after mixing. Ensure you’re working within this time frame to maintain proper adhesion.
- Tile Absorption: Some tiles absorb moisture from the adhesive, which can weaken it over time. Check your tile’s absorption rate and adjust your installation method accordingly (e.g., use a modified trowel technique).
- Substrate Temperature: Ensure the substrate temperature is within the range specified by your adhesive manufacturer. Typically, this is between 50°F to 90°F (10°C to 32°C).
Quick rule: Always perform these checks before tiling. Skipping them can lead to premature tile failure, costly rework, and potential health hazards due to tiles falling off.
Conclusion
Fixing underlayment right now protects safety, durability, and the look of the tile for years. When you diagnose, choose the right underlayment, and follow a disciplined repair and prep workflow, you lower the risk of cracks, delamination, and moisture ruin.
First, ensure the slab is clean and dry, run a moisture check, look for cracks or bond issues, pick the correct underlayment for your tile and slab, then repair or patch as needed, abrade or skim as required, and seal or prime only where specified, then let it cure or dry before you tile, and finally confirm the surface is solid, flat, and ready according to the project checklist.
Two or three common mistakes to avoid are skipping moisture testing, using the wrong underlayment type for your slab or climate, and rushing through surface preparation. Safety rules are simple: wear eye and skin protection, keep power tools in good condition, test small areas before full application, and never tile over a visibly cracked or damp slab, or over debris or loose coatings.
If you’re unsure about slab condition, underlayment compatibility, or moisture risk, it makes sense to call a professional before you push ahead. But with careful checks, the right materials, and a steady workflow, you’ll finish with a solid, long-lasting tile installation that looks right and wears well. Stay methodical, stay safe, and proceed with confidence.
FAQ
Do I need underlayment for tile on a concrete slab, and how can I tell?
Look for moisture in the slab, previous cracks, and whether the slab is smooth and flat. If there are signs of moisture or unevenness, underlayment or a crack-isolating layer is usually needed. Check the tile manufacturer’s guidance and your local rules for what’s acceptable.
What underlayment options are acceptable for tile on concrete?
Common choices are mortar beds, cement backer boards, and uncoupling or crack-isolation membranes. Use only products labeled for tile on concrete and compatible with your thinset and tile type. Always follow the manufacturer instructions and check labels for moisture tolerance and installation steps.
How should I prep the slab if moisture risk is present or the surface isn’t flat?
If moisture risk exists, address it per the product instructions before laying tile. Grind or grind-and-screed to flatten high spots and fill low spots with an appropriate patch material, then clean all dust and debris. Rinse and dry as required by the underlayment product you choose.
What are the key installation checks to prevent tile failures?
Ensure the underlayment or membrane covers the area as specified, with proper lippage and no voids. Verify compatibility with thinset, allow required curing time, and test moisture if required. Follow the exact steps in the product instructions and inspect for any damage before tiling.