
Introduction
Residential roofing replacement is the process of removing an old roof and installing a new one on a home. Before you lift a shingle, inspect the existing deck, flashing around chimneys and walls, attic insulation, and attic ventilation. Plan for practical steps like budgeting material needs, removing old roofing safely, and choosing underlayment and fasteners appropriate for your climate.
There are home repair programs and loan options that can assist eligible homeowners. Check local guidelines and lender details for eligibility, terms, and what is covered, and talk to a contractor about fixes you can do safely. If you are older or fall into special programs, look into options and what they cover and any requirements you should know about before proceeding.
Key takeaways
- Assess repair versus replacement by age, extent of damage, and leakage history.
- Plan replacement windows with weather, material availability, and contractor lead times.
- Explore home repair programs and eligibility criteria before applying for financing.
- Know loan options for improvements, including HUD Title 1 and rehab-specific products.
- Safety: secure work area, ladder discipline, fall protection, and material handling.
- Vet contractors with clear contracts, warranties, and documented change orders.
- Consider reverse mortgages (HECM) for seniors as financing option.
Table of Contents
- Introduction
- Key takeaways
- When to Replace Vs. Repair
- Planning Your Roofing Replacement
- Financing and Assistance Options
- Cost Breakdown and Estimating
- Safety and Site Management
- Step-by-Step Replacement Process
- Common Problems, Troubleshooting, and Quick Fixes
- Hiring a Contractor: Vetting and Contracts
- Conclusion
- FAQ
When to Replace Vs. Repair
Deciding between repair and replacement starts with evaluating the big picture: age, damage, and how widespread the wear is. If the roof is past its typical service life for its material, that age alone flags replacement as a serious option. Look for granule loss, curling shingles, and frequent leaks that recur after temporary fixes. These can indicate underlying deck or underlayment issues that make targeted repairs unreliable. Consider design factors like ventilation and flashing integrity, which affect how well a small repair will hold up over time.
Assess repair-worthy versus replaceable issues by separating isolated problems from systemic wear. Localized leaks or a few missing shingles may be salvageable with careful repairs, while sagging decking, widespread staining, or multiple leak zones point to more extensive damage. If several roof zones show trouble, or moisture is evident in the attic across different areas, plan for replacement. Use simple decision points like age relative to material life and the number of affected zones to guide urgency, and involve a pro for a thorough inspection when unsure. Prepare for next steps with written estimates and a clear cost-benefit view.
Visual checkpoints and inspection checklist
Before you decide to repair or replace, inspect your roof thoroughly. Use this checklist during a sunny day for best results.
- Exterior: Check shingles, flashing, gutters, and vents from the ground using binoculars if needed.
- Shingles: Look for missing, cracked, or curling pieces. Granule loss indicates wear.
- Flashing: Inspect around chimneys, vents, and skylights. Rust or gaps mean it’s compromised.
- Gutters: Ensure they’re securely attached, with no leaks or separations.
- Vents: Check for proper ventilation to prevent moisture buildup in the attic.
- Interior (attic): Inspect for water stains, mold, or light coming through the roof.
- Ceilings and walls: Look for water spots, peeling paint, or bulging drywall.
- Rafters and trusses: Check for warping, sagging, or visible structural damage.
Quick rule: If you find more than a few issues or extensive damage, consider replacement.
Common signs of failure by roof type
Different roofs show wear and tear in various ways. Here’s what to look for:
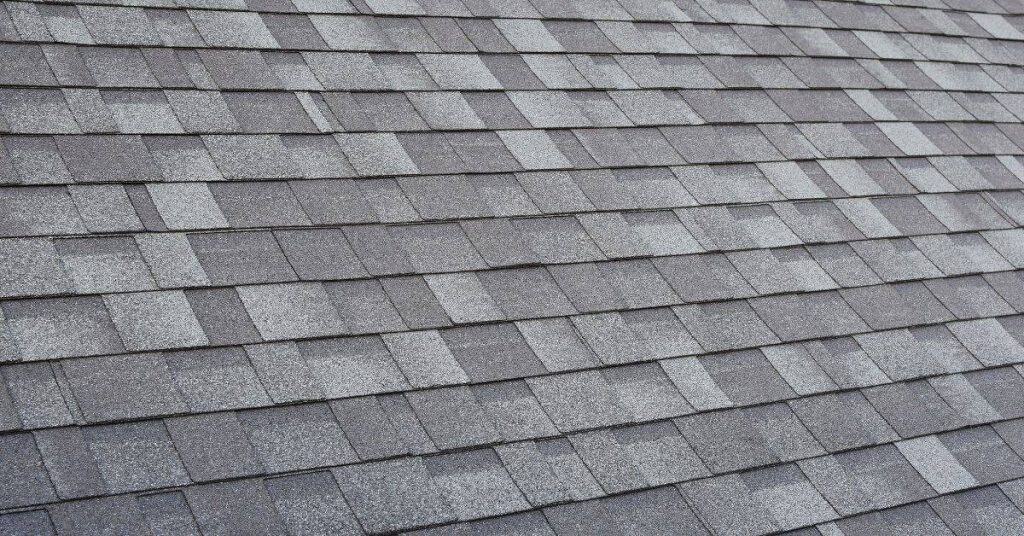
Asphalt shingles: Check for curling, cracking, or missing pieces. Granule loss indicates age and potential leaks.
Metal roofs: Look for rust, pinholes, or damaged panels. Poor installation can lead to leaks around fasteners.
Tile roofs: Inspect for cracked, broken, or missing tiles. Water damage may not be immediately visible but can cause extensive rot over time.
Flat roofs (membrane): Check for blisters, cracks, or separations in the membrane. Standing water indicates poor drainage and potential leaks.
Planning Your Roofing Replacement
Begin with a precise project scope: confirm the roof area, material choices, and whether related fixes like ventilation, insulation, or fascia updates are included. Set expectations for what will be addressed and what will be left for later. Clarify whether flashing, gutters, or soffits are part of the job so you don’t miss critical fixes. Having a written scope helps you compare bids fairly and avoid scope creep later. Gather basic information from manufacturers to verify compatibility with your existing structure.
Next, map out the site and a realistic timeline. Assess weather windows, roof pitch, access constraints, and safety considerations, then translate that into a prep-to-cleanup schedule. Identify required permits, HOA approvals, and local codes; note who is responsible for obtaining them and the documentation you’ll need. Build a budgeting plan that includes materials, labor, disposal, and contingencies, and decide how much involvement you’ll have in the project. Plan laydown areas, debris containment, and interior protections ahead of time so disruptions are minimized.
Permits, codes, and local government services
Before you start your roofing replacement project, it’s crucial to understand the permits required by your local building department. These permits ensure your project meets safety standards and building codes.
Check with your local municipality for a list of required permits. They can also provide guidance on zoning rules and ordinances that might affect your project, such as those imposed by Homeowners Associations (HOAs).
Building inspectors will check your roofing work at various stages to ensure compliance with codes. Contact them early in the planning process to schedule inspections and understand what they’ll be looking for.
Choosing materials and warranties
Selecting the right roofing material is key to a successful, long-lasting replacement. Different materials offer varying lifespans, pros, cons, and costs.
- Asphalt Shingles: Inexpensive, easy to install; look for 20-30 year warranties, avoid thin or low-quality shingles.
- Wood Shakes/Shingles: More expensive, natural look; expect 15-40 year lifespans, avoid high moisture areas without proper ventilation.
- Metal Roofs: Durable, long-lasting (30+ years); consider recycled content and energy efficiency, avoid low-quality metal that can dent easily.
- Tile Roofs: High-end look, very durable; expect 50-100 year lifespans, avoid heavy tiles on weak roof structures.
- Slate Roofs: Most durable (100+ years), high-end appearance; avoid low-quality slate that can break easily, ensure proper underlayment and flashing.
Financing and Assistance Options
Start with private financing options to understand what fits your monthly budget. HELOCs and unsecured personal loans offer flexibility, while credit cards can be convenient for smaller projects or when timing is tight. Each option has trade-offs in terms of interest, repayment terms, and impact on monthly cash flow, so compare these factors against your project size and timeline. Gather quotes and check any prepayment penalties or eligibility criteria before you commit. Use a rough budget that accounts for potential changes in scope and any miscellaneous costs.
Public financing or assistance programs can help with larger upgrades. Look into Federal and state programs that support home repair projects, and verify what qualifies, what documentation is required, and any limitations on project scope. Prepare for the application by organizing income verification, ownership records, and property condition details, then track deadlines and follow up as needed. When weighing options, compare not just upfront cost but long-term financial impact, including insurance implications and potential tax considerations.
HUD Programs and Federal Loan Options
The U.S. Department of Housing and Urban Development (HUD) offers two main programs for homeowners needing roof repairs: Title I and Section 203(k).
Title I: This program provides low-interest loans for home repair, alteration, or improvement. Eligibility depends on your income, credit score, and the condition of your property. Roof replacement is typically covered.
Section 203(k): This is a rehabilitation loan that allows you to finance both the purchase and renovation of a home through a single mortgage. It’s designed for low-to-moderate-income families. Both new and existing homes can be eligible, with roof repair or replacement often being part of the approved work.
Local, State, and Nonprofit Assistance
Many states, counties, and nonprofits offer their own loan programs, grants, or repair services. These can help with roof replacement costs.
To find these resources:
- Contact your state’s housing finance agency or department of community affairs.
- Reach out to local nonprofits specializing in home repair or weatherization.
- Check with your county’s human services or community development office.
Required documentation usually includes: income verification, proof of homeownership, and a detailed description of the needed repairs. Some programs may also consider your credit score and property condition.
Cost Breakdown and Estimating
Frame your comparison around full roof replacement versus partial repairs, and use that as a basis for your estimates. A full replacement has different labor, material, and disposal dynamics than localized fixes, so map out how decisions affect each category. Use a practical rule of thumb to gauge when widespread damage justifies replacing the whole roof rather than patching perforations and re-sealing. Keep in mind that roof size, pitch, and complexity will influence the ultimate cost, so avoid relying on a single number. Focus on a clear breakdown that you can review side-by-side with contractors.
Itemize the cost components so you can see where money goes: materials, labor, disposal, and permits. Compare material options—shingles, underlayment, and flashing—and discuss how durability and warranties affect long-term value. Consider labor factors like crew size and time on site, which shift with pitch, height, and access. Don’t overlook permits, inspections, and any local fees, and plan for waste handling charges and contingencies. When asking for estimates, request itemized quotes and look for consistency across bidders to avoid surprises later.
How contractors estimate and compare bids
When you get bids for your roofing project, expect to see line items for materials, labor, disposal, permits, and sometimes profit margin. Here’s how to understand and compare them:
Materials: This includes shingles, underlayment, flashing, nails, etc. Prices vary by quality and type (asphalt, metal, etc.).
Labor: Labor costs depend on roof size, pitch, complexity, and time needed. A larger, steeper roof with complex features will cost more.
Ask contractors about their crew size, estimated hours, and how they account for safety equipment and scaffolding. Normalize bids by dividing the total price by the number of squares (100 sq. ft.) to compare apples-to-apples.
DIY cost-saving strategies and when not to DIY
To save money, consider these DIY tasks:
Demolition: You can remove old shingles, gutters, and other debris before the pros arrive. Safety tip: Wear gloves, eye protection, and a dust mask.
Permits: Some areas allow homeowners to pull permits themselves. Check local regulations.
However, do not DIY roof installation or repair. Here’s why:
Safety: Roofing is dangerous. Falls are the leading cause of death among roofers. Plus, you’re responsible if something goes wrong.
Warranty: Most manufacturers won’t honor warranties on installations done by non-professionals.
Quality: Pros have the tools, experience, and know-how to do the job right. A botched DIY job can cost more to fix than hiring a pro in the first place.

Safety and Site Management
Safety comes first on every roofing project, so define fall protection requirements and assign responsibilities for setup and inspection. Discuss whether harnesses, lanyards, guardrails, or temporary perimeters are needed based on roof height and slope. Establish rules for weather-related stopping points to protect workers and the building, and set clear signals for pausing work when conditions worsen. Build a plan that covers access, debris containment, and emergency procedures so all crew members know what to do if something goes wrong. Keep a simple checklist handy for daily safety reviews.
Protecting the surroundings is a must to avoid costly collateral damage. Use tarps and edge protectors to guard gutters, landscaping, and siding, and create a contained waste plan to minimize on-ground debris. Verify that labor and material handling follows local rules, and ensure all required permits and insurance are up to date. Document training, PPE usage, and communications so your team stays coordinated and compliant throughout the job.
On-site safety equipment and protocols
Safety’s our top priority. Here’s what you need to know about personal protective gear, ladder use, harness basics, and daily cleanup.
- Hard Hat: Protects against falling debris. $10-$20.
- Ear Protection: Blocks loud nail guns and saws. $5-$15 for a pair.
- Eye Protection: Shields from dust, dirt, and small particles. $3-$10 per pair.
- Harness: Secures you to the roof. Adjustable, with lanyard. Rent or buy: $50-$200.
- Ladders: Ensure they’re secure and extend at least 3 feet above the roofline. Inspect before use. $100-$500.
Insurance, liability, and warranties
Understanding insurance and warranties is crucial to protect your investment and avoid unexpected costs.
First, check your homeowner’s policy. It may cover damage during construction. Review deductibles and limits.
Next, ensure your contractor has liability coverage. This protects you if they cause property damage or injury. Ask for a certificate of insurance.
Lastly, understand warranties. Material warranties cover defects (5-30 years). Labor warranties cover workmanship (1-2 years). Some contractors offer combined warranties.
Step-by-Step Replacement Process
Outline the full sequence from teardown to final inspection, so you know what to expect at each stage. Start with debris removal and any deck repairs, then move to underlayment installation, roofing covering, flashing, venting, and drip edge placement. Finish with a thorough inspection and any required touch-ups. Provide a practical timeline that accounts for weather and material-specific delays, and note how steps may differ for asphalt, metal, tile, or flat roofs. A clear sequence helps keep crews aligned and minimizes miscommunications on site.
Include a detailed tools and materials list, along with common joinery tactics, nailing patterns, and drainage checks. Address safety protocols, ladder setup, PPE, and the required inspections at code milestones. Add quality checks and handoffs between crews so you can track progress and catch issues early. End with a concise post-installation walkthrough to verify sealing, drainage, and overall workmanship before leaving site.
Step-by-Step Process
This section guides you through the practical, DIY-friendly steps of replacing your residential roof.
- Preparation and Safety Checks:
– Secure necessary permits.
– Set up fall protection and ladders safely.
– Gather tools and materials. - Tear-off and Deck Inspection:
– Remove old roofing carefully.
– Inspect decking for damage or rot.
– Repair or replace sheathing if needed. - Main Roof Installation:
– Install underlayment according to material type.
– Lay out shingles/metal/tiles properly.
– Ensure correct nailing patterns and fasteners. - Flashing, Ventilation, and Drip Edge:
– Install flashing around chimneys, vents, and skylights.
– Ensure proper ventilation for your roof design.
– Attach drip edge to protect fascia and eaves. - Final Inspection and Cleanup:
– Conduct a thorough walkthrough with the inspector.
– Address any issues found during inspection.
– Clean up debris and dispose of materials properly.
Tear-off and Deck Inspection/Repairs
Use this checklist when removing old roofing to inspect the decking beneath.
- Remove old nails: Prevents damage to new materials and ensures a flat surface.
– Use a pry bar or nail puller. - Check for rot or damage: Identify any weak spots in the decking.
– Tap with a hammer; soft spots indicate rot. - Inspect structural components: Ensure no major issues need addressing.
– Look for warping, sagging, or missing pieces. - Check for pests: Pests can cause unseen damage.
– Look for signs of infestation, like droppings or nests. - Measure and mark for replacement: If repairs are needed, measure and mark the areas.
– Use chalk lines to ensure straight cuts. - Replace sheathing if necessary: Rotten or damaged sheathing needs replacing.
– Use 7/16″ or 1/2″ OSB or plywood for new sheathing. - Inspect rafters and trusses: Ensure they’re secure and in good condition.
– Look for cracks, gaps, or signs of movement. - Check attic ventilation: Proper ventilation prevents moisture buildup.
– Ensure there’s adequate intake and exhaust vents.
Quick rule: Always replace damaged sheathing to maintain your roof’s integrity.
Installation, Flashing, Ventilation, and Final Inspection
Use this checklist when installing new roofing to ensure a proper job.
- Underlayment installation: Protects your decking from moisture.
– Use 15-lb or 30-lb felt paper for asphalt roofs.
– Consider synthetic underlayment for better protection. - Flashing around chimneys: Prevents water intrusion.
– Install step flashing and counter flashing properly. - Ventilation needs: Proper ventilation extends your roof’s life.
– Ensure you have adequate intake and exhaust vents.
– Consider installing ridge vent or gable fans. - Shingle/metal installation: Lay out materials correctly.
– Start at the bottom left corner, working up and to the right.
– Follow manufacturer’s guidelines for nailing patterns. - Drip edge installation: Protects fascia and eaves from water damage.
– Install along eaves and rakes; use appropriate fasteners. - Valley flashing: Prevents water buildup in valleys.
– Use valley metal or install shingles properly to direct water flow. - Ridge capping: Protects ridges from water intrusion.
– Install ridge cap shingles according to manufacturer’s guidelines. - Final walkthrough: Ensure everything is installed correctly.
– Check for any missed spots, improper installation, or damage.
Quick rule: Always follow manufacturer’s guidelines for proper installation and warranties.
Common Problems, Troubleshooting, and Quick Fixes
Identify the most common post-install issues and describe how they typically appear on residential roofs. Look for blow-offs, slow leaks, nail pops, and improper or deteriorated flashing, and explain how each symptom manifests in the field. Translate these observations into a diagnostic checklist that you can use during inspections, using visual cues like curling shingles, missed granules, and gaps in flashing. Include moisture tests and timing considerations so you can distinguish between weather-driven leaks and persistent failures. This helps you decide when a DIY fix is feasible or when to call in the installer.
Offer practical, safe troubleshooting steps for DIYers, including temporary remedies and inspection techniques from the ground or from a safe vantage point on the roof. Clarify the difference between quick fixes and permanent repairs, and explain when resealing, re-nailing, or re-flashing is appropriate versus a full replacement. Provide guidance on warranty coverage and what documentation to gather when contacting the installer, so you know what to expect for coverage or future claims.
Temporary repairs and emergency patching
When you spot a leak or wind damage, quick action can prevent further harm. Here’s how to temporarily fix common issues:
Leaks: Use roofing tar or asphalt cement to seal small holes or cracks. Apply it with a putty knife, pressing firmly into the damaged area.
Wind damage: For blown-off shingles, nail them back in place temporarily using galvanized nails. If a shingle is missing, cover the hole with a piece of plywood until you can make permanent repairs.
Long-term maintenance to prevent future replacement
Maintaining your roof keeps it in top shape and extends its lifespan. Here’s a simple maintenance plan:
Inspect annually: Check your roof once a year, preferably after winter’s harsh weather. Look for damaged or missing shingles, gaps in flashing, and signs of moisture.
Clean gutters: Clogged gutters can cause water to back up under shingles, leading to leaks. Clean them out at least twice a year.
Trim trees: Overhanging branches can damage your roof during storms. Trim them back regularly to keep your roof safe.
Hiring a Contractor: Vetting and Contracts
Start with a solid check of licensing and insurance. Confirm the exact license type, active status, and whether workers’ compensation and general liability coverage are in place. It’s worth verifying their policy limits and getting a certificate of insurance with you named as an insured party. This step helps protect you from liability and ensures the crew is covered for on-site incidents. Take notes and keep copies of everything for your records during the project.
Build a robust references and portfolio review into your process, and look for projects similar in scope to yours. Ask for contactable former clients and request photos or site visits to gauge workmanship. Watch for red flags such as high-pressure tactics or vague estimates, and insist on a written contract that clearly defines scope, materials, timeline, payments, and change orders. Include permit responsibilities, lien waivers, warranties, and post-install cleanup guarantees to protect your interests.
Questions to ask and documents to obtain
Before hiring, grill your contractor with these questions. They should provide clear answers and relevant paperwork.
Scope: Ask about the exact work they’ll do, materials they’ll use, and any additional services like disposal or cleanup.
Timeline: Inquire about start date, duration, and completion date. Also ask about potential weather delays.
Change Orders: Understand their process for change orders. Ask how they’re documented and billed.
Cleanup & Disposal: Ensure they’ll leave your site clean and handle waste disposal responsibly.
Lien Releases: Confirm they’ll provide lien releases once paid in full to protect your property from mechanic’s liens.
Warranty Paperwork: Ask for a detailed warranty document outlining what’s covered, duration, and any exclusions.
Avoiding common hiring mistakes
Steer clear of these pitfalls to protect your investment and ensure a successful roof replacement.
- Full Upfront Payment: Never pay the full amount before work begins. Stick to progress payments tied to completed milestones.
- Verbal-Only Agreements: Insist on a written contract outlining all aspects of the project.
- Choosing Lowest Bid Without References: The lowest bid isn’t always best. Always check references and verify past work.
- Ignoring Red Flags: Trust your instincts. If something feels off, it probably is. Don’t ignore warning signs like pressure tactics or vague estimates.
Remember, a good contractor will be transparent, responsive, and eager to provide references and examples of their work.
Conclusion
Handle this like a job site: plan, verify, and move with purpose. Prioritize safety, protect the home, and aim for a roofing upgrade that lasts through the seasons.
Check in sequence as you go: confirm the decision to replace or repair based on actual condition, finalize a realistic plan and budget, map financing if needed, estimate materials and waste, review safety protocols, follow the step-by-step process you laid out, anticipate common problems, test fixes in a small area first, and lock in a solid contractor if you decide to hire.
Common mistakes to avoid include rushing the inspection, skipping a proper shutoff and fall protection, and using improper fasteners or tools. Safety first means lose the ego, double-check every screw and seam, and treat any ladder, roof edge, or weather risk as non-negotiable. don’t cut corners—if a problem looks deep, or you’re unsure about flashing, ventilation, or structural support, pause and reassess rather than forcing a quick fix.
If you’ve confirmed the scope, budget, and safety plan and you’re still unsure about key steps or pricing, bring in a qualified professional rather than pressing on. A contractor can vet the roof’s structure, ensure proper flashing and underlayment, and help you avoid costly mistakes. Stay disciplined, stay safe, and you’ll finish with a durable roof and real peace of mind.
FAQ
What home repair programs can help with roofing and who qualifies?
Look for local or state programs that offer grants or low-interest loans for home repairs. Eligibility varies by income, age, and whether the home is your primary residence. Check the program label or contact the agency to confirm what counts as a “roof” repair and what documentation you’ll need.
What kinds of loans exist for home improvement and how do I choose for roofing?
Common options are unsecured personal loans, home improvement loans, and rehab loans. Compare interest, repayment terms, and whether the loan is tied to your home. Read the lender’s instructions and check what qualifies as eligible improvement work for roofing.
What is the HUD Title 1 Property Improvement Loan Program and how does it apply to roof work?
HUD Title 1 is marketed as a way to finance home improvements. It can cover roofing in some cases, but terms and availability depend on the lender and local rules. If you’re considering it, verify with the lender and read the program details and requirements on the official materials.
Can seniors use reverse mortgages for roof replacement and what should I watch out for?
Reverse mortgages can provide funds for home improvements, but they come with fees and long-term implications on your estate. Make sure you understand what happens if you or a co-borrower die or move out. Always review the loan disclosures and talk to a qualified counselor before deciding.