
Introduction
Under-slab plumbing sleeves are protective conduits that allow pipes to move slightly under a concrete slab to prevent leaks. They give a controlled path for movement so joints don’t crack or rub on sharp edges. This intro will lay out the practical ideas you’ll need to know when planning or checking sleeves on a DIY project.
We’ll explain what slab leaks are in plain terms and why movement under the slab matters, especially when soil expands, conditions change, or pipes aren’t installed with enough clearance. You’ll get a straightforward look at warning signs to watch for and practical options for fixing leaks, including trenchless ideas or re-routing under the slab, while you know what to check on labels and instructions for any products you use. Think of this as a hands-on guide to understanding sleeves, movement, and when to call in a pro for the tougher parts of the job.
Key takeaways
- Slab leaks are water line breaches under a concrete slab risking moisture.
- Causes include soil movement, abrasion, improper installation; sleeves accommodate movement.
- Terminate work if leak signs appear; shutoff valves and power off first.
- Use sleeves with flexible joints and tested sealants to absorb settling.
- Place sleeves centered, guard edges, and avoid concrete abrasion over sleeves.
- Pressure test lines after pour and inspect for movement-induced leaks.
- Schedule periodic inspections and corrosion checks to catch wear before failure.
Table of Contents
- Introduction
- Key takeaways
- What Under-Slab Plumbing Sleeves Are and Why They Matter
- Why Leaving Movement Is Essential Under Slabs
- Common Causes of Slab Leaks to Avoid with Sleeves
- Design Principles for Sleeves That Allow Movement Without Leaking
- Materials, Specs, and Tools — Selecting the Right Sleeve System
- Step-by-Step Installation Best Practices to Leave Movement Without Leaks
- Visual Checkpoints, Testing, and Commissioning to Catch Problems Early
- Costs, Contractor Selection, and Long-Term Maintenance
- Conclusion
- FAQ
What Under-Slab Plumbing Sleeves Are and Why They Matter
Plumbing sleeves are hollow channels that run through concrete slabs to protect pipes as they pass from one side to the other. They create a dedicated space that shields pipes from abrasive concrete and soil contact.
Sleeves are designed to accommodate movement from settlement, temperature changes, and soil shifts, which helps prevent stress on joints and possible leaks. They should be selected and installed with proper clearance around pipes and, when needed, extended above grade to keep the sleeve functional and accessible.
Sleeve definitions and common forms
Plumbing sleeves are protective casings that encase pipes where they pass through concrete slabs. They come in various types to suit different applications:
Rigid sleeves are typically made of plastic or metal, providing a sturdy barrier against soil and concrete. They’re often used for larger pipes and in stable soil conditions.
Flexible sleeves, like those with bellows or concertina-like sections, allow for more movement. These are ideal where there’s potential settlement or thermal expansion.
Conduit-style sleeves are usually made of metal and are designed to protect smaller pipes or electrical conduit. Always verify the suitability of a sleeve type for buried applications.
How sleeves reduce leak risk
Sleeves minimize leaks by physically separating pipes from abrasive concrete and soil. Here’s how they work:
Firstly, separation: Sleeves create a gap between the pipe and surrounding materials, preventing direct contact that could cause damage or wear.
Secondly, movement allowance: Sleeves accommodate pipe movement due to settlement, thermal expansion, or soil shifts. This prevents stress on joints and potential leaks.
Lastly, sleeves protect pipes from corrosion and abrasion. By isolating pipes, they reduce the risk of damage that could lead to leaks over time.
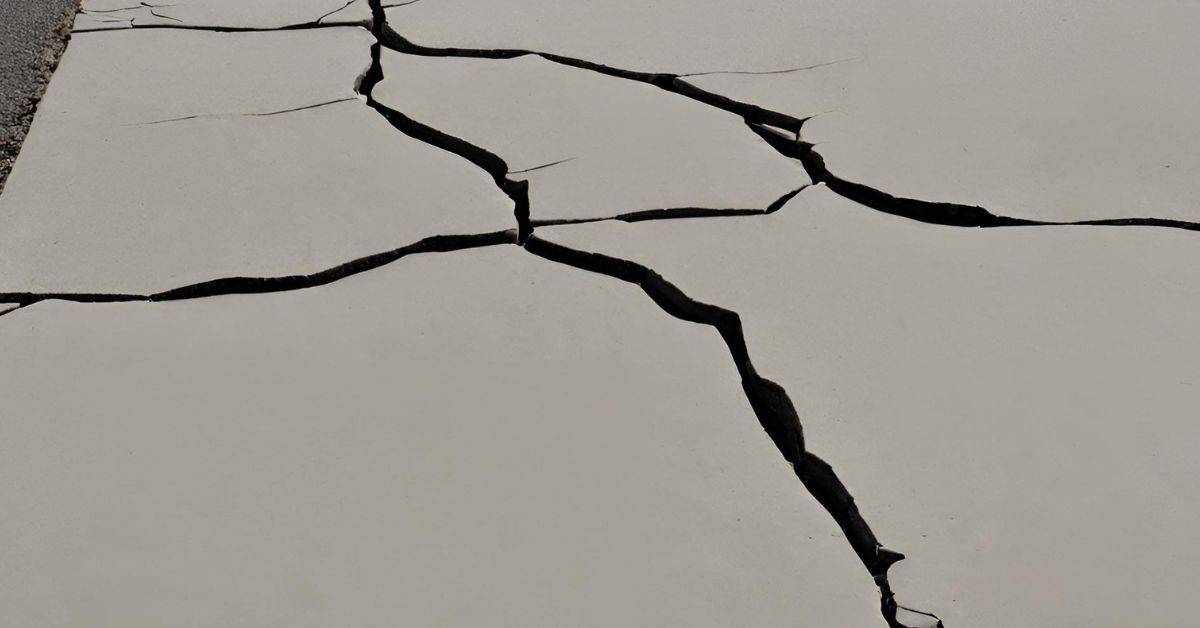
Why Leaving Movement Is Essential Under Slabs
Under slabs, movement comes from soil settlement, expansion and contraction, building loading, and vibrations. Rigid connections without movement relief can crack joints and lead to leaks over time.
The design goal is to tolerate movement rather than block it entirely. Sleeves, flexible joints, and properly placed connections help minimize stress on pipes and fittings during cycles of movement.
Soil and foundation movement drivers
The ground under your slab isn’t static. It moves, and understanding why is key to protecting your under-slab plumbing.
Expansive clays are a common culprit. When they get wet, they swell, pushing up on your slab. When they dry out, they shrink, pulling away from the slab. This causes lateral and vertical shifts that can stress and damage pipes.
Moisture changes aren’t the only driver. Frost heave in colder climates can also cause upward movement. Nearby excavation can create voids that collapse, leading to settlement and downward movement of your slab.
Thermal expansion and operational movement
Temperature changes cause pipes to expand and contract. This is especially true for under-slab plumbing, where pipes are surrounded by concrete that doesn’t stretch.
In the summer heat, pipes can expand significantly. In the winter cold, they contract. If you don’t account for this movement, pipes can crack or rupture at slab penetrations.
Pressure cycles in your plumbing system also cause operational movement. Water hammer (when water suddenly stops flowing, like when you turn off a faucet) can create shockwaves that stress pipes and joints.
Common Causes of Slab Leaks to Avoid with Sleeves
Sleeves are meant to stop wear from soil and concrete, reduce corrosion exposure, and prevent leaks caused by poor installation. They address abrasion, chemical exposure, and misalignment that can create leak paths.
Common installation errors include wrong sleeve size or alignment, missing end seals, inadequate bore cleanliness, and insufficient clearance for concrete flow. Construction-phase risks like impact, congestion around rebar, and improper handling can damage sleeves and compromise the bore.
Abrasion, corrosion, and chemistry
The soil under your slab isn’t just dirt. It’s a mix of minerals, moisture, and chemicals that can wear away at sleeves over time. Concrete itself is alkaline, which can corrode metal sleeves. That’s why barrier materials like HDPE are crucial. They resist abrasion and corrosion, keeping your pipes safe.
Concrete also shrinks as it cures, pulling on any pipes in its path. Without proper sleeves, this movement can cause leaks at pipe joints. So, using the right sleeve material and ensuring they’re long enough to accommodate movement is vital.
Installation errors and mechanical damage
Proper installation is key to preventing leaks. Here are some common mistakes to avoid:
- Pinched pipes: Ensure sleeves have enough clearance around them for concrete flow. Too little space can cause the sleeve to be crushed, damaging the pipe.
- Incorrect sleeve alignment: Sleeves must align with the pipe’s direction to allow for thermal expansion and contraction without stressing the joint.
- Insufficient clearance: Inadequate space around sleeves can lead to concrete pressure against them, causing damage or leaks.
- Failing to seal ends: Uncapped sleeve ends can let in debris and moisture, leading to blockages or corrosion.
Regularly inspect your installation during the construction phase to catch and correct any errors early. It’s much cheaper to fix mistakes before concrete is poured.
Design Principles for Sleeves That Allow Movement Without Leaking
The core design goal is to maintain a continuous annular space around the sleeve so the pipe can move without the surrounding concrete restricting it. This space, along with proper wall thickness and alignment, helps isolate movement from the pipe.
Proper exterior support and robust joints enable axial and lateral movement without leaks. Selections like gasketed or flexible connections and corrosion-resistant materials are part of a durable, movement-tolerant system.
Required clearances and annular space strategy
The key to a successful sleeve installation is ensuring there’s enough room around it for movement. This is called the annular space. Here’s how to get it right:
First, size your sleeves so they’re bigger than your pipes. You’ll need at least 2 inches of clearance on all sides. But check with the manufacturer or local code – some may require more.
This gap lets your pipe move without transferring stress to the concrete. It also gives you room for non-rigid sealants or backfill that can absorb movement.
Alignment, slope, and support outside the slab
Proper alignment and support are crucial to keep your sleeves working as they should. Here’s how:
Align your sleeves with the run of your pipe. This helps prevent binding and ensures smooth flow. Use reference lines or laser guides to maintain this alignment during installation.
Slope your sleeves where needed for proper drainage. A gentle slope (around 1/4 inch per foot) is usually sufficient. Check vertical and horizontal consistency before pouring concrete.
Support your sleeves on both sides of the slab. This prevents punctures or bending due to settlement or rotation during pouring. Use anchors, bracing, and vibration control measures as needed.
Transition details at fittings and valves
Special attention is required where pipes transition to fittings, meters, or valves. These areas are prone to stress concentrations:
Add extra movement allowance here – increase the annular space or use flexible connectors. This absorbs expansion and contraction without putting strain on the sleeve.
Check local codes for specific requirements at these transitions. Some may mandate additional protection or support.
Regularly inspect these areas during and after installation to ensure they’re functioning as expected under load.
Materials, Specs, and Tools — Selecting the Right Sleeve System
Choose sleeve materials that work well with the pipe materials you’re using and resist soil moisture and concrete exposure. Material options should be checked against compatibility and long-term durability in buried conditions.
Verify datasheets for wall thickness, tolerances, and movement allowances. Also confirm that local codes and standards support the chosen sleeve system before purchase and installation.
Material compatibility and corrosion resistance
The chemistry between sleeves and pipes is crucial for longevity. Wrong materials can cause cracking, staining, and weak bonds.
- PVC Sleeves with PVC Pipes: Use together to avoid chemical incompatibilities. Look for sleeves rated for high pressure and temperature. Avoid using in areas with extreme temperatures or chemicals.
- HDPE Sleeves with PE Pipes: Both are resistant to corrosion, chemicals, and abrasion. Specify sleeves with high shear strength and impact resistance. Protect from UV exposure.
- Corrosion-Resistant Metal Sleeves (galvanized or stainless): Use with steel, copper, or PE pipes. Ensure sleeves have a protective coating compatible with concrete mixes. Avoid in areas with high soil acidity.
- CPVC Pipes with PVC or CPVC Sleeves: Both are resistant to corrosion and chemicals. Specify sleeves rated for high pressure and temperature. Avoid using in areas with extreme temperatures.
- Copper Pipes with Corrosion-Resistant Metal Sleeves: Use together to prevent chemical incompatibilities. Ensure sleeves have a protective coating compatible with concrete mixes. Avoid in areas with high soil acidity or chemicals.
Tools and materials checklist for installers
Use this checklist before starting the installation to ensure you have everything needed.
- Sleeves: Verify sizes, lengths, and quantities match your plans. Check manufacturer recommendations for installation.
- Supports: Have enough to secure sleeves in place during concrete pouring. Check manufacturer recommendations for spacing.
- Backer materials: Ensure you have the right materials (e.g., foam, plastic) to protect sleeves from concrete and support them.
- Sealants: Have sealants suitable for your pipe material to prevent leaks at sleeve-pipe joints.
- Grout or compressible fillers: Ensure you have materials to fill the annular space around pipes after installation.
- Protective coatings: Have coatings compatible with concrete mixes and sleeves to protect from corrosion and UV exposure.
- Cutting tools: Verify you have tools (e.g., saws, knives) suitable for cutting sleeves and pipes.
- Fastener tools: Ensure you have tools needed to secure supports and sleeves in place.
- Tape measure: Use to verify sleeve sizes and lengths match your plans. Check manufacturer recommendations for installation.
- Level: Use to ensure sleeves are level and properly aligned before concrete pouring.
Quick rule: Always check manufacturer recommendations before purchasing tools and materials.
Size, pressure, and code considerations
Sleeve and pipe sizes must match your plans and local codes. Pressure class should also be confirmed with manufacturer specs.
Check local plumbing codes for minimum sleeve wall thickness to ensure they can withstand soil loads and slab pressures. Also, confirm annular gap tolerances to prevent excessive movement or concrete intrusion.
Verify that sleeves are compatible with your cement/concrete mixes and can withstand exposure to them without compromising their integrity. Check manufacturer datasheets for this information.
Always check local codes and standards (ASTM/UL/CSA references) for sleeve systems before purchasing. Required test results, such as mismatch, leak, and freeze-thaw resistance, should be verified with the manufacturer or on product datasheets.
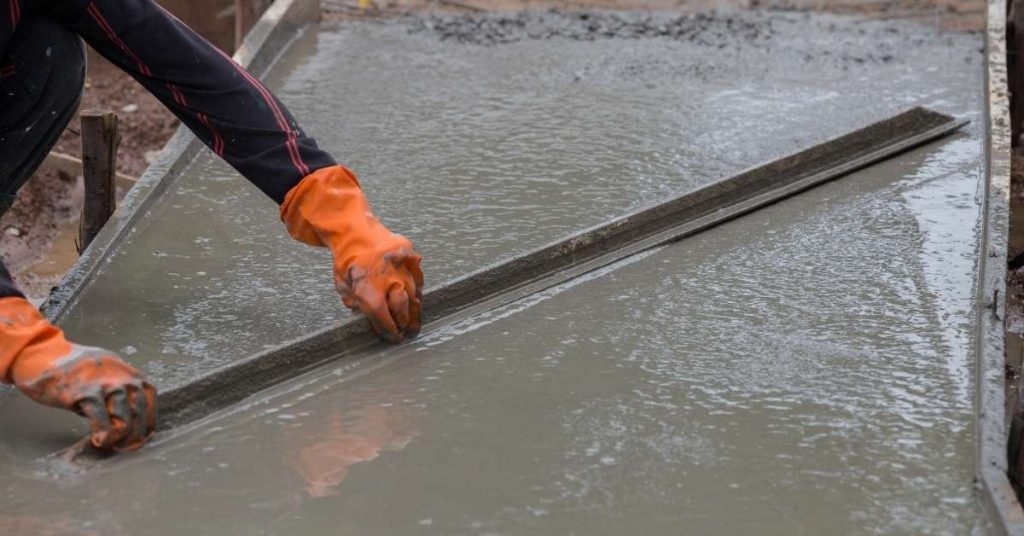
Step-by-Step Installation Best Practices to Leave Movement Without Leaks
Start with planning the sleeve sizes and placement, accounting for soil conditions and expected movement. Confirm offsets and clearances so the sleeve remains true through the pour.
During the pour, keep sleeves from direct contact with fresh concrete and coordinate pour sequencing to avoid displacing sleeves. Use appropriate sealing approaches that tolerate movement without creating a fixed barrier.
Step-by-Step Installation Process
Follow these practical steps to install under-slab plumbing sleeves that allow for movement without leaks.
- Prepare the site: Clear debris, ensure safety, and check weather conditions.
- Check and mark sleeve locations: Verify they align with pipe routes and maintain clearances from rebar.
- Position sleeves accurately: Use temporary supports or shims to keep them true and prevent rotation.
- Protect sleeves during pour: Cover them with plastic sheeting, secure them, and ensure concrete delivery won’t displace them.
- Inspect after curing: Check sleeve alignment, end finish, and seal integrity before backfilling.
Pre-installation layout and inspection
Use this checklist before starting installation to ensure everything is in order.
- Check soil conditions: Ensure subgrade is stable, compacted, and free of organic matter.
- Mark penetration points: Clearly mark sleeve locations on the forms or ground using a marker or paint.
- Verify reinforcement layout: Confirm sleeves won’t interfere with rebar and maintain clearances.
- Check embedded items: Ensure no conflicts with other utilities, anchors, or post-tensioning cables.
- Confirm sleeve sizes: Double-check they match the pipe sizes and can accommodate anticipated movement.
- Plan expansion joints: Locate them away from sleeves to avoid stress concentrations.
Quick rule: Always inspect before you install. It saves time and prevents costly mistakes.
Installing sleeves and setting pipe through slab
Accurately position sleeves to prevent leaks and maintain clearances for movement.
Use a level or laser level to ensure sleeves are plumb. Maintain required clearance from rebar using spacers or shims.
Secure sleeves temporarily with nails, screws, or clamps to prevent displacement during concrete placement. Protect pipe ends with tape or caps to keep them clean and free of debris.
Note: If sleeves are too heavy or large for one person to handle safely, consider using a helper or mechanical aid like a hoist.
Sealing, backfill, and joint details that permit movement
Use appropriate sealing methods to allow for slab movement without leaks.
Apply compressible backer rod or flexible sealant around sleeves before pouring concrete. Use non-rigid grout for filling annular spaces.
For transitions at fittings and valves, use expansion couplings or watertight boots that can accommodate movement. Always test compatibility with pipe and sleeve materials to prevent corrosion or damage.
Quick tip: When backfilling, ensure the material is well-compacted around sleeves to provide proper support and prevent settlement.
Visual Checkpoints, Testing, and Commissioning to Catch Problems Early
Before the pour, verify sleeve placement, alignment with room lines, and clean, dry surfaces. Ensure protective caps and bore visibility are in place for future access.
After pouring, perform simple leak checks and visually confirm sleeve integrity. Document measurements and prepare a commissioning checklist with responsible parties and dates.
Pre-pour and post-pour visual checkpoints
Before pouring concrete and after it has cured, follow this checklist to ensure your under-slab plumbing sleeves are in good shape.
- Sleeve placement: Verify sleeves align with wall/floor lines. If not, they may cause future plumbing issues.
- Protective caps: Confirm all sleeves have protective caps to prevent concrete intrusion during the pour.
- Sleeve depth: Check sleeves are at the correct depth. Too shallow or deep can lead to leaks or pipe damage.
- Frustums/collars: Ensure any required frustums or collars are present and properly installed for a good seal.
- Conduit separations: Confirm conduits are separated properly to prevent concrete intrusion during the pour.
- Surface condition: Check surfaces are clean and dry. Concrete sticks better to clean surfaces.
- Sleeve stability: During the pour, monitor sleeve stability with forms and bracing. Unstable sleeves can shift and cause leaks.
- Concrete surround: Ensure concrete surrounds but does not crush or collapse the sleeve during the pour.
- Deviations: Note any deviations in real-time for later correction. Ignoring these may lead to costly repairs.
- Post-pour plumb and centered: After curing, confirm sleeves are plumb and centered. If not, it could indicate settlement or other issues.
- Inspect for damage: Check for chips, dents, or deformities that could cause leaks or pipe damage.
- No blockage: Verify no concrete blockage or sealing material obstructs the sleeve. Blockages prevent proper plumbing installation.
- Document exposure: Record sleeve exposure for future access. Without this, you may struggle to find sleeves when needed.
Quick rule: Regular visual checks help catch problems early, saving time and money in the long run.
Functional testing and leak detection
Before commissioning your plumbing system, follow this checklist to test for leaks and ensure everything is functioning properly.
- Air pressure hold test: Conduct an air pressure hold test on the entire system. This helps identify any leaks in the pipes or sleeves.
- Low-pressure water test: Perform a low-pressure water test to check for leaks and ensure all joints are sealed properly.
- Soap-test on joints: Use soap suds on joint connections to visually inspect for any air leaks. Air bubbles indicate a leak is present.
- Listen for leaks: Listen for any signs of water escaping or air hissing, which could indicate a leak.
- Tracer methods: Use tracer methods like food coloring or dye tablets to help locate hard-to-find leaks in buried pipes.
- Target pressures and hold times: Specify target pressures and hold times for your tests. These should be based on the system’s design pressure and manufacturer recommendations.
- Acceptable leakage criteria: Establish clear criteria for acceptable leakage. This helps you know when to stop testing or take corrective action.
- Isolate sections: If a test fails, isolate the affected section for further investigation and repair. Ignoring leaks can lead to costly damage over time.
- Document tests: Record all test results, including pressures used, hold times, and any observed leakage. This is crucial for future reference and troubleshooting.
Quick rule: Regular testing helps ensure your plumbing system is functioning properly and can help catch leaks early before they cause major damage.
Costs, Contractor Selection, and Long-Term Maintenance
Cost drivers include sleeve material, size, quantity, slab thickness, and whether the project is remodel or new construction. Accessibility for installation and potential remediation also affect pricing.
When selecting a contractor, look for licensed plumbers with under-slab experience, clear references, and examples of past sleeve work. Plan for maintenance with defined inspection steps and documentation for future leaks or repairs.
What to ask contractors and how to evaluate bids
When hiring a contractor for under-slab plumbing sleeves, it’s crucial to ask the right questions and compare bids carefully. Here’s what you should consider:
Vetting contractors: Ask about their experience with under-slab work, references from past clients, warranties on their workmanship, testing methods they use, and if they’re licensed and insured.
Evaluating bids: Compare quotes based on the required scope of work, material specifications, warranty terms, and payment schedules tied to milestones. Ensure all bids include labor, permits, core drilling or demolition costs, potential repairs, and a contingency margin.
Maintenance, inspection schedule, and warranty considerations
Regular maintenance and inspections are key to ensuring your under-slab plumbing sleeves perform well over time. Use this checklist after significant events like settlement or nearby excavation:
- Check seal integrity: Ensure seals around the sleeves remain intact to prevent leaks.
- Verify sleeve alignment: Confirm sleeves are still properly aligned with the pipes above to avoid stress and potential damage.
- Inspect for corrosion: Check for signs of corrosion on the sleeves, which could lead to leaks or structural issues.
- Examine surrounding concrete: Look for cracks or other damage that might indicate a problem with the sleeves.
- Test water pressure: Perform a simple pressure test to ensure there are no leaks in the system.
- Review warranty terms: Confirm what’s covered under warranty and for how long, both from the contractor and sleeve manufacturer.
- Document findings: Keep records of inspections, tests, and any repairs made to aid future maintenance efforts.
Quick rule: Inspect your sleeves every 2-3 years or after significant events to catch potential issues early.
Conclusion
Leaving proper movement for under-slab sleeves keeps pipes safe, seals intact, and the slab looking clean for years. If you control movement and test early, you prevent leaks, drafts, and costly repairs that punch through the surface and ruin finishes.
Check in plain language as you go: confirm the sleeve system matches the design, inspect every sleeve and joint for correct alignment, confirm enough clearance for movement, install per the approved sequence in a small test patch first, then extend to the full slab once the test passes, perform a focused pressure or water test in a controlled area, review visual checkpoints during backfill, and commission the system only after a final walk‑through with the test results in hand.
Common mistakes to avoid are trying to force movement where the sleeve isn’t rated for it, skipping small-area testing, and skimping on the final checks before covering the slab. Never ignore a leak path you can see or hear, and always keep safety gear and shutoff access ready while you test. If you’re unsure about sleeve compatibility, movement allowance, or the required test method, pause and verify with the design specs or a professional before proceeding.
When in doubt, call a pro for the design review, installation coordination, or a professional pressure test. Stay deliberate, work in small steps, and you’ll get a durable system that stays dry and quiet under the slab. You’ve got this—move with confidence and finish strong.
FAQ
What is a slab leak and how can under-slab sleeves help prevent it?
A slab leak is water or sewer leaking beneath the concrete slab, often showing up as damp spots, warm floors, or rising water bills. Sleeves give pipes a way to move with soil and temperature changes without rubbing on concrete, which helps stop leaks from abrasion and pressure. If you’re unsure, check the sleeve design details on the product label or manufacturer instructions.
What causes slab leaks besides sleeve movement, and how can I spot them early?
Soil movement, improper install, and heavy traffic over the line can crack pipes under the slab. Look for damp patches, cracking in the slab, gurgling sounds, or unexplained wet or warm spots. Early signs mean you should verify sleeve clearance, bedding, and pipe alignment per the sleeve system’s guidance.
What are common ways to fix a slab leak if it’s already started?
Trenchless repair, re-piping under the slab, or tunneling beneath are typical options. Each has its own pros and limits, and local conditions drive the choice. Check with a knowledgeable pro about which method a sleeve-equipped system might support in your situation.
How long do slab leak repairs usually take and how does that affect my project?
Repair duration depends on the method and access. Expect that some repairs are multi-day jobs, and others can be quicker if the sleeve design allows direct work overhead or under-slab routing. Always confirm a timeline based on your exact site and method with your installer.