
Introduction
Embarking on a DIY roofing project? Understanding the timeline and duration is crucial to ensure you allocate sufficient time, resources, and plan accordingly. This guide walks you through the process, from preparation to installation and maintenance, helping you estimate how long each step takes.
Whether you’re replacing an old roof or installing a new one, knowing the timeline will help you stay on track and avoid common pitfalls. Let’s dive into the details and explore the duration of each phase.
The Roofing Timeline: From Preparation to Maintenance
Roofing projects involve several stages, each with its unique timeline. Here’s a breakdown of what to expect at every step:
- Preparation (1-3 days): Inspect your roof, gather materials, and ensure you have the necessary permits.
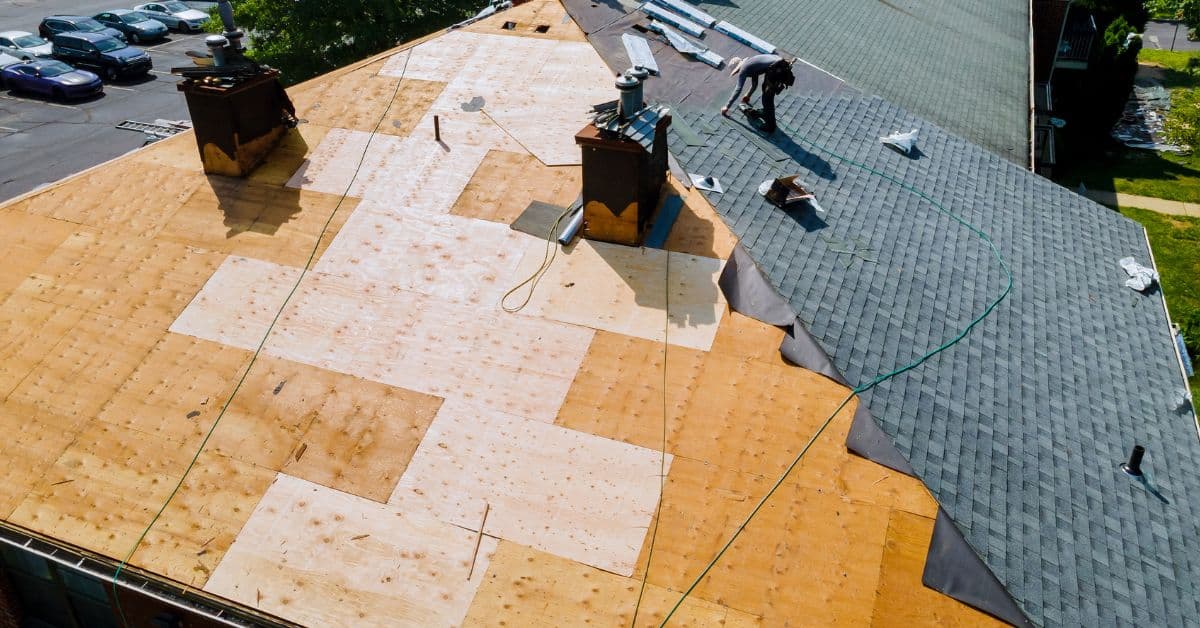
- Removal of Old Roofing (1-2 days): Carefully remove existing shingles or tiles, ensuring no damage to the underlying structure.
- Deck Preparation (1 day): Inspect and prepare the roof deck for new materials. This may involve repairing damages, applying felt paper, or installing drip edges.
- Installation of Underlayment (1-2 days): Apply a layer of underlayment to protect against moisture and air infiltration.
- Roofing Material Installation (2-4 days): Install your chosen roofing material, following manufacturer guidelines for proper spacing, nailing, and ventilation.
- Flashing and Ventilation (1 day): Install flashing around chimneys, vents, and other penetrations. Ensure proper ventilation to prevent moisture buildup.
- Final Inspection and Cleanup (1-2 days): Inspect your work, make any necessary adjustments, and clean up the site.
The total duration of a roofing project can range from 5 to 10 days, depending on the size of your roof, the complexity of the job, and local weather conditions. Always allow for contingencies in your timeline to account for unexpected delays or challenges.
Key takeaways
Proper preparation is key to staying on schedule. Ensuring you have all necessary materials and permits before starting can save you valuable time and prevent setbacks during the installation process.
- Inspect roof for damaged shingles, loose flashing, and worn underlayment before repair.
- Match material to climate by considering wind, rain exposure, and snow load.
- DIY repairs speedily fix minor leaks but escalate if flashing or decking shows damage.
- Get permits and follow local code when replacing roof, especially underlayment and venting.
- Compare bids by scope, timelines, warranties, and contractor responsiveness to avoid surprises.
- Safety: never work on a wet roof; use harnesses, ladders, and spotters.
Table of Contents
- Introduction
- Key takeaways
- Common Roofing Materials Overview
- How to Match Material to House and Climate
- Cost, Lifespan, and Value Trade-Offs
- Typical Installation Mistakes and Why They Happen
- Better Fixes and DIY-Friendly Repairs
- Material Specs, Standards, and Permits Explained
- Visual Checkpoints and Maintenance Schedule
- Selecting a Contractor and Comparing Bids
- Conclusion
- FAQ
Common Roofing Materials Overview
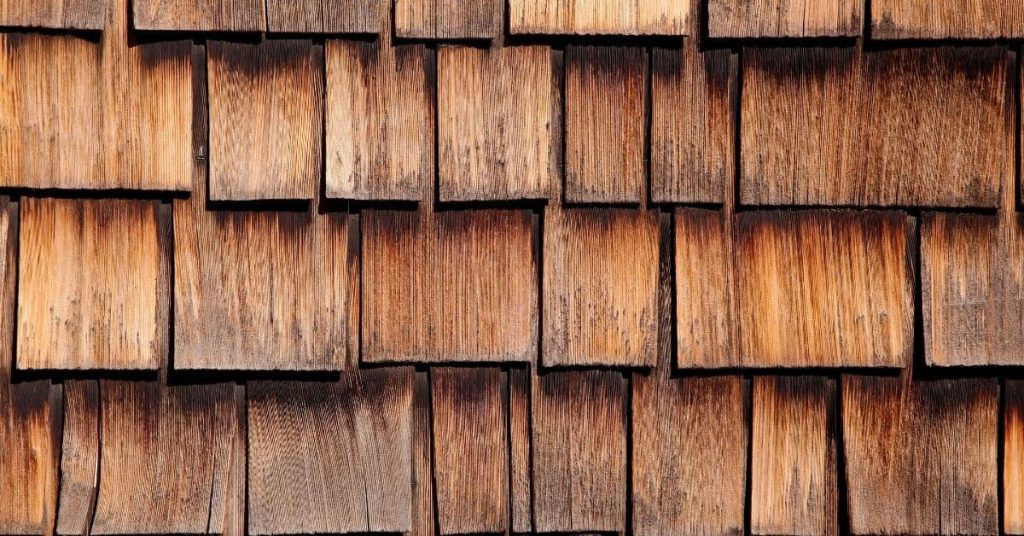
Roofing comes in several main categories, each with its own feel and job. Asphalt shingles, metal, clay or concrete tile, slate, wood shakes, synthetic membranes, and flat-roof systems cover most homes. Think about climate, budget, and roof pitch when you start comparing options.
Each material has typical uses and a general lifespan range you can discuss with suppliers or installers. Use this overview to spot quick pros and cons and to guide questions you ask during product data sheet reviews. Don’t lock in on a single factor before you compare the full picture.
Asphalt shingles
Asphalt shingles are the most common roofing material due to their affordability and ease of installation. They’re made from a fiberglass mat coated with asphalt and topped with granules.
Pros: Inexpensive, easy to install, and come in various styles and colors.
Cons: Short lifespan (15-30 years), susceptible to wind damage, and not eco-friendly. Common installation mistakes include nailing too high, which can cause shingles to curl up and blow off.
Metal roofing
Metal roofs are durable and long-lasting, made from steel, aluminum, or copper. Standing seam metal roofs have vertical panels with seams raised above the level of the panel’s flat area.
Pros: Long lifespan (40-70 years), energy-efficient, and low maintenance. They’re also resistant to fire, insects, and rot.
Cons: More expensive than asphalt shingles, can be noisy during rain, and may dent from hail or falling branches. Regular inspections are needed to check for rust or damaged panels.
Tile, slate, and masonry
Clay/concrete tiles and slate offer a classic, elegant look. They’re heavy (up to 800 lbs per square) and require a strong roof structure.
Pros: Long lifespan (50-100 years), fire-resistant, and provide good insulation. Slate is especially durable and low-maintenance.
Cons: Expensive to install due to their weight and complexity of installation. Tiles can break if walked on or during hail storms. Installation mistakes include using insufficient nails or not allowing for proper expansion.
How to Match Material to House and Climate
Climate factors like wind, snow loads, hail, sun exposure, and humidity shape material suitability. Some products handle heat and UV better, while others resist moisture or cold better. Consider how your roof will perform year after year under local conditions.
Also check roof slope, fire rating, and local building codes. If you’re unsure about a rating or code requirement, verify with the manufacturer instructions or the local authority having jurisdiction. Look for safe ranges or options when exact specs aren’t available.
Step-by-Step Process
Follow these practical steps to match your roofing material to your house and climate.
- Inspect your roof’s slope, structure, and existing materials. A professional may be needed for steep slopes or complex structures.
- Check local building codes and fire ratings for materials in your area.
- Consider your climate: hot/sunny, cold/snowy, wind/hail/fire-prone.
- Choose suitable materials based on the above factors. Refer to our earlier sections for material types and common mistakes.
- Plan installation, including underlayment, ventilation, and fasteners. Double-check that your chosen material is compatible with your roof’s structure.
- Gather necessary tools and safety equipment. Always use proper fall protection on steep roofs.
- Install the roofing material according to manufacturer’s instructions. Regularly check for any signs of damage or improper installation.
- After completion, perform a final inspection. Address any issues promptly to prevent future problems.
Hot, Sunny Climates
In hot, sunny climates, consider reflective or ‘cool’ roofs to reduce energy costs and heat gain. Dark colors absorb heat, so avoid them if possible.
Unvented assemblies can trap heat, leading to premature degradation of materials. Always ensure proper ventilation.
Clay tiles, metal, and light-colored asphalt shingles are good choices for hot climates. Consider using light colors or reflective coatings on metal roofs to maximize reflectivity.
Regularly inspect your roof for signs of heat damage, such as warping or cracking, especially in areas with high UV exposure.
Cold and Snowy Climates
In cold, snowy regions, choose materials that can shed snow effectively to prevent ice dams and excessive weight. Slate, metal, and composite shingles are good options.
Underlayment is crucial in cold climates. Use a high-quality, breathable underlayment to prevent moisture buildup and ice dams.
Proper insulation and ventilation are key in cold climates. Ensure your attic is well-insulated and properly ventilated to prevent heat buildup and ice dams.
Avoid using materials that can become brittle in extreme cold, such as some types of asphalt shingles or unmodified bitumen membranes.
Wind-, Hail-, and Fire-Prone Areas
In windy, hail-prone regions, choose impact-resistant materials like metal, tile, or Class 4 impact-resistant asphalt shingles.
Fastening patterns are crucial in high-wind areas. Use appropriate fasteners and follow recommended spacing to secure your roof against high winds.
In fire-prone regions, consider using fire-rated materials like metal, tile, or Class A asphalt shingles. Always check local building codes for specific fire-resistant material requirements.
Avoid using highly combustible materials in fire-prone areas. Regularly inspect and maintain your roof to minimize potential fire hazards.
Cost, Lifespan, and Value Trade-Offs
Upfront costs vary by material and installation complexity. Long-term value depends on durability, maintenance, and repair needs. Use this lens to weigh initial price against life expectancy and performance in your climate.
Judge repair costs and intervals by material type and local labor rates. When you need precise figures, consult a pro for estimates and check warranty terms. If uncertain, base decisions on ranges you verify with product labels or manufacturer guides.
Upfront vs lifecycle costs
The first thing you’ll notice is the upfront cost. Asphalt shingles are cheapest, while slate and tile are most expensive.
But don’t stop there. Consider maintenance and repairs over time. Metal roofs need less frequent repair than asphalt, but they can dent from hail or falling branches.
Energy savings matter too. Light-colored roofs reflect heat in hot climates, saving on cooling costs. Insulated roofs help in cold climates.
Tip: Calculate the total cost over 15-30 years to see the true value of each material.
Warranty and insurance considerations
Check warranties carefully. Some cover only manufacturing defects, not labor or materials. Others offer prorated coverage that decreases over time.
Material choice can affect insurance premiums. Impact-resistant roofs can lower premiums in hail-prone areas. Class 4 impact-resistant asphalt shingles are a good option here.
In wildfire zones, consider fire-resistant materials like metal or tile to reduce risk and potentially save on insurance.
Pro tip: Consult with your insurer before choosing a roof material to understand potential discounts or increased risks.
Typical Installation Mistakes and Why They Happen
Common mistakes include poor flashing detail, insufficient underlayment, wrong fastener type or pattern, and improper ventilation. These issues often stem from cost-cutting or skipping a critical step in the process. They can shorten roof life and invite leaks.
Root causes also include misreading slope requirements or ignoring local code nuances. Use this as a diagnostic list to spot vulnerabilities in a bid or plan. Always confirm installation requirements with labeled product instructions or code references.
Flashing and penetration failures
Incorrect flashing techniques around chimneys, vents, valleys, and skylights can lead to moisture problems that shorten your roof’s life. Water finds the path of least resistance, so without proper sealing, it can seep in and cause rot, mold, or ice dams.
Chimney flashings should be securely attached with counter-flashing on the chimney itself to prevent water intrusion. Vent flashings need to be tight around each vent pipe, using a rubber boot or metal flashing that’s sealed properly. Valleys and skylights require careful attention too – ensure they’re well-sealed and sloped for water runoff.
Using the wrong materials or cutting corners here can cost you dearly in repairs down the road. Always use high-quality flashing and follow manufacturer guidelines for best results.
Ventilation and insulation mismatches
Poor attic ventilation and insulation choices can lead to ice dams, rot, and energy loss – all enemies of a long-lasting roof. Proper balance between the two is key.
Insufficient ventilation traps heat in your attic, causing snow melt that refreezes at the eaves, forming ice dams. This can lead to leaks and damage. Too much insulation without proper ventilation does the same thing – it traps heat, leading to similar problems.
To avoid these issues, follow these guidelines: install a continuous ridge vent with soffit vents for intake; use baffles at the eaves to prevent insulation from blocking airflow; and insulate your attic floor to keep heat out in summer and in during winter. This helps maintain a cool, dry attic year-round.
Fastening and substrate mistakes
Using the wrong nails or spacing them improperly, along with installing over unsuitable decking, can cause your roof to fail prematurely. Here are some common mistakes to avoid:
- Wrong nail type/length: Using too short or incorrect nails won’t hold shingles securely. Always use the right size and type recommended by the manufacturer.
- Improper spacing: Nails should be spaced evenly along each shingle’s seam, not too close together or too far apart.
- Installing over unsuitable decking: Roofs need a solid base. Avoid installing on rotted, warped, or poorly secured plywood – replace it first.
- Not following manufacturer guidelines: Each material has specific nailing patterns and techniques. Always follow the instructions provided.
Taking care with these details ensures your roof is securely fastened to last as long as possible. Don’t skimp on quality or cut corners here – it’s worth the extra effort upfront.
Better Fixes and DIY-Friendly Repairs
Practical fixes start with safety and a solid assessment. Replacing damaged shingles, resealing flashings, and clearing gutters are common tasks homeowners can handle with basic tools. Apply only what you’re confident performing without exposing yourself to hazards.
Follow a stepwise approach: prep, remove damaged material, clean, and reattach with proper fasteners and sealant. When in doubt about material specifics, check the product label or manufacturer instructions. If a repair feels beyond your skill, hire a pro.
Shingle replacement and patching
Safety first: wear gloves, safety glasses, and a sturdy ladder. Tie it off for stability.
Remove damaged shingles carefully, keeping surrounding ones intact. Match the new one to the old, both in size and color. Apply roofing cement under the tabs of the new shingle before nailing it down.
Seal around the new shingle with more cement to prevent water intrusion. Use a caulking gun for best control.
Flashing repair and resealing
Inspect your flashings – around chimneys, vents, and skylights. If they’re loose or cracked, reseal with new flashing cement. For major damage, replace the entire flashing.
Use a putty knife to apply a thick bead of sealant along the base of the flashing. Smooth it out with your finger, wearing gloves for protection.
Check your work after a rainstorm. If water’s getting in, you may need professional help.
Temporary vs permanent fixes for emergencies
For sudden leaks, use a tarp to cover the damaged area. Secure it with weights or ropes, not nails that could cause more damage.
Seal small holes temporarily with roofing tar or silicone caulk. But remember, these are temporary fixes. Get a professional out within 2-3 weeks for permanent repairs.
If water’s coming in heavily, turn off power to the affected area to prevent electrical hazards. Then, contain the water with buckets or towels until you can make proper repairs.
Material Specs, Standards, and Permits Explained
Understand wind, fire, and impact classifications in homeowner terms. Translate labels and ASTM/NFPA references into practical expectations for your roof. This helps with selecting materials suited to your area.
Permits are often required for significant roof work; verify with your local building department. Track what to check on official documents and when to ask for official approvals. If you aren’t sure about a standard, ask the manufacturer or local authority for guidance.
Understanding Ratings and Labels
When shopping for roofing materials, you’ll see various ratings and labels. Let’s break down the common ones to help you make informed decisions.
Fire Classifications: These are rated A, B, or C based on their resistance to fire. Class A is the most resistant, providing the best protection for your home.
ASTM Numbers: ASTM International sets standards for materials and products. When you see an ASTM number (like D3018 for asphalt shingles), it means the product meets certain quality and performance criteria.
UL Listings: Underwriters Laboratories tests and certifies products for safety and performance. A UL listing ensures your roofing material has been independently tested and approved.
When You Need Permits and Inspections
Before starting any major roofing project, check with your local building department. Here’s a quick checklist to help you determine when permits are required.
- Full Reroof: Most areas require permits for replacing an entire roof.
- Structural Changes: Altering the roof’s structure, like adding dormers or changing the pitch, always needs a permit.
- Building Codes: Permits ensure your project follows local building codes and safety standards.
- Resale Value: A permit shows future buyers that your roofing work was done legally and safely.
- Insurance Purposes: Having permits can help with insurance claims if something goes wrong.
- Professional Installation: If you’re hiring a pro, they should pull the permits. Check their license and credentials first.
- Temporary Repairs: Some areas require permits for temporary repairs too.
- Historic Districts: If your home is in a historic district, additional rules may apply.
Quick rule: When in doubt, call your local building department. They can guide you through the process and ensure you’re following all regulations.
Visual Checkpoints and Maintenance Schedule
Set a seasonal rhythm for inspections and camera or photo notes of wear. Look for curling, missing granules, rust, or loosening along edges. Early signs are cheaper to address than large failures.
Plan maintenance intervals around material type and local conditions. Note any immediate action signs like leaks or damaged flashing. When uncertain, reference manufacturer care sheets or labeling for maintenance steps.
Seasonal Inspection Checklist
Inspect your roof regularly to catch minor issues before they become major problems. Here’s a seasonal guide.
- Spring: Check for missing or damaged shingles after winter storms. Look for signs of water damage in the attic.
- Summer: Inspect flashing around chimneys, vents, and skylights. Ensure gutters are secure and functioning properly.
- Fall: Remove leaves and debris from roof and gutters to prevent ice dams in winter. Trim tree branches that could damage the roof during storms.
- Winter: Inspect for ice dams, which can cause water damage. Check for signs of leaks in the attic after heavy snowfall or ice storms.
Quick rule: Always inspect your roof after severe weather events.
Long-Term Maintenance Tasks
Regular upkeep ensures your roof lasts as long as possible. Here’s a list of tasks to keep your roof in tip-top shape.
- Gutter cleaning: Clean gutters twice a year – once in spring and again in fall. Clogged gutters can cause water damage to your roof and home.
- Moss removal: Remove moss from your roof annually. Moss holds moisture, which can damage shingles over time.
- Fastener checks: Inspect metal fasteners every few years. Tighten or replace any that are loose or missing to prevent leaks.
- Professional inspections: Schedule a professional inspection every 3-5 years. They can spot issues you might miss.
Quick rule: Regular maintenance is cheaper than repairs.
Selecting a Contractor and Comparing Bids
Vet roofers by checking licenses, insurance, and project portfolios. Ask questions about material choices, installation methods, and warranty coverage. Compare not just price, but the scope of work and promised outcomes.
Request a written bid with a clear breakdown of materials, labor, and timescales. Include a list of documents to provide and red flags to watch for. If you’re unsure about a claim, verify with the product data sheet or manufacturer instructions.
Questions to ask and red flags
First off, always ask for their license number. They should be insured too – liability and workers’ comp.
Ask about their experience with the specific material you’re using. If they’ve never worked with it before, find someone who has.
Beware of bids that are way lower than others. It might mean they’re cutting corners or not including everything in their quote. No written contract? That’s a red flag too.
Evaluating bids and contracts
When comparing bids, check the scope of work. Make sure they’re all covering the same stuff. Materials should be specified too – you don’t want cheap substitutes.
Warranties matter. Some contractors might offer longer warranties than others. Same goes for cleanup – some might include it, others might not.
Payment schedules vary too. Some might ask for a big chunk upfront, others might have a more reasonable schedule. Read the fine print and make sure you’re comfortable with it before signing anything.
Conclusion
Choosing the right material and following proper practice protects your home’s safety, keeps it durable, and preserves curb appeal. Stay steady, plan the steps, and don’t rush through critical details like flashing, underlayment, and fastening.
Make your finish plan in this order: confirm the roof type and climate fit, verify permits and local standards, review material specs and warranties, compare bids, map a maintenance schedule, assemble safety gear and a fall protection plan, test a small area or detail first, then proceed with the main installation paying attention to flashing, ventilation, and proper fastening in line with the manufacturer’s instructions.
Common mistakes to avoid include skipping permits or overloading a ladder, underestimating ventilation or flashing needs, and using improper fasteners or mismatched materials. Safety rules are simple: never work on a wet or windy day, always use fall protection and sturdy footwear, and test on a small area before committing. If you’re unsure about flashing, gutters, or structural prep, pause and call a professional—better to pay a little now than repair a costly mistake later.
FAQ
What common mistakes happen when installing underlayment beneath roofing material, and how can I avoid them?
Backer or underlayment that isn’t continuous or overlaps incorrectly causes leaks. Read the manufacturer’s install instructions and align edges per their guidance. Check that any overlaps and fasteners are consistent with what the product label requires.
How can I tell if the roof venting and intake are set up right for my material and climate?
Improper venting leads to moisture and heat buildup. Read the product and local guidelines for vent placement, then verify with the existing attic layout and the material’s instructions. If unsure, check the label or manufacturer sheet for venting requirements.
Is my roof slope suitable for the material I’m considering, and what should I verify before you buy?
Some materials don’t perform on very low or very steep pitches. Verify the material’s slope range in the installation guide and confirm with the product label. If you’re unsure, consult the manufacturer instructions or the local supplier for acceptable ranges.
What fixes commonly fail when DIY homeowners try to patch roofs, and how do I do it correctly?
Patch jobs often fail due to missing surface prep, wrong fasteners, or improper sealant. Follow the material’s prep steps, use the recommended fasteners, and apply sealant per the label. If in doubt, check the manufacturer instructions and local rules for accepted methods.