Search Results for: sealer

Concrete formwork with rebar and spacer components inside

Concrete Spall Repairs at Rebar: Cleaning Standards, Corrosion Protection, and Patch Build-up

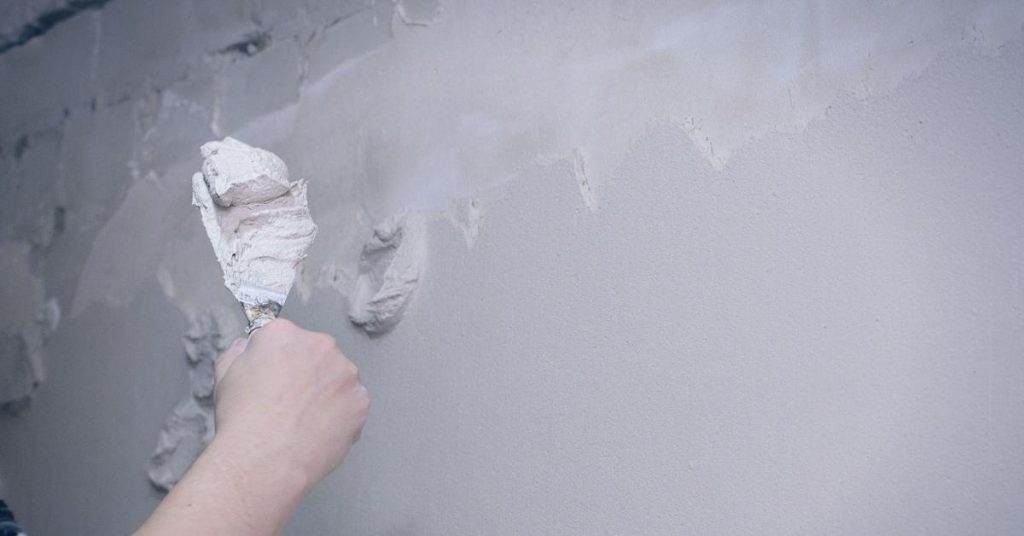
Introduction Concrete spall repairs at rebar involve cleaning the damaged area, exposing corroded steel, and rebuilding the surface. This is a hands‑on task you can handle with basic tools, patience, and attention to safety. You’ll focus on cleaning to remove loose material, protecting rebar from further corrosion, and patching with compatible concrete. Check manufacturer instructions […]

Concrete Spall Repairs at Rebar: Cleaning Standards, Corrosion Protection, and Patch Build-up Read More »

Concrete floor grinding machine on concrete surface

Concrete Trowel Blade Burnishing: When It Makes a Floor Stronger and When It Creates Dark Swirls

Introduction Concrete trowel blade burnishing is the act of using a trowel blade on a fresh slab to seal the surface and tighten the paste, which can harden the floor but may leave dark swirl marks if done too aggressively. In practice, it can give a slick finish and extra density when conditions are right,

Concrete Trowel Blade Burnishing: When It Makes a Floor Stronger and When It Creates Dark Swirls Read More »

Concrete stairs with a smooth concrete ramp in the middle

Finishing Concrete Along Stairs and Steps: Clean Risers, Tight Corners, and No Ragged Edges

Introduction Finishing concrete along stairs and steps means smoothing and shaping risers and treads to remove ridges and achieve clean, even faces. This work uses hand tools and careful edging to keep joints tight and consistent along each stair edge. The goal is a safe, neat look that lasts without ragged edges. Start by outlining

Finishing Concrete Along Stairs and Steps: Clean Risers, Tight Corners, and No Ragged Edges Read More »

Three sheets of sandpaper in red brown and beige on wood

Venetian Plaster Touch-Ups: Avoiding Shiny Spots and Burnish Lines

Introduction Venetian plaster touch-ups are about repairing shine and burnish lines to restore an even, mirror-like finish. This hands-on guide walks you through practical steps and what to watch for on a DIY job. Check the product label and manufacturer instructions for any limitations and recommended mixing or application notes. There are several finishes you

Venetian Plaster Touch-Ups: Avoiding Shiny Spots and Burnish Lines Read More »

Closeup of white paint roller applying paint on wall

Feathering Plaster Repairs: Avoiding a ‘Picture Frame’ Ridge Under Paint

Introduction Feathering plaster repairs means blending new patch material into the surrounding plaster so there’s no raised ridge under paint. It’s a hands-on fix that helps avoid a visible edge where paint can lift. The goal is a smooth transition that you can sand and feather with basic tools. Start by assessing cracks and holes

Feathering Plaster Repairs: Avoiding a ‘Picture Frame’ Ridge Under Paint Read More »

Hand applying plaster to damaged wall with trowel

Repairing Plaster Keys From the Back Side: When Access Exists and How to Lock It In

Introduction Repairing plaster keys from the back side means fixing the hidden anchors behind the plaster when you can reach them. You work from the cavity side, not the face, and you aim to reattach loose plaster to the lath or keys. This approach relies on solid access and careful placement to lock the repair

Repairing Plaster Keys From the Back Side: When Access Exists and How to Lock It In Read More »

Blue painted stucco wall texture close-up

Mineral Paint on Stucco: When It Outlasts Acrylic and How to Prep Properly

Introduction Mineral paint on stucco provides a durable, breathable finish that can outlast typical acrylic when the surface is prepped properly. In plain terms, you start with clean, sound stucco, protect surrounding areas, and choose a mineral-based paint designed for masonry. The prep and technique matter more than color or brand. The application hinges on

Mineral Paint on Stucco: When It Outlasts Acrylic and How to Prep Properly Read More »

Close-up of two different colored stucco wall sections with textured surface

Color Matching Stucco Repairs in Shade vs Sun: Why It Looks Different and How to Test

Introduction Color matching stucco repairs varies between shade and sun, because lighting changes how pigments look. Natural light shifts perception and can make colors appear lighter or darker in different conditions. Test patches in both areas and compare them under the same conditions you’ll live with day to day. When testing, check colors in sun

Color Matching Stucco Repairs in Shade vs Sun: Why It Looks Different and How to Test Read More »

Close-up of light gray rough stucco texture

Stucco Texture Matching on Large Patches: How to Avoid ‘Panel’ Look in Sunlight

Introduction Texture matching on large stucco patches is about blending new material with the existing surface so it doesn’t read as separate panels when sunlight hits it. Work in manageable areas, keep the texture consistent, and feather the edges so the changeover isn’t obvious. If you see a mismatch, adjust trowel pressure, use a compatible

Stucco Texture Matching on Large Patches: How to Avoid ‘Panel’ Look in Sunlight Read More »

Peeling stucco on red brick wall

Stucco Patch Cracks That Reappear: Movement vs Shrinkage and How to Tell

Introduction Cracks that reappear after patching are usually caused by movement or shrinkage in the stucco system. You can tell them apart by looking at how the crack ran and what the surrounding area did over time; movement cracks often change with structure or temperature, while shrinkage cracks stay smaller and more uniform. To start,

Stucco Patch Cracks That Reappear: Movement vs Shrinkage and How to Tell Read More »