
Introduction
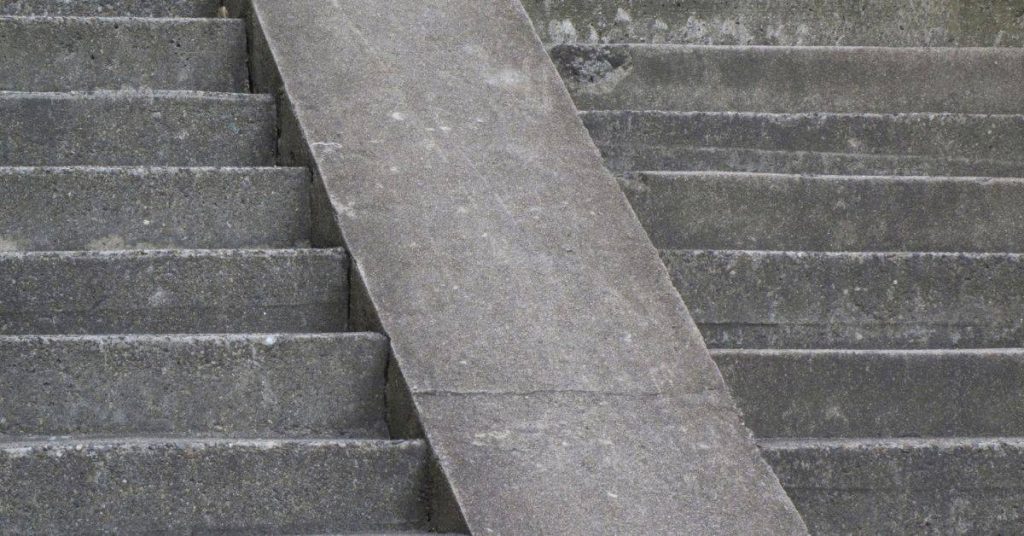
Finishing concrete along stairs and steps means smoothing and shaping risers and treads to remove ridges and achieve clean, even faces. This work uses hand tools and careful edging to keep joints tight and consistent along each stair edge. The goal is a safe, neat look that lasts without ragged edges.
Start by outlining the edge lines and working from top to bottom, following the face of each tread and riser. Use a firm, controlled motion to blend transitions where risers meet treads, and wipe away excess material to avoid buildup. If you see voids or jagged spots, check the product label and manufacturer guidance, and adjust your technique or tool choice accordingly.
Key takeaways
- Plan stair layout, forms, drainage, and potential load paths before pouring.
- Use sharp-edged tools to form tight corners; avoid ragged edges.
- Verify form alignment and riser heights; confirm compatibility with existing structure.
- Place concrete in shallow lifts; consolidate around noses, corners, and edges.
- Plan edging, joints, and finishes for durability and aesthetics.
- Wear PPE; stop if rebar, voids, or contamination found; cure and protect.
Table of Contents
- Introduction
- Key takeaways
- Project Planning and Safety
- Tools and Materials Checklist
- Forming Stairs and Achieving Tight Corners
- Placing and Consolidating Concrete on Stairs
- Finishing Techniques for Treads, Risers, and Tight Corners
- Edging, Joints, and Control for Durability and Aesthetics
- Troubleshooting Common Problems and Repair Tactics
- Curing, Protection, and Long-Term Maintenance
- Conclusion
- FAQ
Project Planning and Safety
Start with a clear assessment of the staircase area and the scope of work. Identify access, weather windows, and potential hazards on site. Plan a safety approach that covers fall protection, PPE, and crew circulation to reduce rushing the finish.
Coordinate the sequence with other trades and set realistic milestones based on the project conditions. Document the plan and check labels, manufacturer instructions, and local rules for required PPE and protective measures. Ensure everyone understands the plan before work begins.
Measuring and layout for stair runs
Before you start forming, measure each riser and tread. Risers are the vertical parts, treads are the horizontal steps.
Record these dimensions. They’ll help you set your forms right. Use a tape measure, be precise.
Check alignment too. Stairs should line up straight. Use a level or laser level to ensure they do.
Permits, codes, and load considerations
Check local building codes before you start. They’ll tell you what’s allowed for stairs in your area.
If your stairs are unusual – wide, tall, or have heavy loads – consult the engineer who designed them. Safety first.
You might need permits too. Check with your local authority. It’s better to know before you start.
Site safety and staging
Safety comes first, especially when working at height. Set up barricades around the work area to keep others out.
Use fall protection. If you’re more than a few feet off the ground, wear a harness tied to a secure anchor point.
Stage your materials safely too. Keep them close but not in the way. Heavy bags of concrete can cause injuries if they fall.
Tools and Materials Checklist
List essential hand tools, power tools, form materials, finishing tools, and common consumables in a compact kit. Include items for measurement, mixing, and securing forms. Keep a separate stash for protective gear and cleaning supplies.
Refer to product datasheets and manufacturer instructions to verify specific requirements. Prefer a quality tier that matches the task, and avoid low‑end options for critical edges and corners. When in doubt, check labels and local codes before purchasing.
Formwork and edge-form materials
Before you start pouring, ensure you have the right formwork materials to achieve your desired finish.
- Lumber: Use for simple forms with a rough or textured finish. Check for straightness and no warping.
- Metal (aluminum or steel): Ideal for smooth, sharp edges. Inspect for bends and rust on steel.
- Plastic: Great for complex shapes and smooth finishes. Ensure it’s in good condition with no cracks.
- Edge-forms: Use for clean, crisp corners. Check they’re the right size and in good repair.
- Form ties: Necessary to hold forms together. Make sure they’re compatible with your form material.
- Screeds: Used to strike off excess concrete. Ensure they’re long enough for your form’s width.
- Vibrators (internal or external): Help remove air bubbles. Check they’re in working order and compatible with your form size.
- Form release agent: Applies to prevent concrete from sticking. Choose one suitable for your form material.
Quick rule: Always inspect your formwork materials before use to avoid costly mistakes.
Finishing tools (hand and power)
Having the right tools ensures a smooth, professional finish on your stairs and steps.
- Bull float: Smooths and consolidates concrete. Use after initial strike-off with screed.
- Hand trowel (3/8″ – 1/2″): Finishes small areas and edges. Use for final smoothing and to remove imperfections.
- Edger (4″ – 6″): Creates a clean, sharp edge along forms. Use after bull float and before troweling.
- Grinder (4″ – 7″): Removes high spots and smooths surfaces. Use for large areas or to correct mistakes.
- Jointer (12″ – 36″): Smooths and levels concrete. Use after edging and before troweling for a smooth, flat surface.
- Power trowel (18″ – 48″): Finishes large areas quickly. Use after jointer for final smoothing.
- Handheld vibrator: Removes air bubbles in small areas. Use sparingly to avoid over-vibrating and weakening concrete.
- Concrete saw (wet or dry): Cuts control joints and removes excess concrete. Ensure it’s in good working order.
Quick rule: Choose hand tools for small areas, power tools for large ones. Always follow manufacturer instructions.
Mix, admixtures, and curing products to consider
Selecting the right materials ensures your concrete is strong, durable, and easy to finish.
- Cement type: Choose between Type I (general-purpose) or Type II (moderate sulfate resistance). Follow manufacturer recommendations for your project’s needs.
- Aggregates (sand and gravel): Ensure they’re clean, well-graded, and meet local standards. Check for proper proportions in your mix design.
- Admixtures: Additives to enhance concrete properties. Consider air entrainment, water reduction, or accelerators/retarders based on your project’s requirements. Always follow manufacturer guidelines.
- Curing compounds: Protects and maintains moisture in concrete during curing. Choose one suitable for your climate and finish expectations.
- Concrete mix design: Calculate or consult a professional to ensure proper proportions of cement, aggregates, and water for your project’s needs.
- Water: Use clean, drinkable water. Avoid using salty or contaminated water as it can weaken concrete.
- Concrete testing equipment: Tools like slump cones, air entrainment meters, and compressive strength testers help ensure your mix meets specifications.
- Protective clothing and gear: Include safety glasses, gloves, ear protection, and steel-toed boots to protect yourself during mixing and finishing.
Quick rule: Always follow manufacturer specifications for admixtures and curing compounds. Test your mix before pouring to ensure it meets project requirements.
Forming Stairs and Achieving Tight Corners
Use accurate riser and tread forms and secure them firmly to prevent movement during pours. Double‑check square corners and consistent nosing throughout the run. Consider both site‑built forms and precast‑style forms for different sections.
Lock the forms with appropriate fasteners and bracing to resist blowout. Align form edges to the final surface lines and verify plumb and level before any concrete is placed. Reference manufacturer guidelines when choosing form materials and fasteners.
Techniques for square risers and crisp nosing
For clean risers, set your form height precisely. Use a level and shims to ensure consistency.
To create sharp nosing, use a straight edge or template at the top of each tread form. Secure it tightly with clamps or nails.
For precast-style forms, align them carefully before setting. Ensure they’re square to the string line and level with each other.
Pro tip: Use a scrap piece of 2×4 as a template for consistent nosing profiles.
Small or irregular step geometry
For landings, build your form to match the exact size and shape. Use temporary supports to hold it in place.
For curved treads, create a template using cardboard or thin plywood. Trace and cut along the curve, then use this as your form guide.
With offset risers, measure carefully from the top of one riser to the bottom of the next. Adjust your forms accordingly.
Pro tip: Always double-check your layout before pouring. A little extra time spent measuring can save you from costly mistakes.
Temporary bracing and vibration control near forms
Brace your forms tightly to prevent blowout. Use 2x4s or other sturdy material, securing them at both the top and bottom.
For localized vibration, use a small vibrator or even a screwdriver with a vibrating handle. Work from the bottom up, ensuring concrete fills all voids.
If you’re using a power trowel, keep it away from forms to avoid vibrations that could cause honeycombing.
Pro tip: Before pouring, give your forms a good shake to ensure they’re secure. Any movement now is better than during pour.
Placing and Consolidating Concrete on Stairs
Stage the pour so each level progresses in a controlled sequence. Minimize vertical drops that cause segregation and keep concrete within the form boundaries. Use careful placement to fill tight stair cavities without overloading the forms.
Consolidate with compatible methods that suit the form size and access, avoiding overwork near corners. Plan avoidance of form damage by distributing the work and maintaining form integrity. Check guidance from the mix supplier and form manufacturer if there are questions about technique.
Pour sequencing for uniform fills
The key to consistent concrete stair fills is planning your pours right. You want each riser and tread to receive placement at the same time, avoiding cold joints.
Start at the bottom of the stairs. Pour each section from the lowest riser up, filling both the riser and its corresponding tread simultaneously. This way, they cure together, ensuring a uniform finish.
Never pour a single riser or tread by itself. It’ll set differently and you’ll end up with visible lines where it meets the rest of your stairs.
Vibration and consolidation methods for narrow areas
Stair cavities can be tight, making it tough to get standard vibrators in there. That’s where internal or external vibration techniques come in handy.
Internal vibrators are inserted directly into the concrete. They’re great for those really narrow spots. External vibrators sit on top of the formwork, transmitting vibrations through the forms to consolidate the concrete below.
But sometimes, you’ll need to get in there with a manual rodder. It’s old-school, but it works. Just be sure to rod every corner to ensure full consolidation and no hidden voids.
Avoiding segregation and ensuring uniform aggregate distribution
Segregation is when the concrete’s components—aggregate, cement, and water—separate during placement. It’s a mistake you want to avoid as it weakens your stairs.
- Keep your placement rate steady. Dumping all your concrete at once can cause segregation. A consistent flow helps keep everything mixed together.
- Control your slump. Too much water in your mix can make the aggregate separate. Keep an eye on your slump and adjust your water content as needed.
- Use a funneling technique. Pour your concrete into the forms from one side, letting it flow out evenly across the entire area. This helps prevent segregation.
- Avoid over-vibrating. While vibration is key to consolidating your concrete, too much of it can cause segregation. Keep an eye on your vibrators and don’t leave them in too long.
Remember, prevention is the best cure here. Keep an eye on your placement techniques and you’ll avoid segregation altogether.

Finishing Techniques for Treads, Risers, and Tight Corners
Follow a practical sequence to achieve flat treads, smooth risers, and crisp edges. Work from the outer edges toward the center to minimize ragged transitions. Push toward tight inside corners with careful tooling and clean, controlled motions.
Monitor the set state using the product instructions rather than fixed times. Adjust your timing based on temperature, humidity, and mix type, and verify with the data sheet or manufacturer guidance. Keep edges sharp and corners square as you proceed.
Initial strike-off and screeding on stairs
Start by striking off excess concrete from the top of your forms. Use a long straight edge, like an aluminum screed or a 2×4, to level the surface across multiple treads at once. Be careful not to overwork the surface.
Control elevations as you go. Check with a level or laser level to ensure each tread is even and at the correct height. Remember, it’s easier to remove excess concrete than to add more later.
Tip: Work quickly but carefully. Concrete sets fast, so don’t spend too much time on one area.
Floating and hand-troweling in confined spaces
After initial strike-off, use a bull float to remove any remaining excess water and level the surface. Work from one end of the stair to the other, using long, smooth strokes.
For tight corners and nosings, switch to a hand trowel. Use short, firm strokes to pack the concrete into these areas. Be careful not to leave tool marks or create hollow spots.
Tip: Check your trowel regularly. A sharp edge helps prevent leaving marks on the surface.
Creating clean inside and outside corners
Use corner forms to create crisp, clean edges. These can be made from plywood or metal, depending on your needs. Make sure they’re well-secured before pouring.
After removing the forms, tool the corners by hand with a trowel or corner tool. Use short, firm strokes to pack the concrete and remove any excess. Be careful not to leave voids or create sharp ridges.
Tip: Feather your strokes at the end of each pass to avoid creating lines in the concrete.
Edging, Joints, and Control for Durability and Aesthetics
Profile and place edge tools to maintain clean, straight edges along the stairs. Space control joints appropriately to accommodate movement while preserving appearance. Consider expansion joint options where required by the design or local practice.
Balance function and aesthetics by selecting joint types that fit the stair run. Ensure joints are aligned with overall structural requirements and finish expectations. Refer to project notes, product instructions, and local standards for guidance.
Using edgers and nosing profiles
To achieve clean, consistent edges on your concrete stairs, you’ll need the right tools. For bull-nose edges, use a bull-nose edger. For square nosings, a nosing profile will do the trick.
First, attach the chosen edger to your straight edge form. Then, as you pull the edger along the form, apply steady pressure. This creates a smooth, even edge.
For tight corners, use a corner edger. Position it carefully at the corner, then pull it along the form. Be sure to keep your movements steady and consistent for a clean finish.
Control joints and saw-cut timing
Control joints help prevent random cracking by controlling where concrete will naturally crack. For stairs, space them every 12-18 inches along the treads.
As for risers, place a joint at each nosing. This helps maintain square risers and prevents cracking at the nosing.
Follow your concrete product’s guidance for saw-cut timing. Typically, you’ll want to cut after the initial set but before final set. Use a concrete saw with a diamond blade for clean cuts.
Sealing joints and transitions
For durability and slip resistance, seal your control joints and tread-landing transitions. Use a silicone-based joint filler for best results.
First, clean the joint thoroughly. Then, apply the filler according to the manufacturer’s instructions. Smooth it out with a trowel or putty knife, ensuring it’s level with the surface.
For transitions between treads and landings, use a urethane-based sealant. Apply it in a continuous bead along the joint. Tool it smooth using a damp finger or tool to create a clean, even line.
Troubleshooting Common Problems and Repair Tactics
Identify typical defects such as ragged edges, honeycombing, feathered lips, and uneven risers early. Plan immediate corrective actions that can salvage the surface and prevent further damage. Use concrete patching or grinding methods appropriate for stairs and edges.
Develop post‑cure repair strategies and a brief inspection checklist to catch issues quickly. Document conditions on site notes and compare with manufacturer guidance to choose safe repair options. Verify applicable standards and recommendations before proceeding.
Fixes for ragged edges and torn forms
Ragged edges often happen when forms aren’t properly aligned, or they shift during the pour. First, inspect your forms. If they’re out of alignment, realign them immediately.
If you’ve already cured, you’ll need to grind down the ragged edge using a concrete grinder. Then, apply a patch repair compound mixed according to the manufacturer’s instructions. Smooth it out with a trowel and let it cure.
Torn forms can be patched with a form release agent applied first, followed by a fiber-reinforced form repair material. Press it into the tear, smooth it out, and let it cure before pouring your next lift.
Repairing surface defects on treads and risers
Small pitting or blowholes can be filled with a concrete patch repair material. First, clean the area to remove any loose debris. Then, apply the patch according to the manufacturer’s instructions, using a trowel or putty knife to fill and smooth.
For delaminations, you’ll need to grind out the affected area first. Use a concrete grinder with a diamond blade to remove the damaged material. Clean the area, then apply your patch repair compound, pressing it into the void and smoothing it out.
Let all patches cure according to the manufacturer’s instructions before using or finishing the stairs.
Dealing with color or finish inconsistencies
If you’ve got color or finish inconsistencies, start by preparing the surface. Clean it thoroughly and remove any loose material. Lightly sand if necessary.
For minor inconsistencies, a concrete stain can be applied to unify the appearance. Choose a color that matches your existing stairs as closely as possible. For larger areas or more significant differences, consider an overlay. Apply according to the manufacturer’s instructions, using a trowel to spread it evenly.
If you’re applying a coating like a sealer or stain, make sure to follow the manufacturer’s guidelines for surface preparation and application. This will help ensure a consistent finish across your stairs.
Curing, Protection, and Long-Term Maintenance
Select curing methods that suit stair surfaces and traffic expectations. Provide temporary protection to prevent damage from foot traffic and equipment during early strength gain. Follow the curing window stated by the product and keep the area protected accordingly.
Establish maintenance routines to preserve edges and slip resistance over time. Schedule periodic inspections and light cleaning to maintain appearance and safety. Consult product instructions and maintenance guidelines for best practices.
On-site protection and safe access during cure
While your concrete stairs are curing, they’re vulnerable to damage. Protect them from traffic and impact.
Use protective coverings: Lay down plastic sheets or plywood to shield the treads and risers from foot traffic and debris.
Temporary ramps and barriers: Set up temporary ramps around the stairs to redirect traffic. Install barriers to prevent people from walking on the curing concrete.
Selecting sealers and anti-slip treatments
Sealers protect your stairs’ surface, while non-slip additives enhance safety. Choose wisely.
Sealer categories: Consider film-forming (surface) or penetrating (deep) sealers. Each has its pros and cons. Film-forming sealers provide a glossy finish but can peel if not properly maintained. Penetrating sealers are more durable but offer less shine.
Non-slip additives: These come in two types: solid particles mixed into the sealer or grit embedded in a separate layer. Both increase traction, but they may wear out over time or get covered by dirt.
Inspection and periodic maintenance checklist
Use this checklist: Every six months to a year, inspect your stairs for wear and tear. Catching issues early prevents costly repairs.
- Edge condition: Check for chipping or cracking at the edges. If left untreated, these can worsen over time.
- Joints: Inspect control joints and saw cuts for proper functioning. If they’re not working as intended, water may penetrate and cause damage.
- Surface wear: Look for signs of excessive use or abuse. Deep scratches or gouges can compromise the surface’s integrity.
- Slip resistance: Test the stairs’ traction by walking on them with wet shoes. If you slip, it’s time to reapply anti-slip treatment.
- Sealer condition: Check if the sealer is still intact and providing protection. Peeling or flaking sealers need to be removed and reapplied.
- Riser alignment: Ensure risers are still properly aligned. Misaligned risers can cause tripping hazards.
- Tread leveling: Make sure treads are even. Uneven treads can lead to trips and falls.
- Drainage: Confirm water is draining properly from the stairs’ surface. Standing water can cause damage over time.
Quick rule: Address any issues you find promptly to maintain your stairs’ longevity and safety.
Conclusion
Finish with confidence by keeping safety and durability at the front of every step. Clean, crisp risers and tight corners come from set-up, careful placing, and proper curing, not from luck.
Safety first means double-checking forms, dropping tools only where they won’t snag tempting mis-ties, and wearing eye protection and gloves during every stage. Before you strike a single edge, check your levels and ensure the tread and riser heights are consistent. Then place and consolidate the concrete evenly, edge cleanly, and protect the work as it cures to prevent cracks and ragged edges.
Common mistakes to avoid are rushing the setup, skipping proper curing, and neglecting protection. Do not trowel when the surface is not firm, do not leave joints unprotected, and do not remove forms too soon. If in doubt about the structure, or if you see cracks forming that you can’t stop, stop work and reassess before continuing; delays or added repairs cost more than a cautious pause.
If the stairs are large, highly structural, or the forms are collapsing, call a professional instead of pushing on alone. Stay patient, follow the steps you’ve planned, and you’ll finish with solid stairs that look good and hold up over time.
FAQ
How do I avoid ragged edges when finishing stair risers and treads?
Use a sharp edging tool and steady strokes to keep a clean line. Work from the corners toward the center so you don’t pull material where you don’t want it. If you see any flaking, touch it up before it hardens.
What’s the best way to handle tight corners on stairs without crowning or feathering?
Go slow and use a small tool to maintain the corner profile. If the concrete tries to push into the corner, pause and reseat it with a firm, consistent pass. Check the corner while it’s still workable and clean up any excess material gradually.
How can I prevent visible seams or transitions between steps and risers?
Strive for continuous flow by finishing each edge in the same direction and at the same pace. Keep tools clean and flat against the surface to avoid gouges. If a seam forms, blend it carefully with a light touch and re-check for consistency.
What should I do after finishing to protect the surface on stairs?
Cover or shield the steps from traffic during the initial cure as directed by the product instructions. Avoid heavy traffic until the surface has reached the appropriate set in your area. Check labels for recommended curing or sealing steps before proceeding.