
Introduction
Repairing plaster keys from the back side means fixing the hidden anchors behind the plaster when you can reach them. You work from the cavity side, not the face, and you aim to reattach loose plaster to the lath or keys. This approach relies on solid access and careful placement to lock the repair in place.
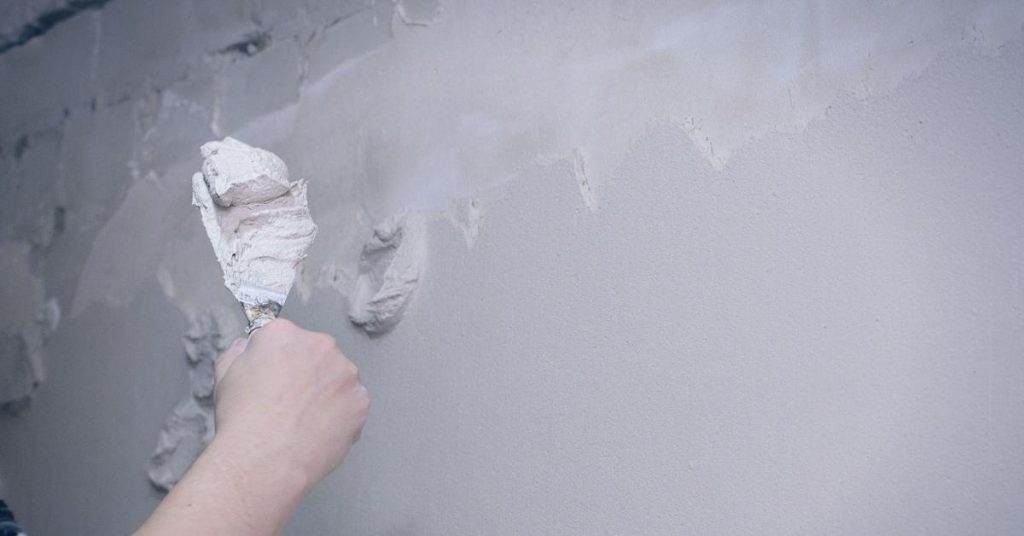
Start by clearing access behind the wall and assessing the condition of the plaster keys. Carefully remove damaged plaster, clean debris, and secure any lath or backing before re-keying. Apply new plaster per the instructions on the label and push it into the keys so it locks in, always following local rules and manufacturer guidance.
Key takeaways
- Identify weakened plaster keys from the back by visible cracks and hollow sounds.
- Back-side access requires clean, dry area, safe scaffold, and eye/respirator protection.
- Remove loose plaster gently, expose reinforcements, and avoid damaging existing lath.
- Securely re-anchor reinforcements before applying new plaster to prevent movement.
- Lock plaster keys with back-side technique to coexist with front-face finish.
- Inspect finish after cure, then perform smooth feathering and non-cracking patches.
Table of Contents
- Introduction
- Key takeaways
- Understanding Plaster Keys and Back-Side Access
- Diagnosing Plaster Key Damage from the Back Side
- Safety and Site Preparation Before Back-Side Repairs
- Tools and Materials Checklist
- Step-by-Step Techniques for Re-Establishing and Locking Plaster Keys
- Patching, Smoothing, and Finishing the Front Surface
- Cleanup, Inspection, and Long-Term Maintenance
- Costs, Time Considerations, and When to Call a Professional
- Conclusion
- FAQ
Understanding Plaster Keys and Back-Side Access
Plaster keys are thin, embedded patches that grip onto lath or masonry to form a mechanical bond. They’re created during original plastering when a roughened backer or keyed surface is worked to hold material in place. Distinguishing a key failure from surface plaster failure helps define repair scope and methods, especially when you can access the back.
Back-side access lets you inspect key depth, backing material, and lath or masonry condition directly. This changes options from simple surface patching to key-by-key restoration or behind-the-wall bonding approaches. You’ll assess integrity across the key network and plan repairs accordingly.
What plaster keys are and why they matter
Plaster keys are thin patches of plaster embedded into lath or masonry. They create a mechanical bond, locking the plaster to its backing. During original plastering, keys form when troweling creates keyed surfaces with roughened backers.
Why they matter: Keys’ integrity is crucial for repairs when access from behind exists. A lost key causes delamination or sagging, leading to repair failure.
Unlike surface-only plaster failure, which can be patched, key loss requires direct intervention to recreate the bond and prevent further deterioration.
How back-side access changes repair strategy
Back-side access allows direct inspection of key depth, backing material, and lath or masonry condition. This changes repair options from surface patching to more effective methods.
Advantages: Direct anchoring and reinstating keys become feasible with back-side access. It makes repairs possible where front-side patching alone would fail.
For instance, if a key is missing or damaged, back-side access lets you recreate it accurately, ensuring a solid bond. Without this access, the repair may not last.
However, even with access, always assess the entire wall for other issues before starting repairs to ensure lasting results.
Diagnosing Plaster Key Damage from the Back Side
Look for visible signs of key loss from behind the plaster, such as loose patches or unusual darkness around key contact zones. Cracking patterns radiating from key areas can indicate edging issues or movement. Bulges behind the surface may reveal voids or deteriorated backing.
Tactile checks are essential: tap to listen for hollow sounds and press to feel for softness versus solid areas. Compare suspected spots to surrounding, sound sections to gauge severity and extent of damage. Document findings for decisions on repair strategy.
Visual and Tactile Inspection Checklist
Before you start any repairs, follow this checklist to assess the damage thoroughly. It helps map affected areas for targeted fixes.
- Cracks: Look for cracks radiating from key areas. They indicate lost keys or movement.
- Loose Patches: Gently press on plaster around keys. If it feels soft or gives, you’ve found a loose patch.
- Bulges: Check for bulging plaster. It could hide voids or indicate moisture issues.
- Dark Spots: Look for unexpected darkness around key contacts. It might signal hidden voids.
- Hollow Sounds: Tap the plaster with a hammer. Hollow sounds point to voids behind the surface.
- Moisture Signs: Check for efflorescence (white powder) or mold, which indicate moisture problems.
- Probe Gaps: Carefully probe gaps between lath and plaster with a thin tool. Feel for voids or movement.
- Compare Surroundings: Compare the damaged area with solid surrounding plaster to understand the extent of damage.
Quick rule: Skipping these checks might lead you to miss hidden damage, wasting time and materials on ineffective repairs.
When Back-Side Repair is Required vs Surface Repair
Deciding between back-side repair and surface patching depends on the severity of damage. Here’s how to tell:
If you’ve found severe key loss, large voids, or moisture issues, re-establishing keys from the back is necessary. This ensures a solid base for new plaster.
For minor cracks, small voids, or minor key loss, a surface skim or patch might suffice. It’s quicker and less invasive, but it won’t address structural issues.
Quick rule: If in doubt, lean towards back-side repair. It’s better to find and fix hidden damage than to cover up problems that will reappear later.
Safety and Site Preparation Before Back-Side Repairs
Assess inherent risks of working behind walls or ceilings, including structural members, wiring, and plumbing. Confirm necessary permits or approvals and outline a plan to minimize outages or accidental damage. Establish a clear sequence for access to reduce surprises.
Wear appropriate PPE and maintain workflow hygiene to prevent cross-contamination between occupied spaces. Plan containment with plastic sheeting and drop cloths to keep dust contained behind the work zone. Keep tools and debris controlled to protect adjacent finishes.
Personal protective equipment and workspace protection
Safety starts with the right gear. Protect yourself and your home from dust and damage.
- Respiratory Protection: Use a P100 respirator or N95 dust mask to filter out concrete and plaster particulates. Rentable: $20-$30/day
- Eye Protection: Wear safety glasses with side shields or a full-face shield. Protects from dust, debris, and potential chemical splashes.
- Gloves: Use heavy-duty work gloves for handling materials and protecting hands from cuts. Tip: Change gloves frequently to minimize cross-contamination
- Hard Hat: Wear a hard hat when working in areas with potential head injuries, like around exposed framing or near ceiling work.
- Floor Protection: Lay down drop cloths or plastic sheeting to protect floors from dust and debris. Tip: Secure edges with tape to prevent tripping
- Furniture Coverage: Cover furniture in adjacent rooms with plastic sheets or old bed linens to protect from dust.
Structural, electrical, and plumbing risk checks
Before you start poking holes or cutting into walls, identify and mitigate potential risks.
Structural Risks: Check for any signs of structural damage like cracks, warping, or soft spots. Probe suspect areas gently with a screwdriver to assess stability. If unsure, consult a structural engineer.
Electrical Risks: Turn off power at the main panel and use a non-contact voltage tester to ensure wires are dead before probing or cutting into walls. Mark known electrical lines on your access plan.
Plumbing Risks: Locate and mark any plumbing lines behind the wall or ceiling you’ll be working on. Use a stud finder to avoid puncturing pipes. If you hit a pipe, stop work immediately and call a professional plumber.
Tools and Materials Checklist
List the hand tools, power tools, fasteners, adhesives, and plaster materials needed for back-side key repairs, with substitutions for different substrates. Include items for surface prep, key formation, and backing reinforcement. Check labels and manufacturer instructions to ensure compatibility with your substrate.
Different substrates require guidance on bonding agents or lime-putty formulations. Note when historical plaster, gypsum plaster, cementitious backing, brick, or concrete call for specific products. Prioritize PPE and dust-control gear for safe operation.
Essential tools for back-side plaster-key repair
Before you start repairing your plaster key, make sure to gather all the necessary tools. This checklist will help you ensure you have everything you need before you begin.
- Inspection Camera: Check for any hidden damage or cracks that may not be visible from the front. Confirm it’s in good working condition by testing its lights and lens.
- Small Drill (1/4″ or 3/8″) with Masonry Bit: Verify the drill is in good working order and the bit is suitable for your wall material. Test it on a scrap piece to ensure it drills smoothly.
- Screws (appropriate length): Measure the thickness of your wall to determine the correct screw length. Check that they are compatible with your chosen anchors.
- Plugs or Expansion Anchors: Ensure you have the right type for your wall material and that they match the screw size. Test one on a scrap piece to confirm it holds securely.
- Injection Ports (if needed): If using chemical anchors, ensure you have the correct ports for your chosen product. Check their compatibility with your anchor type.
- Trowel (1/2″ or 3/4″ wide): Confirm it’s in good condition and suitable for applying the repair material. Test it on a scrap piece to ensure smooth application.
- Sandpaper (120-grit): Check that it’s in good condition and suitable for smoothing the repaired area. Test it on a scrap piece to confirm it sands smoothly.
- Safety Glasses: Inspect them for any cracks or damage. Wear them during drilling and sanding to protect your eyes from debris.
Quick rule: Always double-check your tools before starting any repair work. Faulty tools can lead to poor repairs, causing expensive rework down the line.
Material specs and bonding agents explained
Before you start your plastering job, use this checklist to ensure you’ve got the right materials for your substrate. This will save you time, money, and prevent costly rework.
- Plaster type: Check if your substrate is wood lath, metal lath, or solid masonry. Choose a suitable plaster type:
– Wood/Metal Lath: Use a base coat (scratch coat) followed by a finish coat. Base coat should be 3:1 sand/cement or 4:1 sand/lime.
– Masonry: Use a 2:1 or 3:1 sand/cement mix for the base coat, and a 1:1 or 2:1 mix for the finish coat. - Bonding agent: Ensure your bonding agent is compatible with existing materials. For new work, use a PVA-based bonding agent diluted according to manufacturer’s instructions (usually 1:4 or 1:6).
- Fasteners for lath: If using wood lath, ensure nails are galvanized and at least 2″ long. For metal lath, use self-drilling screws.
- Plaster mix consistency: Mix plaster to a consistency that’s neither too thick nor too thin. It should drop off the trowel in a steady ribbon.
- Sand type: Use sharp sand for your mix, not building or silver sand. Check it’s clean and free of debris.
- Cement type: Ordinary Portland Cement (OPC) is suitable for most jobs. Check the bag for the correct strength class (e.g., 32.5 or 42.5).
- Plasterboard jointing compound: For internal plasterboarding, use a multi-purpose jointing compound that’s compatible with your plasterboard.
- Primer/sealer: Before applying the finish coat, ensure the surface is primed or sealed to prevent suction and improve adhesion.
Quick rule: Always check product labels and manufacturer instructions for specific details. Local building codes may also apply.
Step-by-Step Techniques for Re-Establishing and Locking Plaster Keys
Begin with pre-access planning and safety checks, confirming back-side access exists and evaluating structural soundness and moisture history. Ensure permit needs are met and set up containment to control dust. Establish a clear workflow for the repair sequence.
Expose plaster keys from the rear by removing obstructions and documenting the current condition of lath and backing. Prepare the substrate by cleaning and dampening as needed. Choose a method for forming keys, such as grooving, scored impressions, or bonding keys, and follow with proper materials and tool selection.
Step-by-Step Process
This section guides you through the practical steps to re-establish and lock plaster keys from the back side, ensuring a lasting bond.
- Start with pre-access planning: confirm access, check safety, and set up containment.
- Access and expose the back side: carefully open walls or soffits, document key patterns, and assess substrate condition.
- Prepare the substrate: clean thoroughly, dampen as needed, inspect for damage, and repair backing if required.
- Form or restore keys: select a method (grooving, scored impressions, or reusable bonding keys), choose materials, and place them carefully to maximize grip.
- Lock in the keys: apply a bonding layer, embed restored/new keys, bring plaster bed to correct thickness, and avoid over-compactness.
- Cure, finish, and check: control moisture during cure, test bond strength, and perform touch-up finishing.
Accessing and exposing the back side safely
Safely accessing the back side involves careful planning and execution to minimize damage. Start by identifying access points like crawlspaces, attics, or basements.
Temporary panels can be removed or cut out, then reinstalled once work is complete. For soffits, carefully remove them using a utility knife and pry bar, supporting the opening with 2x4s.
Use a reciprocating saw to cut through any obstructions, keeping dust to a minimum with a vacuum attachment. Always wear appropriate PPE, including safety glasses, gloves, and a dust mask.
Methods to re-create or reinforce plaster keys
Re-creating or reinforcing plaster keys depends on substrate conditions. For mechanical anchors, use a hammer drill and appropriate masonry bits to create holes, then insert anchors and secure with nuts.
For adhesive-injected keys, clean and prepare key slots, apply construction adhesive, and embed fiber reinforcement before injecting the adhesive.
Backing strips can be used to simulate original keys. Attach them using screws or nails, ensuring they’re securely fastened and aligned with existing keys.
Locking the key: securing the bond for long-term performance
Securing the bond involves tensioning, setting, or curing anchors and bonding agents to resist shear and delamination. For mechanical anchors, tighten nuts securely but avoid over-tightening, which can strip threads.
For adhesive-injected keys, allow the adhesive to cure according to manufacturer instructions, usually 24-72 hours. Keep the area moist during curing to promote adhesion.
When embedding new or restored keys, use a trowel to apply a thin layer of bonding plaster, lime-putty, or gypsum-based product over the keys, ensuring they’re well-covered but not overly compacted.
Patching, Smoothing, and Finishing the Front Surface
Identify voids and cracks on the front surface that require feathering, noting depth and any hollow spots behind keys. Prioritize repairs that align with texture and thickness of surrounding plaster. Plan the order of operations to avoid creating new flats or ridges.
Choose patch materials and consistency suitable for the substrate, and outline mixing, set times, and additives for adhesion. Use feathering and embedding techniques to blend new material into the existing surface, with edge tapering and any reinforcement as needed. Test texture against adjacent areas before curing begins.
Filling Voids and Feathering Technique
Start by identifying deep voids and cracks. For these, use a thick, slow-setting patching compound for the backing coat. Mix it according to the manufacturer’s instructions, adding adhesion additives if needed.
Apply the compound using a trowel or putty knife, pushing it into the voids and spreading it outwards in a feathered edge. This helps blend the new material with the existing surface. Let it set until it’s no longer tacky but not fully hardened.
For the finish coat, use a lighter-bodied compound that matches your wall texture. Apply this in thin layers, using a trowel or hawk and knife, working from the center outwards to avoid creating ridges. Sand lightly between coats with fine-grit sandpaper to remove any high spots.
To prevent shrinkage and ridging, ensure each layer is thin enough to cure evenly. Keep the surface damp during curing by misting it lightly or covering it with plastic sheeting.
Texture Matching and Paint-Ready Preparation
To match textures, observe the surrounding area. For skip trowel textures, use a hawk and knife to apply thin layers of compound in a similar pattern. Knockdown textures require a knockdown tool or brush to create the desired effect after applying the compound.
For stippling methods, use a stipple brush or roller to create the texture. Test your technique on a small area first to ensure it matches the surrounding surface. Once you’re satisfied with the texture, let the patch dry completely according to the manufacturer’s instructions.
Before priming, lightly sand the patched areas with fine-grit sandpaper to remove any dust or debris. Wipe the surface clean with a damp cloth and let it dry. Choose a primer that’s compatible with your wall finish and provides good adhesion. Apply the primer evenly, using a roller or brush, following the manufacturer’s instructions.
To blend paint colors, choose a paint that matches the surrounding area as closely as possible. Apply the paint in thin coats, working from the center outwards to avoid creating visible edges. Allow each coat to dry completely before applying the next one. This staged approach helps ensure a seamless final look.
Cleanup, Inspection, and Long-Term Maintenance
Use containment methods and dust control to protect finishes during cleanup. Gently remove debris and avoid disturbing repaired keys. Protect adjacent surfaces with drop cloths and plastic as you clean.
Perform a post-repair inspection checklist to verify mechanical stability and look for hairline cracks or movement under light tapping. Include diagnostic tests such as moisture checks around key areas. Develop a maintenance plan with routine monitoring and documentation for future repairs.
Cleaning techniques without damaging adjacent finishes
Use this checklist after completing the repair to clean up safely and avoid damaging new or existing surfaces.
- Wet down dust: Lightly mist the area with water to prevent dry dust from becoming airborne. Skipping this can lead to excessive dust in the air, which may settle on nearby finishes.
- Use soft brushes: Gently remove loose debris using soft-bristled brushes or brooms. Avoid wire brushes as they can scratch surfaces.
- Vacuum carefully: Use a vacuum with a HEPA filter to capture fine dust. Be gentle to avoid disturbing the repair.
- Test cleaning agents: Before using any cleaner, test it on a small, hidden area to ensure it doesn’t damage finishes. Some cleaners can discolor or dull surfaces.
- Use mild soap and water: For most surfaces, a simple mixture of mild dish soap and warm water is sufficient. Avoid harsh chemicals that can strip paint or damage sealants.
- Rinse thoroughly: Ensure all cleaner residue is removed to prevent streaking or staining. Leaving residue behind can attract more dust and dirt.
- Dry gently: Use a soft, clean cloth or chamois to dry surfaces gently. Avoid rubbing too hard, which can cause damage.
- Inspect for damage: Check nearby finishes for any signs of damage after cleaning. If you find any issues, address them immediately to prevent further deterioration.
Quick rule: Always test cleaners first and work gently to avoid damaging adjacent surfaces.
Maintenance schedule and preventive tips
Follow this checklist regularly to maintain your plaster key repair, prevent recurrence, and detect early signs of failure.
- Visual check (every 3 months): Inspect the repaired area visually for any cracks or signs of movement. Early detection can prevent minor issues from becoming major problems.
- Moisture check (every 6 months): Check around key areas for moisture using a moisture meter. Excessive moisture can cause keys to fail again.
- Efflorescence check (annually): Look for signs of efflorescence, which indicates water intrusion. If present, address the source of water intrusion promptly.
- Sealant application (every 2-3 years): Apply a fresh layer of sealant to protect keys from moisture and prevent movement. Regularly sealing keys helps maintain their integrity.
- Humidity control (year-round): Maintain consistent humidity levels in your home to prevent expansion and contraction of plaster keys. Excessive humidity can cause keys to move or fail.
- Plumbing check (annually): Inspect plumbing near the repaired area for leaks or other issues. Water damage from leaks can cause keys to fail again.
- Electrical safety (every 2-3 years): Have a professional electrician inspect electrical outlets and switches near the repair. Ensuring electrical safety prevents accidents and protects your home.
- Document findings: Keep records of all maintenance activities, findings, and repairs. This helps you track trends and plan future maintenance more effectively.
Quick rule: Regular maintenance is key to prolonging the life of your plaster key repair and preventing recurrence.
Costs, Time Considerations, and When to Call a Professional
Define scope and impact by assessing the extent of key damage and back-side access. The number of affected keys and any concealed issues will influence time and cost. Use this to guide the decision on proceeding DIY or hiring a pro.
Consider materials, methods, and the need for specialized tools when estimating costs. Factor in access difficulty, moisture or rot, and safety requirements that can add time. Gather multiple written estimates and check licenses, references, and scope details before choosing a path.
Estimating project scope and sourcing accurate quotes
To get an accurate quote, first measure the affected area. Count every damaged plaster key and note their size.
Document any visible underlying issues like cracks in lath or structural concerns. Ask contractors about their methods, warranties, and credentials:
Methods: What techniques will they use to re-establish keys?
Warranties: How long is the warranty on labor and materials?
Credentials: Are they licensed and insured?
Common mistakes to avoid during diagnosis and repair
Misdiagnosis and poor repair techniques can lead to further damage. Here are common pitfalls:
- Misidentifying failure mode: Not understanding if keys are damaged due to moisture, settling, or other causes.
- Incompatible materials: Using DIY-grade materials where pro-grade is needed.
- Inadequate anchoring: Not reinforcing back-side support for new keys.
- Poor finishing: Rushing the final smoothing and curing process.
Avoid these by thorough diagnosis, using recommended materials, proper reinforcement, and patient finishing.
Conclusion
Repairing plaster keys from the back side is feasible, but success hinges on safety, careful testing, and deliberate, repeatable steps that protect the wall and surface finish. When done right, the repair becomes durable, invisible, and worth the effort.
Start by checking the back side access and planning the sequence: shut off nearby utilities if needed, contain dust, inspect for obvious damage, gather the right tools and patch materials, dampen the area as you work, re-establish the keys in a controlled order, lock them in, then patch, smooth, and finish the front surface. Move methodically and verify each step before moving on to the next.
Avoid common mistakes: rushing the key re-establishment, using too much moisture or force, and neglecting back-side inspections that miss hidden damage. Don’t skip safety: wear eye protection and a mask, keep the area well ventilated, and test a small area first. Know your limits: if the plaster is bowing, cracking heavily, or there is moisture intrusion, pause and reconsider continuation.
If the wall shows structural signs, if back access is limited or uncertain, or if you’re unsure about the moisture and lath condition, call a professional. With careful work and sensible limits, you can restore strength and appearance and move on with confidence.
FAQ
How do I spot plaster keys that actually need repair from the back side?
Look for looseness or rattling when you tap the back of the wall. If chunks fall away or there is visible gaps, the keys may be failing. If you can push on the plaster and it moves, that’s a sign to fix it.
What should I do to prepare the back side for access?
Clear the area and protect the floor. Remove loose debris and clean the backside where you’ll work. If you need to create access, plan a small opening and make sure it’s stable and safe to work through.
How do I remove old plaster and secure reinforcements without wrecking the wall?
Chisel out failed plaster around the key area in small chunks, not all at once. Remove the loose backing but leave sound layers intact. Tie in new lath or reinforcement as trained, keeping the surface aligned with the surrounding wall.
What’s the right way to apply new plaster and re-lock the keys?
Apply plaster in thin coats, pressing it into the keys from the back side. Build up gradually and check that the surface pulls tight to the backing. Don’t hurry; allow each coat to grab before the next one.
How do I finish and verify the stability of the repair?
Smooth the front side to blend with the existing wall. Let the plaster cure as directed on the product label. Gently test the area by tapping; solid, non-rattling sounds indicate a stable repair. If anything feels incomplete, reassess and reinforce as needed.