Search Results for: concrete chip repair

close up of textured wet plaster surface

Repairing spalled block faces: patch materials and surface prep that lasts

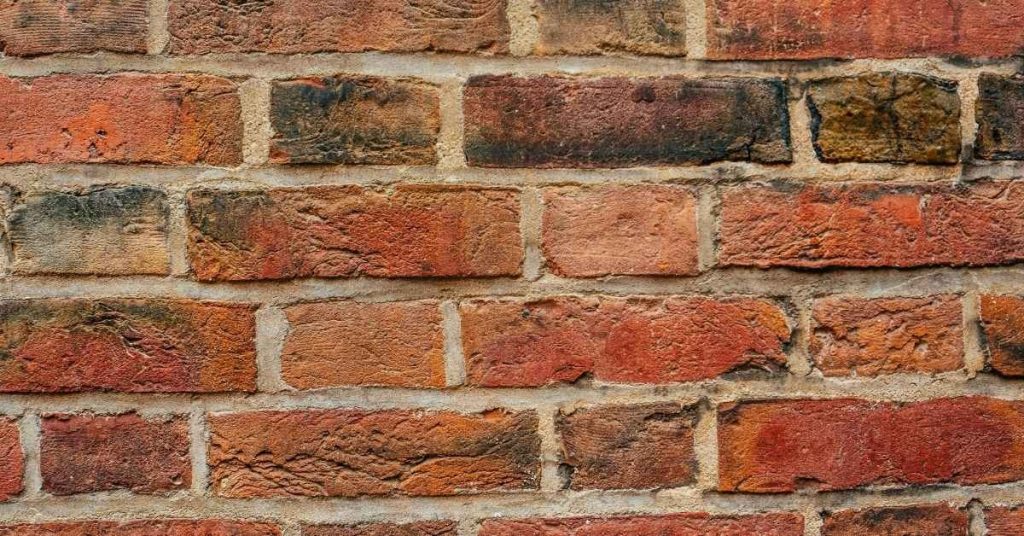
Introduction Repairing spalled block faces involves restoring a damaged masonry surface by cleaning, patching, and smoothing to prevent further deterioration. First assessing whether you should repair or replace is essential; if the damage exposes hollow cores or undermines structural integrity, replacement may be wiser. Prepare the surface by cleaning loose material and chipping away rough […]

Repairing spalled block faces: patch materials and surface prep that lasts Read More »

Closeup of red brick wall with mortar joints

Repairing brick mortar washout at grade: grading changes and sacrificial mortar choices

Introduction Repairing brick mortar washout at grade means restoring deteriorated mortar where the wall meets the soil and addressing shifts in ground moisture. The approach combines survey of damage with practical steps that respect historic materials and the effect of grading on moisture. It’s a hands-on task that requires careful observation and clear planning. Old

Repairing brick mortar washout at grade: grading changes and sacrificial mortar choices Read More »

Person holding green electric drill against white brick wall

Repairing chipped brick corners: patch materials that blend (and those that don’t)

Introduction Repairing chipped brick corners means restoring the edge with patch materials that match the surrounding masonry. This guide focuses on practical choices and steps you can take to blend or distinguish patches as needed. Material options range from blends that closely match color and texture to those that are meant to be obvious. Prepare

Repairing chipped brick corners: patch materials that blend (and those that don’t) Read More »

Old mixing bucket with mortar mixer tool inside

Too-hard brick mortar damage: signs, causes, and how to correct future repairs

Introduction Too-hard brick mortar damage is damage that results when the mortar in a wall has become excessively hard and brittle, leading to cracks and bond failure. Signs include visible cracks between bricks, loose or hollow-sounding joints, and bricks that push or tilt out of place. It often stems from over-tamped or overly aggressive mixes,

Too-hard brick mortar damage: signs, causes, and how to correct future repairs Read More »

close-up of weathered red brick wall with mortar joints

Raking out brick joints safely: depth targets and avoiding chipped arrises

Introduction Raking out brick joints safely means removing deteriorated mortar from between bricks to a controlled depth while protecting the surrounding masonry. This hands-on task requires the right tools and steady technique to avoid damaging arrises. A sensible approach focuses on safe depth targets and careful removal to prevent chipping. Choose appropriate tools designed for

Raking out brick joints safely: depth targets and avoiding chipped arrises Read More »

Person smoothing plaster on ceiling with trowel

Repairing plaster coves and cornices: simple molds and patch materials

Introduction Repairing plaster coves and cornices means restoring damaged decorative plaster trims by patching and reshaping them to match the original profile. It’s a hands-on DIY task that starts with careful assessment, clean work areas, and choosing the right patch materials. Take your time to match texture and edge lines before the material sets. Plan

Repairing plaster coves and cornices: simple molds and patch materials Read More »

Person applying orange mesh over wet brown stucco base coat

Repairing stucco chips at corners: building back profile with mesh and base coat

Introduction Repairing stucco chips at corners means restoring damaged edge areas by rebuilding the corner profile with mesh and a base coat. This approach reinforces the edge, provides a uniform surface, and prepares it for finish. Keep the work neat and check that the base coat adheres well to the existing stucco. Start by cleaning

Repairing stucco chips at corners: building back profile with mesh and base coat Read More »

Worker pouring liquid concrete on ground wearing safety vest and gloves

Rain during concrete finishing: rescue steps that avoid permanent scaling and streaks

Introduction Rain during concrete finishing is when rain hits the surface while concrete is still finishing, risking a poor surface. This article shares practical steps to limit damage and keep the finish looking even. It covers how weather affects curing and what to check before you proceed. If rain arrives, assess the surface and consider

Rain during concrete finishing: rescue steps that avoid permanent scaling and streaks Read More »

Stack of precast concrete beams covered with snow

Air-entrained concrete for driveways and steps: real freeze–thaw failures and how to avoid them

Introduction Air-entrained concrete is a mix that includes tiny air bubbles to improve resistance to freeze–thaw damage. For driveways and steps, this type of concrete helps reduce cracking when the surface repeatedly freezes and thaws. To avoid real freeze–thaw failures, follow the manufacturer’s guidance on mix options and ensure proper placement and curing. Check labels

Air-entrained concrete for driveways and steps: real freeze–thaw failures and how to avoid them Read More »

Worker smoothing fresh concrete slab with trowel

Laitance on fresh concrete pours: quick tests and the right removal method before coatings

Introduction Laitance is the thin, weak film of cement and fine particles that rises to the surface of freshly poured concrete. It forms when fines and moisture push to the top, leaving a smooth but poor bonding layer. Quick checks include a light skim with a dull tool or a damp wipe to feel for

Laitance on fresh concrete pours: quick tests and the right removal method before coatings Read More »