
Introduction
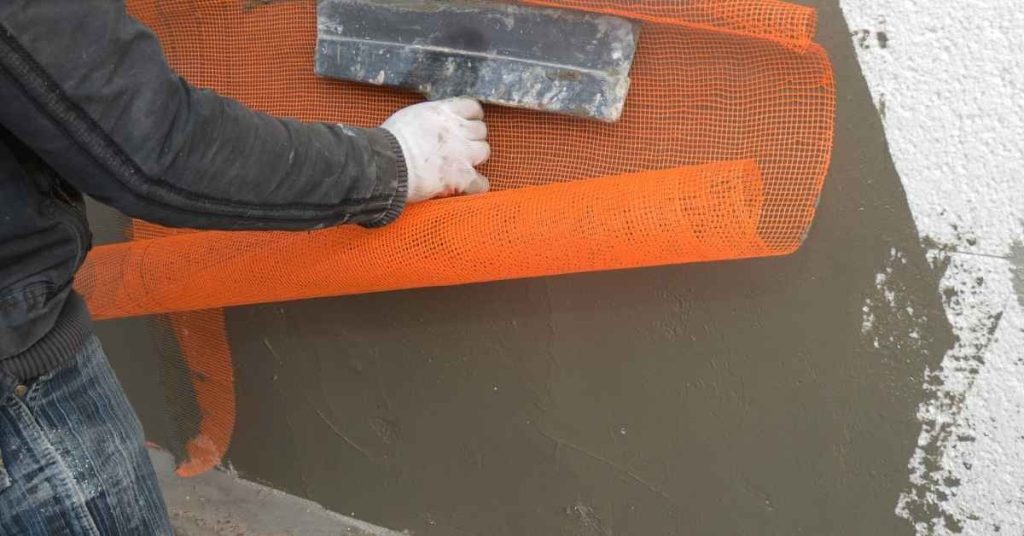
Repairing stucco chips at corners means restoring damaged edge areas by rebuilding the corner profile with mesh and a base coat. This approach reinforces the edge, provides a uniform surface, and prepares it for finish. Keep the work neat and check that the base coat adheres well to the existing stucco.
Start by cleaning the chipped area, applying a bonding agent as needed, then place the mesh over the edge. Apply a base coat over the mesh to build up the profile, smooth to blend with surrounding wall, and let it cure per product instructions. Check for any cracking or notchiness once dry and plan a finish coat later.
Key takeaways
- Assess damage thoroughly before repair, identify loose material and underlying water damage.
- Secure safety: wear eye protection and masks when mixing and applying coatings.
- Choose compatible base coats and mesh for stucco corners to prevent delamination.
- Prepare substrate by cleaning, drying, and repairing any failed backing before mesh.
- Build back corner profile with mesh embedded in base coat for strength.
- Texture and colorMatch require even layers and test patches before finish.
Table of Contents
- Introduction
- Key takeaways
- When to Repair and Assessing Damage
- Tools and Materials Checklist
- Material Specs and Compatibility Explained
- Surface Preparation and Substrate Repair
- Building Back the Corner Profile with Mesh and Base Coat (Step-by-Step)
- Mixing, Curing, and Layer Timing
- Texture Matching, Finish Coat, and Color Considerations
- Troubleshooting, Common Mistakes, and Long‑term Maintenance
- Conclusion
- FAQ
When to Repair and Assessing Damage
Begin by distinguishing cosmetic chips from damage that affects the substrate or lath. Look for cracks, bulges, or moisture staining near corners that signal deeper issues. Prioritize repairs where water intrusion or movement could compromise framing or plaster adhesion.
Evaluate surrounding stucco conditions to determine if the corner repair will need staged work or additional substrate reinforcement. Document observations so you can plan the repair sequence and communicate findings to others involved in the project.
Identify extent of chips and failure modes
Begin by inspecting the damaged area thoroughly. Use a flashlight to illuminate any hidden cracks or gaps.
Check for: hairline cracks, delamination (peeling away from the substrate), rusted lath, or missing substrate behind chips. Document these findings with photos and notes to track progress and plan repairs accurately.
If chips are extensive and reveal underlying damage, prioritize these areas for immediate repair. The presence of hairline cracks or delamination may indicate moisture intrusion or compromised structural integrity.
Safety, weather, and permitting considerations
Before starting any repair work, ensure your safety by following these guidelines:
Wear appropriate Personal Protective Equipment (PPE): gloves, goggles, and a hard hat when working at heights or with hazardous materials. Implement safety measures such as scaffolding, harnesses, or barriers if necessary.
Check local permit rules for stucco repair work and condo association guidelines if applicable. Avoid repairs in extreme weather conditions such as heavy rain, snow, or high winds to prevent further damage and ensure your safety.
Tools and Materials Checklist
Gather hand tools for scraping, cutting, and applying material, plus a mixing container and trowels. Include a mesh knife or scissors, a utility knife, and a straightedge for clean edges. Have a hammer or mallet and nail puller if any lath needs gentle release.
Prepare power tools such as a drill with mixing attachments and a grinder or sander if surface smoothing is needed. Stock base coat and texture products, bonding agents, and compatible primers. Note optional specialty tools for profile shaping and corner guides to help with geometry.
Required Tools
The following tools are essential for a smooth and efficient tiling job. They ensure proper application, durability, and longevity of your tiles.
- Trowel (Notched): Used for applying mortar or adhesive to the wall surface. The notches help control the amount of material applied. Key spec: Notched edge size should match your tile size for even coverage.
- Hawk: A flat board used to hold and transfer mortar from the mixing bucket to the trowel. It helps keep your hands clean and prevents waste.
- Corner Trowel: Used for applying mortar in corners where two walls meet. It has a V-shaped notch for precise application. Key spec: Choose one with a V-notch that matches your tile thickness.
- Mixing Bucket: Essential for mixing mortar or adhesive. A sturdy, large bucket is ideal for preventing spills and ensuring even mixing.
- Grinders/Scrapers (Power Tools): Optional but highly recommended for preparing surfaces. They remove old paint, plaster, and other debris quickly and efficiently. Key spec: Choose a grinder with variable speed settings to control the intensity of removal.
Pro tip: Always visually inspect each tool before starting to ensure nothing is missing or damaged. An experienced installer ensures all necessary tools are clean, functional, and suitable for the task at hand. If power tools like grinders/scrapers are required but not available, consider renting or purchasing these tools as they significantly expedite the process.
Consumables and replacement parts
Use this checklist before starting your stucco repair project to ensure you have the right consumables and replacement parts. This will help prevent costly mistakes and delays.
- Mesh types: Check mesh is flexible enough to conform to corner profiles and compatible with existing stucco. Confirm with manufacturer instructions or local building codes.
- Base coat products: Ensure base coat consistency before application. Check product labels for suitable adhesion properties and compatibility with your existing stucco.
- Bonding agents: Verify bonding agent is designed for stucco and compatible with your chosen base coat. Follow manufacturer guidelines for proper mixing and application.
- Lath or corner bead: If repairing metal-stud based stucco, choose lath or corner bead designed specifically for metal studs to ensure a secure fit.
- Fasteners: Check fasteners are suitable for your wall type (e.g., drywall, wood, metal studs) and compatible with the chosen lath or corner bead. Confirm they meet local building codes.
- Mesh reinforcement: Have extra mesh strips on hand to reinforce any tears during installation. Apply additional base coat to secure reinforced areas.
- Corner bead: Ensure corner bead is designed for your chosen finish (e.g., straight edge, rounded) and compatible with your wall type.
Quick rule: Always check product labels and manufacturer instructions to confirm compatibility with existing stucco and other materials. This ensures a strong, lasting repair.
Material Specs and Compatibility Explained
Clarify differences between cementitious and acrylic repair systems and how they bond to existing stucco. Consider how mesh type affects reinforcement and crack control at corners. Check performance standards on product labels or data sheets before selecting materials.
Verify compatibility between mesh, base coat, and finish products to ensure cohesive curing and color stability. Review manufacturer instructions and local code or rule guidance if a project has specific requirements.
Choosing the right mesh and lath
The choice between woven fiberglass mesh and metal lath significantly impacts your repair’s durability and longevity.
Woven Fiberglass Mesh is lightweight, flexible, and corrosion-resistant. It’s ideal for projects requiring these qualities but may not provide the same strength as metal lath. Ensure you use alkali-resistant fiberglass mesh to prevent degradation from stucco alkalinity.
Metal Lath, typically galvanized, offers high strength and fire resistance. It’s suitable for projects needing these features but can be heavier and less flexible than fiberglass mesh. Always confirm your chosen lath is galvanized to prevent rusting.
Before starting, consult manufacturer guidance to ensure product compatibility with your existing stucco and other materials.
Base coat and bonding agents basics
The formulation of the base coat and use of bonding agents greatly affect adhesion and flexibility, ensuring a successful repair.
A base coat provides a stable surface for applying the final stucco layer. Its formulation varies by product, so review datasheets for recommended mixes and substrates to achieve optimal results.
Bonding agents improve adhesion when working with non-absorbent or poorly adherent substrates. If your existing substrate falls into this category, consider using a bonding agent to enhance adhesion before applying the base coat.
Always review product datasheets for recommended mixes, substrates, and application guidelines to ensure compatibility and proper curing.
Surface Preparation and Substrate Repair
Remove loose stucco and dirty debris from the corner area to expose solid substrate. Use careful scraping to create a clean, sound surface for bonding. Expose any damaged lath or substrate to assess the extent of repair needed.
Address substrate issues such as rust or loose lath with appropriate fixes before applying new layers. Ensure the area is dry and free of dust prior to proceeding with mesh and base coat application.
Remove loose material and clean the area
The success of your repair depends on a sound bonding surface. Removing damaged stucco and cleaning the area ensures optimal adhesion for new layers.
- Loose Stucco: Use a stiff-bristle brush or scraper to gently remove loose material. Be careful not to damage the substrate. Wrong: Using a wire brush can gouge the surface, leading to weak bond points.
- Dust and Debris: Clean the area with a damp cloth or soft brush. Allow it to dry completely before proceeding. Wrong: Leaving dust behind can cause poor adhesion and cracking.
- Mold or Mildew: If present, treat with a suitable cleaner following manufacturer’s instructions. Wrong: Ignoring mold can lead to staining and weakened bond.
- Oil or Grease Stains: Clean using a degreasing agent. Rinse and dry thoroughly. Wrong: Residual oil or grease can prevent proper adhesion.
- Paint or Glue Residue: Remove with appropriate solvents, following safety guidelines. Wrong: Incomplete removal can cause delamination of new stucco layers.
Repair or replace lath, corner bead, and fasteners
The lath provides support for your stucco layers. Inspect it for damage and ensure it’s securely fastened.
If the lath is damaged, replace it with compatible, labeled lath. Ensure it matches the existing lath in type and gauge to maintain structural integrity.
The corner bead protects corners from chipping. If damaged, replace it with a suitable, matching profile or bead. Ensure it’s securely fastened using appropriate screws or nails, following manufacturer’s instructions.
Check all fasteners. If any are missing or loose, reinstall them, ensuring they’re driven in flush to the lath surface to prevent interference with new stucco layers.
Building Back the Corner Profile with Mesh and Base Coat (Step-by-Step)
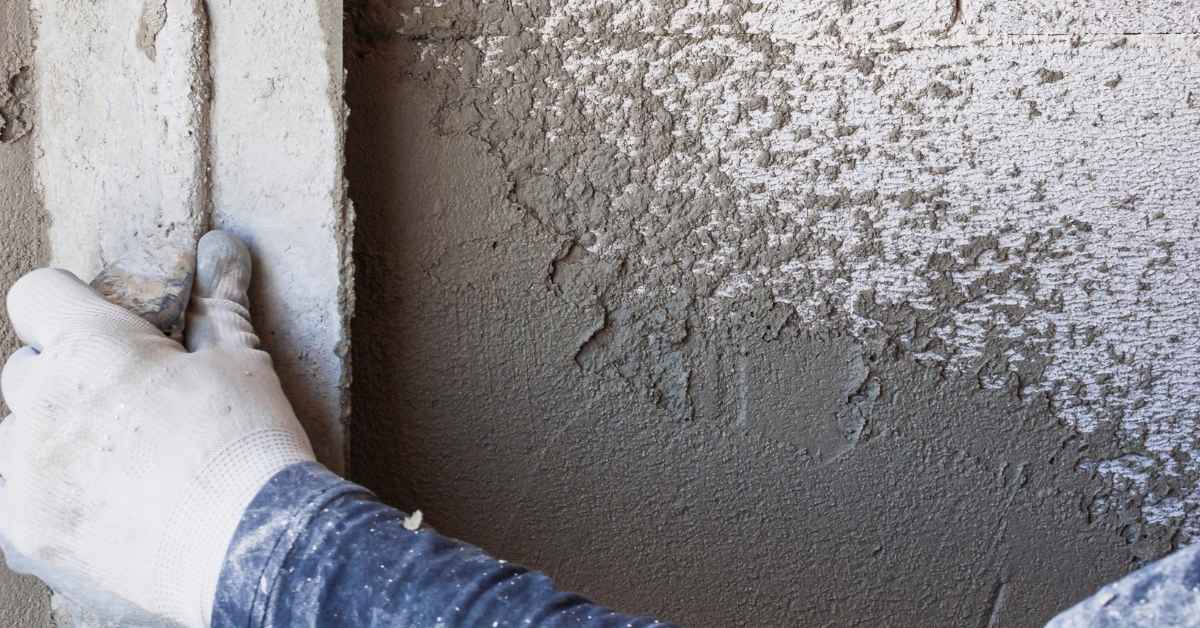
Set profile guides to recreate the existing corner geometry and provide a reference for the new layers. Embed the mesh into the first base coat, ensuring full coverage over the corner edge. Allow the initial layer to set before applying subsequent coats.
Build up the base coat in controlled passes to achieve the desired geometry, checking alignment with the guides as you go. Smooth and feather edges to blend with surrounding stucco while maintaining the corner profile.
Step-by-Step Process
This step-by-step sequence guides you through rebuilding the corner profile with mesh and base coat, ensuring a smooth and professional finish.
- Ensure all materials are on hand. Check your tools and consumables checklist from earlier in this article.
- Inspect the area for any remaining damage or loose material. Make sure to remove all debris before proceeding.
- Set guides according to corner type (inside or outside). Use straightedges, temporary forms, or stakes to establish the correct profile and alignment.
- Apply base coat to the substrate within the guide are