
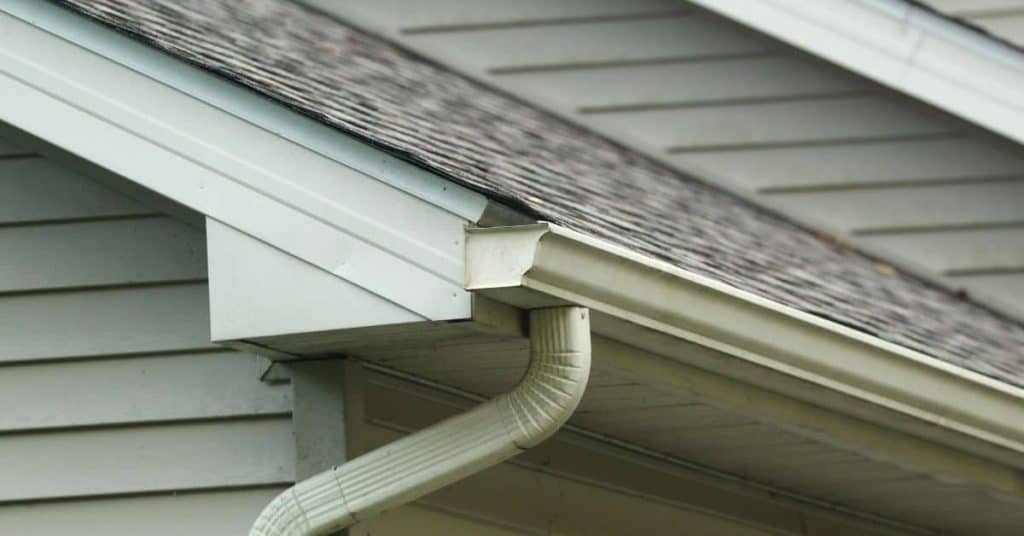
Introduction
Roof-to-wall clearances refer to the gap between the roof edge and the adjacent stucco wall. If the space is too tight, moisture and wind can cause problems and costly repairs later. This article keeps things practical and hands-on for a DIY approach.
Start by checking the actual gap at the critical spots, then look for signs of water intrusion, staining, or loose edges. Plan fixes that may include improving flashing, resealing joints, or adjusting the stucco finish, while keeping safety and weather considerations in mind. If you’re unsure about requirements, verify with the product instructions, local rules, or a local pro before making changes.
Key takeaways
- Regularly inspect roof-to-wall junctions for stucco cracks, gaps, and moisture staining.
- Ensure flashing and sealant joints are continuous, free of gaps, and properly lapped.
- Look for paint peeling or efflorescence near the junction as early indicators.
- Document suspect areas with notes and photos for contractor or code checks.
- Use compatible materials and follow manufacturer instructions when repairing.
- Wear eye protection and stay off damaged surfaces; avoid leaning on crumbling stucco.
Table of Contents
- Introduction
- Key takeaways
- Why Roof-to-Wall Clearance Matters for Stucco
- How to Inspect Roof-to-Wall Junctions
- Identifying Signs That Stucco Is Too Close
- Common Causes and Installation Mistakes
- Repair Options and When to Call a Pro
- Step-by-Step Repair Guide for a Typical Corrective Detail
- Material Specs, Standards, and Documentation to Check
- Preventative Maintenance and Long-Term Monitoring
- Conclusion
- FAQ
Why Roof-to-Wall Clearance Matters for Stucco
Gaps at the roof and wall junctions control how moisture travels across the surface. They influence how flashing is exposed to wind and rain, and how water drains away from the wall system. Clearances affect stucco longevity by reducing ongoing leakage and material damage over time.
When clearances are too tight or misaligned, flashing performance can be compromised and drainage paths can clog. This can lead to water intrusion, substrate rot, and cracked stucco joints. Understanding these gaps helps protect the long-term integrity of the wall system.
Moisture risk and failure modes
When stucco’s too close to the roof, moisture can’t escape. It gets trapped, leading to rot, rust, and mold.
Rotten wood framing, rusted nails, and delaminating stucco are signs of trouble. You might not see them right away, but they’re happening behind your walls.
Pro tip: Check for these issues during regular home maintenance or before repainting your stucco.
Flashing and drainage plane interaction
Flashing at the roof-wall junction directs water outwards. But if it’s too close to the wall, water can’t escape fast enough.
The water-resistive barrier (WRB) or drainage plane behind your stucco helps shed water. But again, if it’s too tight against the roof, water can get trapped and find its way into your walls.
An air gap lets moisture evaporate. Without it, you’re asking for trouble. So, make sure there’s room for both flashing and drainage plane to do their jobs.
How to Inspect Roof-to-Wall Junctions
Plan a systematic exterior inspection first, looking at the joint where roof edge, soffit, and wall meet. Move to attic or crawlspace areas to check for signs of moisture behind the siding and near flashing. Finally, inspect interior walls for related signs of water ingress.
Document findings with photos and notes, and note any accessibility concerns. Prioritize safe access and avoid leaning on weak surfaces. Verify what the manufacturer and local codes require for clearances during inspections.
Step-by-Step Process
Follow this clear, numbered sequence to inspect your roof-to-wall junctions safely and effectively.
- Preparation: Check weather conditions, ensure it’s dry. Gather tools and PPE. Safety first.
- Exterior Inspection: Use a ladder to access the area. Be cautious, use stabilizers if needed. Check for gaps, staining, or improper flashing.
- Attic/Soffit Check: Access attic/soffit safely. Inspect rafters, joists, and ventilation. Look for moisture, mold, or damage.
- Interior Check: Inspect interior walls for signs of moisture, staining, or peeling paint. Check around windows and doors too.
- Document Findings: Take photos and make notes. This helps track progress and plan repairs.
- Minor Test/Correction: Bring materials for minor fixes, like caulk or sealant. Address small issues on the spot if possible.
- Cleanup/Final Checks: Tidy up your workspace. Double-check all areas before wrapping up. Ensure nothing was missed.
- Professional Consultation: If findings are severe or unclear, consult a pro. Better safe than sorry.
Visual checkpoints checklist
Use this list during your exterior inspection to identify potential issues at the roof-to-wall junction.
- Gaps between stucco and wall: Check for any spaces. Water can enter here.
- Staining on walls or stucco: Look for discoloration. Could indicate moisture intrusion.
- Flashing condition: Inspect flashings at roof-to-wall junction. Damaged flashings let water in.
- Termination details: Check where stucco meets the wall. Improper termination lets water behind stucco.
- Cracking or damaged stucco: Inspect for signs of wear. Water can enter through cracks.
- Proper drainage plane: Ensure water can drain away from walls. Improper drainage causes moisture buildup.
- Window and door frames: Check for signs of moisture around openings. Water can enter here too.
- Roof-to-wall angle: Ensure it’s steep enough to shed water. Flat or low angles trap water.
- Debris or blockages: Check for obstacles in drainage paths. Debris can cause water buildup.
Quick rule: If you spot any of these issues, further investigation is needed to prevent moisture damage.
Tools and materials checklist
Use this list to gather everything you need before starting your inspection.
- Ladder: To safely access roof-to-wall junctions. Ensure it’s stable and tall enough.
- Flashlight: For inspecting dark areas like attics or soffits. Helps spot hidden issues.
- Moisture meter: To detect moisture in walls, stucco, or wood. Confirm suspicions with a reading.
- Tape measure: For checking clearances and dimensions. Helps identify improper spacing.
- Camera: To document findings with photos. Pictures help track progress and plan repairs.
- Personal Protective Equipment (PPE): Gloves, safety glasses, hard hat, etc. Safety first when working at heights or with tools.
- Caulk or sealant: For minor fixes on the spot. Address small issues if possible.
- Small pry bar or scraper: To gently remove debris or check for damage. Be careful not to cause further damage.
- Notebook and pen: For making notes during your inspection. Jot down findings as you go.
Quick rule: Having the right tools ensures a thorough, safe, and efficient inspection.
Identifying Signs That Stucco Is Too Close
Exterior signs include staining, staining, or efflorescence near the junction, cracked or spalling stucco, and visible bridging where flashing meets the wall. You may see consistent water marks after rain or irrigation spray. Internal indicators can be damp patches or musty odors near the wall line.
Look for easy-to-spot cues like peeling paint near the edge, fastener corrosion, or rusting metal flashing. These symptoms often point to inadequate clearance and drainage issues. Use these signs to decide if closer inspection is needed.
Exterior indicators (staining, cracking)
Check your home’s exterior for signs of moisture intrusion at the roof-to-wall junction. Rust streaks running down walls or from the roof edge are a telltale sign. Efflorescence – a white, chalky deposit – on stucco can also indicate water penetration.
Hairline cracks near junctions may seem minor, but they can let water in and worsen over time. Paint failure, especially peeling or bubbling, could also signal moisture problems.
Remember: These signs don’t always mean your stucco is too close to the roof. But if you spot them, it’s worth investigating further.
Interior indicators (stains, mold)
Moisture problems at the roof-to-wall junction can manifest inside your home too. Look for stains on ceilings or walls, especially around the perimeter of the room. A musty odor could also indicate hidden mold growth.
Blistering paint on interior walls or ceilings is another red flag. Check your attic space for visible mold growth – it might be growing where you can’t see it elsewhere in the house.
Tip: If you find any of these signs, don’t wait. Address the issue promptly to prevent further damage and potential health risks.
Common Causes and Installation Mistakes
Frequent installation errors include improper sequencing of flashing, thin or missing wall boards, and neglecting proper drip edges. Design oversights often neglect adequate ventilation and drainage space at the roof edge. These missteps can create stubborn water paths along the interface.
Material choices and treatment sequencing also influence outcomes. Inadequate backing, sealing, or flare of flashing can trap moisture. Be mindful that not all fixes are compatible with every product or system, so check compatibility before proceeding.
Poor Flashing Detail
Improperly lapped, missing, or incompatible flashing can lead to water bypassing the barrier and causing moisture issues. Correct overlap and terminations are crucial for proper drainage.
Flashing should be lapped properly at all seams and edges. It should extend up the wall at least 4 inches above the roof line and be securely attached to the substrate.
Incompatible materials can also cause problems. Ensure your flashing is compatible with both your roofing material and stucco system.
Incorrect Substrate or Installation Sequencing
Mistakes in substrate preparation and installation sequencing can lead to insufficient clearances. Here’s what to avoid:
Don’t install stucco before establishing a continuous drainage plane. Stucco should go on after the roof, walls, and flashing are all in place.
Sealing too tightly to roof edges can trap moisture. Leave some room for expansion and contraction at the top of your wall.
Don’t forget kick-out flashings where the roof meets the wall. These help direct water away from the stucco and prevent it from getting behind the flashing.
Repair Options and When to Call a Pro
Use a decision framework to distinguish minor DIY fixes from major repairs that require a licensed contractor. Assess the extent of damage, the integrity of flashing, and whether any structural rot is present. Consider warranty implications and local code requirements when choosing a path.
Always weigh safety and potential liability, especially on tall facades or near active roof sections. If you are unsure about the scope or code compliance, plan a pro assessment before starting work. Documentation should be kept for warranty purposes.
Minor DIY fixes (trim, sealants, adding kick-out flashing)
If you’ve caught the problem early, there are some simple fixes you can do yourself. Remember, prevention is key here.
Kick-out flashings are your first line of defense. If they’re missing or damaged, install new ones at the roof-to-wall junction to direct water away from the stucco.
Check your trim pieces too. If they’re cracked or missing, replace them. They help protect the wall from moisture and keep things looking sharp.
Re-caulk small gaps around windows, doors, and where the roof meets the wall. Use a high-quality, flexible sealant to ensure it doesn’t crack over time.
Major repairs (remove and reinstall stucco, reflash, or re-sheath)
If you’re seeing extensive damage – like large cracks, stains, or mold – it’s time for major repairs. These jobs are best left to the pros.
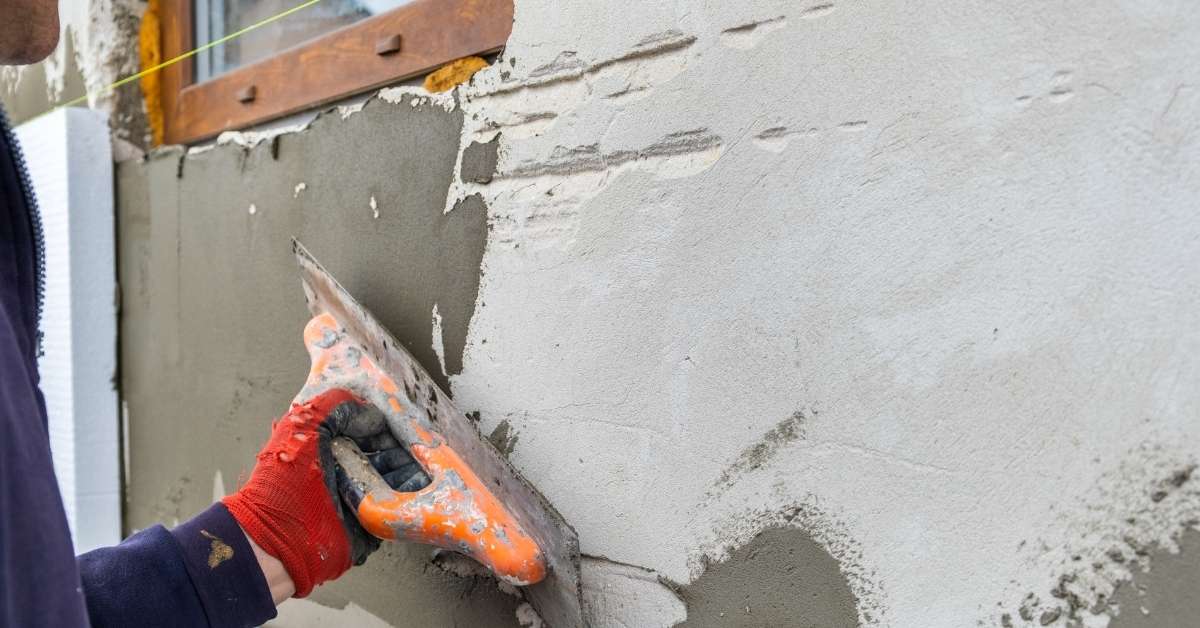
Removing and reinstalling stucco might be necessary if the damage is severe. This involves stripping off the old stucco, checking the substrate, and applying new stucco.
Reflashing involves replacing or adding new flashing to redirect water away from the wall. If the substrate (like plywood or OSB) is damaged, it may need to be replaced too – a job called re-sheathing.
These repairs can be complex and may affect your home’s structure or warranties. Always consult with a licensed contractor before proceeding.
Step-by-Step Repair Guide for a Typical Corrective Detail
Begin with securing the area and protecting nearby materials to prevent further moisture entry. Remove damaged stucco and carefully expose the flashing and wall interface. Clean and prepare the surfaces for new flashing or sealant as required by the system.
Reinstall proper clearance and flashing, then reapply stucco with correct joint detailing. Verify compatibility with manufacturer instructions and local codes, and schedule a final inspection after weather exposure. Use temporary protections to shield the worksite during curing or rain events.
Step-by-Step Repair Process
This section guides you through a clear, numbered sequence of practical steps to repair your roof-to-wall clearance issue and restore proper flashing function.
- Preparation: Check manufacturer guidelines and local codes. Gather tools and materials from the checklist earlier in this article.
- Safety first: Wear appropriate PPE. Contain debris with drop cloths or tarps to protect surrounding materials.
- Main work begins: Remove damaged stucco, flashings, and any rotted substrate. Inspect for further damage.
- Install corrective flashing: Follow the next subsection’s guidance to install head, step, and kick-out flashings.
- Re-stucco and finish: Patch or reinstall stucco layers as described in the following subsection. Clean up and perform final checks.
Prep and safety
Before starting any work, ensure you have all necessary permits and understand local codes. Protect yourself with appropriate PPE, including gloves, goggles, and a dust mask.
Contain debris using drop cloths or tarps to prevent damage to surrounding materials and for easy cleanup.
Temporarily protect any nearby plants, shrubs, or landscaping with plastic sheets or cardboard. Inform neighbors about the work to avoid surprises.
Installing corrective flashing and gap maintenance
Corrective flashing is crucial for maintaining proper roof-to-wall clearance. Install head flashings at the roof’s edge, step flashings along the walls, and kick-out flashings where the wall meets the roof.
Ensure consistent gaps between stucco and roof elements by using spacers or shims during installation. This maintains a clear path for water drainage and prevents future issues.
Check manufacturer guidelines for specific flashing types and installation methods. Ensure flashings are securely attached with nails or screws, following code requirements.
Replacing or patching stucco and finish
After installing corrective flashings, replace or patch the stucco layers to match the existing appearance and performance. Remove any damaged or rotted substrate first.
Apply new stucco in thin layers, allowing each layer to cure according to manufacturer guidelines before adding the next. This ensures proper adhesion and prevents cracking.
Match finish by practicing on a scrap piece of material or using a small test area on your home’s exterior. Once cured, apply any necessary sealants or paint to complete the repair.
Material Specs, Standards, and Documentation to Check
Review product data sheets, installation guides, and any ASTM or ICC references that apply to your system. Inspect local code excerpts that speak to roof-to-wall clearances and flashing requirements. Documentation helps justify warranty coverage and informs liability decisions.
Keep a folder with the latest revisions and check for updates before repairs begin. Note any site-specific conditions that might alter standard requirements. Refer to manufacturer instructions for installation tolerances and compatibility notes.
Manufacturer installation guides and warranty implications
Before you start any repairs, grab the manufacturer’s installation guide for your stucco system. It’s your roadmap to proper installation and maintenance.
Why’s it important? Following these guidelines ensures your product performs as expected and maintains its warranty coverage.
Improper clearances can lead to water intrusion, voiding warranties. So, check if your system requires specific roof-to-wall clearances and follow them religiously.
Contact the manufacturer if you’re unsure about anything. They’re there to help keep your warranty intact.
Building codes, local amendments, and how to look them up
Building codes are the rules that ensure your home is safe and sound. You need to know what they say about roof-wall junctions, flashing, and exterior wall coverings.
Where to find them? Start with the International Residential Code (IRC) or International Building Code (IBC). Then check local amendments. Your city’s building department should have this info online or in print.
Here’s how to look it up:
- Find your code (IRC/IBC).
- Look for chapters on ‘Exterior Walls’ and ‘Roofs’.
- Check sections on flashing, clearances, and wall coverings.
- Read local amendments to see if they’re more stringent.
Preventative Maintenance and Long-Term Monitoring
Set a maintenance plan that includes seasonal checks of the roof edge, flashing, and wall joints. Establish checkpoints after heavy storms or rapid temperature changes. Document findings to build a maintenance history.
Implement practical, low-cost steps like cleaning drainage paths and inspecting fasteners, caulks, and sealants. Use this record to support warranty claims and to catch issues early before they escalate.
Seasonal inspection schedule
Inspect your roof-to-wall clearances regularly to catch any issues early. Here’s a simple seasonal checklist.
- Spring: Check for winter damage. Look for cracks, missing pieces, or damaged sealants.
- Summer: Inspect after major storms. Ensure flashing is intact and there are no new gaps.
- Fall: Clear debris before winter. Remove leaves, twigs, and other materials that could trap moisture.
- Winter: Check for ice dams. They can push water under shingles or flashing, causing leaks.
Quick rule: Inspect after every major storm and seasonally to prevent minor issues from turning into costly repairs.
Maintenance actions (caulking, clearing debris, repainting)
Regular maintenance keeps your roof-to-wall clearances in tip-top shape. Here’s what to do:
Caulk any cracks or gaps you find around the flashing. This prevents water from seeping in.
Clearing debris is crucial, especially in fall and spring. Remove leaves, twigs, and other materials that can trap moisture and cause damage.
Repainting might seem minor, but it’s important. It helps protect the stucco from UV damage and keeps it looking good. If you notice any signs of water damage or structural issues while maintaining your clearances, don’t hesitate to call a professional.
Conclusion
Keeping roof-to-wall clearances safe protects the stucco, keeps moisture out, and prevents costly repairs. Stay disciplined about checks, follow the repair steps, and work with the right details so the job lasts.
Check in this order: start at the eave and wall junction, verify the existing clearance against the standard, look for cracks, staining, or bulges, inspect flashing and sealant, confirm the surface is sound before any patching, then plan the repair, gather materials, and follow the step-by-step guide with small tests first. verify any required clearances in your area’s specs and document what you find so you can track progress and future needs.
Common mistakes to avoid are rushing the inspection, skipping moisture testing, and overwriting the original detail with the wrong flashing or sealant. Safety rules are simple: never work on a wet or icy surface, always use fall protection on roofs, and test a small area before full repair to confirm materials and methods won’t damage the stucco. If anything looks uncertain or you’re dealing with complex flashing or structural concerns, stop and call in a pro.
If the issue involves major flashing concerns, unknown moisture behind the stucco, or you’re unsure about the correct corrective detail, hire a contractor sooner rather than later. Stay focused, follow the standard documentation, and you’ll finish confident that your home is protected and durable for years to come.
FAQ
How can I confirm adequate clearance at the roof-to-wall junction before stucco application?
Check the product label and manufacturer instructions for required gaps. Look for any local rules or guidelines your jobsite uses. If you’re unsure, measure what the spec calls for and compare it to what’s actually installed.
What signs indicate stucco is too close to the roof line or flashing?
Watch for rubbing or contact between stucco and roofing materials, staining, or moisture behind the stucco. Look for fastener corrosion or cracking near the joint. Any settlement or movement at the soffit or wall edge is a red flag.
What options do I have if clearance is insufficient?
Options include updating flashing, adding a proper drip edge, or adjusting the wall-to-roof interface. You may need to modify or extend drainage paths so water doesn’t wick into the stucco. If unsure, check the manufacturer instructions or local guidance before making changes.
What maintenance checks should I do to keep clearance safe over time?
Inspect after storms or high winds for movement or gaps. Re-seal or recaulk where flashing meets stucco as needed. Look for new signs of moisture or staining and address them before they worsen.